Swatch Sunday: Octopus Party Nail Lacquer’s Universal Loner

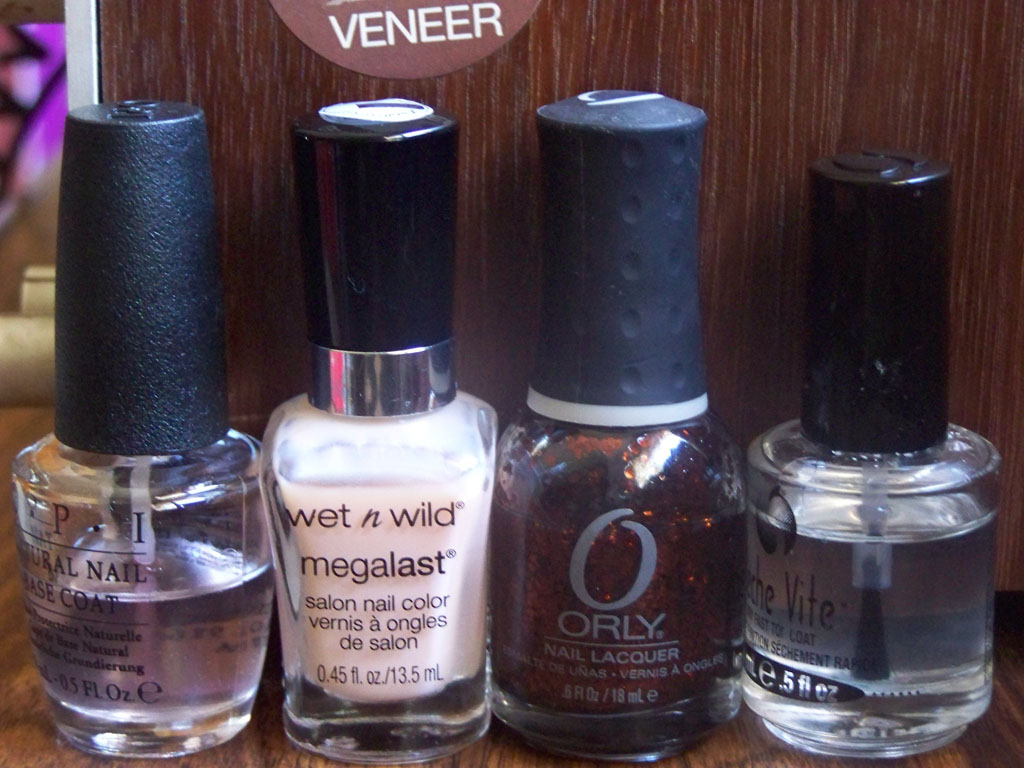
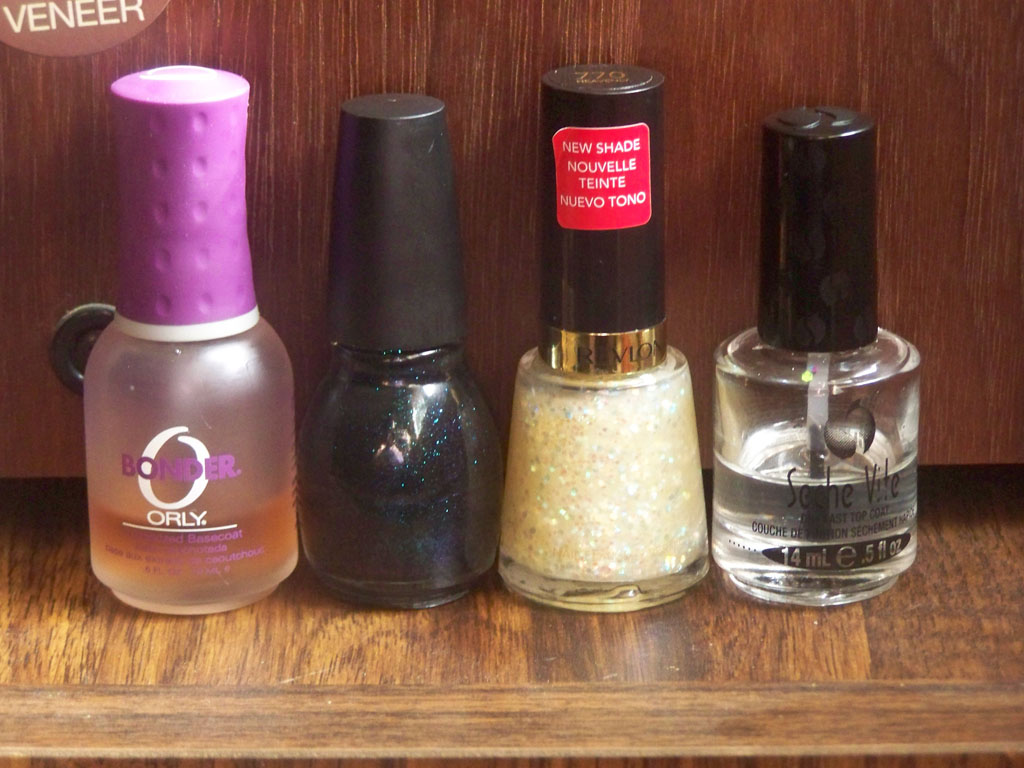
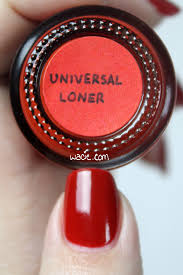
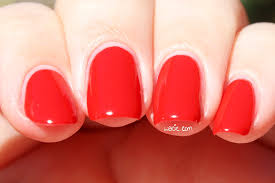
Happy Sunday! It’s Valentine’s Day, so it’s a great day to wear red! This beauty is Octopus Party Nail Lacquer‘s Universal Loner. The name is kind of appropriate, too, isn’t it? I can’t tell. I’m wearing three coats of Universal Loner with one coat of Seche Vite top coat.

ssopnlul

ssopnlul2

ssopnlul3

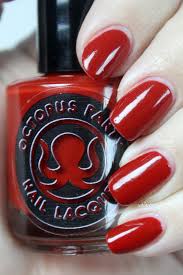
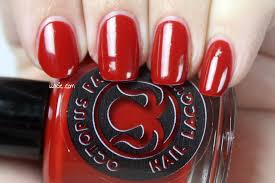
Universal Loner is a true red creme polish; it’s meant to be equally balanced between warm and cool. Like a lot of red cremes, the tone changes in lighting; my outdoor photos leaned more warm, and my indoor photos were cooler. The product consistency is very nice; the polish is a bit sheer on the first coat, but works up to full opacity on the second. It dries quickly and with a glossy finish; I used top coat for extra shine and protection.

ssopnlul4

ssopnlul5

This polish was one of the four indie creme offerings in the inaugural Creme a la Mode box. I love this box because some awesome makers — some of my favorites, even — realized that cremes are an overlooked but necessary part of a great indie manicure. Cremes are common in any polish addict’s kit, but it weirds me out sometimes when I’m still using polishes that might not be five-free or cruelty free or what have you. I know these brands and I know their reputations for quality products, and it puts my mind at ease knowing there’s nothing in this polish that’s going to harm me or be ethically questionable. I have a dozen red cremes, but I trust this one.

ssopnlul6

ssopnlul7

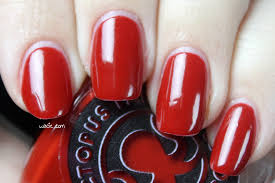
Here’s the outdoor shots, where it looks way more tomato than cherry. I still love it. The shine kills me. It’s my favorite thing.

ssopnlul8

ssopnlul9

ssopnlul10

ssopnlul11

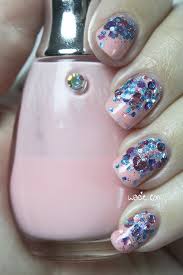
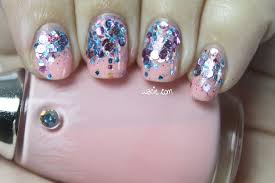
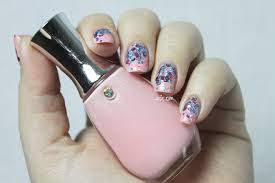
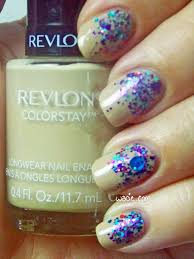
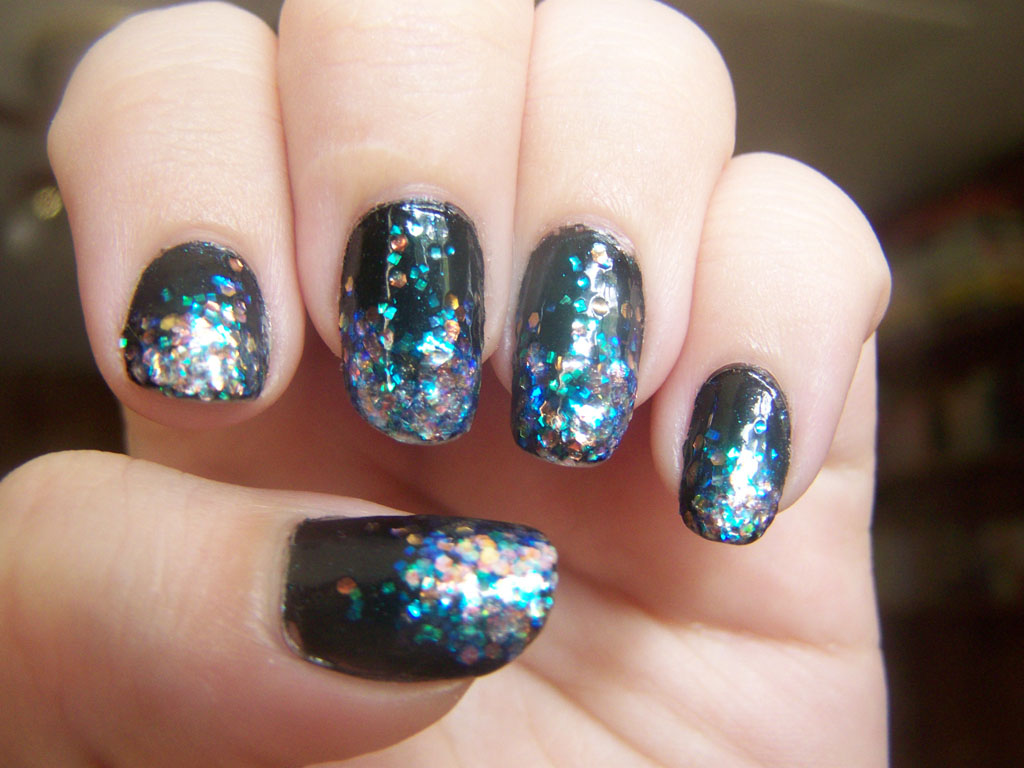
And because it’s Valentine’s Day, I used it as a base for a quick-and-dirty Valentine’s mani. The glitter here is Lynnderella‘s Love the Nail Mail. Nail polish is totally my valentine this year.

ssopnlul12

Universal Loner is out of stock; other Octopus Party Nail Lacquers are available in their etsy shop.

I bought this polish myself.

Manicure Monday: Pink Spring Mystery

Welcome back, reader! Happy Monday! Today’s manicure was done with a chunky springtime glitter and a mystery polish. Spring is springing in Florida, and I get closer with every pastel polish I wear. For this look, I used Model City Polish‘s Breath of Spring and a Sally Hansen mystery pink, as well as a coat of Seche vite top coat.

mmpsm

mmpsm2

Next to knowing that the mystery polish is from Sally Hansen, I know absolutely nothing about it. This is one of my older polishes, a leftover from when I had a terrible habit of peeling the labels off of things. I really did a number on this one; I’ve stripped it of anything identifiable. I also remember buying this polish to match a pair of glasses I was wearing at the time. Despite everything, I actually really like this polish, and it’s a shame I can’t tell you anything about it, because I almost want to recommend it. The product consistency is on the thin side, and it took three coats to reach full opacity, and it took ages to dry… Maybe I don’t want to recommend it after all. It had the most gorgeous shine after it dried, though. I feel like that’s not very common. Though it was fiddly to apply, it didn’t need top coat at all, and I was really impressed. It’s kind of a shame I covered so much of it up.

mmpsm3

mmpsm4

Breath of Spring kind of took over this mani. I wanted just a small but concentrated bit of glitter at the base of each nail, but because of the variety of shapes and colors of glitter, it looked uneven, and by the time I got the look I wanted, it took up half the nail. I think it’s still a cool look; the glitter comes in bright but seasonal colors, and there’s just a hint of holographic goodness in the base. It’s a beautiful topper that would look fantastic over anything. I really enjoy this combination.

mmpsm5

mmpsm6

Breath of Spring has been discontinued by Model City; other Model City Polishes can be found in theiretsy shop. Sally Hansen, and maybe even this polish, can be found in stores nationwide.

I bought these polishes myself.

Manicure Monday: Glitter in Backup Camera Hell

To begin this post, I must first apologize. My regular camera has decided it wants a vacation and has so far refused to turn on. This is the reason my weekend swatches were not posted, and it’s the reason I had to fall back on my — shudder — backup camera. I apologize for the missed posts, and I apologize for the low quality of this one. Until the camera is fixed, my Manicure Monday posts are going to look like this, and I will not do swatches.

Anyway, this mani is gorgeous in real life, and it is an absolute tragedy what this camera did to it. My polishes today are Revlon’s Bare Bones and Digital Nails‘s Timey Wimey, all topped with one coat of Seche Vite top coat.

mmgibch

mmgibch2

Bare Bones is a pretty run-of-the-mill nude. In person, it’s on the cooler side of nude; some of these photos are color-accurate, some are not. The formula is okay; it was on the sheer side and though I did reach full opacity, it still leaves something to be desired. It’s not as smooth as it could be. It doesn’t quite level itself and some brush-strokes were left behind, though a top coat did help some to resolve that.

mmgibch3

mmgibch4

The real star here is Timey Wimey, one of my oldest indie polishes. When I chose a nude as the base, I started combing through the glitter toppers, thinking what this polish needed to carry it through the week was the craziest glitter I had. I found poor Timey Wimey at the bottom of the Helmer and that was that. I used an eyeshadow applicator sponge to apply it to my nail; I brushed the glitter onto the end of the sponge, then dabbed it on. I’m really happy with how it came out. Even when it’s a little dense or clumpy, it’s still gradual. I’m glad some of the nude base can be seen through it.

mmgibch6

mmgibch5

Revlon polishes are sold in stores; I got this one from Big Lots. Timey Wimey and other Digital Nails polishes are available in their etsy shop.

I bought these polishes myself.

Manicure Monday: Pink Moons and Glitter Crowns

Welcome back, reader! I hope your Monday treated you well. I had some Monday mishaps with my manicure today, but overall, I really love how it turned out. For this look, I used a deep pink Maybelline polish with Nails Inc.’s Princes Arcade for my glitter accents. All nails are topped with one coat of Seche Vite top coat.

mmpmagc

mmpmagc2

So this Maybelline polish is one I’ve had for probably a decade and a half. It’s a formula that’s not sold anymore, the color label has long since been peeled off, and the print on the label was wearing away. These aren’t necessarily signs of a bad polish, just an old one. Here’s the kicker, though: the brush was disintegrating. Strands of the brush — sometimes in whole, long fibers, others broken off into centimeter-long pieces — were coming off and getting stuck on the nail as I was applying the polish. At first I thought I could just pick it off, since I’ve had brushes like this before; they lose one or two hairs, I tweeze them off, and no harm done. This was not that. The more I brushed, the more came off. It was shedding like a cat. By the second coat I had to give up. I got a mini bottle from my workshop, poured the polish into it, and started working with the new brush. It was a vast improvement, but unfortunately some of the strands were left floating in the polish and found their way into my manicure anyway. You can see a couple in there. I probably should have thrown it out, but it seemed like such a waste; it’s really a great polish; I got perfect opacity in two coats, and it dried with a really glossy finish, albeit a bit slowly. I had to save what I could.

mmpmagc3

mmpmagc4

So I do the half-moon thing pretty often, but usually with two polishes, a base coat and then a second color brushed over. I’ve never done it with the natural nail exposed, so I decided to give it a shot. Really, I just wanted to do something other than the usual creme-and-glitter-accents I usually do. I really love this glitter — Princes Arcade from Nails Inc. — because it and the mystery color kind of complete each other. I’m not sure that Princes Arcade is dense enough to be worn on its own, but it looks full and lush over the base color. I also tried it as a gradient along the half-moon — a crown, if you will — just as a glitter accent but also trying something different. I like the look, but I think I got a bit too much on the index finger. The middle finger’s got the right idea though. They just work together so beautifully.

mmpmagc6

mmpmagc5

I got my bottle of Princes Arcade from Sephora. I don’t even know how to tell you to find this Maybelline polish, even if you wanted it. The bow is from Daily Charme.

I bought these products myself.

Manicure Monday: Jazzy Mint Glitter Gradient

Happy Monday, reader! Hope you had a good one. I present to you this weekend’s edition of Manicure Monday; I tried my hand at a glitter gradient for the first time in ages, and I’m pretty happy with the result. My base color is Sinful Colors’s Mint Apple, and my glitter is Essie’s Jazzy Jubilant. I also used one coat of Seche Vite top coat.

mmjmgg

mmjmgg2

A quick few words about the polishes I used: Mint Apple is a minty green with some silvery shimmer. It’s a very nice polish; I like the color and shimmer together, and I feel like it’s a unique piece in my collection, despite being so simple. Jazzy Jubilant is like the grown-up version of the classic rainbow glitter; the colors are muted and deeper, but each color is respresented well. I actually didn’t like it much when I first got it, but wearing it has totally changed my mind. It looks way better on the nail than in the bottle, especially over a base color like this one.

mmjmgg3

mmjmgg4

I tried the gradient from the cuticle for the first time, and I like it. I just wish I had more nail real estate. I only wanted a smattering of glitter instead of the dense coverage I got. I applied the glitter with an eyeshadow applicator sponge, and while the sponge absorbed the excess lacquer, the dryness meant I couldn’t push the glitter around like I wanted to, and of course once there’s too much, I can’t take it off, so I got stuck with it. It’s not bad, and if my nails were longer, there would have been more room to fade out the gradient, so to speak, but I’m pretty happy with it as is.

mmjmgg5

mmjmgg6

Mint Apple and other Sinful Colors products are sold in stores nationwide, as are Jazzy Jubilant and other Essie shades. I got mine from Walgreens.

I bought these polishes myself.

Manicure Monday: Teal Glitter Gradient

I started this Manicure Monday with no real plan. I had a glitter and a bright base color, but I didn’t really know what to do. I thought at first I would use some nail vinyls to create a pattern, but I screwed it up. I tried stamping and blew that, too. I didn’t want to do a gradient because I always do those, but here we are. I used Sinful Colors’s Nail Junkie (how appropriate) and Essie’s Naughty Nautical, as well as two coats of Digital Nails‘s Ain’t Nobody Got Time for That top coat.

IMG_43262

IMG_43302

Naughty Nautical is a teal polish with fine rainbow shimmer. Nail Junkie is a thin teal jelly with many colors of fine iridescent glitters. I paired them together thinking I would just wear Naughty Nautical as a base for Nail Junkie, but I thought that was boring and forced myself to do some nail art. It’s not as intricate and ambitious as I wanted it to be, but I like the look I got. I acheived it by putting down two coats of Nail Junkie, then doing the gradient. It looks like the glitter is sponged over the teal polish, but that’s not the case. I also considered painting another coat of glitter over the gradient, but I decided that what I had was enough. You can also see the nail with the stud has no gradient; it’s only the base color and glitter.

IMG_43392

IMG_43442

I’m pretty happy with it. It’s been a while since I’ve done anything nail-arty and fun. I really want to do more of that instead of just painting glitter over a base. Also, I’m really embarrassed by how dry my hands look in these photos. I put lotion on before I took them, I swear.

IMG_43482

IMG_43532

You can get these polishes wherever Essie and Sinful Colors are sold. Mine are from Walgreens.

I bought this polishes myself.

Manicure Monday on Tuesday: Celestial Gradient

So it’s been a while since I did a manicure like this; I haven’t been into nail art much lately, just doing the accent-nails-with-glitter-is-easy mani. I swatched Blue-Eyed Girl Lacquer‘s Weary Traveller a couple months ago and wanted to wear it in a new way, so I did a glitter gradient thing with it. The colors in my gradient are Sally Hansen’s Black Out and Essie’s Urban Jungle, with Weary Traveller sponged onto the tips.

IMG_89002

IMG_89032

I wasn’t sure how to do this at first; I definitely wanted a look that would show the jelly properties of Weary Traveller, so I thought the best way to do that would be with a nude and black gradient. The first time I tried this, I couldn’t get the jelly sheer enough to show the nude without streaks. I kind of wish that had worked out. I also didn’t get a fantastic gradient since my nails are so short.

IMG_89422

IMG_89182

I used Color Club’s clear coat again this week. So far, it wears well, but it doesn’t smooth glitter out very easily. I don’t want to use more than one coat on a mani like this, since there are already so many layers. I’m also afraid of shrinkage.

IMG_89302

IMG_89362

I should really start doing nail art again. I forgot how cool gradients look.

Manicure Monday: Barely There Glitter Gradient

This week we have another subtle, dainty, blink-and-you’ll-miss-it manicure. These soft shades didn’t pair together as well as I thought they would, but I still like the result.

100_3073
Revlon launched a little duochrome nail line called Sweet Nothings sometime around 2006 or 2007, I forget exactly when. I snapped them up when Walgreens had them on final clearance for $2 each. I’ve had these babies for a long time now, and I’ve gotten so much mileage out of them because they’re so versatile. They’re easy to wear; they look amazing worn over light colors, dark colors, or alone. There were only a few shades in this line, and sadly, I’ve already run out of one. Using the last of a discontinued product is always a hard thing for me to do.

100_3077
Right, so the polish. Here I’m wearing two coats of Rendez-Blue. It’s a sweet, milky blue with lots of pink shimmer. The blue would probably be more visible on a dark color; here I’m only wearing it over base coat. The pink shift is hard to capture on camera, but I think I did well enough.

100_3092
The glitter I used for the gradient is Julep’s Camille. Camille is a clear base with iridescent glitter that shifts from orange to green. The colors in the glitter are the complete opposite of Rendez-Blue, but I kind of like the contrast. I was afraid the glitter would blend in and it would just look like a bunch of nothing on my nails. Given the subtle colors, it already kind of does, but the glitter helps it stand out.

Revlon's Rendez-Blue, Julep's Camille

Revlon’s Rendez-Blue, Julep’s Camille

So, quick announcement: it turns out that wacie.com is a nail blog after all. Yeah, that wasn’t really my intention, but I felt really inspired and motivated over the weekend and decided to start my own indie polish brand, Wacie Nail Company. Yeah, I’m excited, too! Since wacie.com is already mostly about nails, I decided just to use wacie.com for my nail shop and blog, and move my writerly pursuits somewhere else. If you’re interested in reading my bad fiction and fail stories, please hop on over to my new blog. Thanks for reading!

Manicure Monday: Bronze Glitter Gradient

It’s like I dipped my nails in shiny chocolate. It’s not chocolate, though. It’s glitter!

100_2802

As you can see, I used two polishes this week. Wet ‘n Wild’s 2% Milk is a very pale, very sheer pink. The first coat was so sheer that it was nearly invisible. The second coat was less so, but was still very transparent and natural-looking. I’ve never gotten the point of these sheer pinks that don’t cover anything. I guess they’re useful for French manicures, but I never got the point of those either.  Orly’s So Go-Diva is a bronze glitter suspended in a clear base, and I had some trouble with this one. Before I started working with it, there was this layer of clear polish hovering over the glitter, and so when I pulled the brush out, I’d have maybe five pieces of glitter on an otherwise bare nail. I got this look by applying it with an eyeshadow sponge; the sponge soaked up the extra lacquer and still let me place the glitter where I wanted it.

100_2807

I could have done a better job with the gradient, probably. Since 2% Milk was so sheer, I felt I needed a thick layer of glitter to cover the nail line, and so that’s why it goes down so far. I tried to exercise some control, I honestly did. This is actually the second attempt at this manicure today; my gradient work was awesome, but I tried a jelly sandwich thing with the pink, but I ended up hating it and took it off. I’m not especially happy with this gradient, but I like it enough to keep it on. However, it has crossed my mind to just sponge the glitter onto the whole nail and keep the sheer pink out of it.

100_2810

This is a good festive manicure, I think. I never do themed or holiday nails, but I love when they happen by accident.

Wet 'n Wild's 2% Milk, Orly's So Go-Diva

Wet ‘n Wild’s 2% Milk, Orly’s So Go-Diva

You’ll see that layer of clear is gone from the Orly bottle. Out of curiosity, I tested it to see if the glitter spreads any better, and it does. I think I’m just going to pour out that extra bit of lacquer from every bottle from now on.

Manicure Monday: Iridescent Glitter Gradient

This manicure was a total surprise. I didn’t expect it to turn out this way, and I definitely didn’t expect to like it so much!

100_2235

I don’t know if it’s been obvious, but I’ve been using a lot of warm colors in my manicures. It’s summer; I’m wearing a lot of warm neutral makeup shades to achieve a natural sun-kissed look, and wanted to get the same effect on my nails. I chose the glitter, Revlon’s Heavenly, because in the bottle, it’s warm and iridescent. When paired with the black, I got a completely different look, and I couldn’t be happier with it. The colors in the glitter are much more visible, as well as the different shapes and sizes. I almost feel as if I’ve judged this glitter polish unfairly.

100_2237

Sinful Colors’ What’s Your Name, Revlon’s Heavenly

Here’s a picture of a cat my friend drew on my dusty record player. I should clean my stuff.

100_2239