Swatch Saturday: Blue-Eyed Girl Lacquer’s Sell Souls for ISOs (OBO)

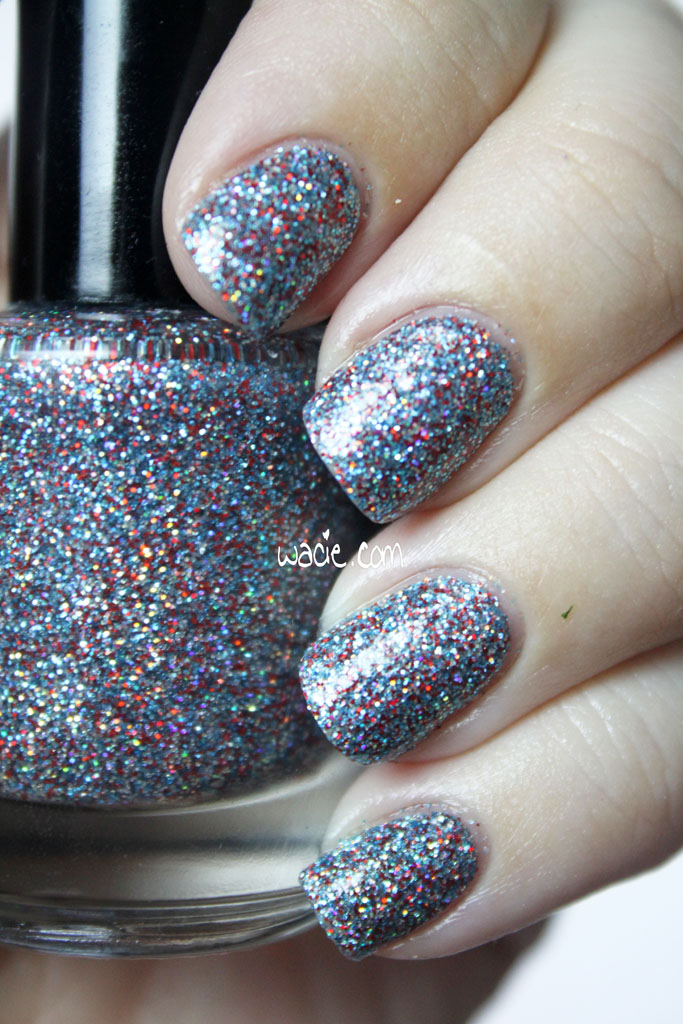
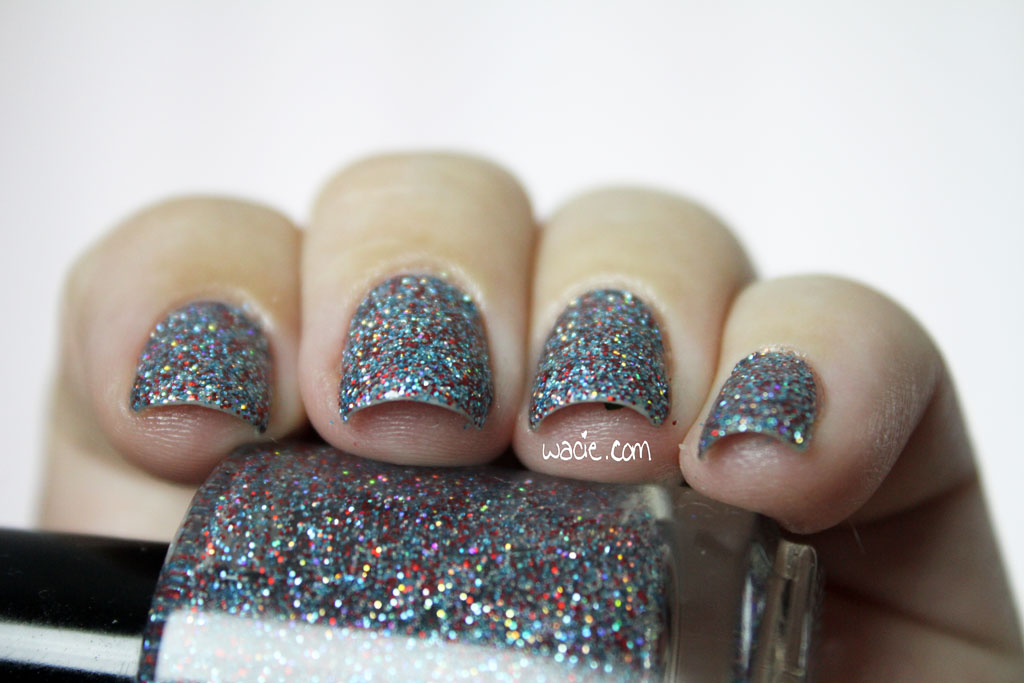
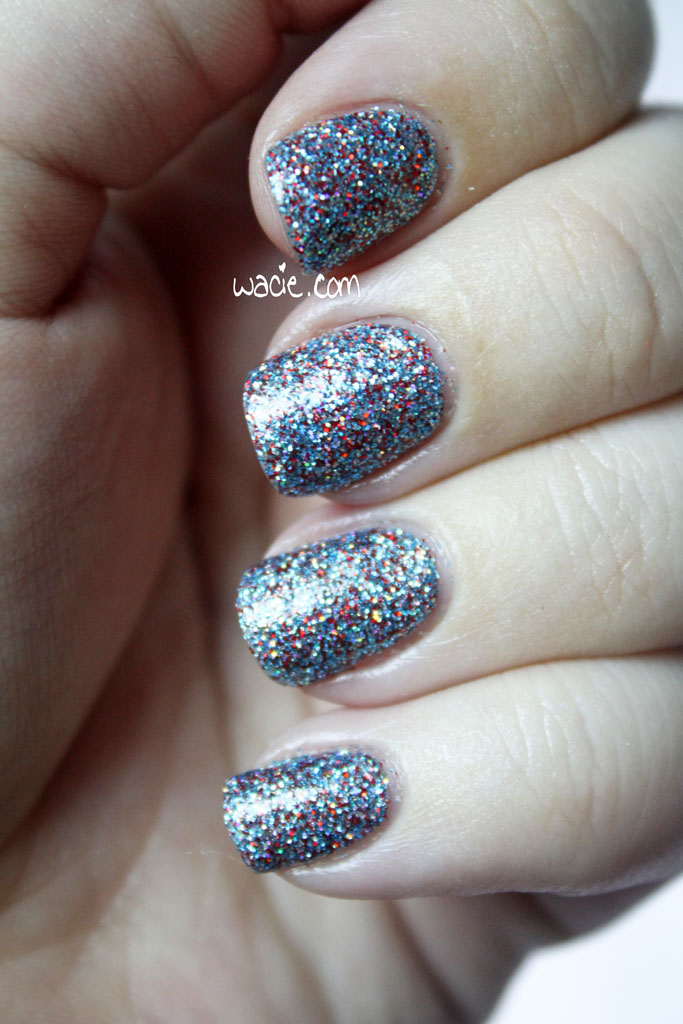
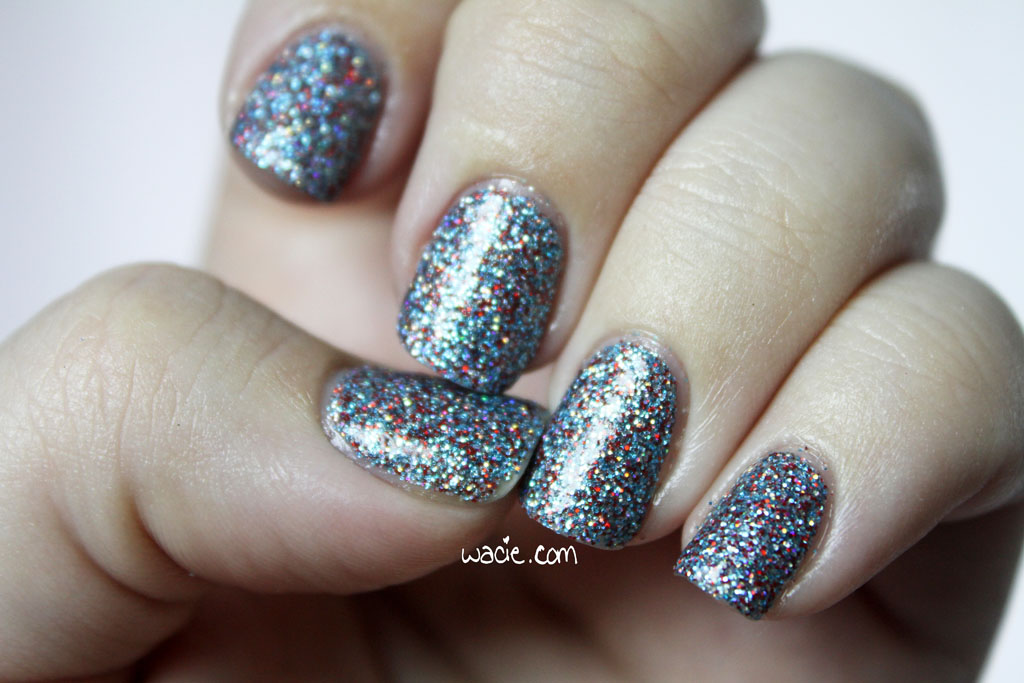
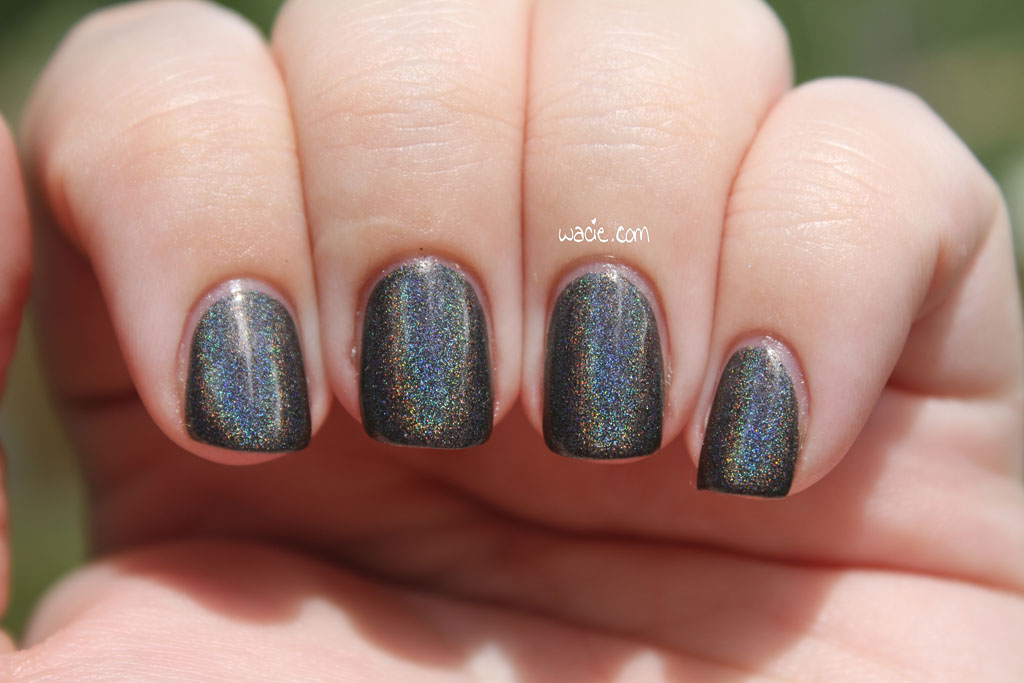
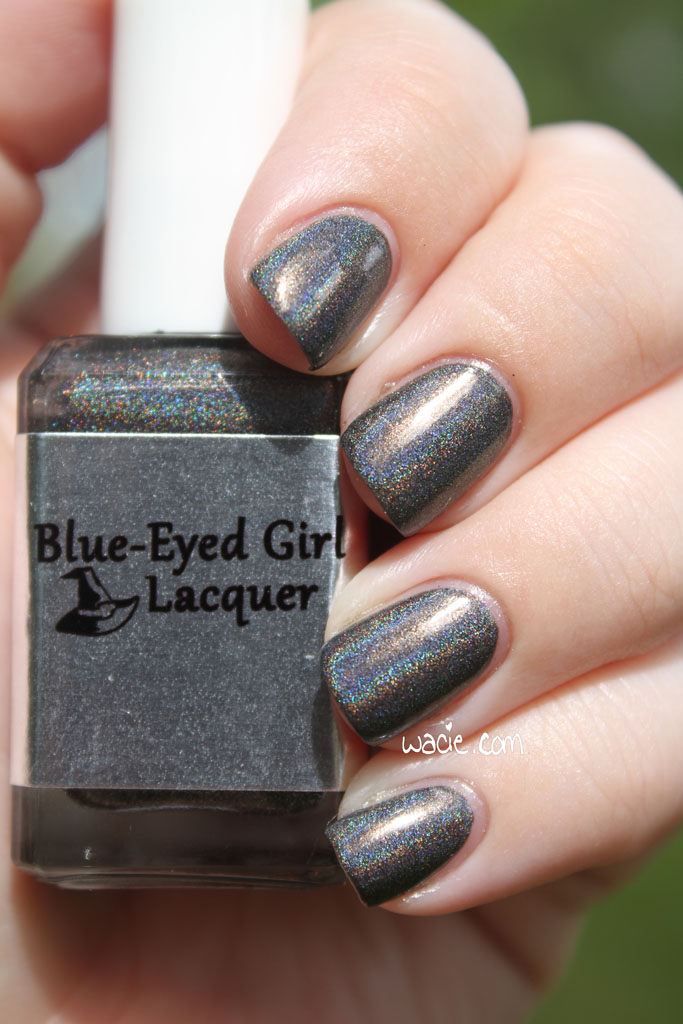
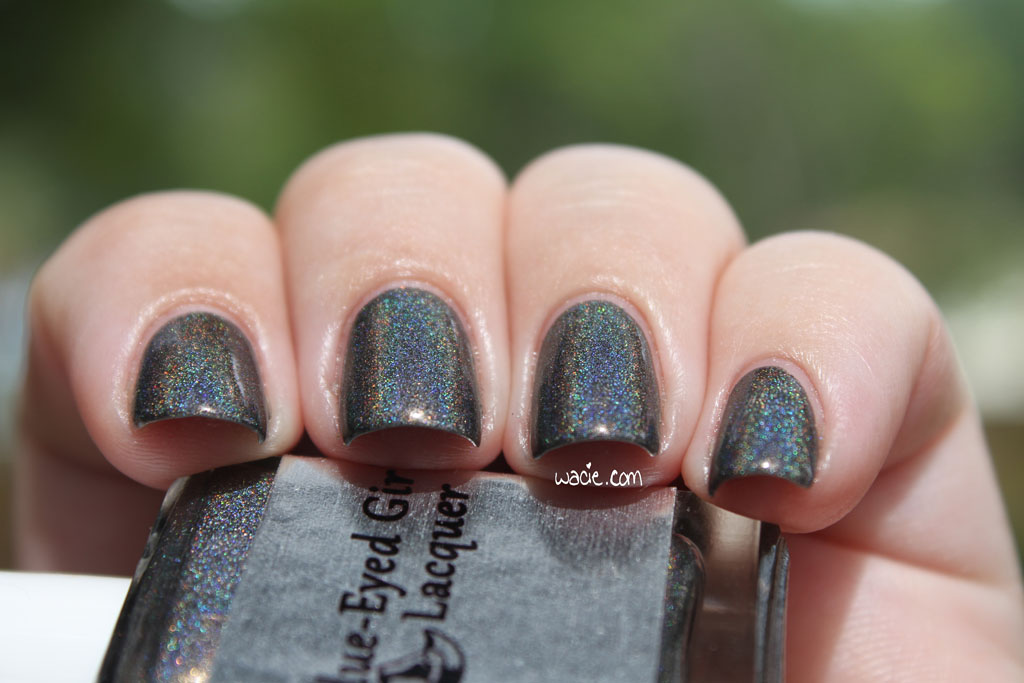
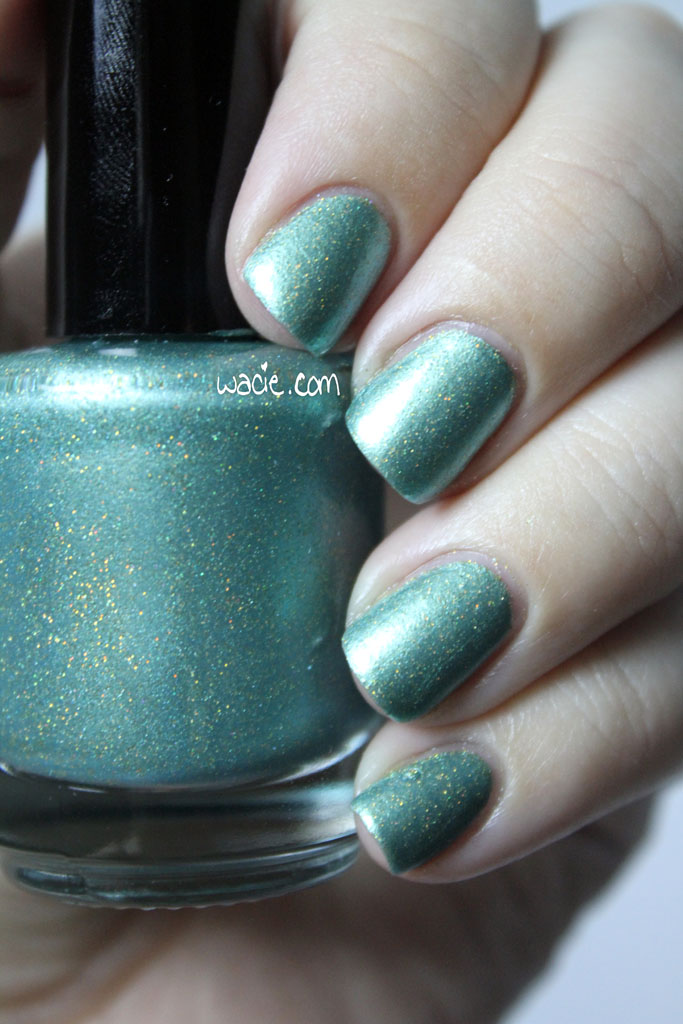
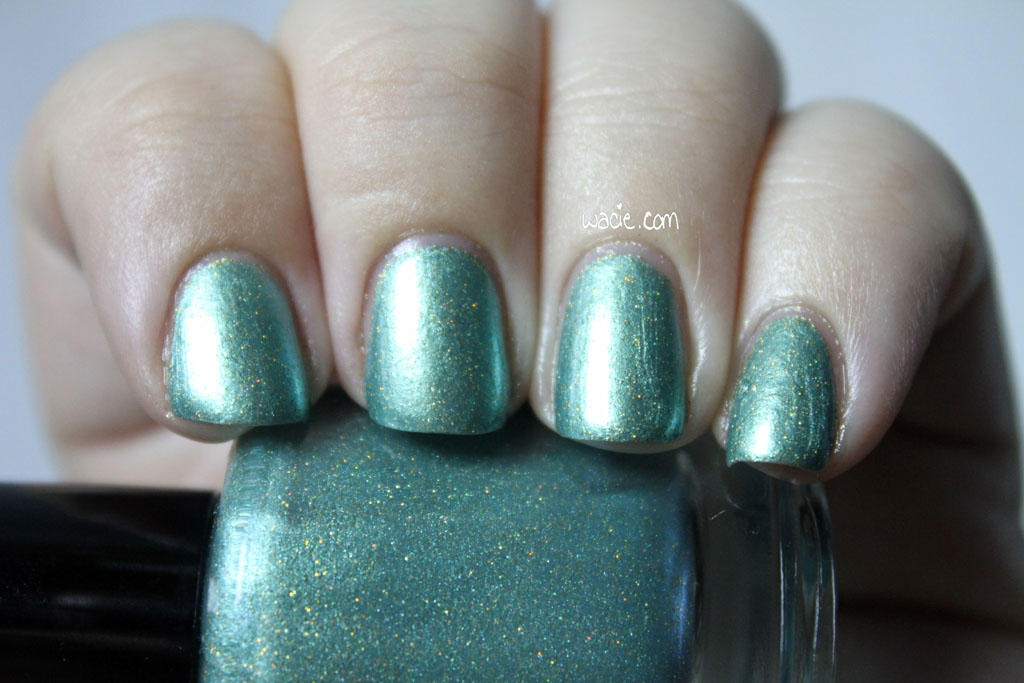
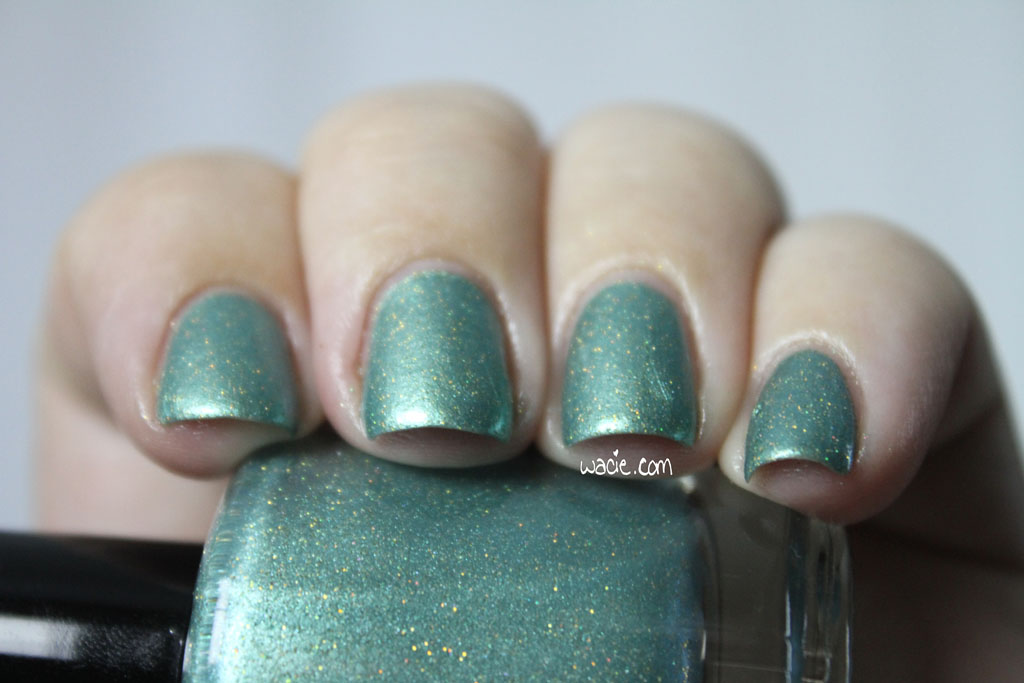
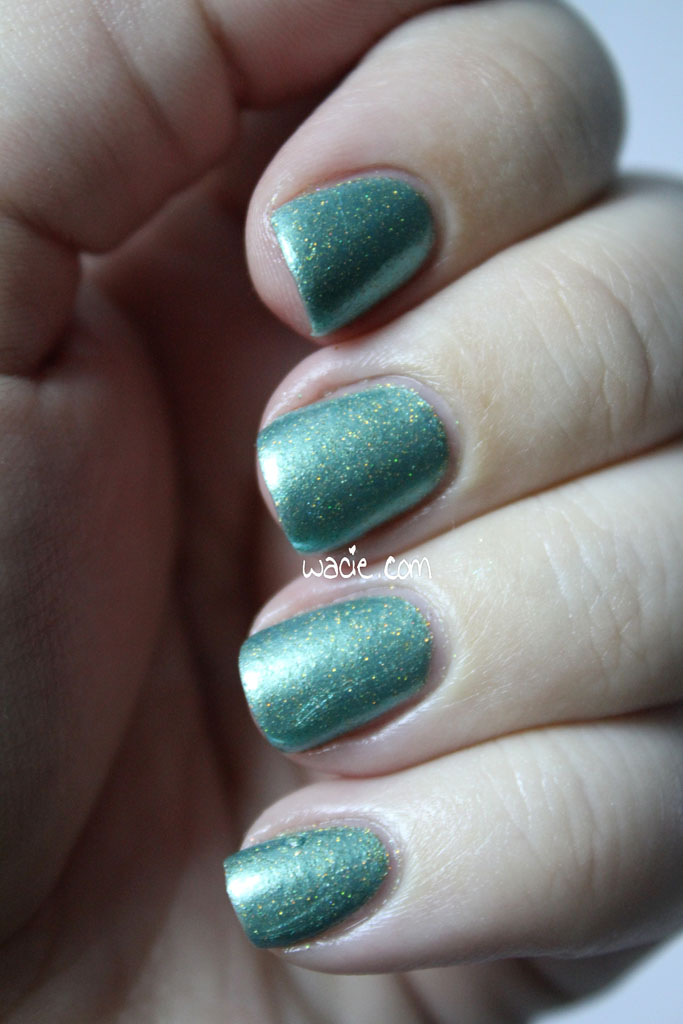
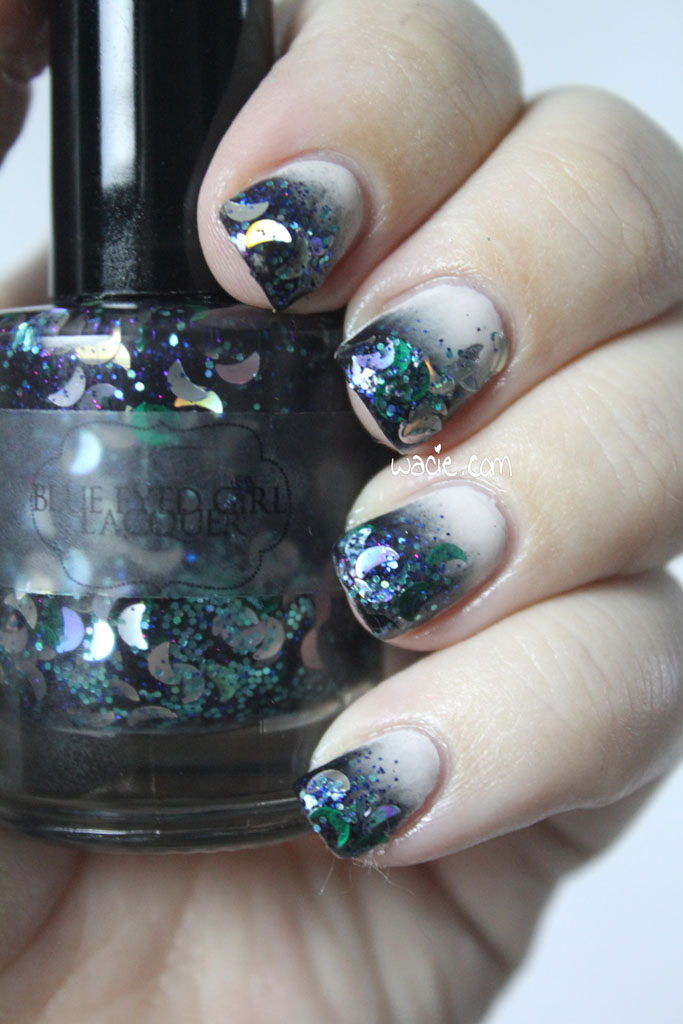
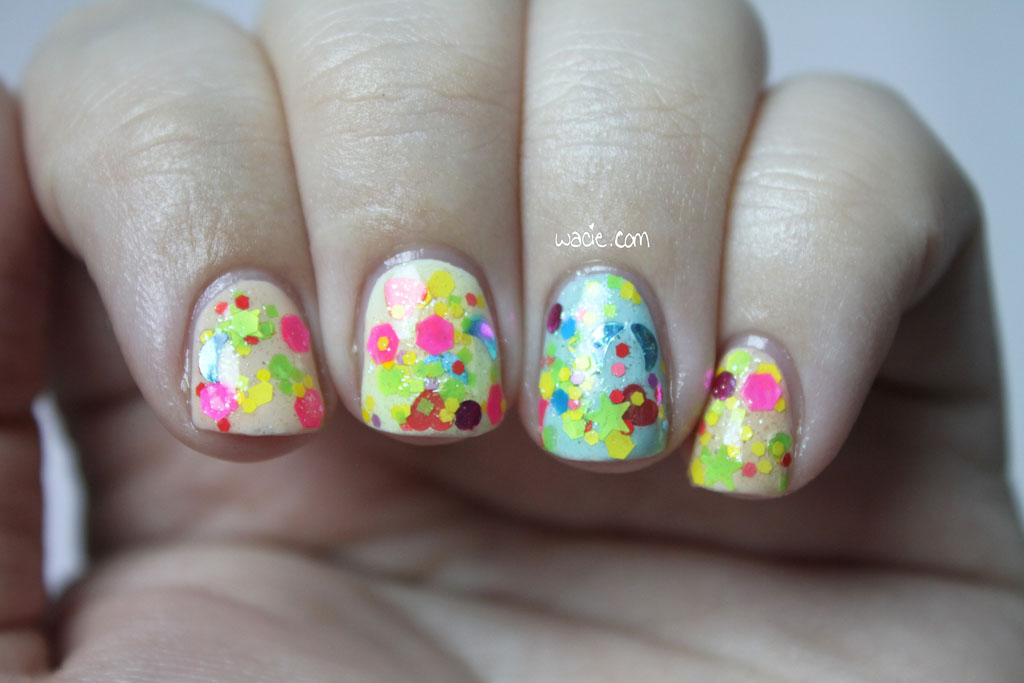
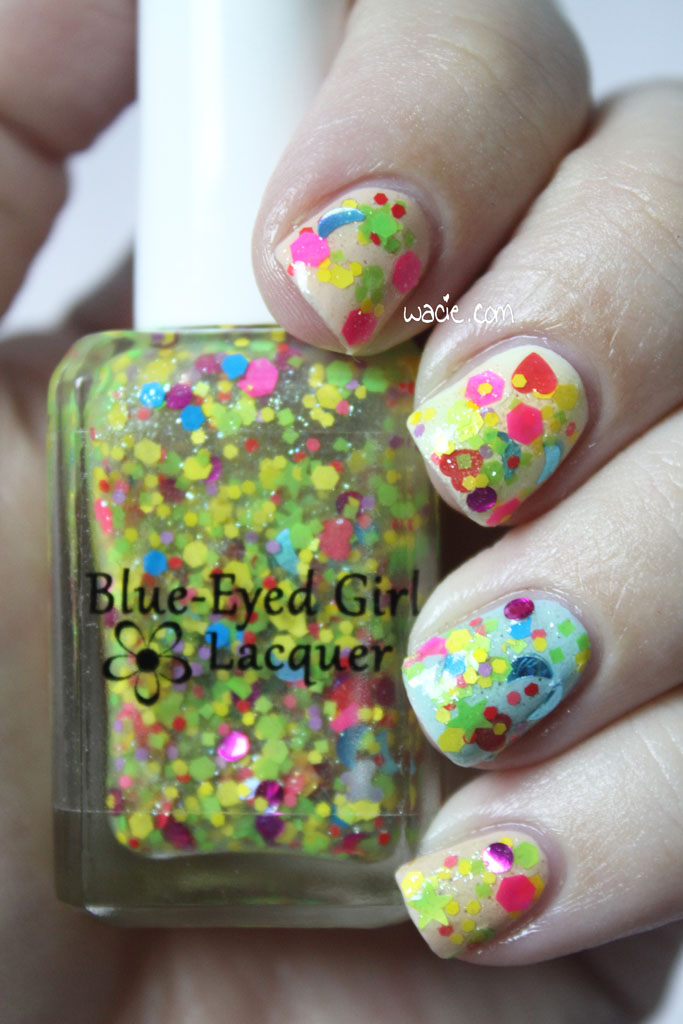
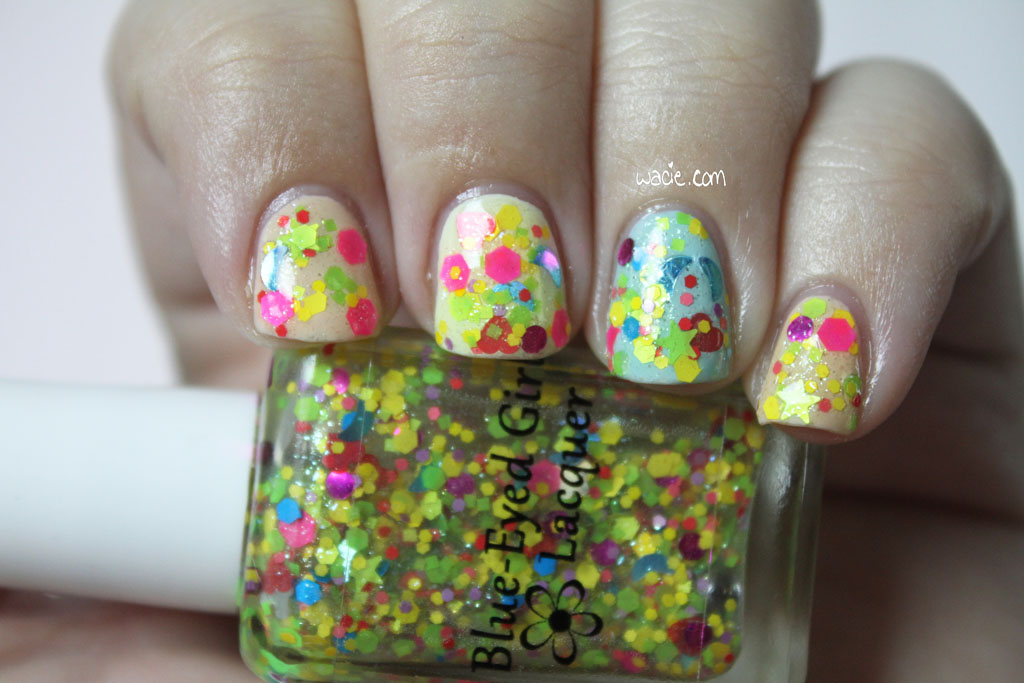
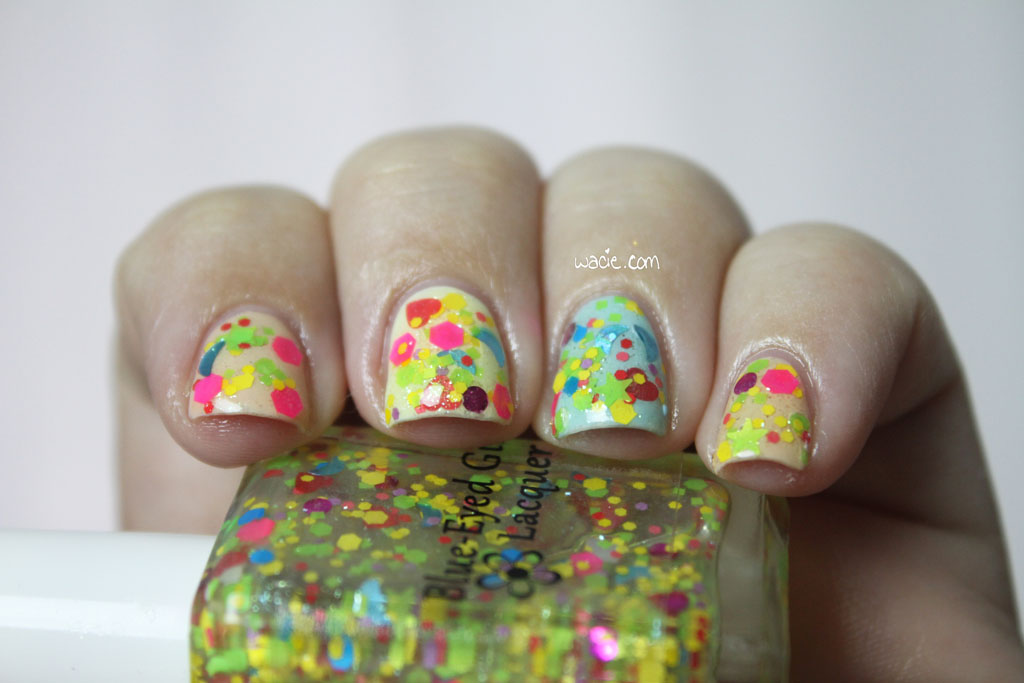
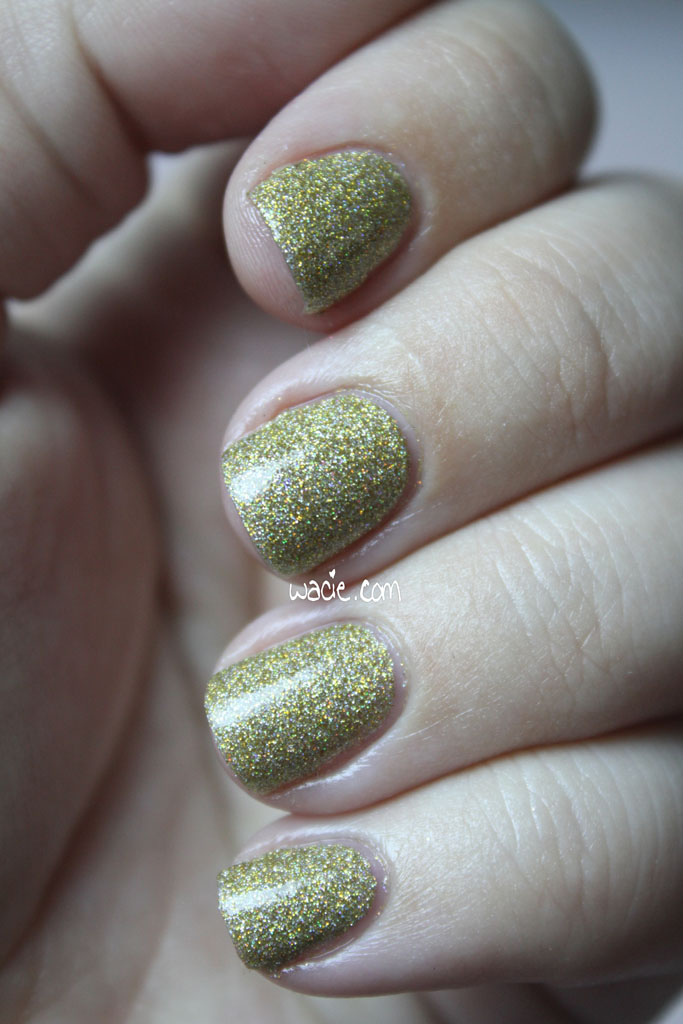
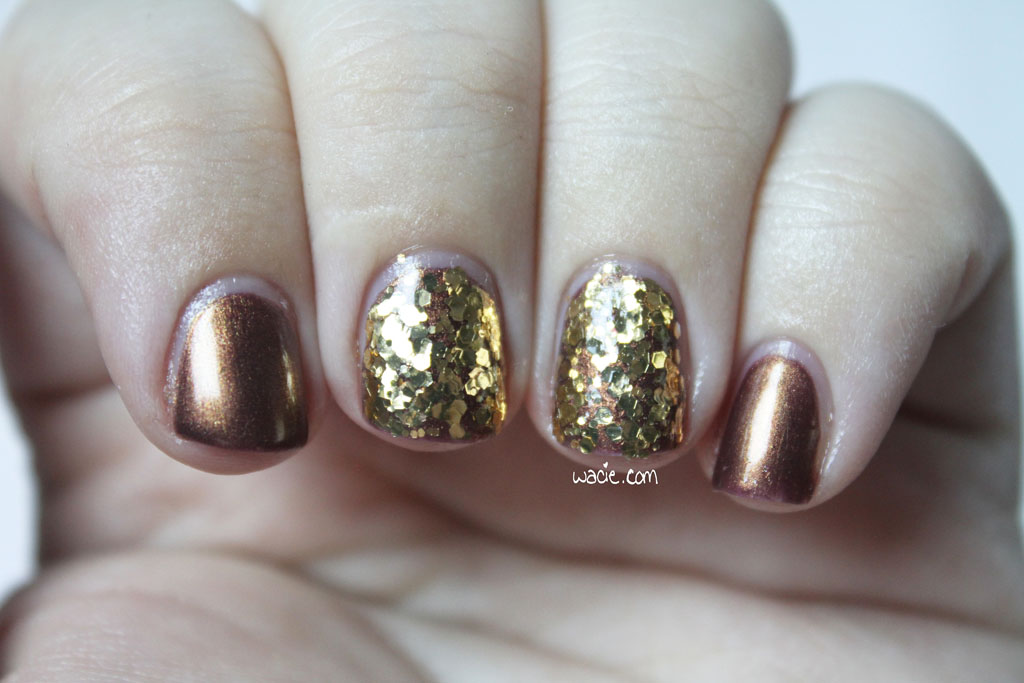
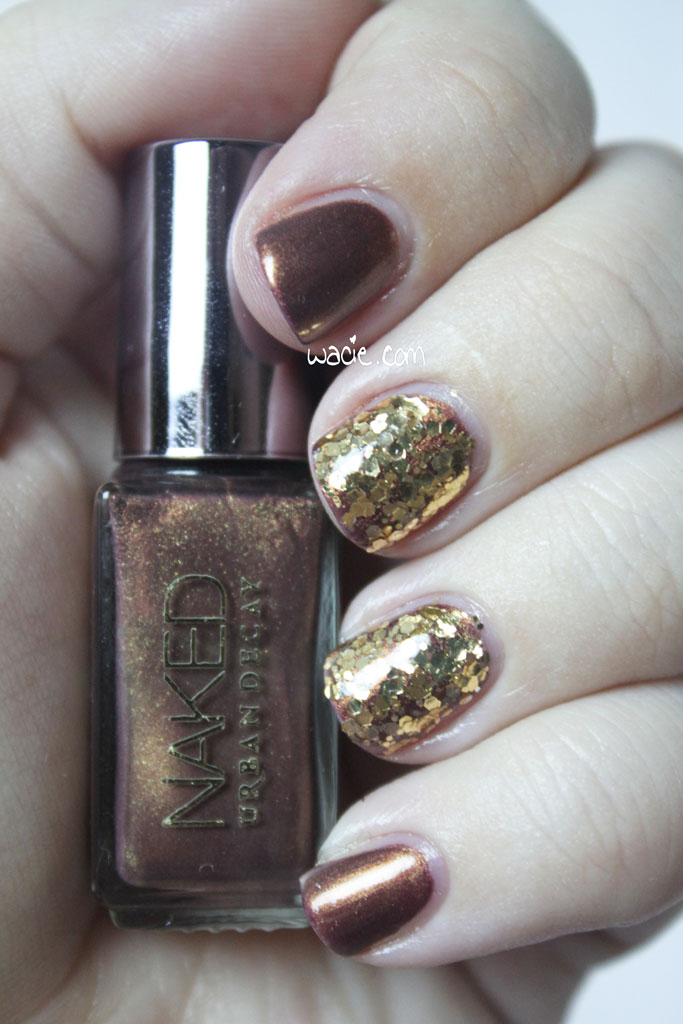
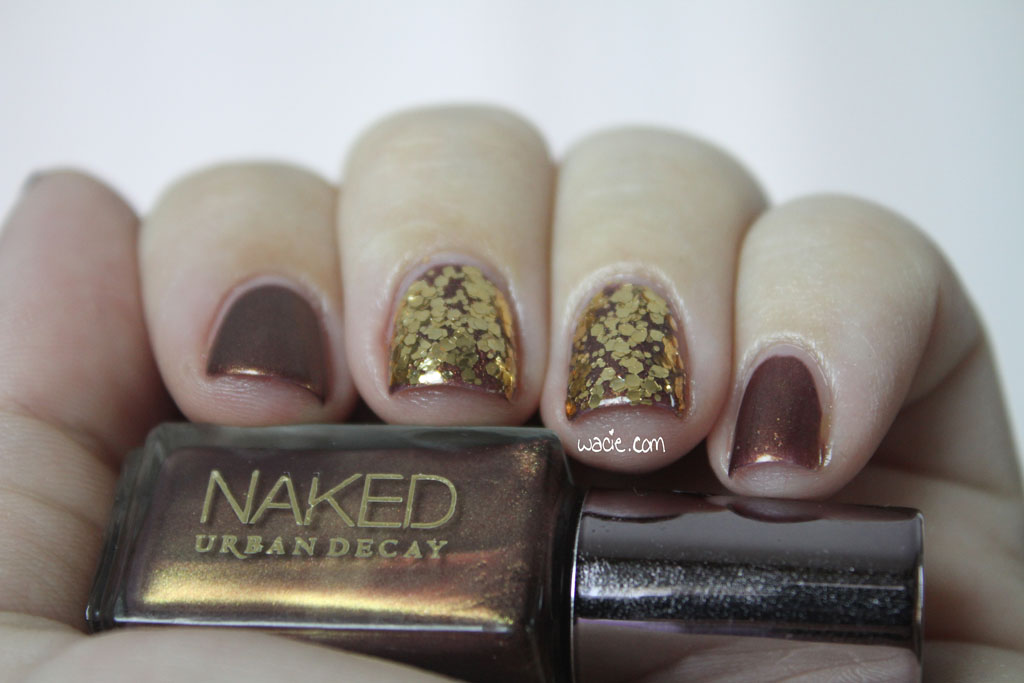
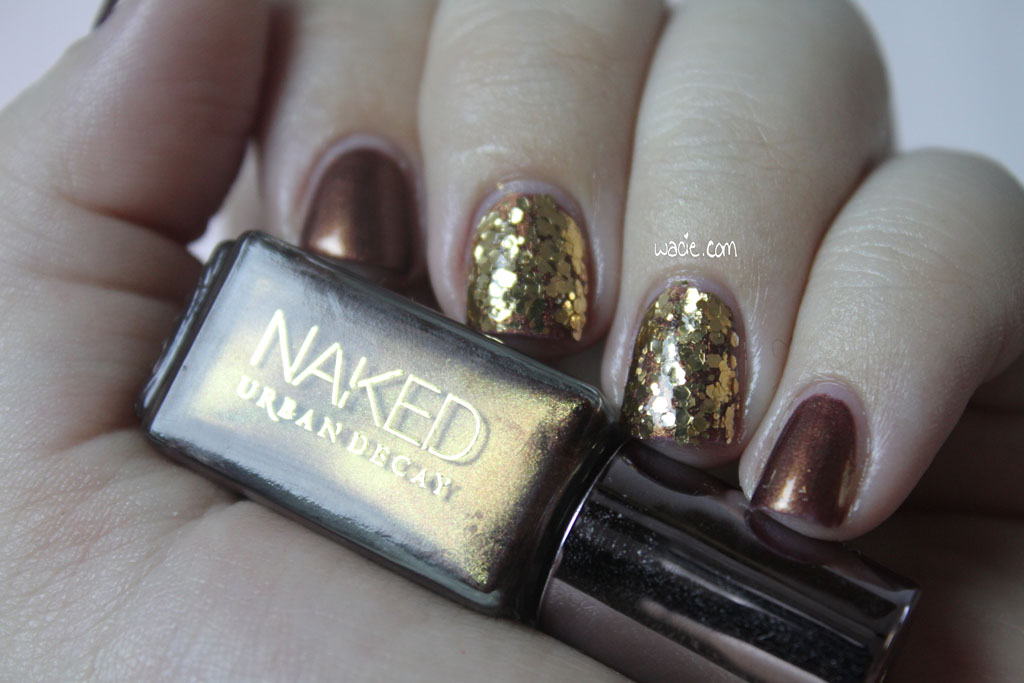
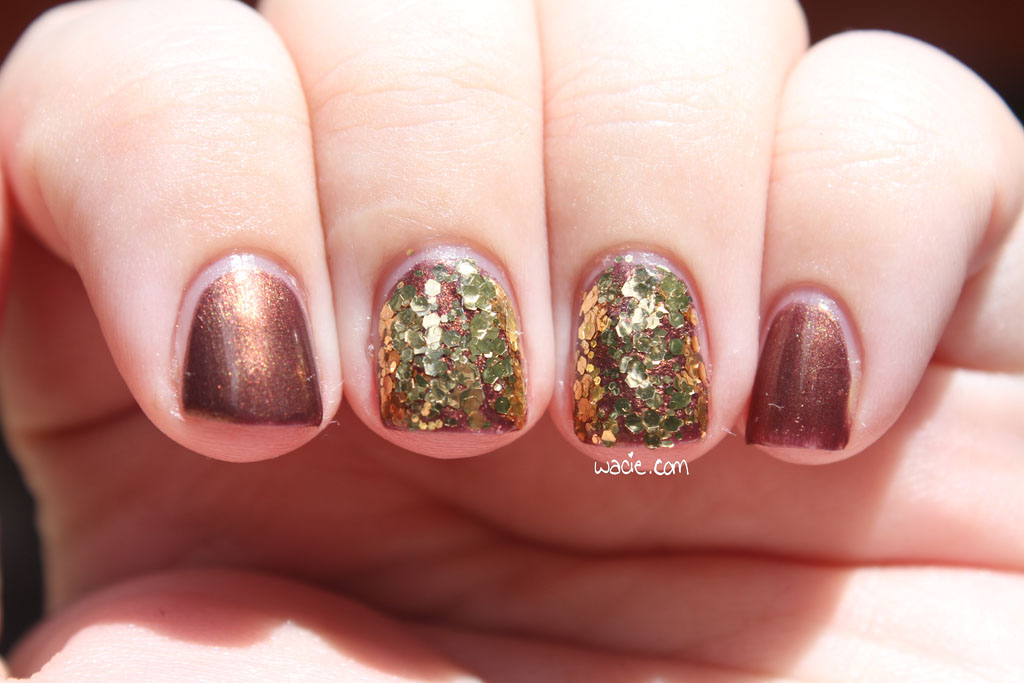
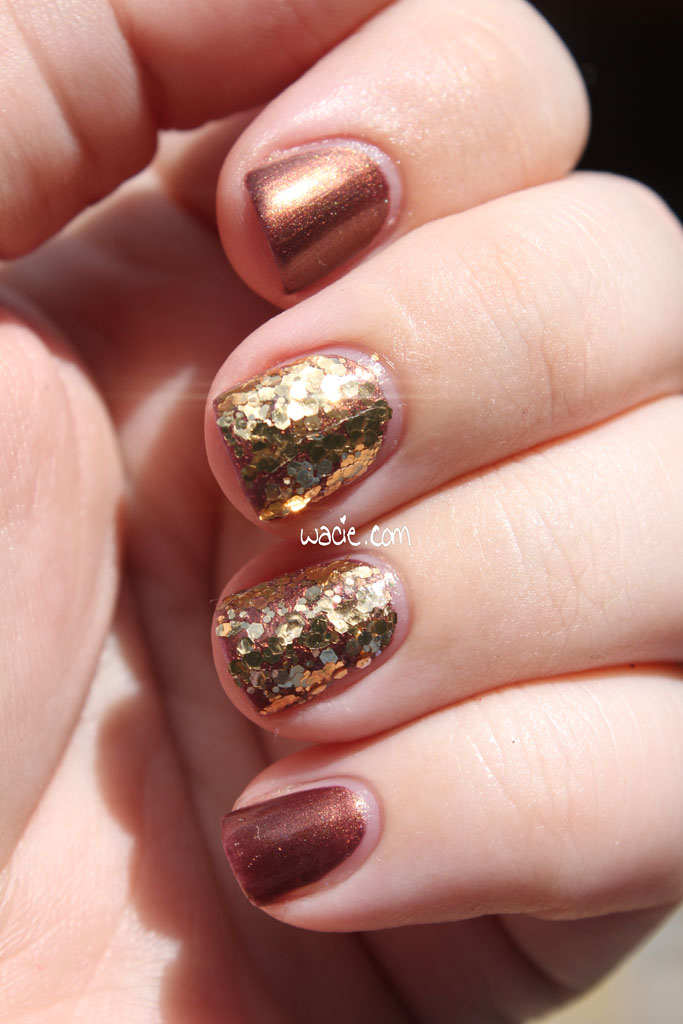
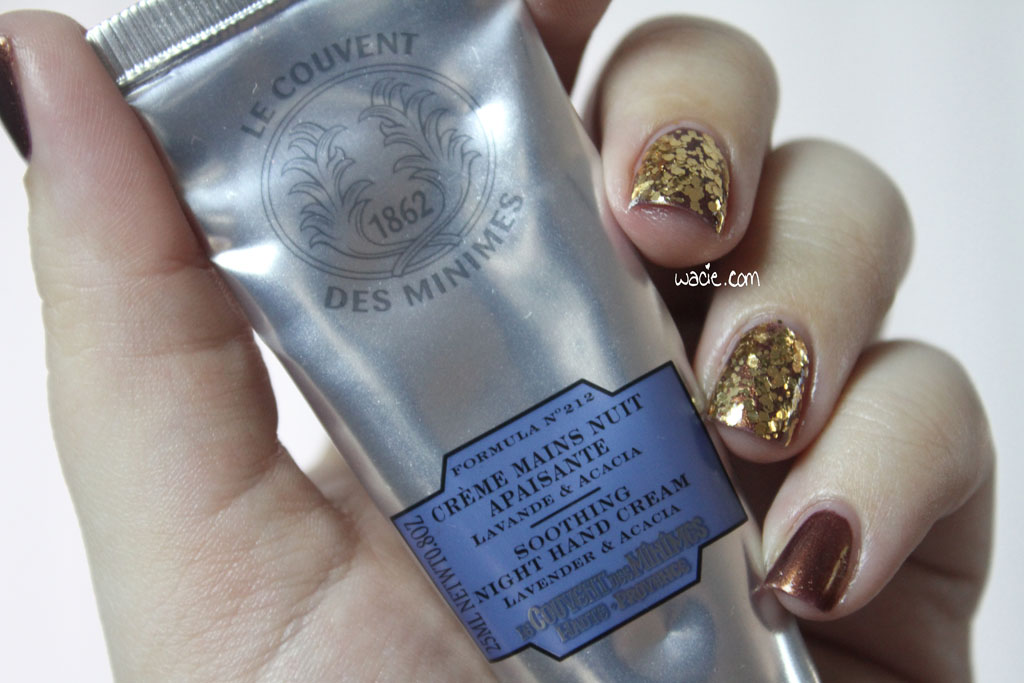
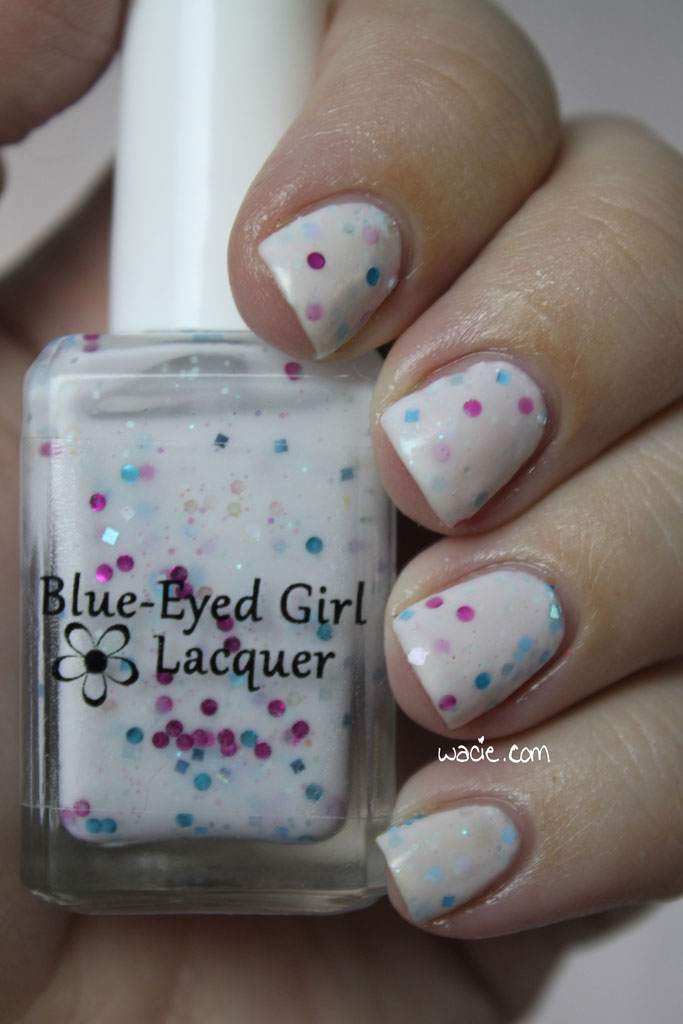
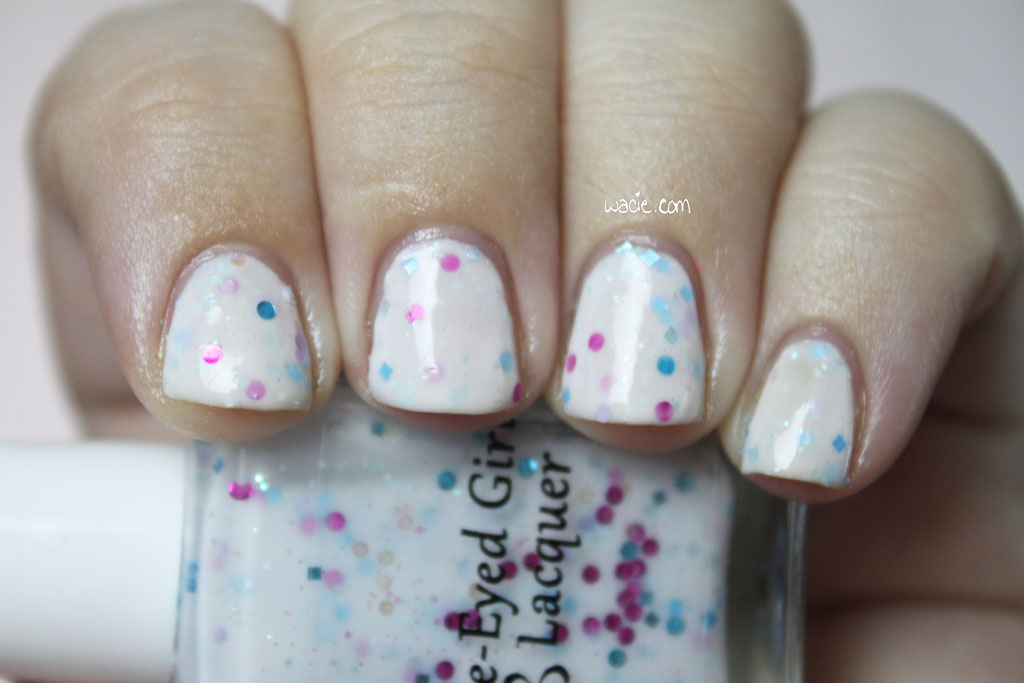
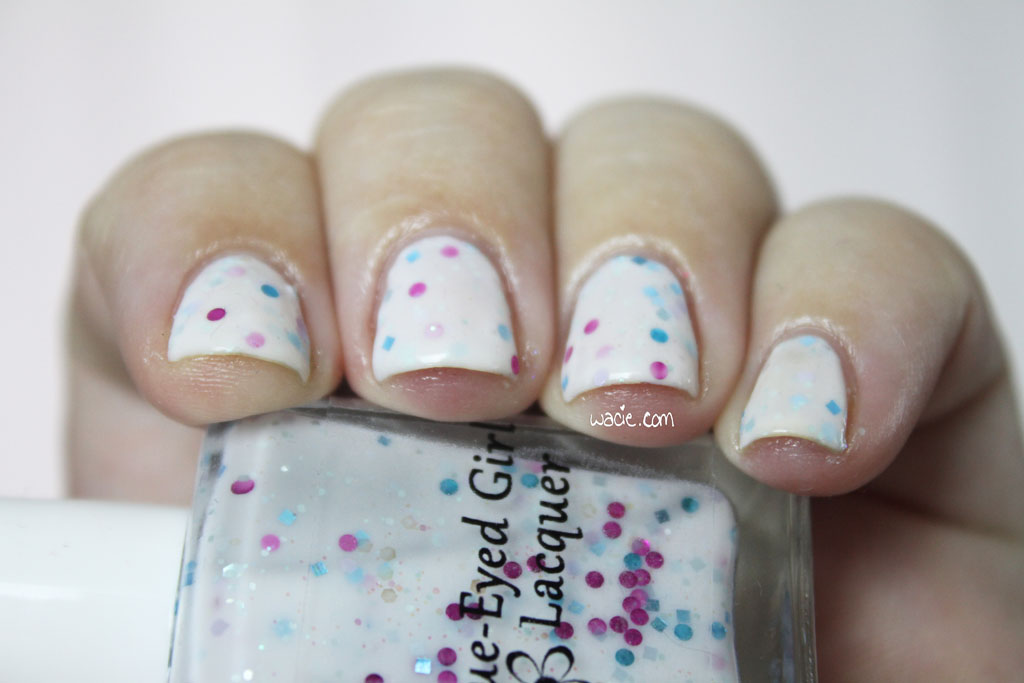
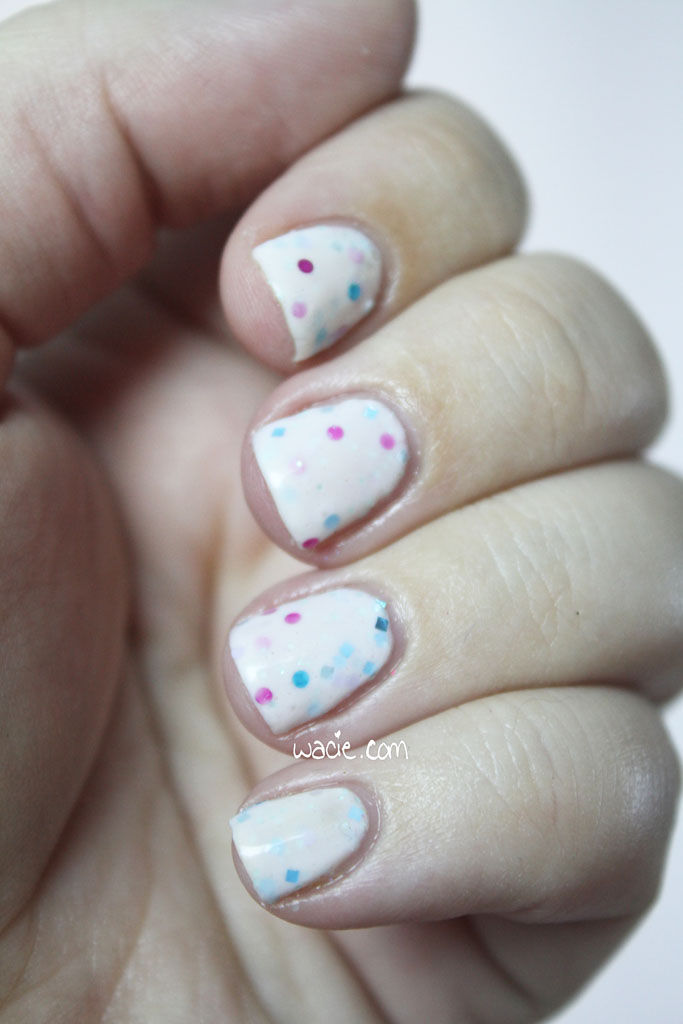
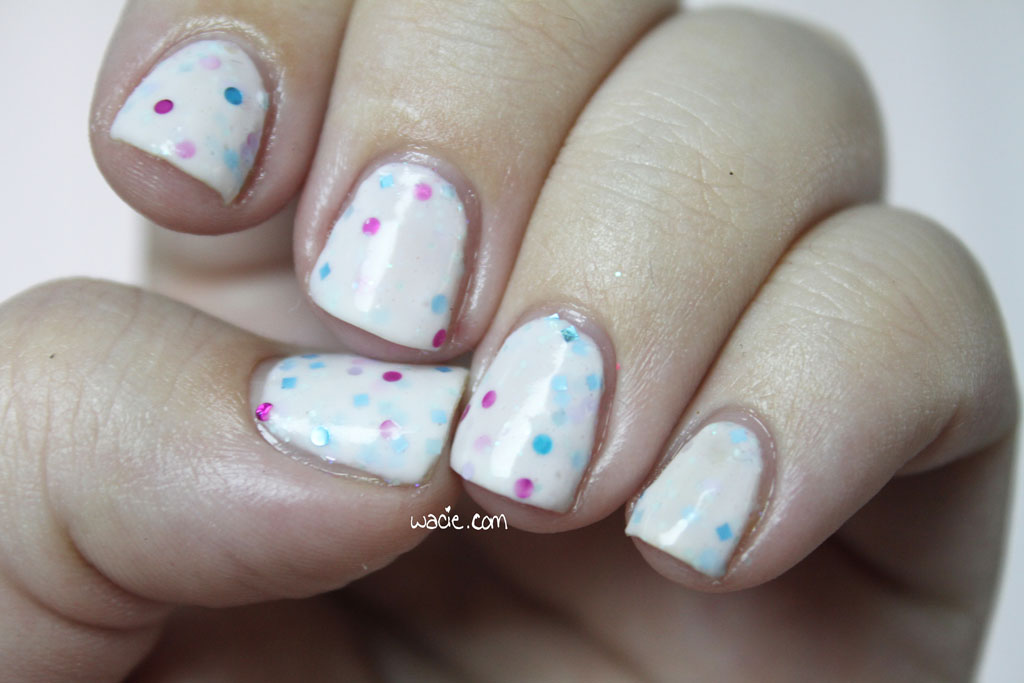
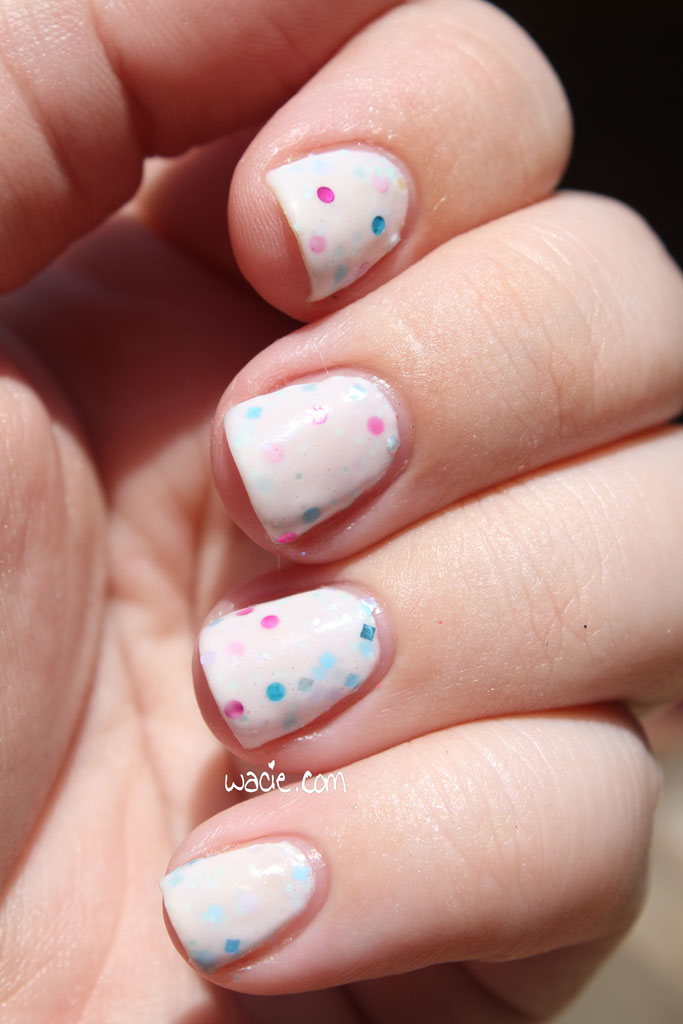
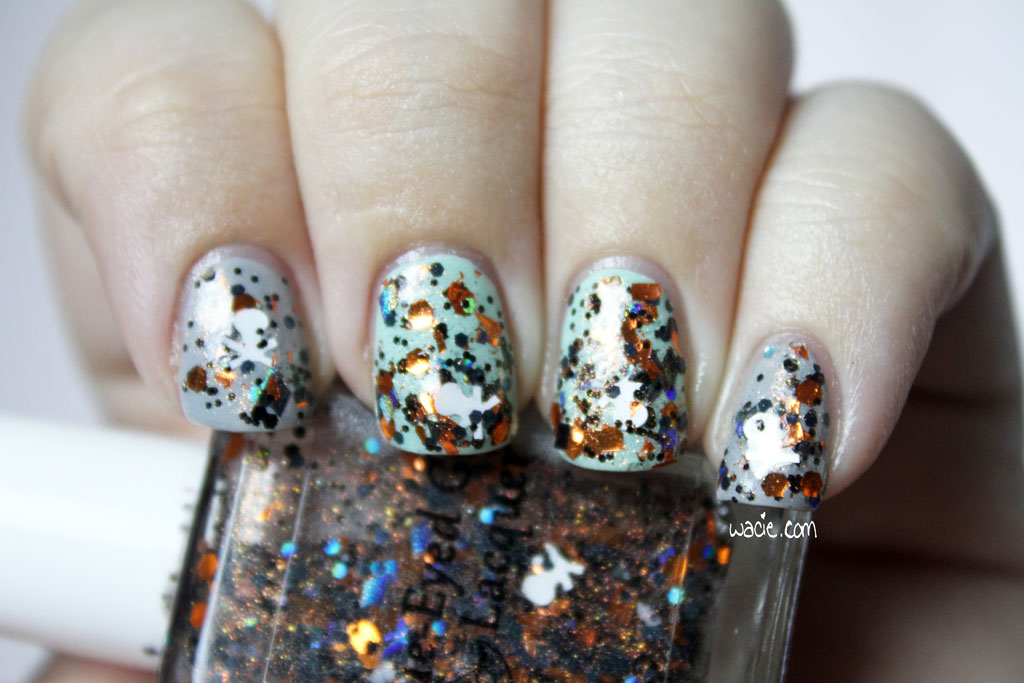
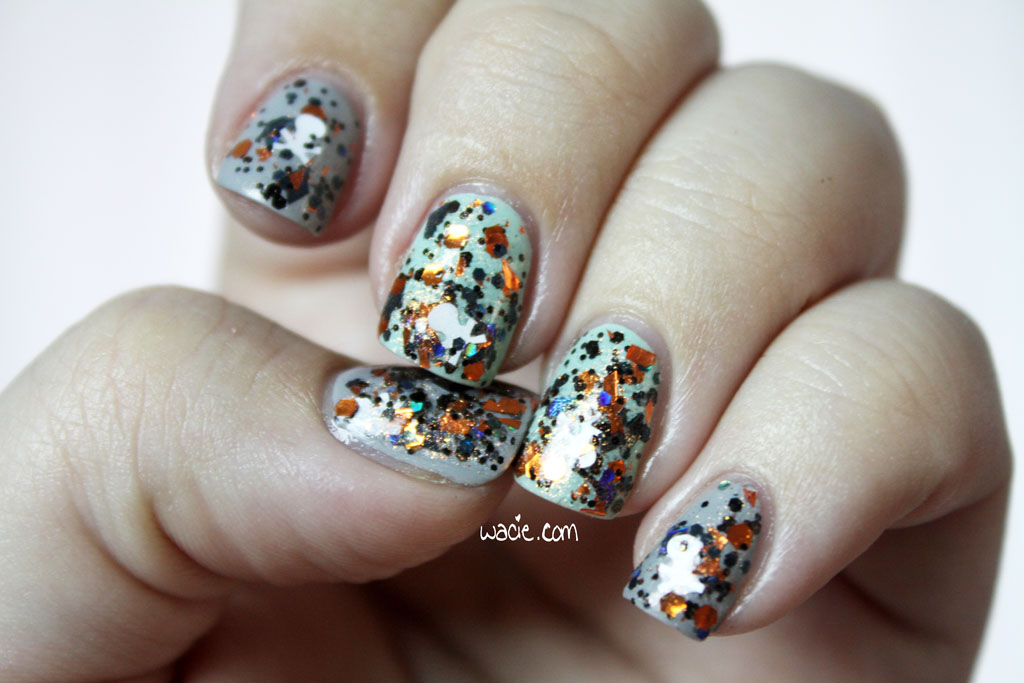
I got some Halloween costume catalogs in the mail this week, so it’s officially not too early to post this manicure. We’re still looking at long overdue swatches from Blue-Eyed Girl Lacquer‘s Halloween 2013 collection. This polish is called Sell Souls for ISOs (OBO); I’m wearing one generous coat of it over China Glaze’s Pelican Gray and Essie’s Fashion Playground.

IMG_93722

IMG_93782

IMG_93812

IMG_93892

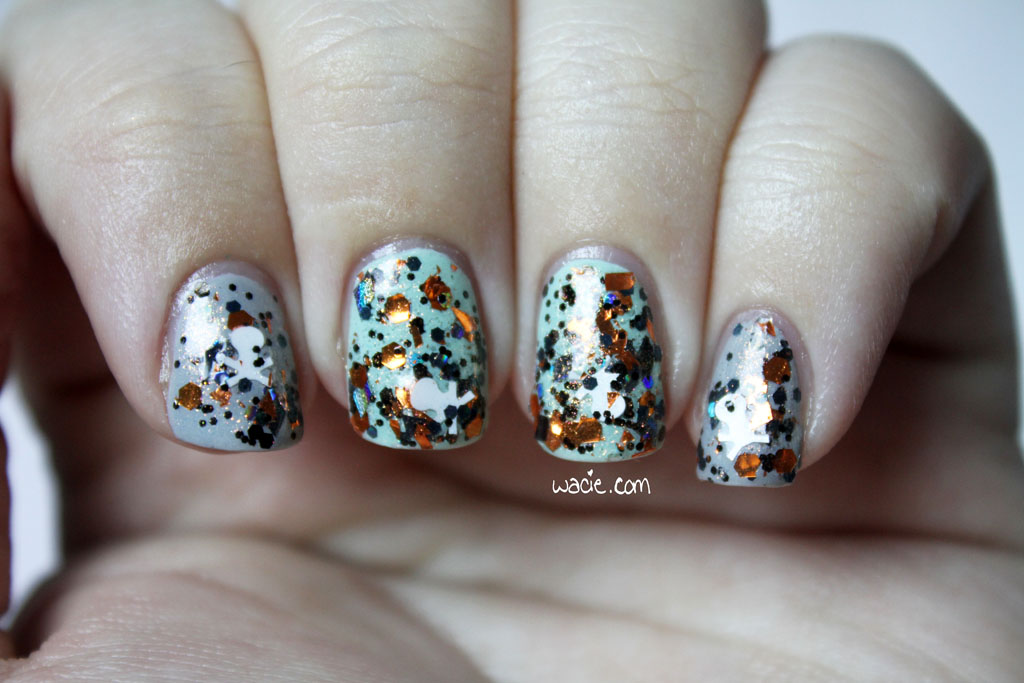
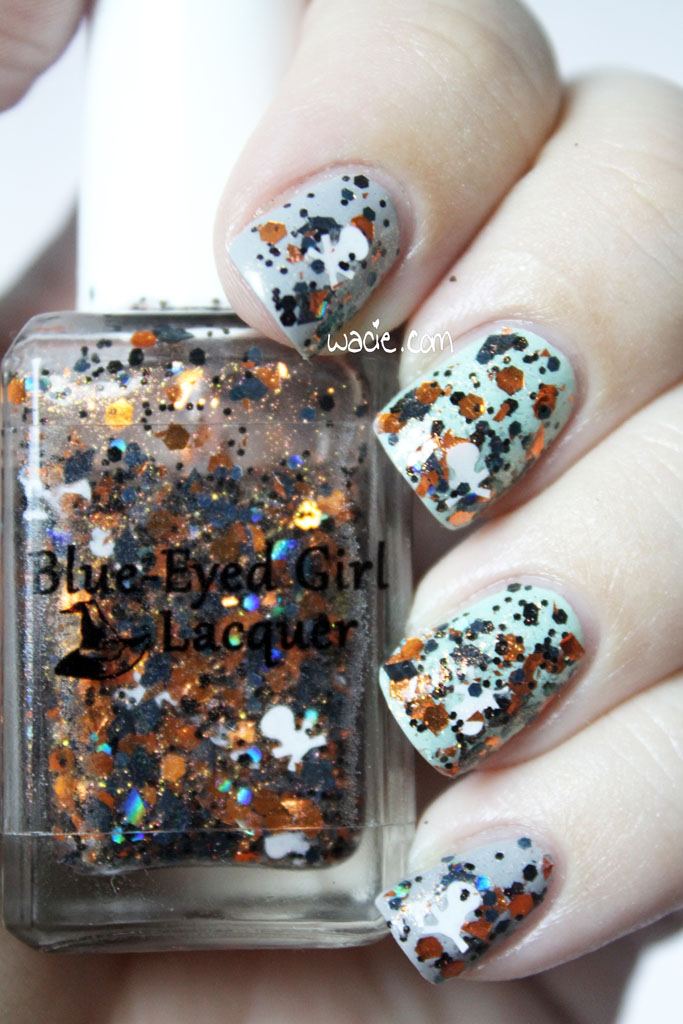
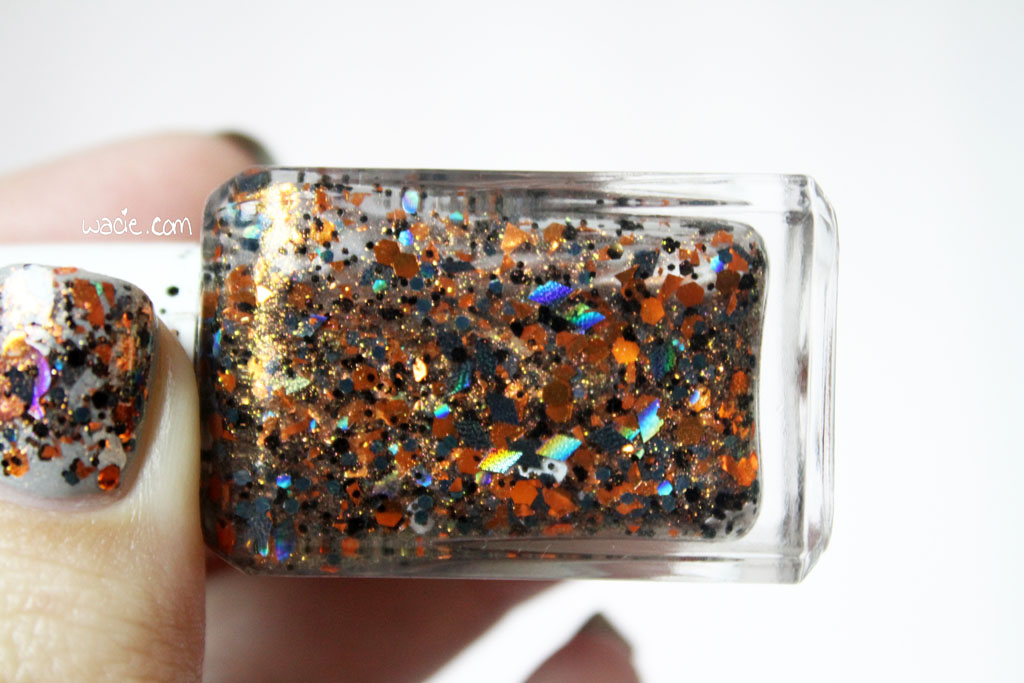
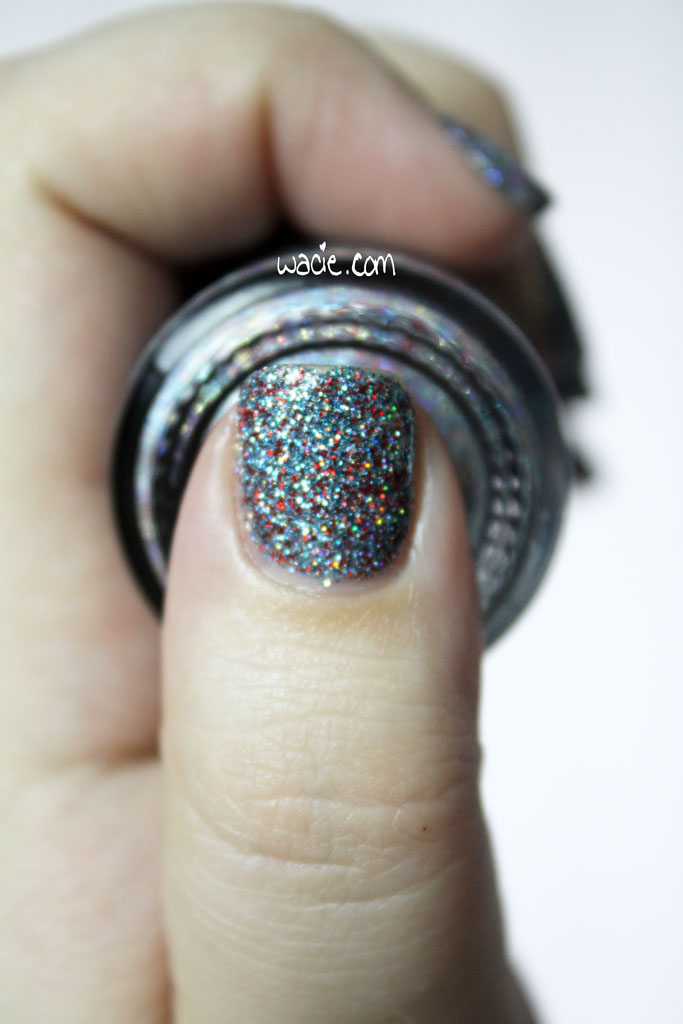
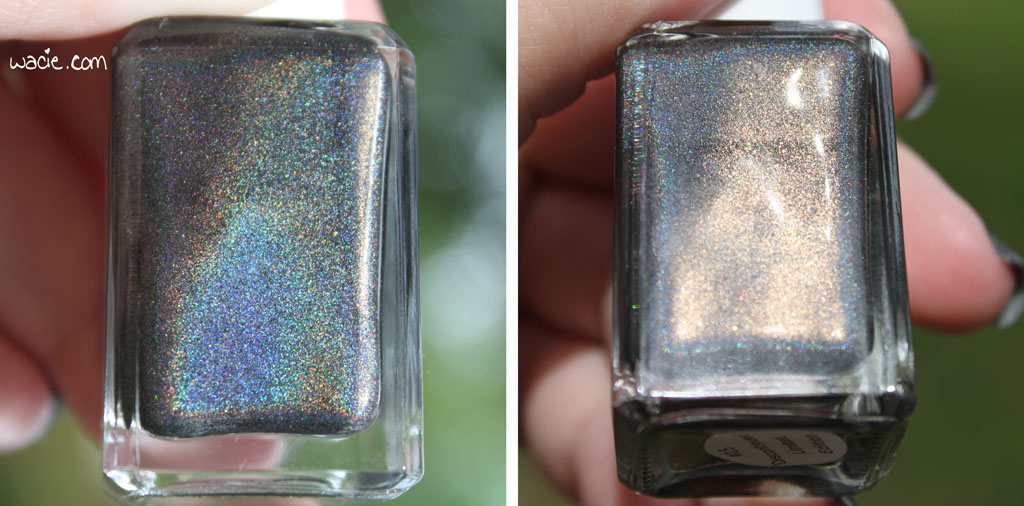
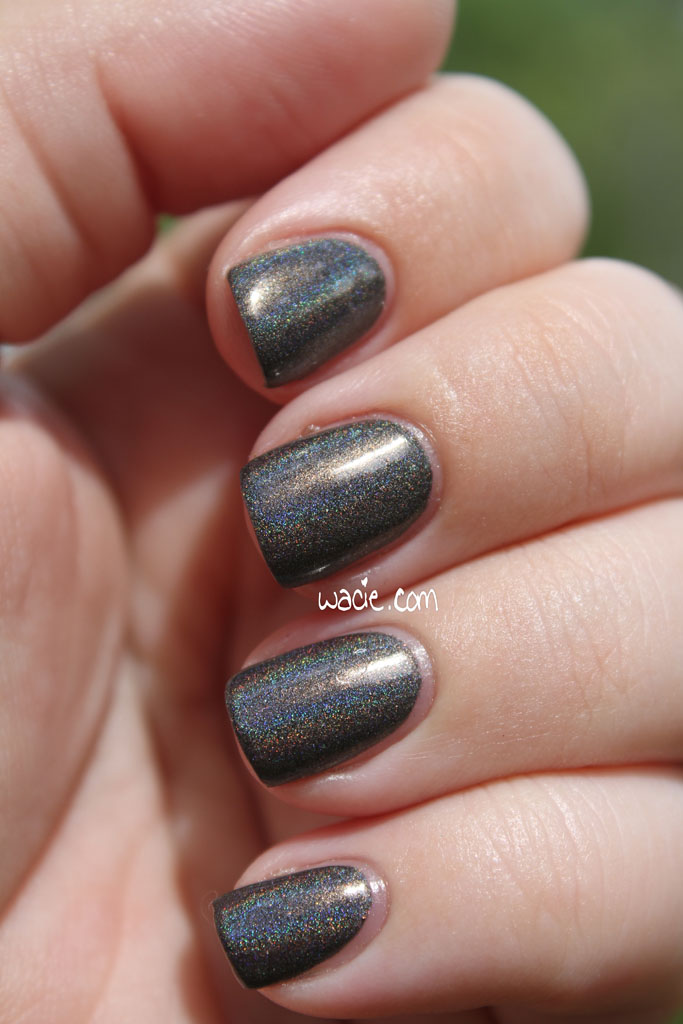
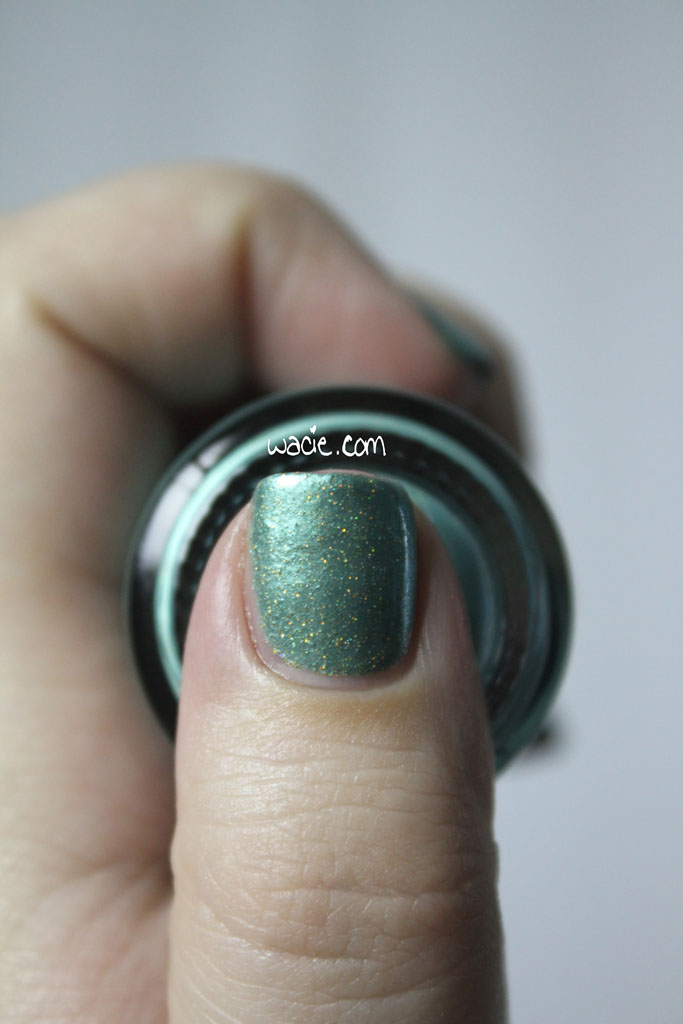
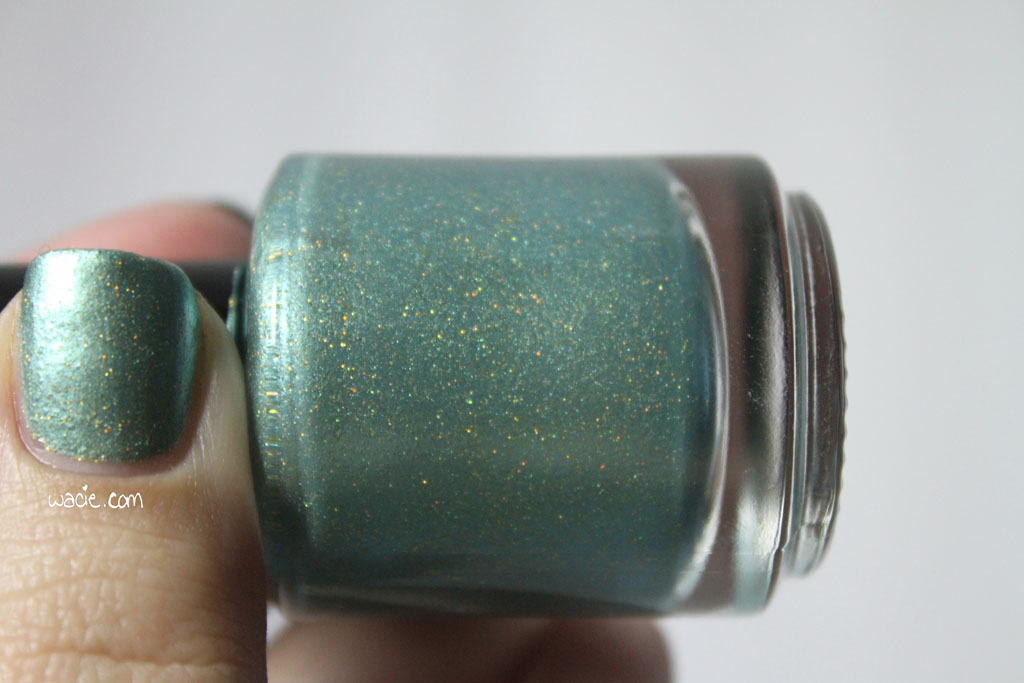
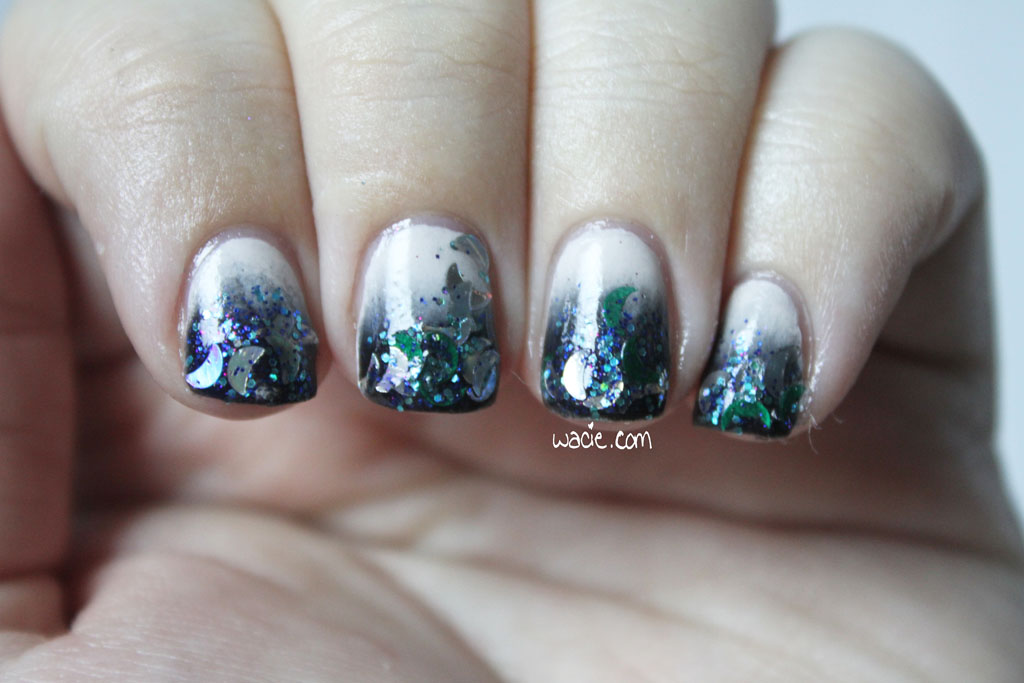
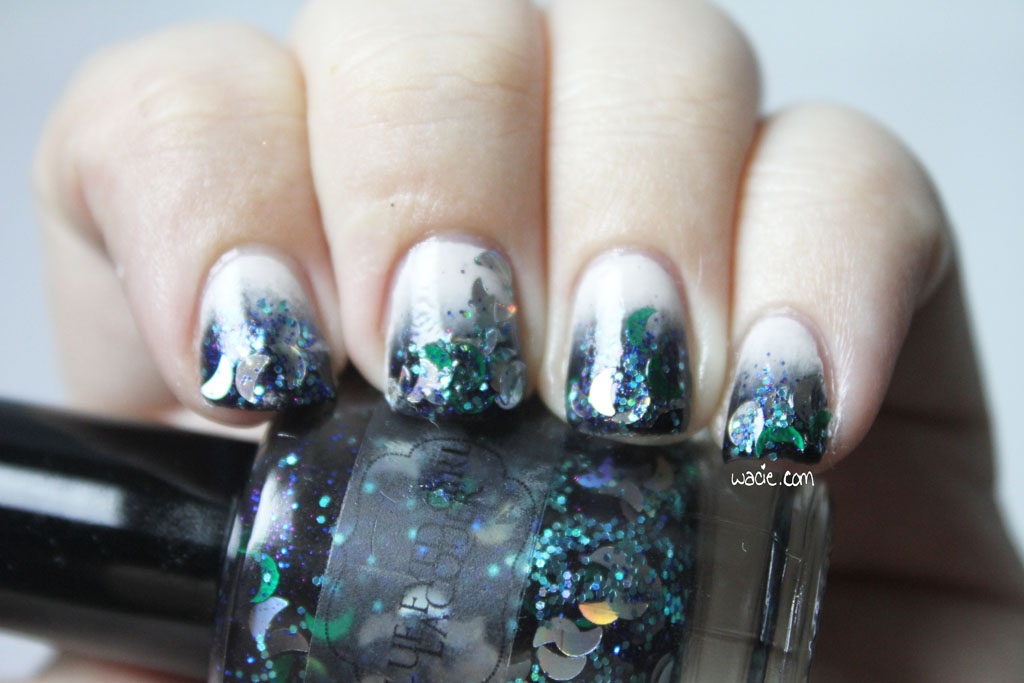
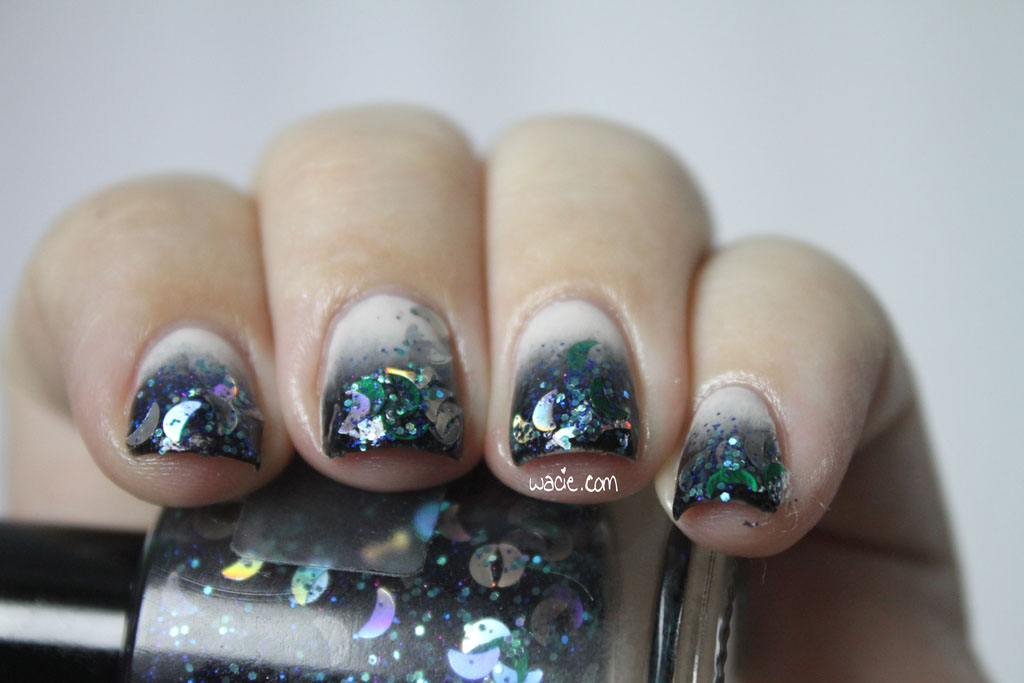
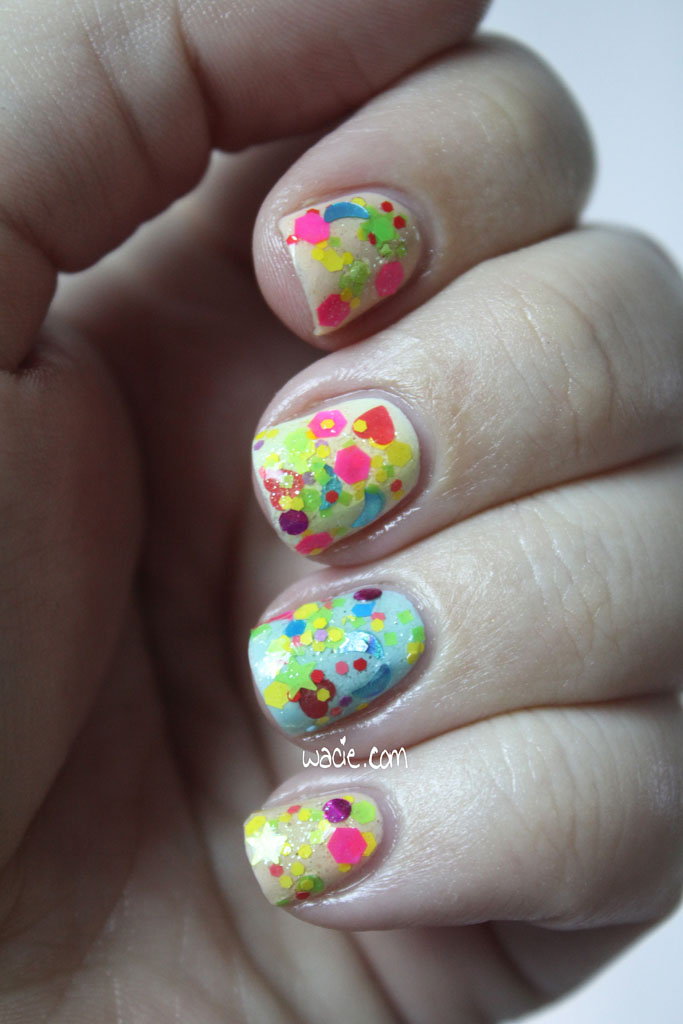
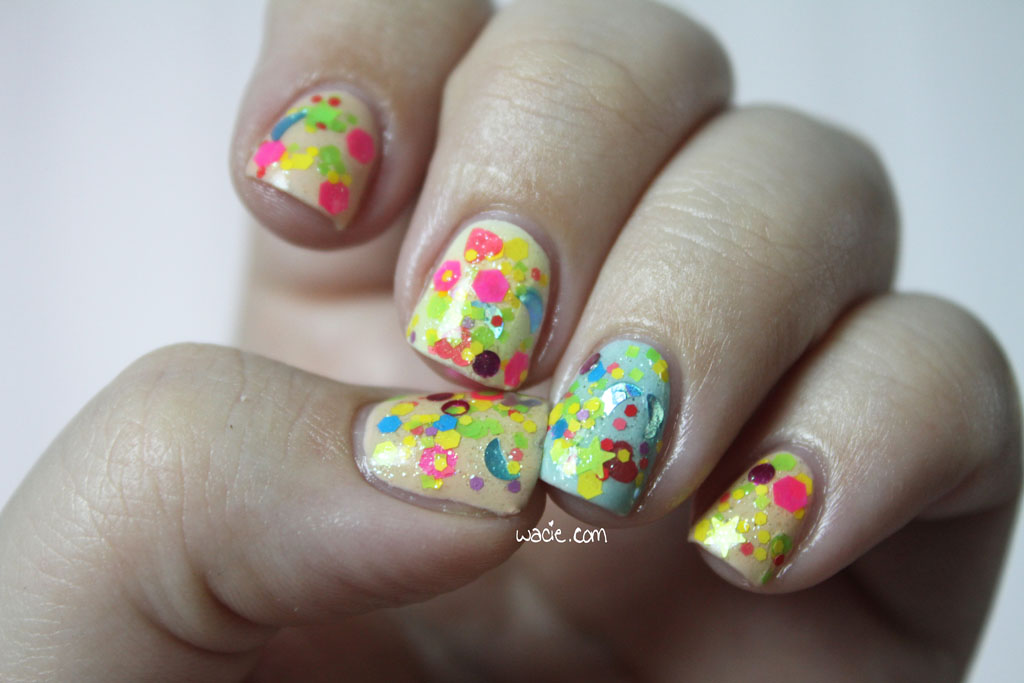
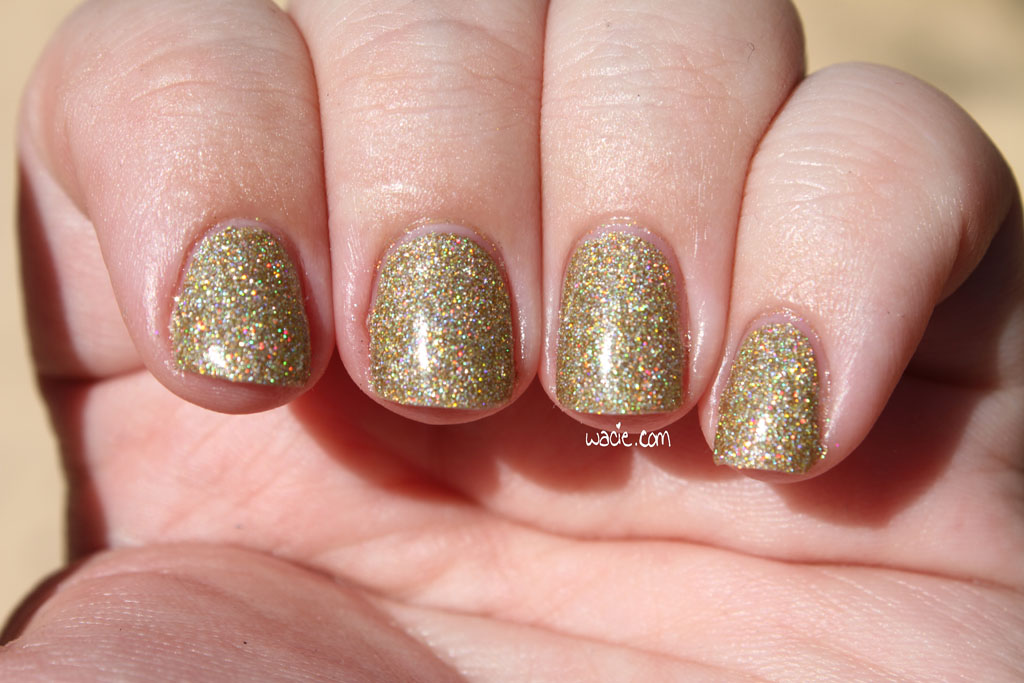
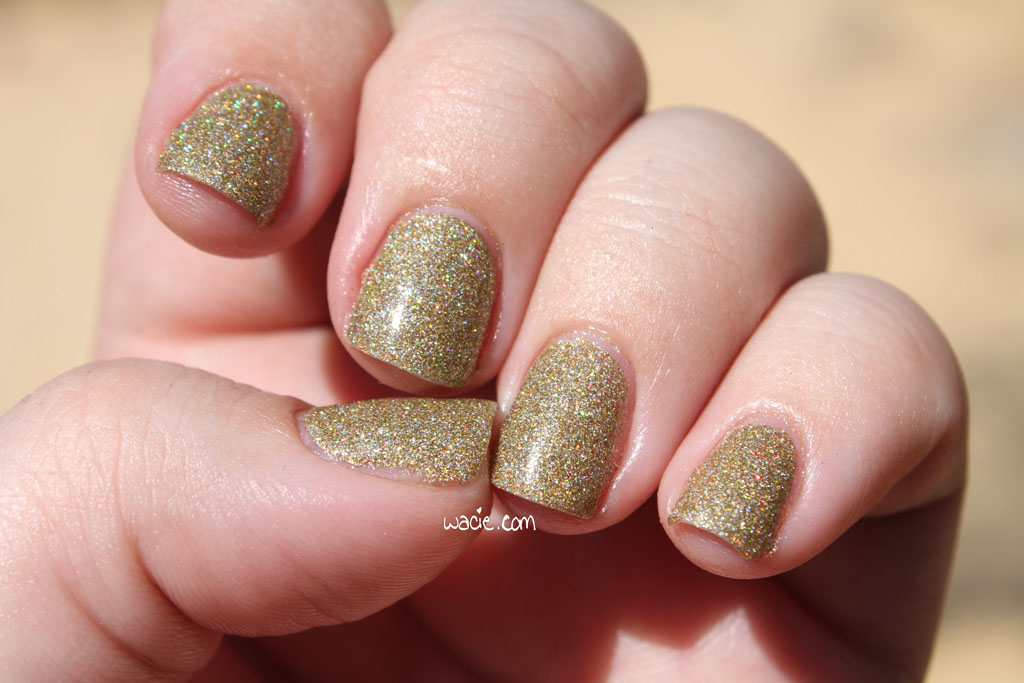
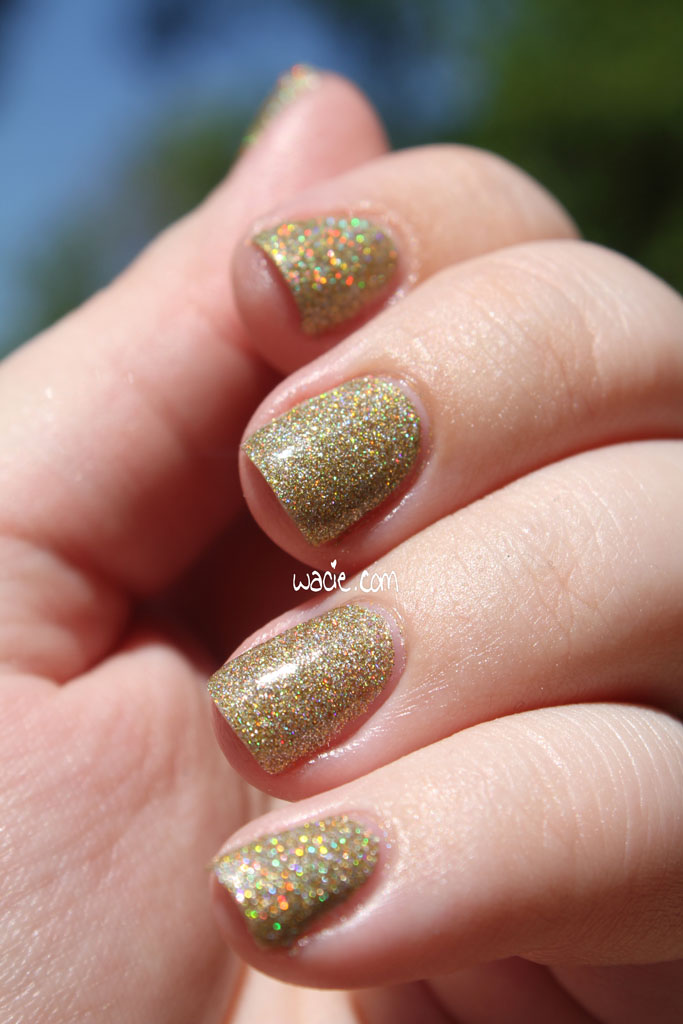
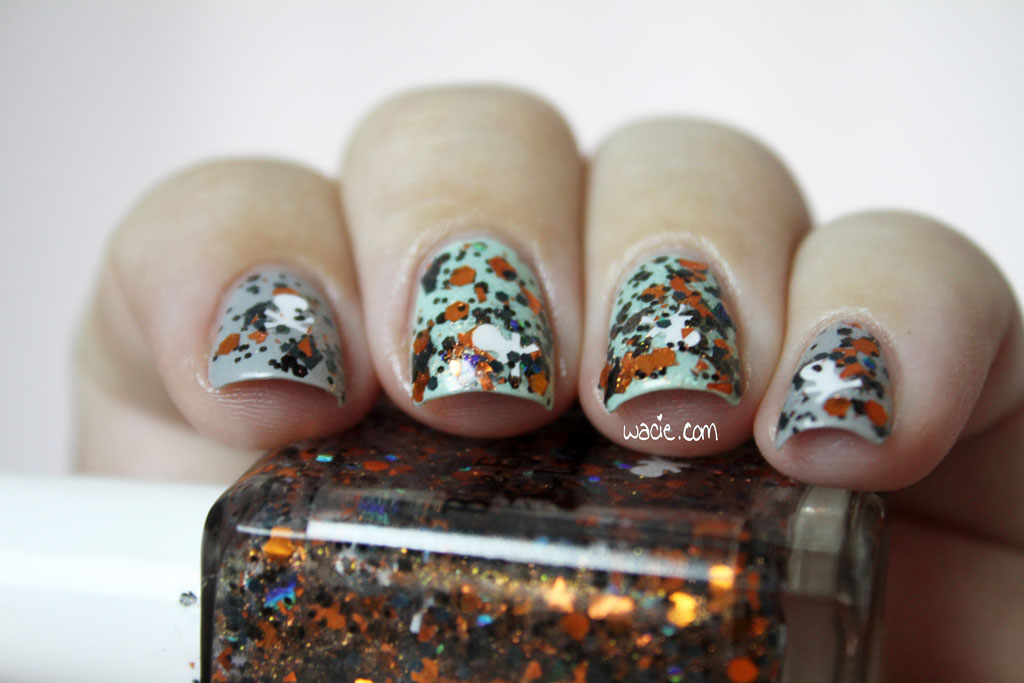
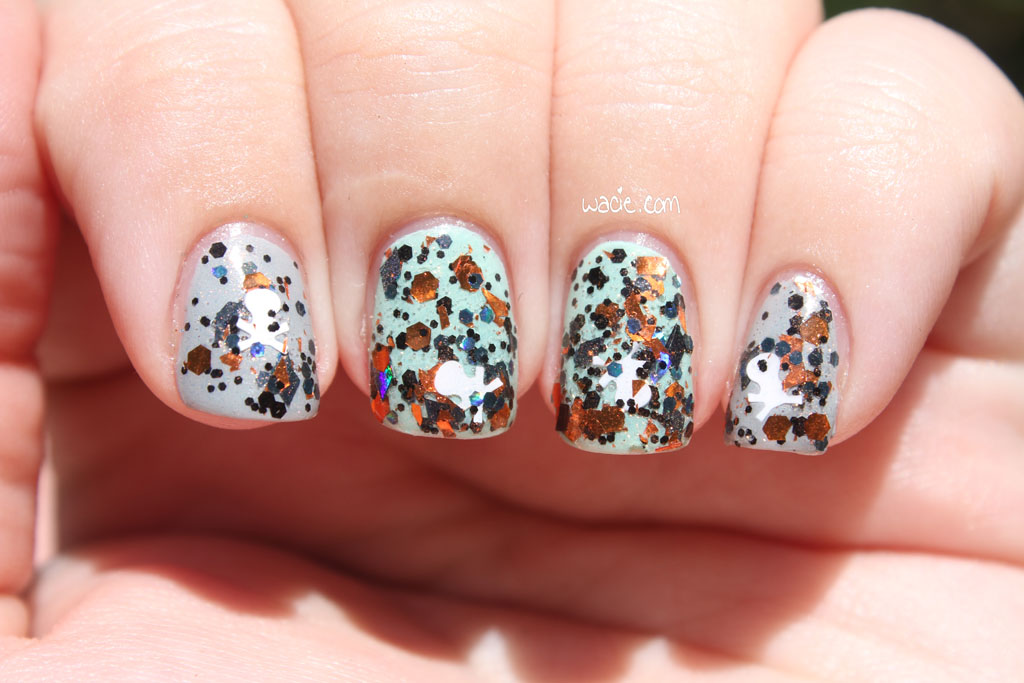
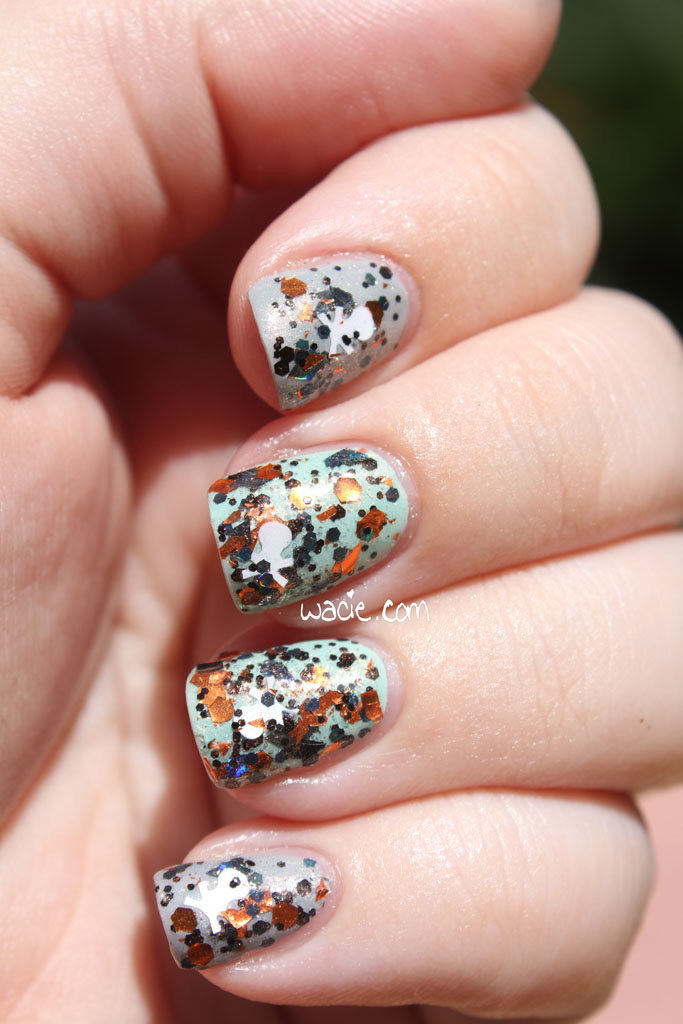
Sell Souls for ISOs (OBO) is a clear glitter topper with orange shimmer, orange and black glitters, white skull-and-crossbones, and holo orange pumpkins. The skull and pumpkin shaped glitters were new at the time, and that was enough to sell me on this polish (or any polish, really). The description doesn’t really do it justice; you can look at the bottle and see a myriad of different shapes, sizes, and finishes of glitter. It’s a well-rounded mix. The skulls and pumpkin glitters are scarce, I fished for a pumpkin glitter for like fifteen minutes and the only one I got was the one on my thumb. They’re rare on purpose, so that they can easily be avoided, in case you happen not to like them, or happen to be wearing the polish in September.

IMG_93962

IMG_94002

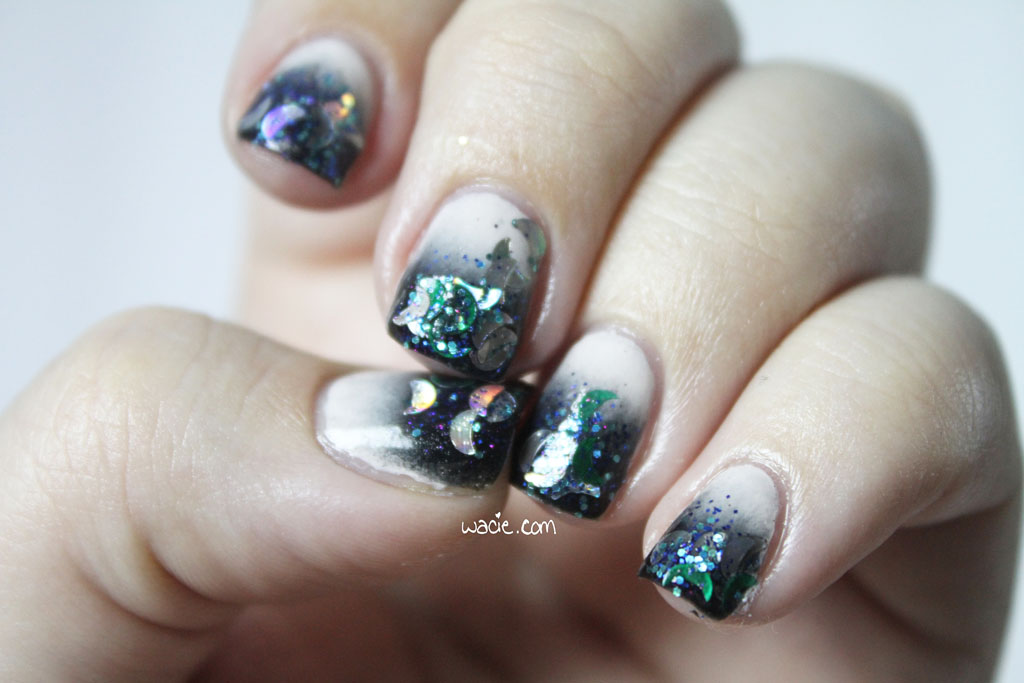
Application was easy, but because I swirled the polish around so much fishing for glitter, I ended up with a lot of bubbles. The drying time was pretty good for a polish like this; I really blobbed it on and it was dry in five minutes. The consistency was a bit thick, and got thicker as I used it, but that’s to be expected from a polish like this, and is easily remedied.

IMG_94072

IMG_94132

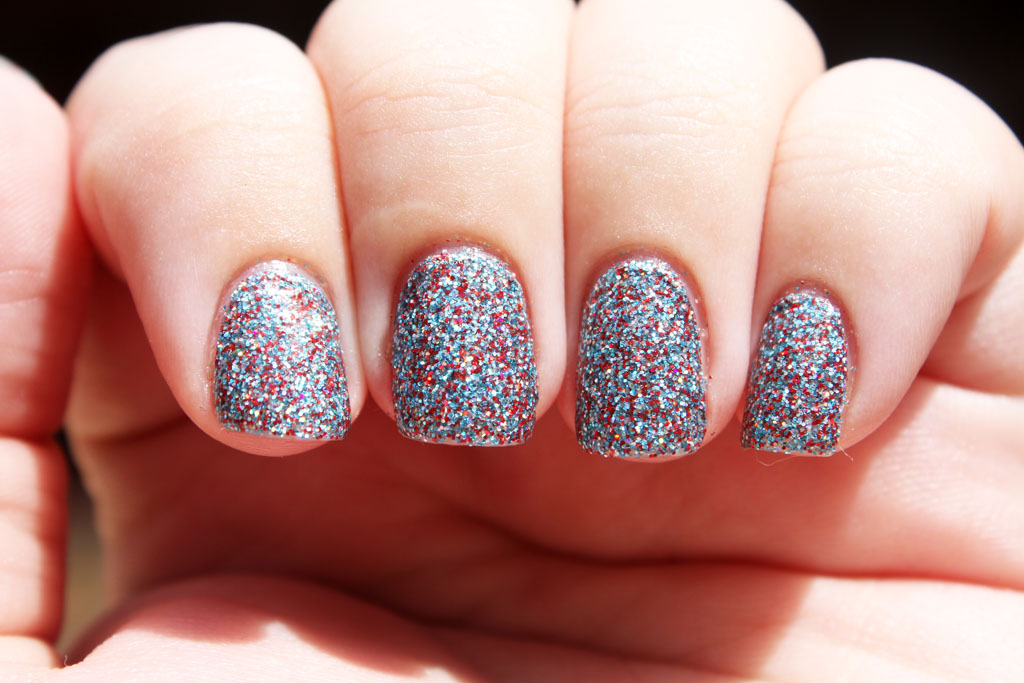
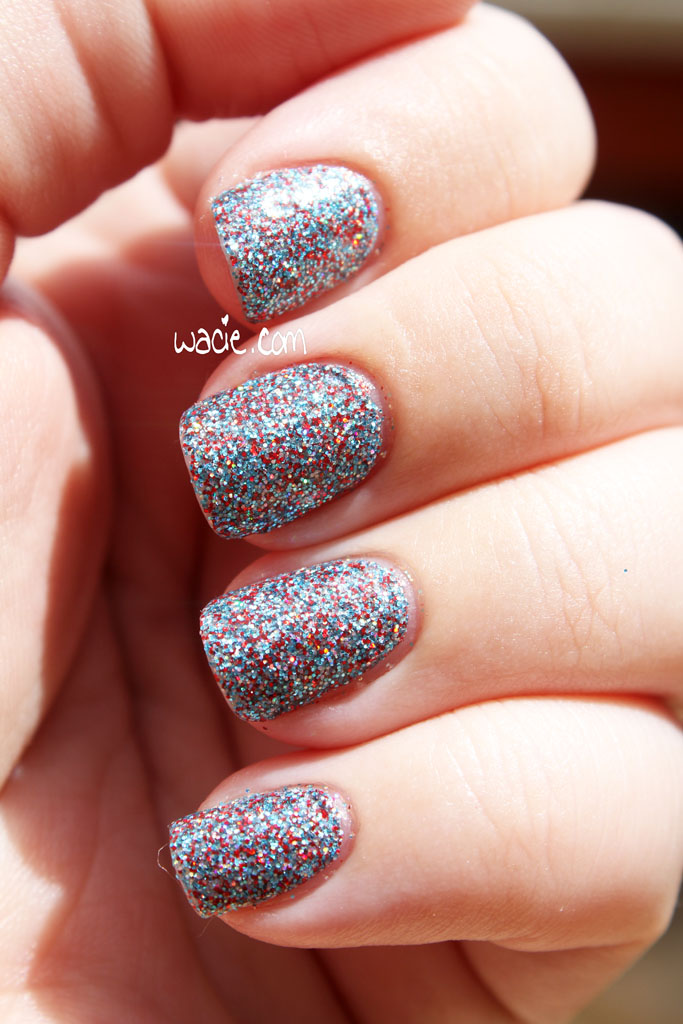
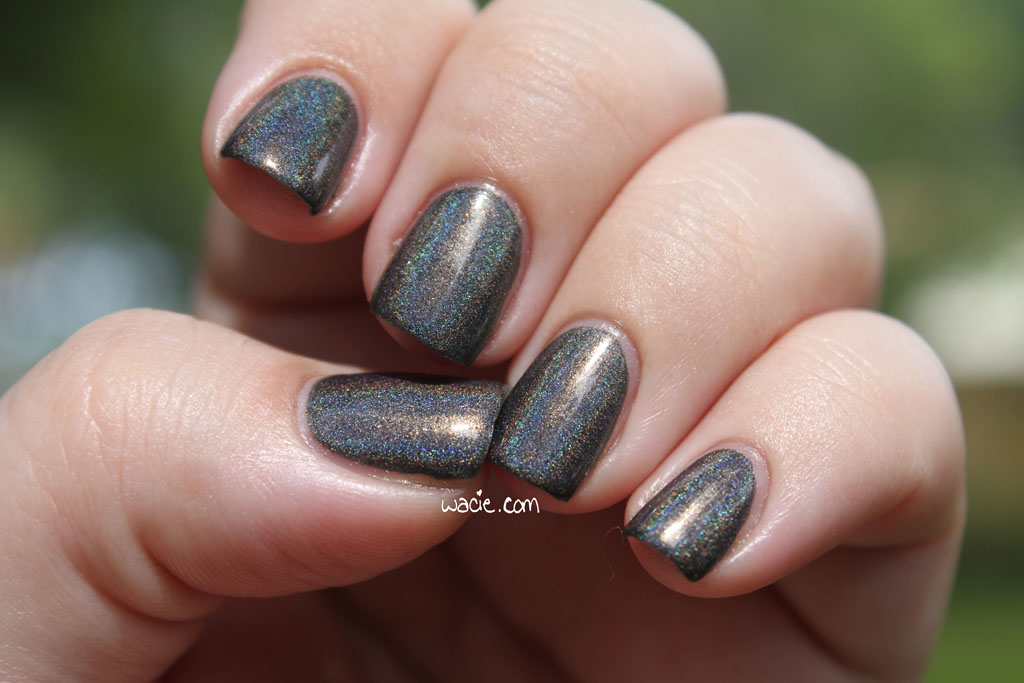
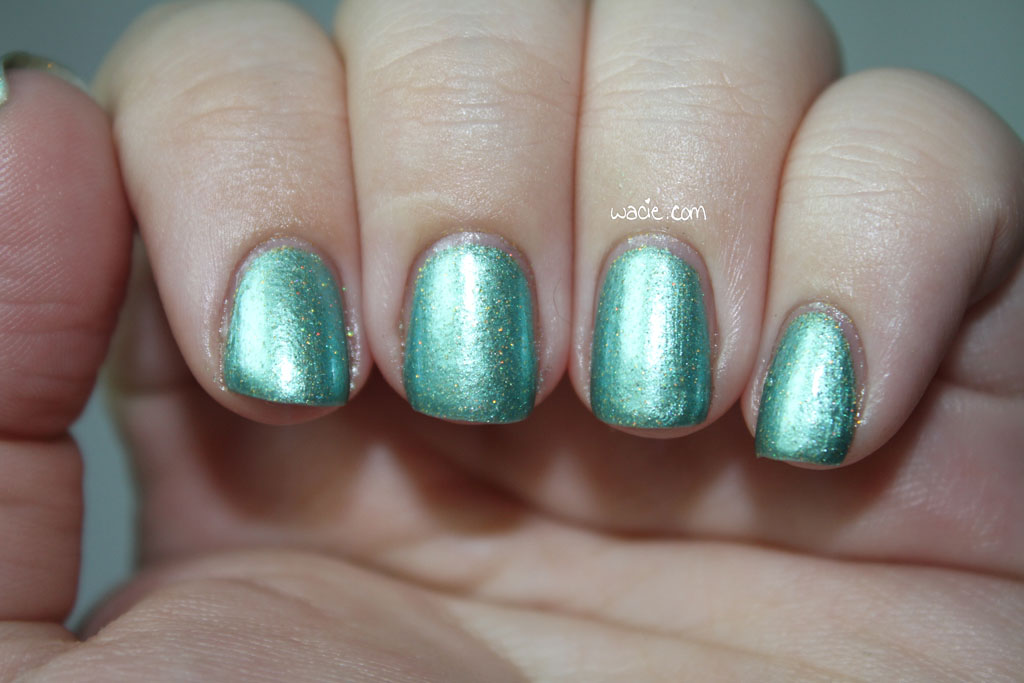
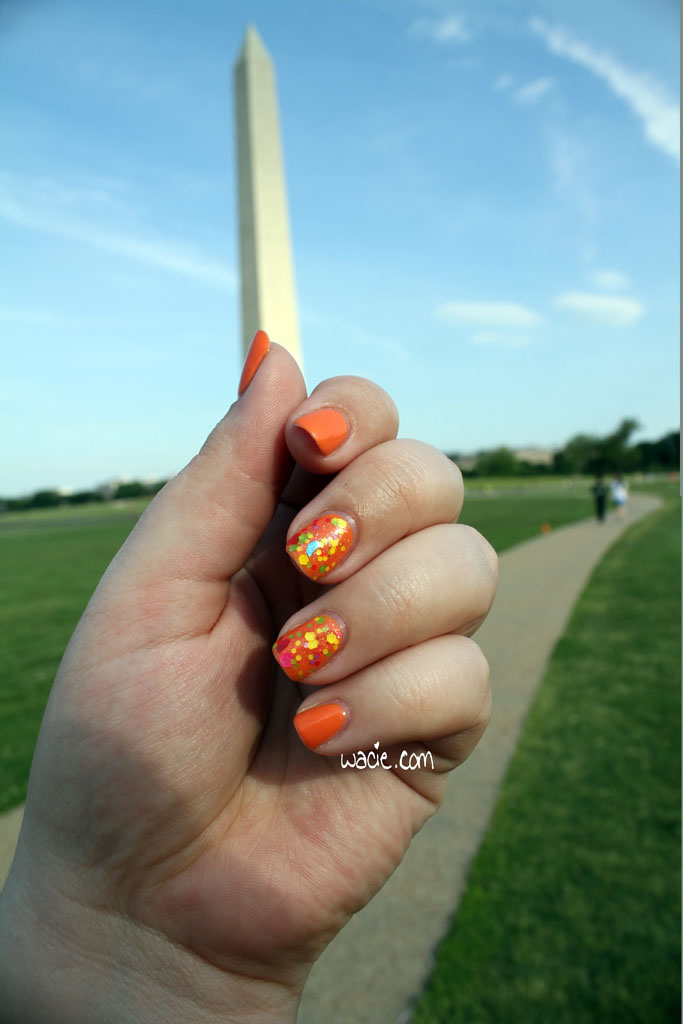
Outdoors, this polish is amazing. The metallic orange glitters really shine (hee) in direct natural light.

IMG_94162

IMG_94312

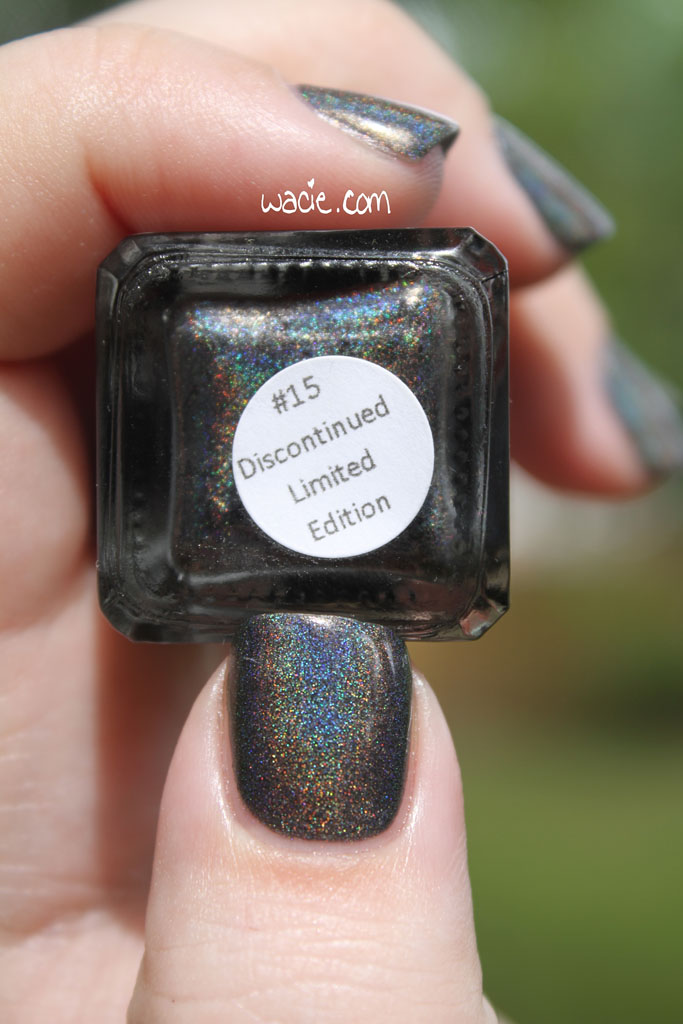
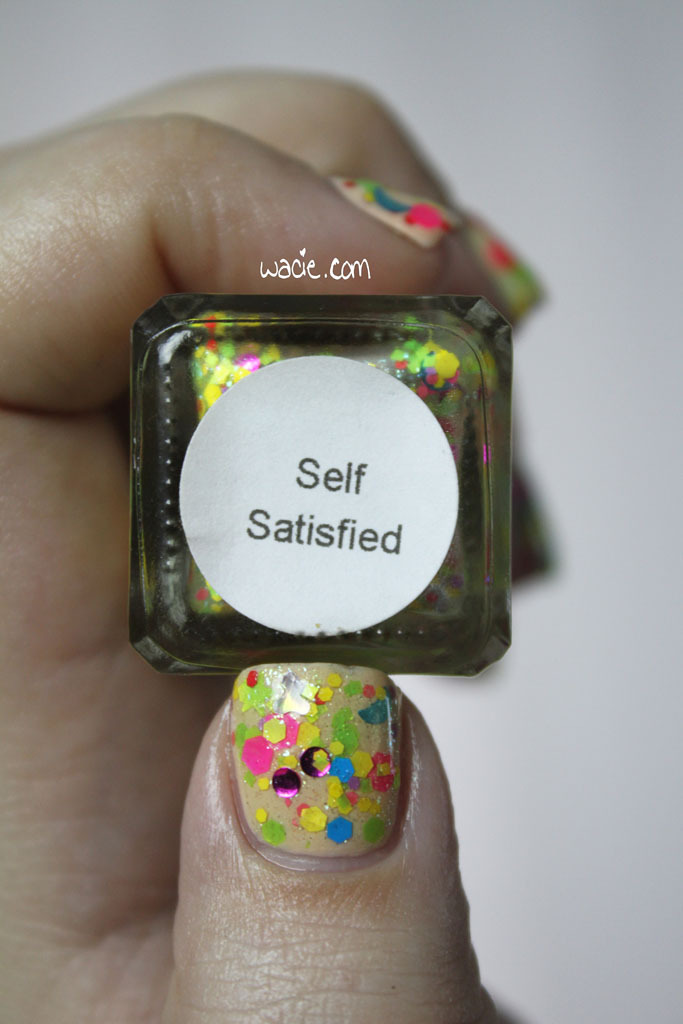
Now for a little lesson on lacquerista vernacular (because sometimes my mom reads this): “ISO” stands for “in search of”, and is used on message boards and such to express a strong desire to own a certain polish. These are often small batch polishes that aren’t widely available or have been discontinued by the maker. A desperate lacquerista might resort to some pretty drastic measures to own it, hence the name of this polish. We all have a polish we’d sell our souls to own. Mine is Lobster Roll from Enchanted Polish. You don’t know the horrible things I’d do for it.

Wacie Wednesday: Decadence

It’s Wacie Wednesday, and this week I’m wearing a sister polish to Opulence, the gold and silver glitterbomb I wore a week or two ago. This is Decadence, a full coverage glitter with fine red, silver, and turquoise holo glitters. I’m wearing three coats of Decadence with one coat of Color Club’s clear coat.

IMG_93032

IMG_93152

IMG_93212

IMG_93252

I call this a sister polish to Opulence because it was made with the same intent, to learn how different glitters work and compliment each other. I also love the trend of full coverage microglitter polishes among indie makers, and I wanted to try to replicate that look in my own way. I also have some pretty limited glitter selections, and that’s why I’ve used such an odd color combination. I basically mixed every glitter of this size and shape into a bottle. I’d do it again.

IMG_93302

IMG_93372

Decadence goes on a bit thick, naturally, because there’s so much glitter in it. It does dry quickly, though, and with a fine gritty texture. It’s still textured with one coat of top coat, but it’s a bit smoother than without it. I also probably could have gotten away with two coats, because these glitters cover pretty well.

IMG_93432

IMG_93462

Outdoors, this is stunning. Sunlight is, for a lot of manicures, the ultimate complement to this polish. Everything is so glittery and shiny and blinding. It’s gorgeous.

IMG_93582

IMG_93652

Not looking forward to taking it off, though.

Manicure Monday on Tuesday: Fun With Thermals

I’m always excited to share a first on the blog. For Manicure Monday this week, I’m wearing Tomboyish from Pretty & Polished, one of my first-ever indies, my first-ever thermal polish, and the first-ever thermal on the blog. I’m wearing three coats of Tomboyish with one coat of Digital Nails‘s Spectraflair top coat and Color Club’s clear coat.

IMG_92412

IMG_92492

The label got soft and peeled a bit from dipping the bottle into water to change its color.

The label got soft and peeled a bit from dipping the bottle into water to change its color.

Tomboyish is a deep teal-to-dusty blue thermal polish with a light sprinkle of holographic sparkle. The consistency is thick due to extra pigments, but it’s still very easy to use and apply. The first coat was very sheer, but coverage builds with additional coats. It dries quickly, and with a matte finish. In this regard, it’s very much like an ordinary polish.

IMG_92552

IMG_92612

Thermal polishes change color with heat, and that’s what makes this polish special. The teal color deepens when it’s exposed to cold temperatures, and it fades to blue when exposed to warm temperatures. Body heat is enough to effect the change, and it happens instantaneously; if I dipped my fingertips in cold water, the teal color would deepen, but would fade back to blue as they warm up again. If your nails are longer than your fingertips, you’ll often have a nice gradient effect; the part of your nail grown past your finger will be different than that’s closer to your cuticle. It’s an awesome, effortless look.

IMG_92672

I wanted just a little bit more sparkle with Tomboyish, so I put on a Spectraflair top coat made by Digital Nails. The holo isn’t as strong as it would be if it was a holo polish, but being able to turn any polish I own into a holo is pretty cool.

IMG_92702

I’ve had this polish for a long time, so I think the effect isn’t as potent as it used to be. The first time I used it, the light color was much lighter, and now it hovers somewhere in between. It’s still pretty cool, and it still changes, but not like it used to.

I love thermals, and I’ve got more in the pipeline. I can’t wait to wear them.

Swatch Saturday: Blue-Eyed Girl Lacquer’s Discontinued Limited Edition

All right, I know it’s just barely September, and I know it won’t be Halloween for quite some time, and yet I’m wearing Halloween polish. As I’m going down the Polish List, I’ll be running into some seasonal confusion. It’s going to happen. It’s only going to be weird if we let it be.

This beauty is called Discontinued Limited Edition, and was part of Blue-Eyed Girl Lacquer‘s Nail Polish Frights collection from last fall. As you can guess, this polish was a discontinued limited edition, which is truly horrific. I’m wearing three coats of Discontinued Limited Edition with one coat of Color Club’s clear coat.

IMG_90062

IMG_90122

IMG_90192

dlebottle

Discontinued Limited Edition is a black linear holo with orange shimmer. It’s gorgeous, right? We all know black holos are amazing and perfect, but this one has a little extra, this bit of orange peeking out from the center of the linear rainbow. It’s not always obvious, and it doesn’t appear in all lighting conditions, but it’s glorious when it does. It’s just enough to make it subtly but unmistakably Halloweeny.

IMG_90352

IMG_90382

I found the consistency to be a bit thick, but this means it was opaque in two coats, and was still quite easy to work with. It dried quickly. It dries with a bit of a shine, and the holo effect was still pretty strong without the topcoat, but the topcoat really brings out the orange shimmer.

IMG_90452

IMG_90582

IMG_90552

I only took outdoor photos today. Holo photos in the studio never turn out well, so I decided to not to bore you with them. It’s been mostly cloudy all day, but there was one somewhat-sunny patch in the backyard, so I went for it. It served me well, but I really want to see that orange shimmer in direct sunlight.

Wacie Wednesday: Sweetleaf

Sweetleaf is the Wacie Nail Company polish of the week. This shimmery green polish contains superfine gold holo glitter, giving a bold color a subtle sparkle. I’m wearing three coats with one coat of Color Club clear. All photos were taken indoors.

IMG_89462

IMG_89552IMG_89612

IMG_89672

Sweetleaf, most of the other polishes I’ve made and worn on the blog, were experiments in polish making. In this case, I wanted to see how well the glitter and pigments would blend together. Next time, I’ll thin it out a little; I could still work with it, but it’s much too thick. Also, brush strokes show up on some nails, and that annoys me. It dried matte and with very little texture.

IMG_89732

IMG_89792


IMG_89832

IMG_89942

The glitter doesn’t shine as much in the studio, but it looks amazing in the sunlight. Unfortunately, while I was waiting for my camera battery to charge, the sun went down and I totally missed out on outdoor photos. I don’t like how early it’s getting dark now. I tried a photo with flash; the glitters are somewhat shinier, but the flash mostly obscures any details on the nail. It’s a terrible photo, but I love how the color looks. I’m pretty sure it’s just the pinkness in my skin complementing it.

IMG_89992

Final word: This is a gorgeous color to end the summer with. I know it’s still technically summer for a couple more weeks, but I miss it already.

Manicure Monday on Tuesday: Celestial Gradient

So it’s been a while since I did a manicure like this; I haven’t been into nail art much lately, just doing the accent-nails-with-glitter-is-easy mani. I swatched Blue-Eyed Girl Lacquer‘s Weary Traveller a couple months ago and wanted to wear it in a new way, so I did a glitter gradient thing with it. The colors in my gradient are Sally Hansen’s Black Out and Essie’s Urban Jungle, with Weary Traveller sponged onto the tips.

IMG_89002

IMG_89032

I wasn’t sure how to do this at first; I definitely wanted a look that would show the jelly properties of Weary Traveller, so I thought the best way to do that would be with a nude and black gradient. The first time I tried this, I couldn’t get the jelly sheer enough to show the nude without streaks. I kind of wish that had worked out. I also didn’t get a fantastic gradient since my nails are so short.

IMG_89422

IMG_89182

I used Color Club’s clear coat again this week. So far, it wears well, but it doesn’t smooth glitter out very easily. I don’t want to use more than one coat on a mani like this, since there are already so many layers. I’m also afraid of shrinkage.

IMG_89302

IMG_89362

I should really start doing nail art again. I forgot how cool gradients look.

Swatch Saturday: Blue-Eyed Girl Lacquer’s Self-Satisfied

Swatch Saturday this week is glitter chaos! I’m wearing Self-Satisfied from Blue-Eyed Girl Lacquer, a smorgasbord of neon glitters. I’m wearing one dabbed coat over Eaton Terrace from Nails Inc., and Saltwater Taffy and Skylight from Cover Girl, topped with one coat of Color Club’s clear coat.

IMG_88242

IMG_88262

IMG_88362

IMG_88412

BEGL describes Self-Satisfied as a glitter topper “predominantly yellow and green neon glitters with pink, blue, orange, and purple neon glitters, baby blue holo moons, fuchsia dots, and silver holo butterflies”. I’m not sure it’s possible to count every size, color, and type of glitter in this bottle. Attempting to do so would probably result in some kind of head-clutching space madness.

IMG_88462

IMG_88512

Since I dabbed this polish on, I’m not sure how long it took to dry, but it seemed dry enough after a 15 minute drying period. The glitters spread evenly enough, but I will admit that I placed a few here and there, just to cover some bare spots. Application is pretty typical for a glitter topper like this, but the look you get is so unique and so worth it.

IMG_88562

IMG_88652

This isn’t the first time I’ve worn Self-Satisfied; I brought it on vacation with me a couple months ago. I took a picture of my nails with the Washington Monument. I’m wearing it over Julep’s Cody.

IMG_59412

Self-Satisfied, and well as its insane pink counterpart, Watch the Walls, are on sale at the BEGL store for $6 each. I adore both of these polishes, and I definitely say they are worth grabbing.

I’m going to hijack the end of this post to say goodbye to an old friend. Last August, I bought a four ounce bottle of Seche Vite. Everyone thought I was crazy to buy so much at once, but I was living alone at the time, I couldn’t get to Sally Beauty whenever I wanted, and I got tired of having to buy a new bottle every few weeks. It was so worth the $15 I paid for it. Last Wednesday, I used the very last of that giant bottle. That giant bottle of Seche Vite has gotten me through nearly every manicure in the past year. Good night, sweet prince.

This is the day I got it. My polish is OPI's Get Your Number.

This is the day I got it. My polish is OPI’s Get Your Number.

ripsv

My interim top coat is Color Club’s clear coat. I’m not sure if this is a full-fledged top coat, but it dries quickly and leaves a nice shine, and that’s enough for me. This is my first time using it, so I don’t know how well it’s going to wear, but we’ll find out. Either way, it’s fun using something new.

Wacie Wednesday: Opulence

The Wacie Nail Company polish I’m using this week was a fun experiment. I’d gotten some very fine glitter, practically dust, that I wanted to play with. I got two colors, holo gold and holo silver, and mixed them together, just to see how it would come out. The final product is a full-coverage glitter that is insanely, gloriously sparkly. This is Opulence, and I’m wearing three coats with one coat of Seche Vite.

IMG_87452

IMG_87472

IMG_87622

I actually took photos of the polish with and without top coat, just to see how they photographed differently. The left photo is with Seche Vite, the right photo is bare. They look pretty similar, and there’s a ton of sparkle either way, but I feel like the top coat really brings out the beauty of the holo glitter. It becomes so much brighter and sensitive to light. I definitely prefer it that way.

Left: Finished with Seche Vite. Right: Polish only

Left: Finished with Seche Vite. Right: Polish only

Opulence is an absolute joy to wear. It was very easy to apply; due to the density of the glitter, the polish was very thick; very little mistakes were made in application, so in that regard, it was a bit like applying a textured polish that’s heavy on the glitter. For as thick as it is, though, it dried very quickly. It did dry with a bit of texture, but it gradually got smoother with each coat; the first coat was the grittiest. It still wasn’t glassy smooth by the third coat, but it wasn’t grainy, either.

IMG_87672

IMG_87712

Unfortunately, it’s easy to forget there are two different colored glitters in there. The gold is definitely more visible, and you can see the silvers if you really try, but only in certain lighting conditions and viewing angles.

IMG_87742

IMG_87792

In the sun, this is incredible. In the studio, I couldn’t get my camera to focus on the glitters well, so all you see is sparkle and not much individuality among glitter particles. You can see them in the sun. It looks fantastic out there! All that shine, all those little rainbows… It’s just beautiful. I love it.

IMG_87952

IMG_88052

IMG_88132

I do apologize for the lateness of this post. I spent all day playing video games.

Manicure Monday: Summer Bronze and Gold

For Manicure Monday this week, I’m wearing one of the super-gorgeous Naked polishes! Every time I get one of these out, I think about how foolish I was to buy this Urban Decay set, and how glad I am that I did, because it’s nowhere to be found now. This is Smog, and I’m wearing two coats topped by one coat of Seche Vite. My glitter accents are Orly’s Too Fab.

IMG_86122

IMG_86202

Smog is a bronze polish with a rich golden shimmer. It’s wonderfully opaque in two coats, dries quickly enough, and delivers even color. It reminds me of chocolate ganache, just rich and sweet and shiny. Delicious. I want to wear this so much more often, but the bottle is so small and scarce that I never want to run out.

IMG_86292

IMG_86352

Too Fab is the opposite. Orly bottles are enormous, and I’ve had this one for a pretty long time. This is like the metallic gold glitter topper that never stops giving. My bottle is a hair more than halfway full, but I will be using it until the end of time, probably. I didn’t expect to get so much glitter on my accents; this is one coat, after all. I wanted to be able to see the Smog through the glitter. It’s still pretty, though. I think the gold and the bronze complement each other very well.

IMG_86402

IMG_86582

Outside, this is just blinding. The gold shimmer in Smog is really visible here, and the glitter throws so much light it’s insane. You can see the light flaring off of it. It’s crazy.

IMG_86722

IMG_86802

Handcare rave: I got this cream the other weekend from Ulta. Le Couvent des Minimes Soothing Night Hand Creme has the most delicious lavender scent, and it makes my hands pretty soft. I use it right after I wash dishes in the evening, when my hands are the most dry. It absorbs well, smells incredible, and feels very light after application. The price is a little steep; it was something like $8 for a .8oz tube, but oh my gosh, it was so worth it to me.

IMG_86612

Final word: these are the perfect polishes for the end of summer and the beginning of the school season. I could not have chosen better.

Swatch Saturday: Blue-Eyed Girl Lacquer’s Skating in the Snow

Thanks to Swatch Saturday this week, it’s winter in August! As I write this, my phone says it is 101 degrees outside, but Skating in the Snow from Blue-Eyed Girl Lacquer is keeping me cool. I mean that figuratively, of course; I’m so sweaty you don’t even know. I am wearing three coats of Skating in the Snow alone with one coat of Seche Vite.

IMG_85472

IMG_85562

IMG_85692

IMG_85742

Skating in the Snow is a white crelly with lavender and blue hexes, iridescents, and pink and blue dots. Applying this was pretty easy; some glitters sink, but that’s easily rectified with shaking and keeping it upside down for a minute or two. Otherwise, it can be tough to get the glitter to spread evenly. Apart from that, this polish dries quickly, cleans up easily, and is semi-opaque at two coats. Three coats, seen here, was a little too much. I covered up all the glitters from previous coats.

IMG_85782

IMG_85822

I’ve lived most of my life in Florida, so I can count all the times I’ve ever seen snow on one hand. I’ve been ice skating exactly once. I can imagine this polish as a winter scene, though: revellers in candy-colored snow suits, surrounded by white, laughing and enjoying themselves. I’ll probably never experience such a thing, but it’s nice to think about, especially in August.

IMG_85852

IMG_85922

In the sunshine, the crelly looks a bit more opaque. The previous coat’s glitters are harder to see, and the iridescents don’t shimmer so well. It’s still quite pretty, though. The whiteness makes my fingers look tan.

IMG_86002

IMG_86072

Final Word: Skating in the Snow is still available in the BEGL shop, and it’s on sale! Don’t miss out on this soft but colorful polish.