Wacie Wednesday: Decadence

It’s Wacie Wednesday, and this week I’m wearing a sister polish to Opulence, the gold and silver glitterbomb I wore a week or two ago. This is Decadence, a full coverage glitter with fine red, silver, and turquoise holo glitters. I’m wearing three coats of Decadence with one coat of Color Club’s clear coat.

IMG_93032

IMG_93152

IMG_93212

IMG_93252

I call this a sister polish to Opulence because it was made with the same intent, to learn how different glitters work and compliment each other. I also love the trend of full coverage microglitter polishes among indie makers, and I wanted to try to replicate that look in my own way. I also have some pretty limited glitter selections, and that’s why I’ve used such an odd color combination. I basically mixed every glitter of this size and shape into a bottle. I’d do it again.

IMG_93302

IMG_93372

Decadence goes on a bit thick, naturally, because there’s so much glitter in it. It does dry quickly, though, and with a fine gritty texture. It’s still textured with one coat of top coat, but it’s a bit smoother than without it. I also probably could have gotten away with two coats, because these glitters cover pretty well.

IMG_93432

IMG_93462

Outdoors, this is stunning. Sunlight is, for a lot of manicures, the ultimate complement to this polish. Everything is so glittery and shiny and blinding. It’s gorgeous.

IMG_93582

IMG_93652

Not looking forward to taking it off, though.

Wacie Wednesday: Opulence

The Wacie Nail Company polish I’m using this week was a fun experiment. I’d gotten some very fine glitter, practically dust, that I wanted to play with. I got two colors, holo gold and holo silver, and mixed them together, just to see how it would come out. The final product is a full-coverage glitter that is insanely, gloriously sparkly. This is Opulence, and I’m wearing three coats with one coat of Seche Vite.

IMG_87452

IMG_87472

IMG_87622

I actually took photos of the polish with and without top coat, just to see how they photographed differently. The left photo is with Seche Vite, the right photo is bare. They look pretty similar, and there’s a ton of sparkle either way, but I feel like the top coat really brings out the beauty of the holo glitter. It becomes so much brighter and sensitive to light. I definitely prefer it that way.

Left: Finished with Seche Vite. Right: Polish only

Left: Finished with Seche Vite. Right: Polish only

Opulence is an absolute joy to wear. It was very easy to apply; due to the density of the glitter, the polish was very thick; very little mistakes were made in application, so in that regard, it was a bit like applying a textured polish that’s heavy on the glitter. For as thick as it is, though, it dried very quickly. It did dry with a bit of texture, but it gradually got smoother with each coat; the first coat was the grittiest. It still wasn’t glassy smooth by the third coat, but it wasn’t grainy, either.

IMG_87672

IMG_87712

Unfortunately, it’s easy to forget there are two different colored glitters in there. The gold is definitely more visible, and you can see the silvers if you really try, but only in certain lighting conditions and viewing angles.

IMG_87742

IMG_87792

In the sun, this is incredible. In the studio, I couldn’t get my camera to focus on the glitters well, so all you see is sparkle and not much individuality among glitter particles. You can see them in the sun. It looks fantastic out there! All that shine, all those little rainbows… It’s just beautiful. I love it.

IMG_87952

IMG_88052

IMG_88132

I do apologize for the lateness of this post. I spent all day playing video games.

Summer of Untrieds Day 31: Metallic

It’s the final day of the Summer of Untrieds Challenge! I cannot believe I’ve actually painted my nails for 31 straight days. On this final day, the theme du jour is metallic, and I went with Essie’s No Place Like Chrome. I’m wearing three coats without top coat.

IMG_77442

IMG_77542

IMG_77612

No Place Like Chrome is a metallic silver polish that dries to a matte mirror-like finish. From the first coat, it goes on smooth and opaque, but sometimes it seems to pull away from itself, leaving holes in the coverage. This is easily remedied by a second coat. Other issues with application include bumps, brush strokes, and visible ridges or nail imperfections. It’s totally possible that these problems are in my application and not part of the polish itself. Despite everything, though, I really love of the look of this. I feel a little like a robot.

IMG_77652

IMG_77802

I fell in love with the Essie Mirror Metallics line quite some time ago, when I wore Penny Talk for the first time. I went out and bought them all after that. So far, though, these are the only two I’ve worn.

IMG_77852

IMG_77972

I didn’t really need to take pictures of this in the sun, because you can already see how shiny it is. Just look at it, though. Look. Shiny.

IMG_78102

IMG_78132

And there you have it: 31 days of untried polishes. Here’s a quick shout-out to Julie at Wishes of a Blue-Eyed Girl for devising this insanely fun, weirdly useful challenge, and awesome job to everyone who took part. For more photos of the challenge, check Instagram hashtags #summerofuntrieds and #julyuntriedschallenge. There’s a nerdy stats post coming up, so stay tuned!

Summer of Untrieds Day 24: Holographic

Holographic polish is today’s Summer of Untrieds theme, and I’m visiting one of my first holo polishes, China Glaze’s Cosmic Dust. This might even be my first-ever, I’m not sure. After putting it on, though, I regret not buying more than this one. I’m wearing three coats of Cosmic Dust with one coat of Seche Vite.

IMG_72112

IMG_72162

IMG_72202

Cosmic Dust is an intriguing color. The holo rainbow effect is pretty strong, even indoors. In the studio it’s a bit faint, but in my office and other parts of the house, it’s quite obvious. When it’s not, Cosmic Dust is a futuristic steel gray. It’s always sleek and smooth.

IMG_72322

IMG_72362

IMG_72412

IMG_72522

In the sunshine, though, oh mama. This is blinding! I just stood outside and admired my nails for a good five minutes before I took any pictures. I kept hearing how disappointing these China Glaze holos were, so I wasn’t expecting much from this. I am completely blown away. This could be the best holo I’ve ever worn yet.

IMG_72582

IMG_72622

IMG_72962

IMG_72792

IMG_72872

IMG_72942

I have to take this off tomorrow. I don’t want to.

Manicure Monday: Plum and Glitter Surprise

It feels like forever since I’ve done a real Manicure Monday post. For this week, I’m wearing The Golden Age from Sephora by OPI over Essie’s Devil’s Advocate, topped with one coat of Seche Vite.

IMG_69862

IMG_69992

I really like Devil’s Advocate. Like really. I adore these dark, dramatic, vampy colors because you can never quite tell what color they really are. You can’t tell this is a deep plum unless you look at the very edges of it. If I didn’t know better, I’d assume it’s black. Devil’s Advocate goes on a little thin on the first coat, but evens out to full opacity on the second, and dries with a beautiful shine. It’s really easy to apply.

IMG_70042

IMG_70122

Unrelated: I put Devil’s Advocate on my toes when I wore Vesper earlier in the month. They’re very similar in color and I really didn’t want to experience the joys of taking Liquid Sand off my toenails.

IMG_70152

IMG_70242

The real star of this manicure is The Golden Age. It’s a clear glitter topper with various sizes of metallic gold and silver hex glitters. The distinction between the colors is pretty difficult to see in some lighting conditions; in my office it’s impossible to tell, but in the studio and in the sun, it’s clearly visible. It’s also very easy to apply; the consistency is thick so as to accommodate all that glitter. Also, I think this polish has my perfect glitter-to-lacquer ratio: one brushed coat is all I needed for full, even glitter coverage. It’s so easy to work with. I love it.

IMG_70302

Sunlight! The sun came out long enough for me to take these photos. The clouds came back when I went inside.

IMG_70402

So, there you have it: a glitter topper with secret differently-colored glitters over a black that’s really purple. I love surprises.

Manicure Monday: Monochrome with Accents

It’s Manicure Monday! Today I’m wearing Lost Soul from LA Colors, and my accent polish is L’Oreal’s The Sparklicious. I have on three coats of Lost Soul, one sponged coat of The Sparklicious on my accent nails, and one coat of Seche Vite.

IMG_63672

IMG_63732

Lost Soul is a cool gray polish with a faint silver shimmer. I’m always a little afraid of these LA Colors polishes; the quality is hit or miss. I’m happy to say this one is pretty good. The consistency is thin, but even; this actually looked pretty nice at one coat. That said, I still went for three coats, because I wanted it to be very opaque to support the glitter.

IMG_63872

IMG_63932

The Sparklicious is a clear glitter topper with holo silver bars with black and holo silver hexes. The glitter didn’t brush on well, and left behind a lot of clear lacquer. I don’t like to dab glitter on with a brush, so I brushed it onto a sponge and applied it that way. It’s not very even, but that’s not noticeable at first. The black and silver glitters complement the gray polish well.

IMG_63972

IMG_64002

I was hoping the baby shimmer in Lost Soul would be more apparent in the sunshine; it is just barely visible, but still more visible in the sun than in the studio. Those holo glitters just blow up, though.

IMG_64132

IMG_64192

The one thing I don’t like: when I apply the glitter this way, no amount of top coat can ever smooth it down. There’s still a lot of texture there. I’m okay with some texture, but having it on only a couple nails is kind of annoying.

Manicure Monday: Red Glitter on Green

It’s another crazy Manicure Monday glitter feast! Today I’m wearing Wet ‘n Wild’s Club Cabaret over Essie’s Navigate Her. It looked different in my head for sure, but I’m still into it.

IMG_44282

IMG_44362

IMG_44542

IMG_44552

First I put down two coats of Navigate Her. This is a shade I’ve worn a lot lately for various swatches and things; it’s so soft that it looks good as undies for any glitter. I chose it for this mani because I wanted a green to complement the red in Club Cabaret, and this was the only green that didn’t challenge the darker colors for dominance. It also seems to look different at different angles; in the photo where I leaned my nails back, you can see it looks a bit more yellow there than in the others, and I’m not sure why.

IMG_44712

IMG_44792

Club Cabaret is a lightly tinted base with black, silver, and red hexes of various sizes. I’m not sure if it’s tinted on purpose, or if the red glitters bled a little, but it seems kind of suspicious. I didn’t get much of a payoff; these W&W bottles have these really wide brushes, and while they pick up a lot of glitter, I don’t get much of it on my nails. Instead I just get clear polish flooding my cuticles. To achieve this look, I brushed the glitter onto the end of a makeup wedge and rolled it on, the way one might roll on a stamped design. I could have gotten this look trying to brush or dab it on, but it would have taken a long time to do, and there’s no guarantee it would have been applied this evenly or cleanly. Cleanup was a pain, but it was worth it.

IMG_44872

IMG_44932

Seeing as I planned this manicure months ago, it’s accidentally festive for Cinco de Mayo. I love it when that happens.

Wacie Wednesday: Virgo Supercluster

I forget if I wrote about this last week, but I’ve finally swatched all the Wacie Nail Co. polishes I intended for the “spring” launch. Some I really liked, some I’m rethinking, but we’ll see how it turns out when we launch for reals in June. The polish I’m wearing for Wacie Wednesday this week is something I made while I was experimenting and hasn’t made it into a collection yet. It’s called Virgo Supercluster, and I’m wearing three coats of it with two coats of Seche Vite.

IMG_42622

IMG_42722

IMG_42842

IMG_42872

Virgo Supercluster is a black jelly with various sizes of silver holo hex glitters. It dries quickly, probably because there’s more glitter in this bottle than lacquer. Since this is a jelly, you have the choice of layering it over a black polish to get a huge glitter payoff, or foregoing undies for the dimensional layers of glitter. It also dries with texture, so you can wear it like a matte textured polish, or you can wear it with top coat. It’s versatile for a black jelly. The big downside, however, is that cleanup is a nightmare. Even after the most careful of applications, I still spent a half hour trying to clean up my cuticles, and I did a crap job of it because I was trying to hurry so I could play video games. I love the way all this glitter looks, but I’m starting to think, for the first time in my life, I need to cool it on the glitter.

IMG_42962

IMG_43082

IMG_43142

IMG_43232

Outdoor, mostly cloudy

Outdoor, mostly cloudy

I like this look overall, but it could probably benefit from being reformulated. I love the way it evokes space and suspension of galaxies in the universe, but I cannot forget how long it took to clean up.


Wacie Wednesday: Dang

It’s Wednesday, and right on schedule, we’re looking at something new from Wacie Nail Company. This is Dang, a blinding glitter topper, named for the first thing I said after I created it. I’m wearing one coat of it over The New Black’s Black, e.l.f.’s Smokin Hot, and Essie’s Aruba Blue.

100_47762

100_47812

100_47902

100_47932

Dang is another happy accident; it’s the result of mixing glitters together without intention. It’s a clear base with various sizes of holo silver hexes and holo silver hearts. Because there’s so much glitter in it, it’s impossible to not get a good glitter payoff. However, the hearts don’t come out very frequently; as you can see, I didn’t get one on every nail. It doesn’t even matter if the hearts are scarce, though. There’s tons of glitter to make up for it.

100_47982

100_48042

100_48112

100_48132

Something I like about this mixture is that it’s sparkly (to the point of blindness in the sunlight), but it’s not trying too hard for it. There’s not a ton of different shapes and colors and craziness jumping out at you for attention. I’m not saying there’s anything wrong with that kind of polish; those kinds of polishes are what drew me to indies in the first place. No, this is a glitter that glitters. It’s like a formal gown for your nails. Like diamond earrings for your nails. They’re your nails, but glitterier. I actually wore this to a red carpet party during awards season. My nails were dressed better than anybody.

100_48212

Outdoors, shade

Outdoors, sunlight

Outdoors, sunlight

I admit, I thought Wacie Nail Co. would have launched by now. Other projects I’m involved with are taking priority over my nail polish business, and it might be a while before I have a chance to reclaim all the time and money I’m putting into other things. My time is going to schoolwork and other entrepreneurial things; my money is all going to the vacation I’m taking next month. I’d planned eight polishes for the Wacie Nail Co. first-ever spring line, but as of right now, there are only seven; I haven’t had the time or means to save one from prototype limbo. Hopefully, there will be a launch before summer. If not, the spring line will become the summer line, which actually works out since I don’t have plans for a summer line. Either way, it will be soon. Please continue to watch this space for more Wacie Nail Co. news.

Manicure Monday: Trash Nails and Magnetic Silver

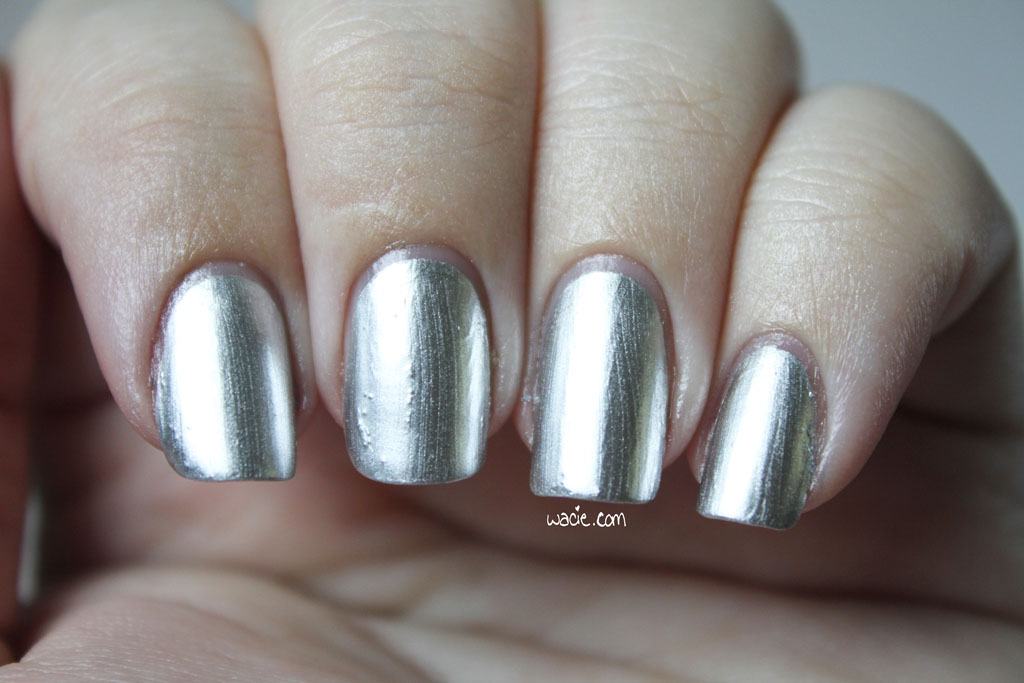
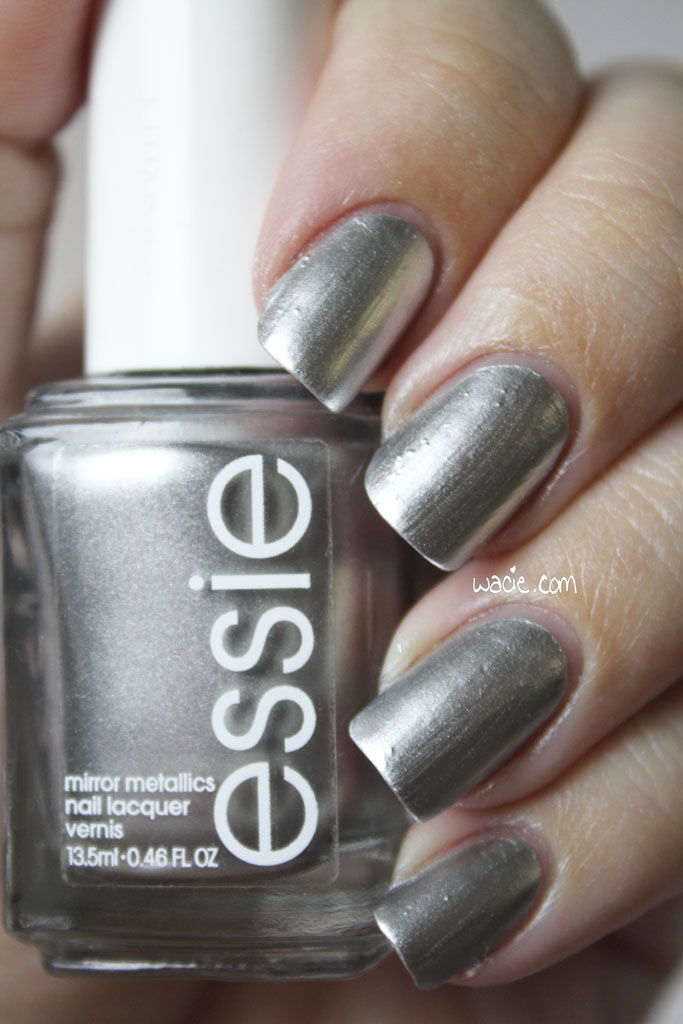
This week on Manicure Monday, we play with magnets, tweezers, and super glue. No, we’re not building a robot, we’re doing our nails! I wish we were building a robot, that would be cool.

100_31492

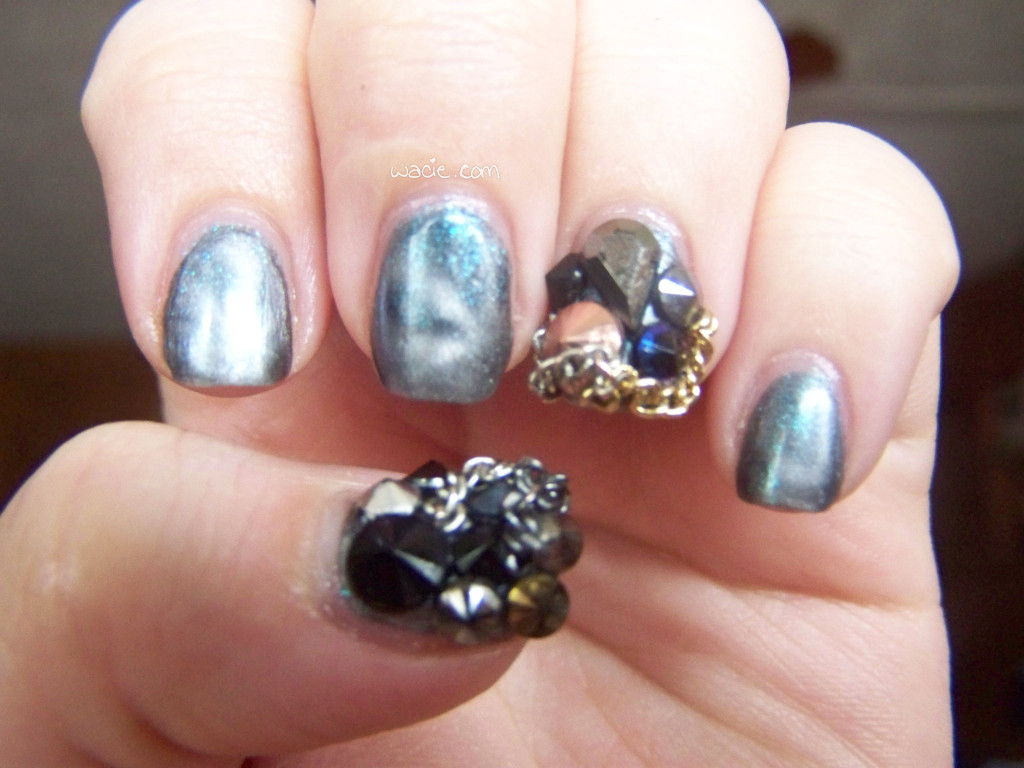
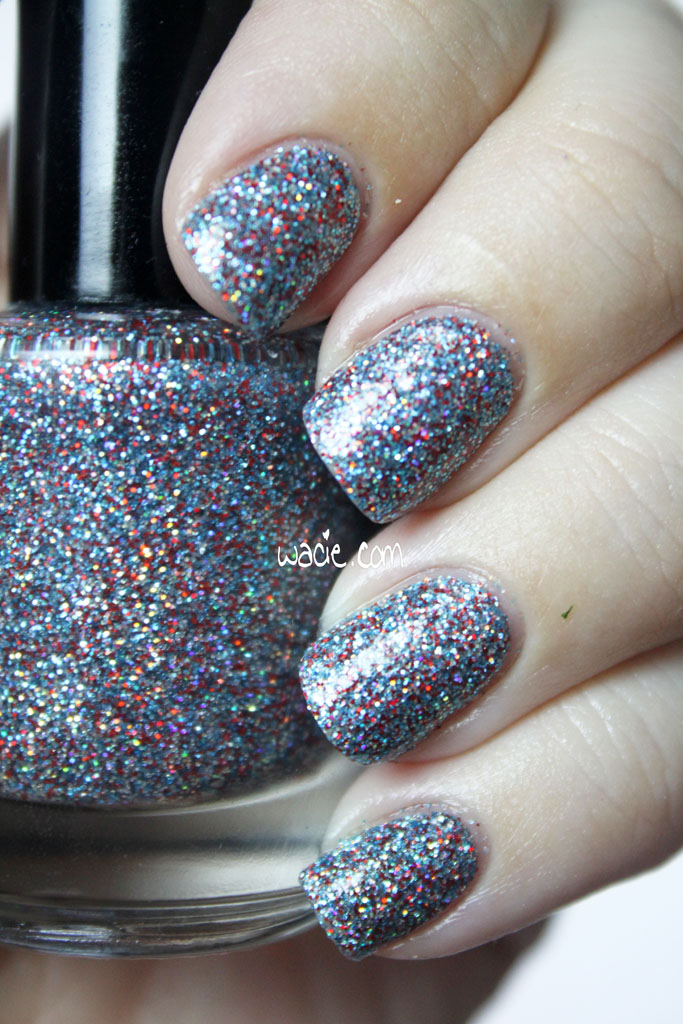
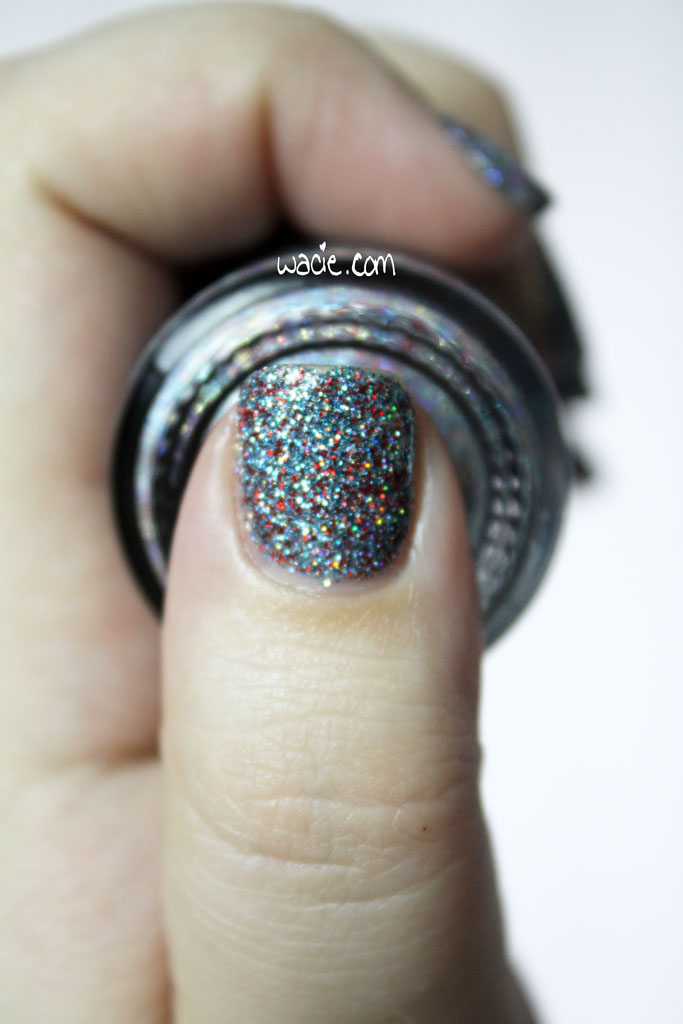
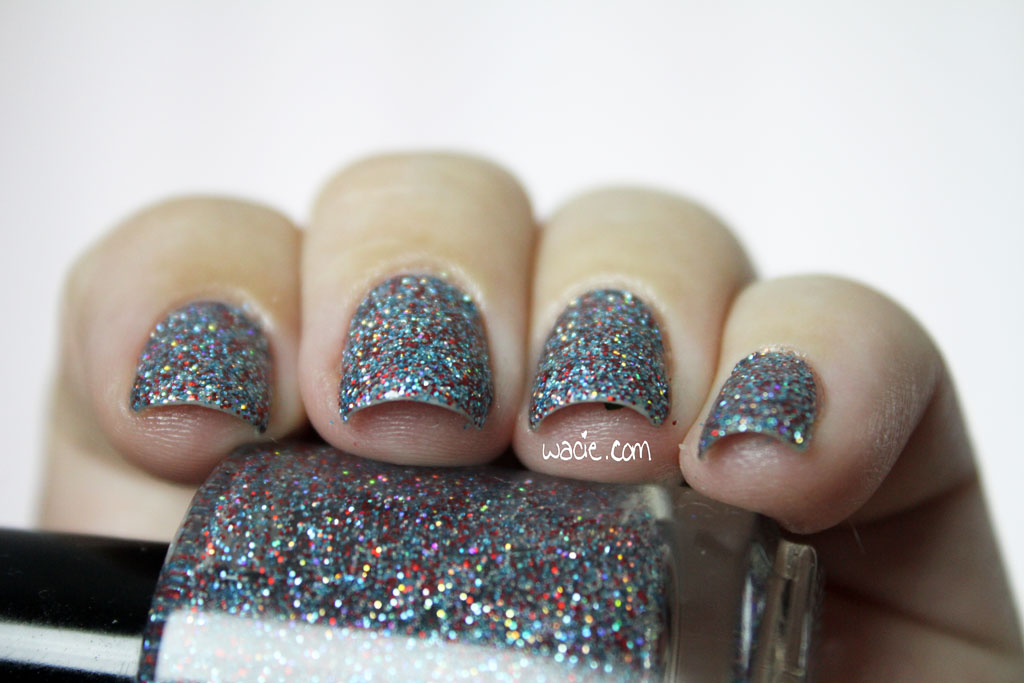
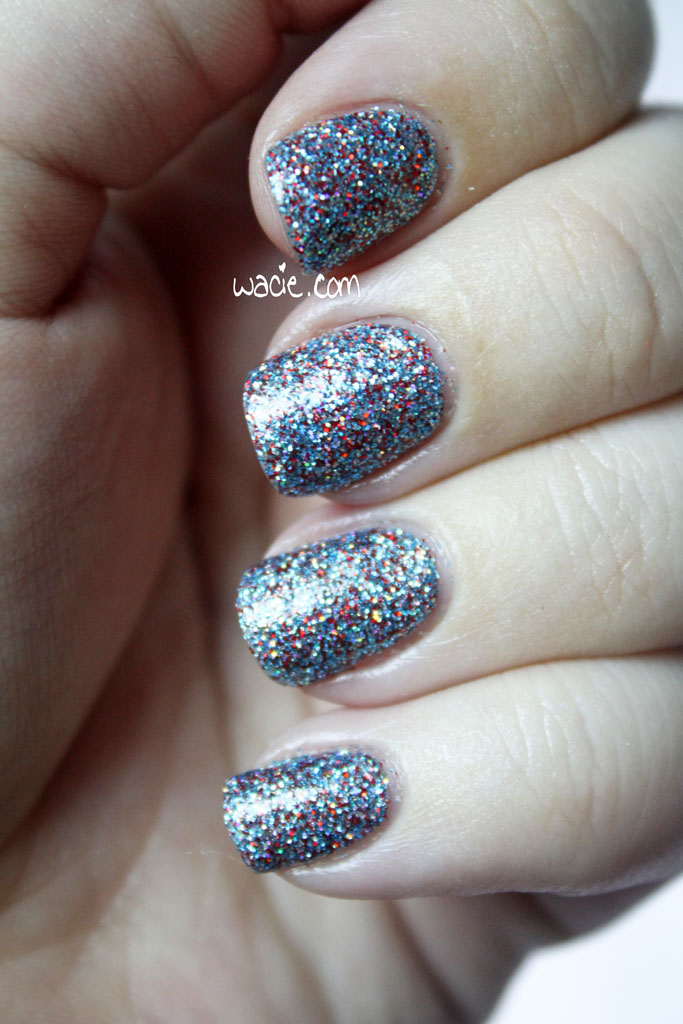
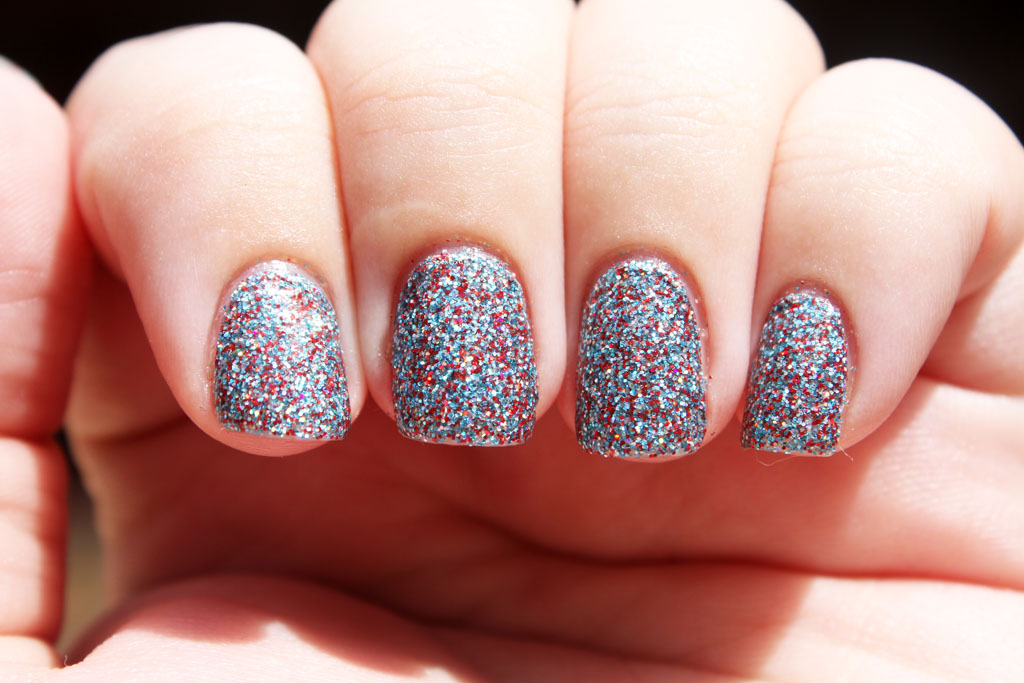
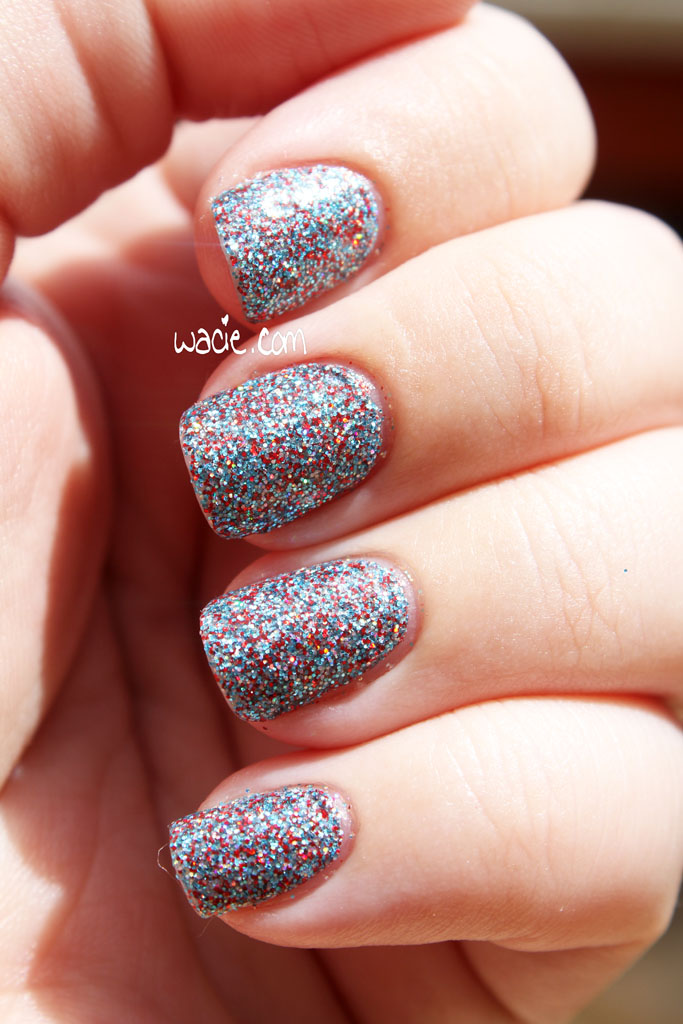
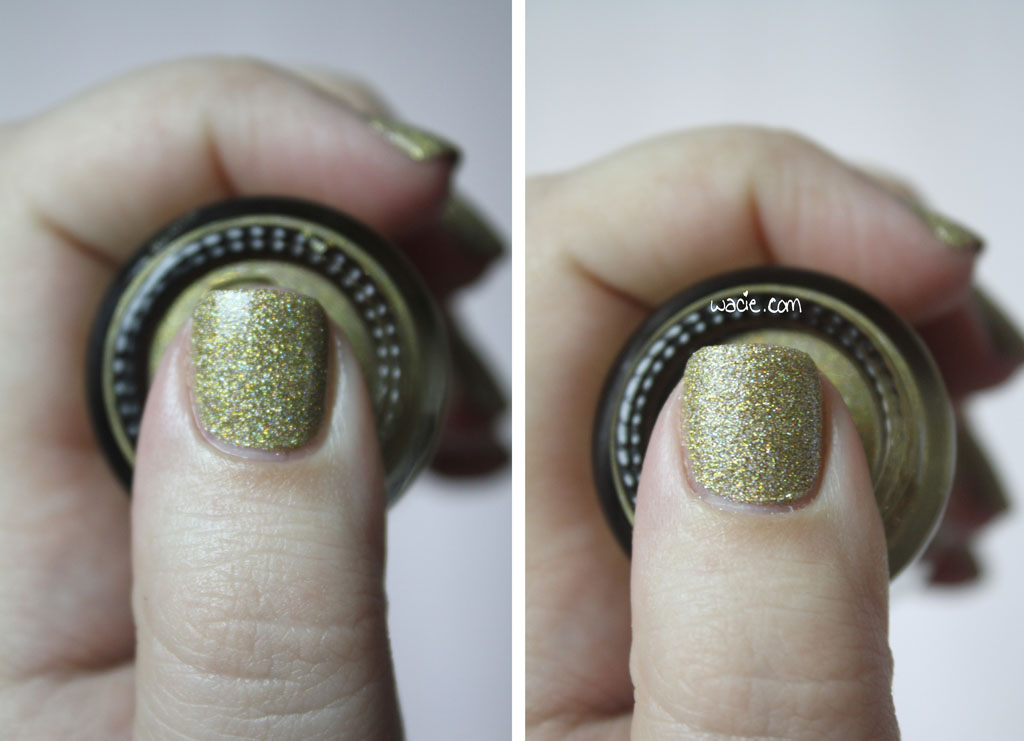
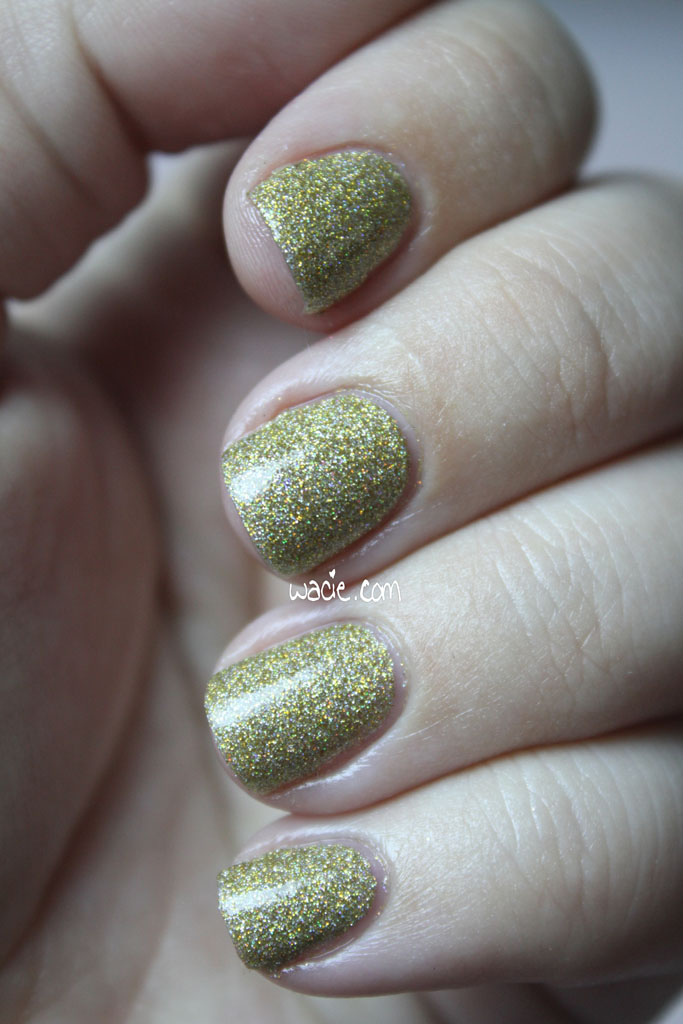
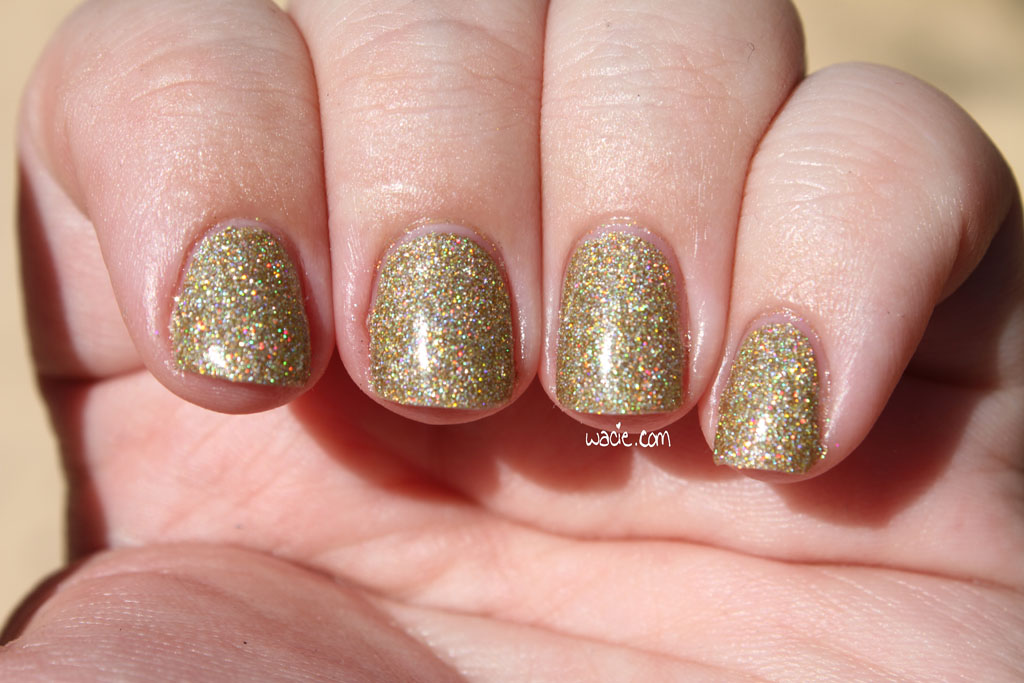
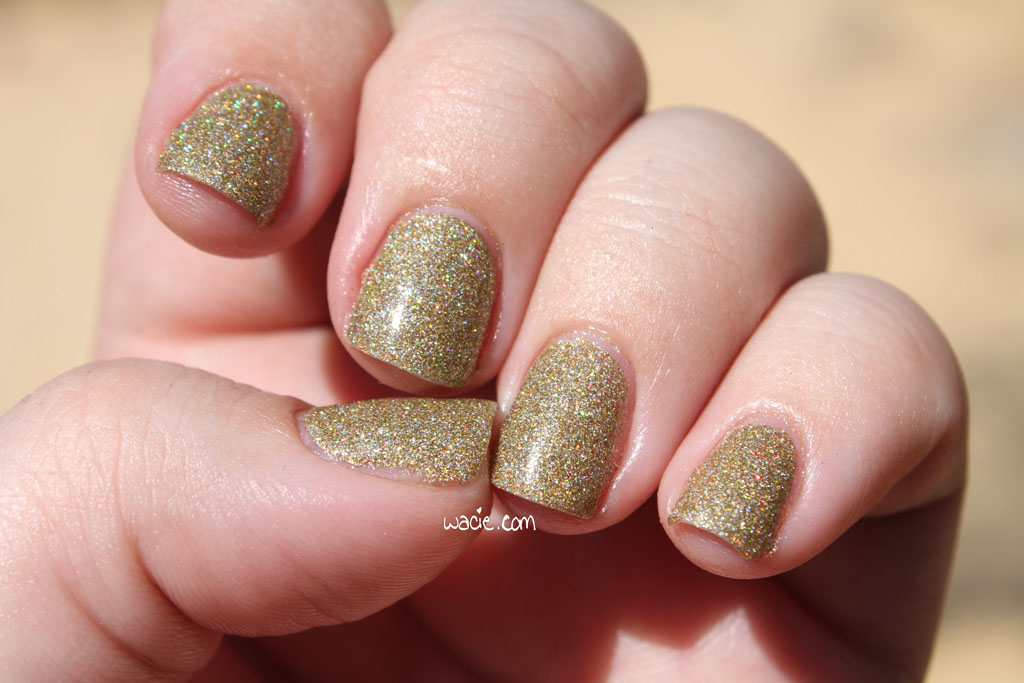
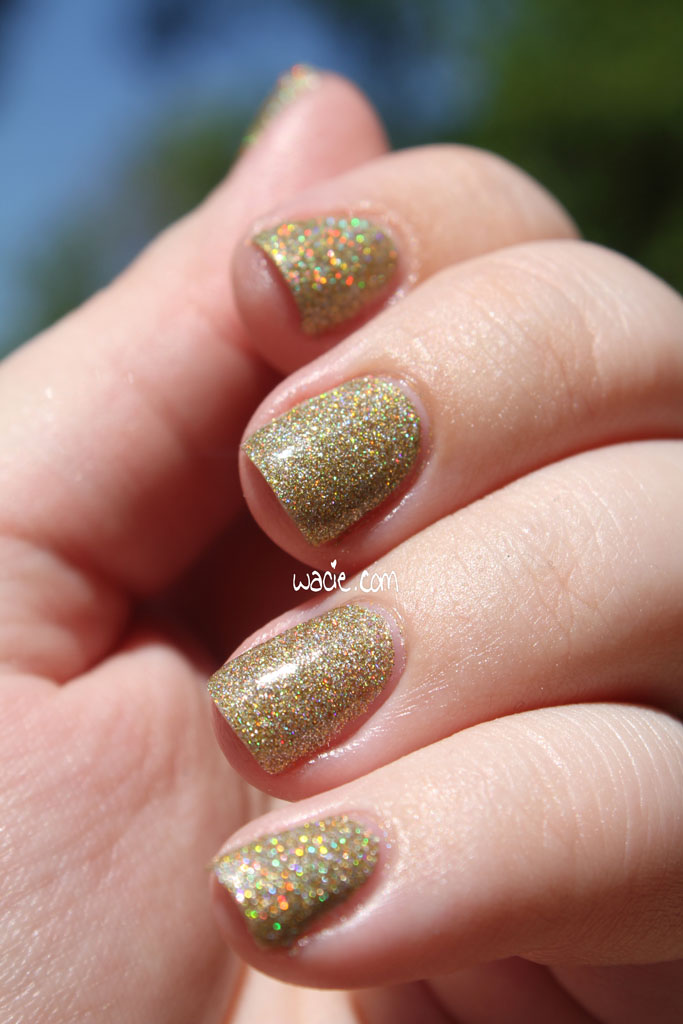
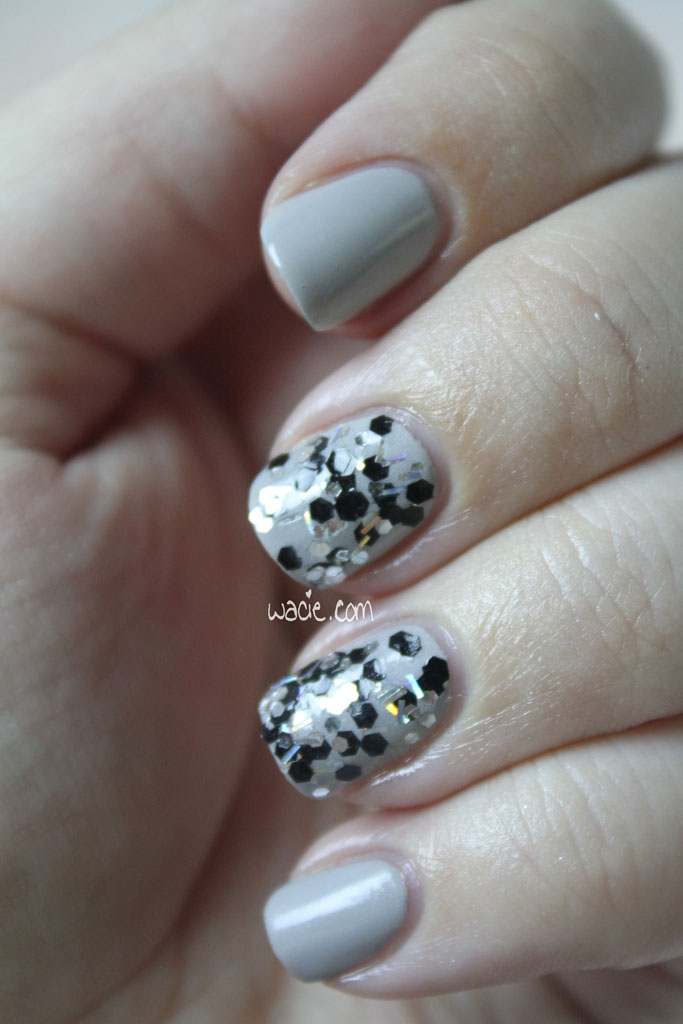
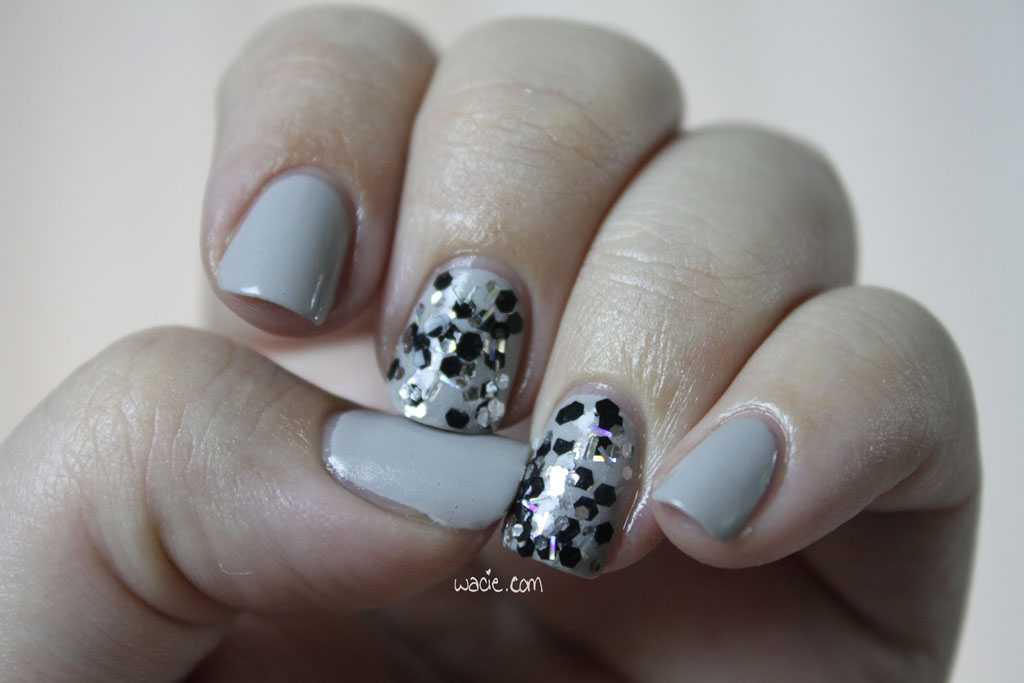
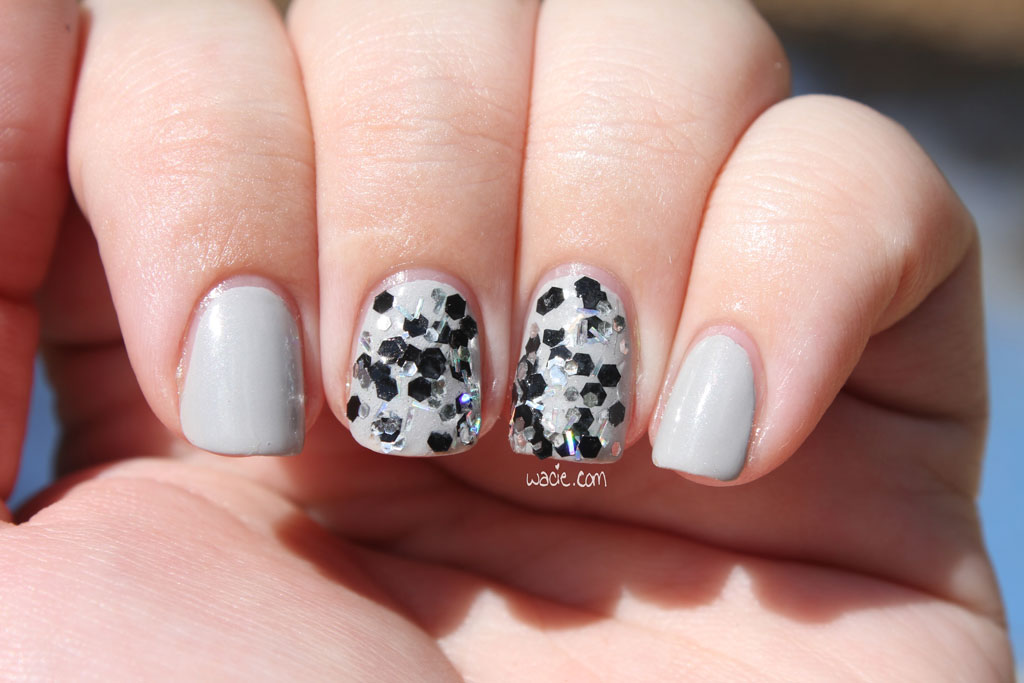
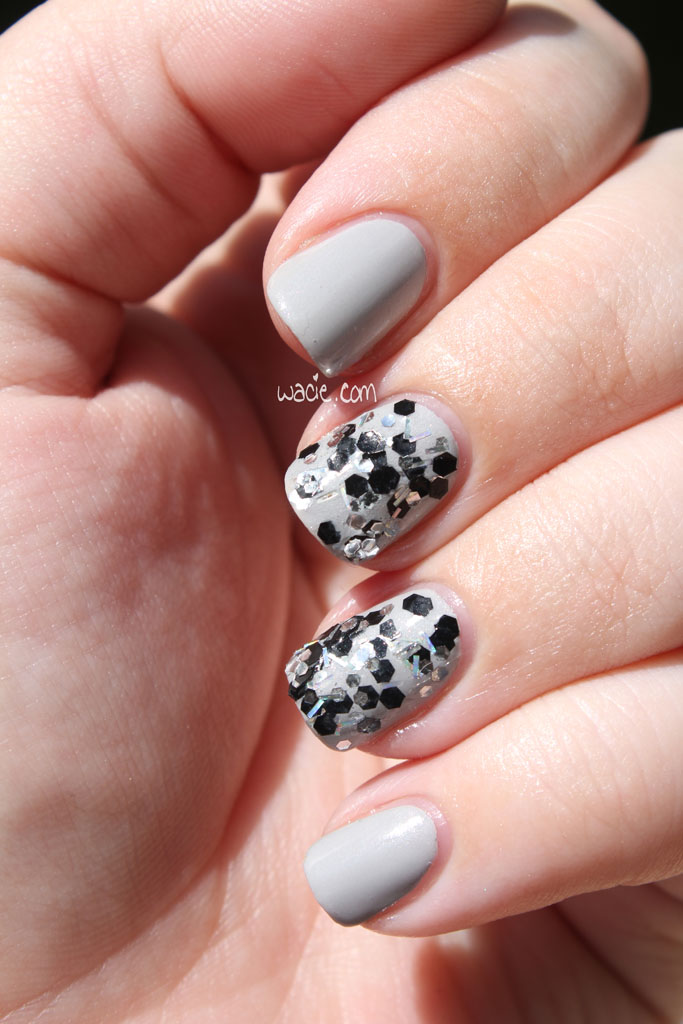
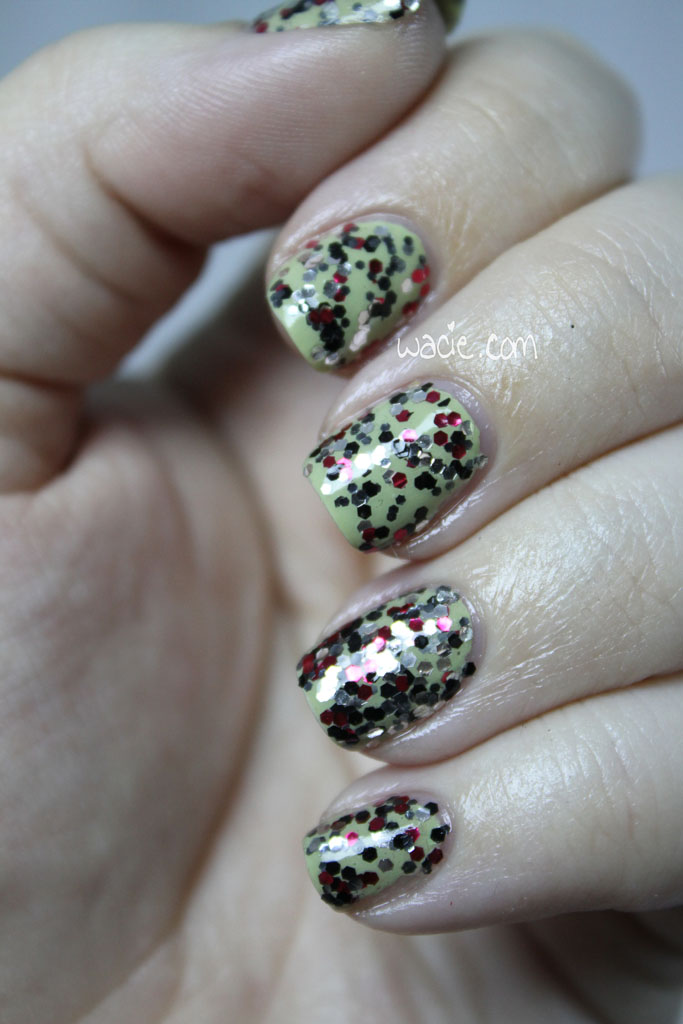
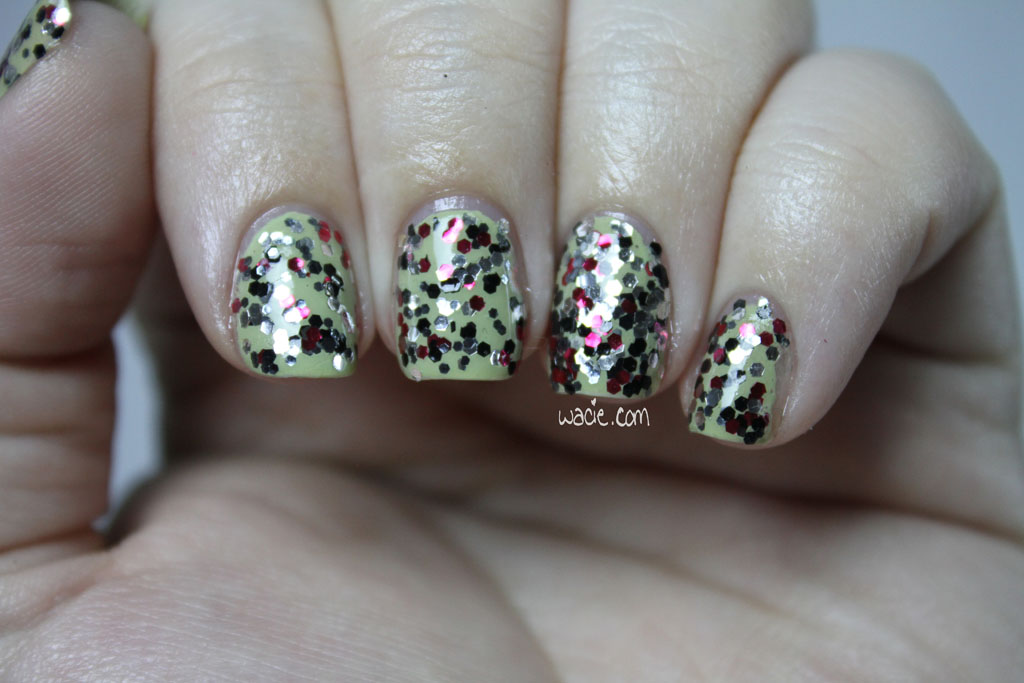
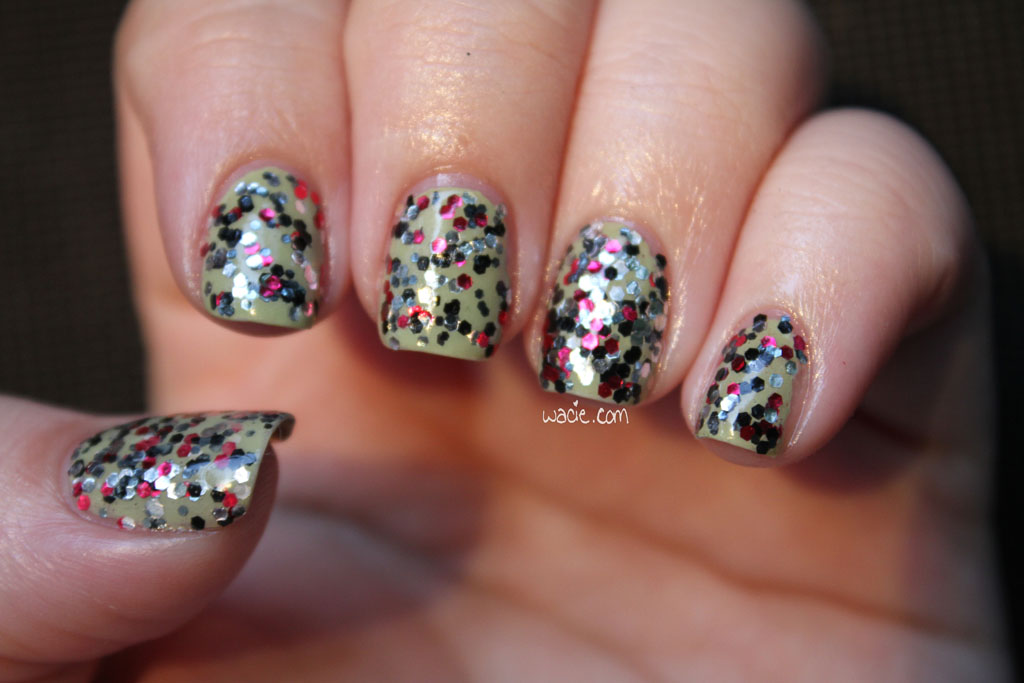
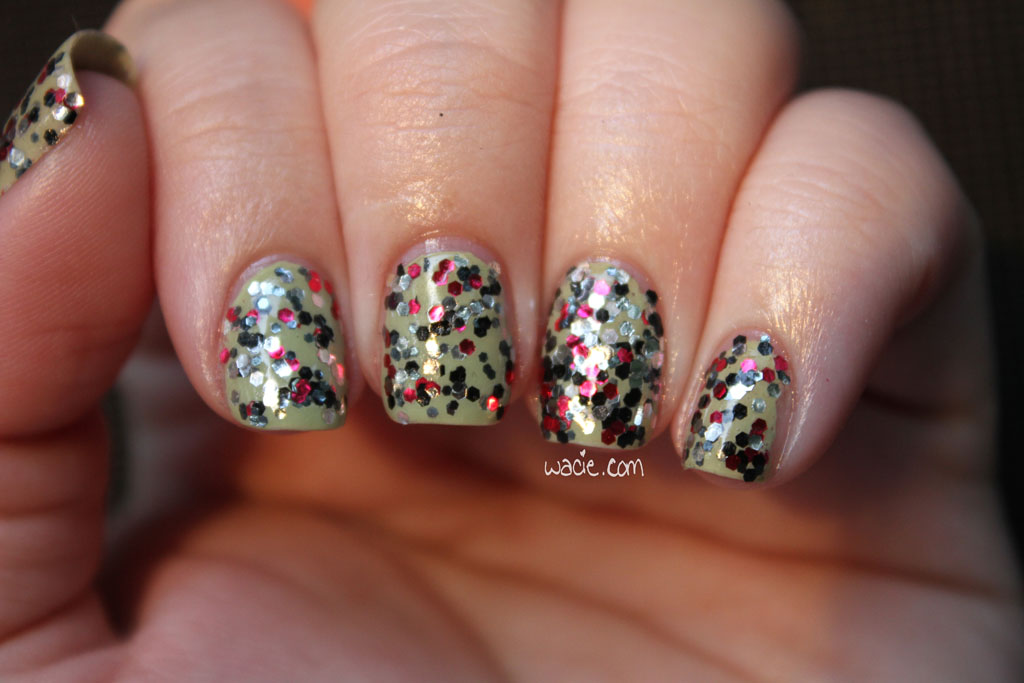
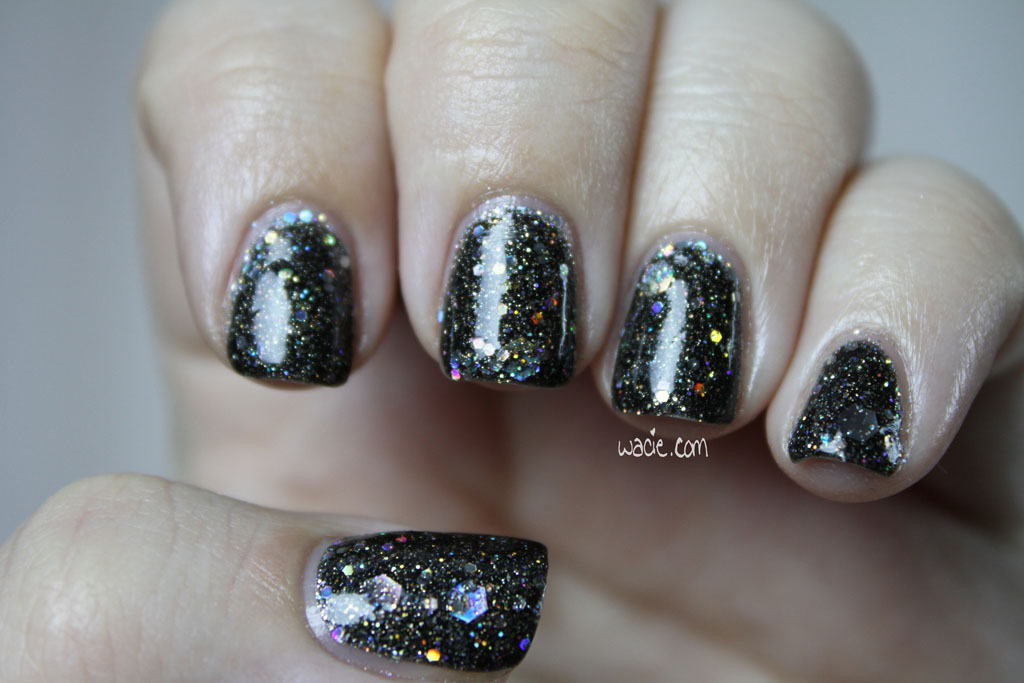
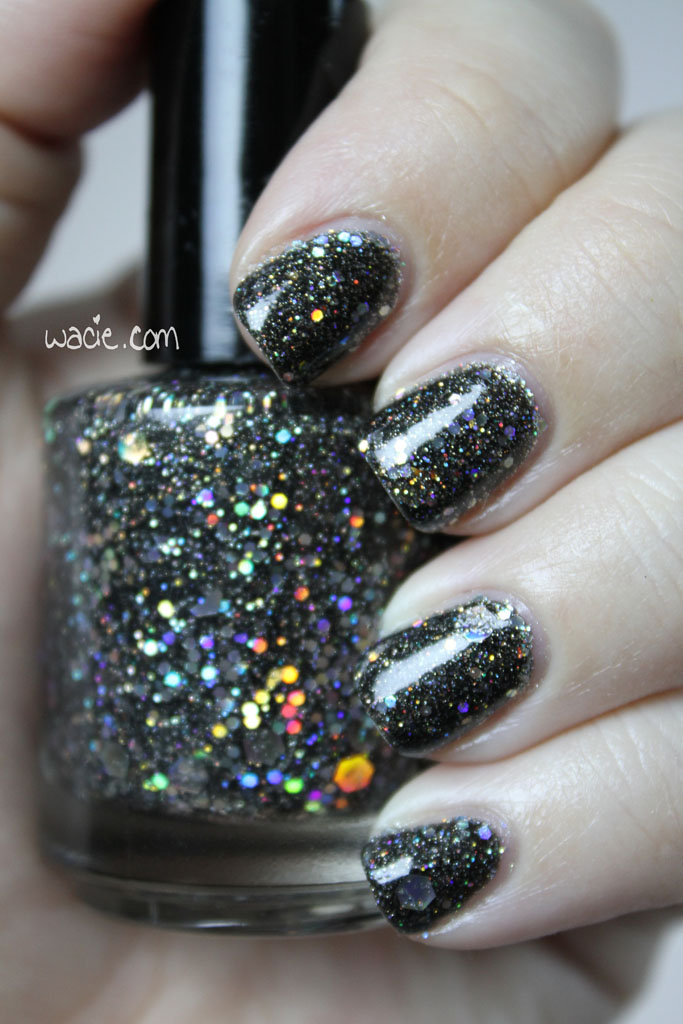
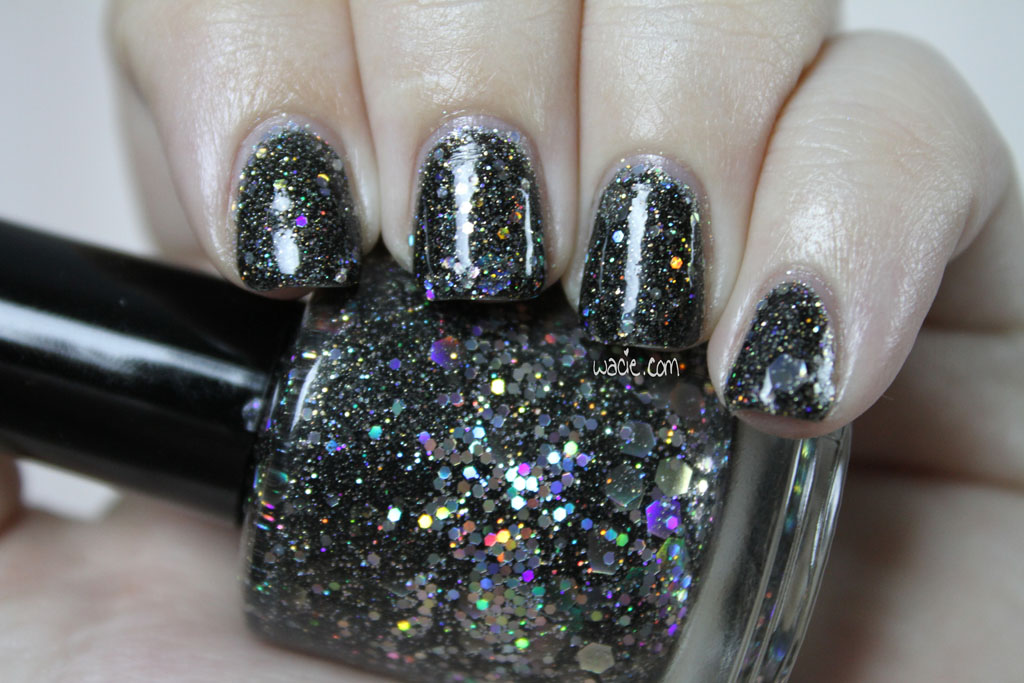
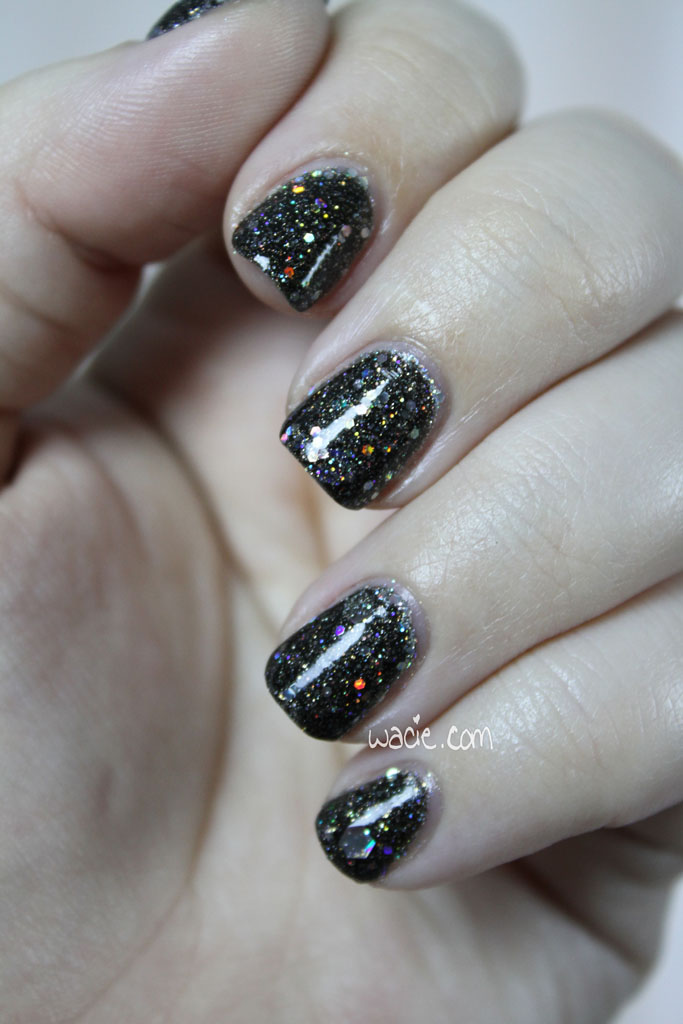
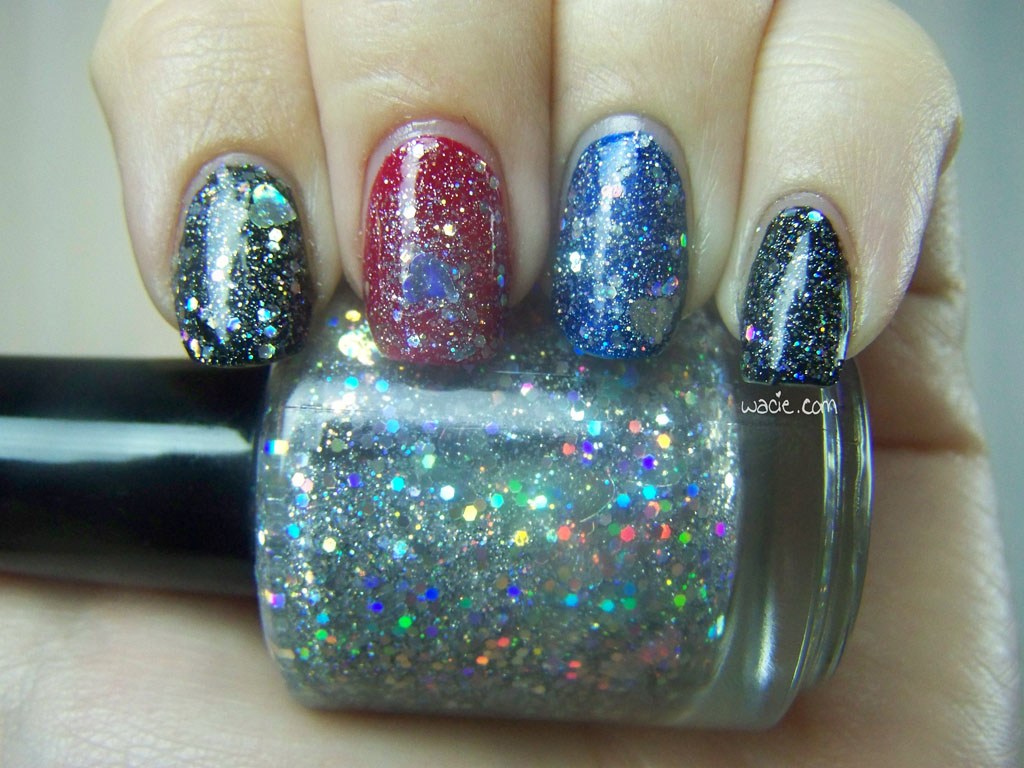
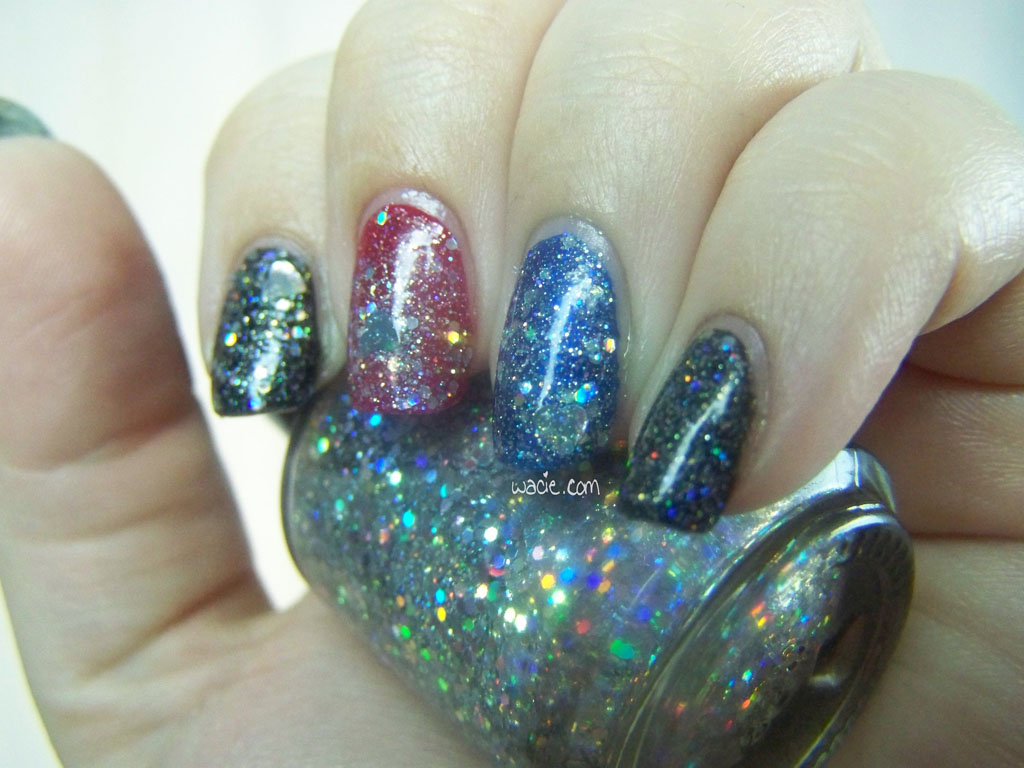
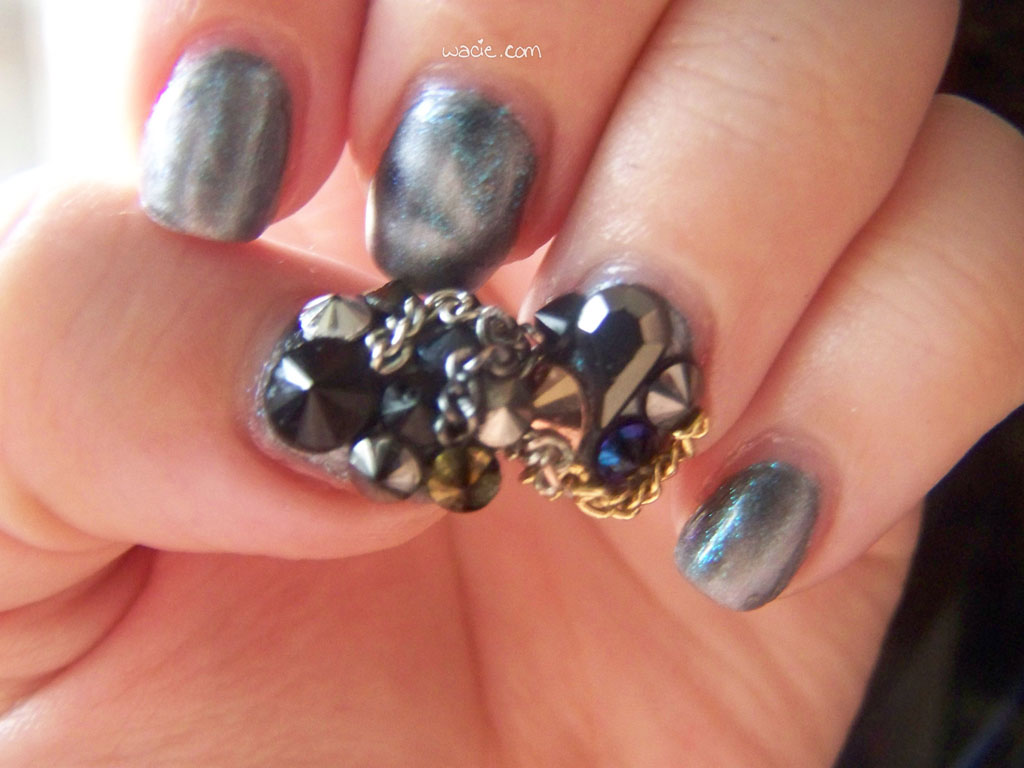
I only used one polish this week: Sinful Colors’ Polar Opposites. I know magnetic polishes are passé and uninteresting now, but I still like the look, even if I couldn’t get mine to come out very well. As was the case with my last magnetic polish, the magnetic design looked fantastic when I pulled the magnet away, but began to fade and distort as it dried. On some nails, the design is completely invisible, whereas some others barely are. It’s too bad; the magnetic effect really brings out the fine blue-to-purple shifting glitter. It’s a shame it’s not more pronounced, it’s really pretty.

100_31592

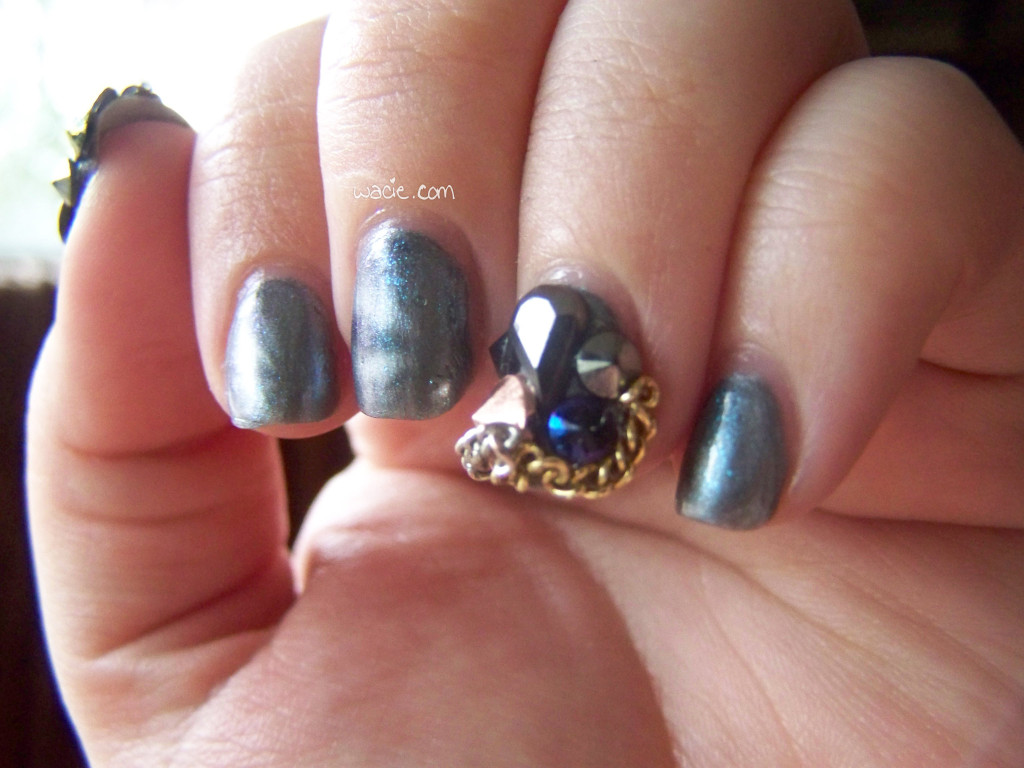
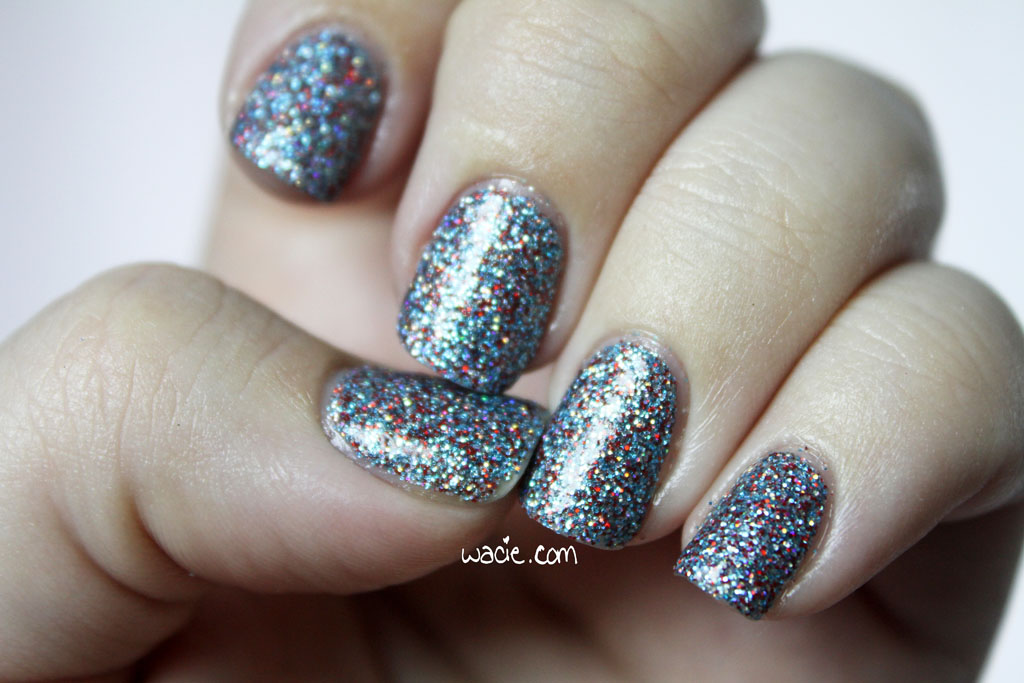
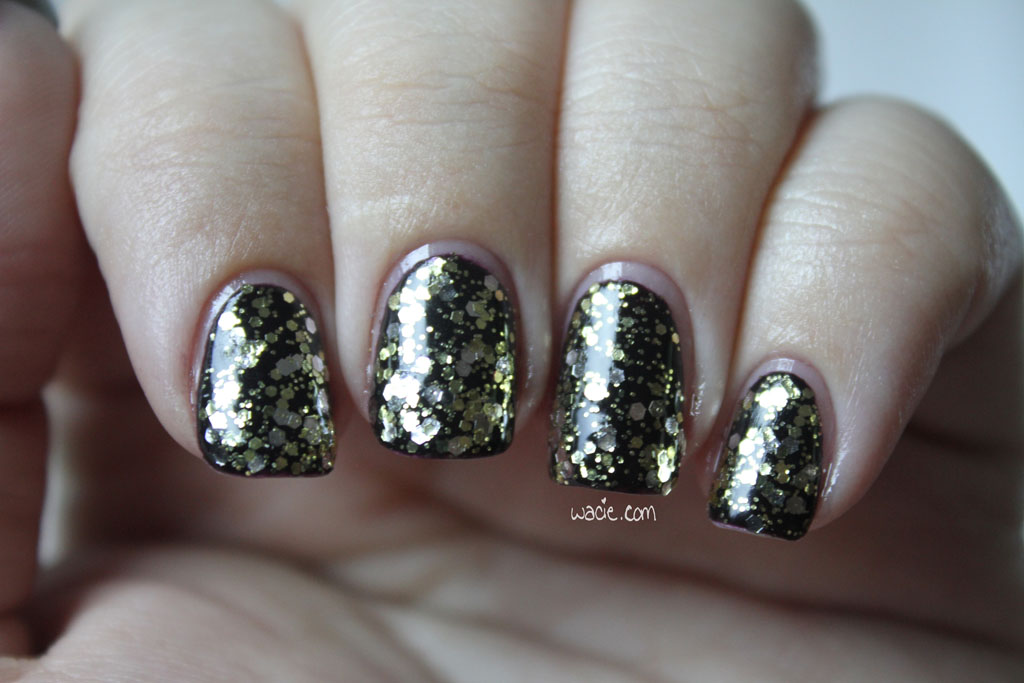
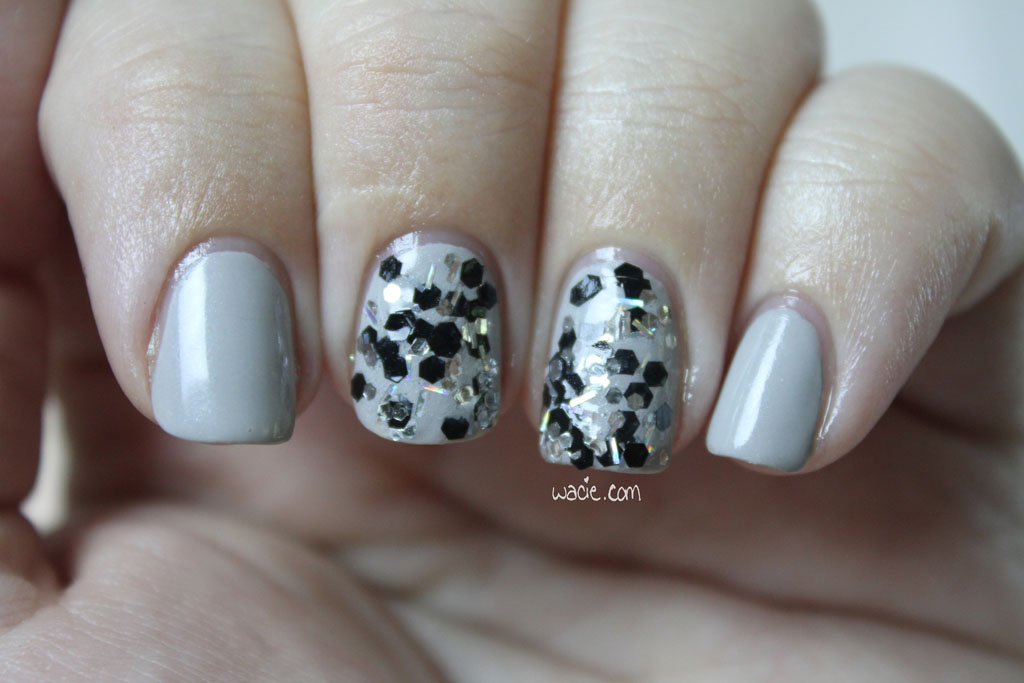
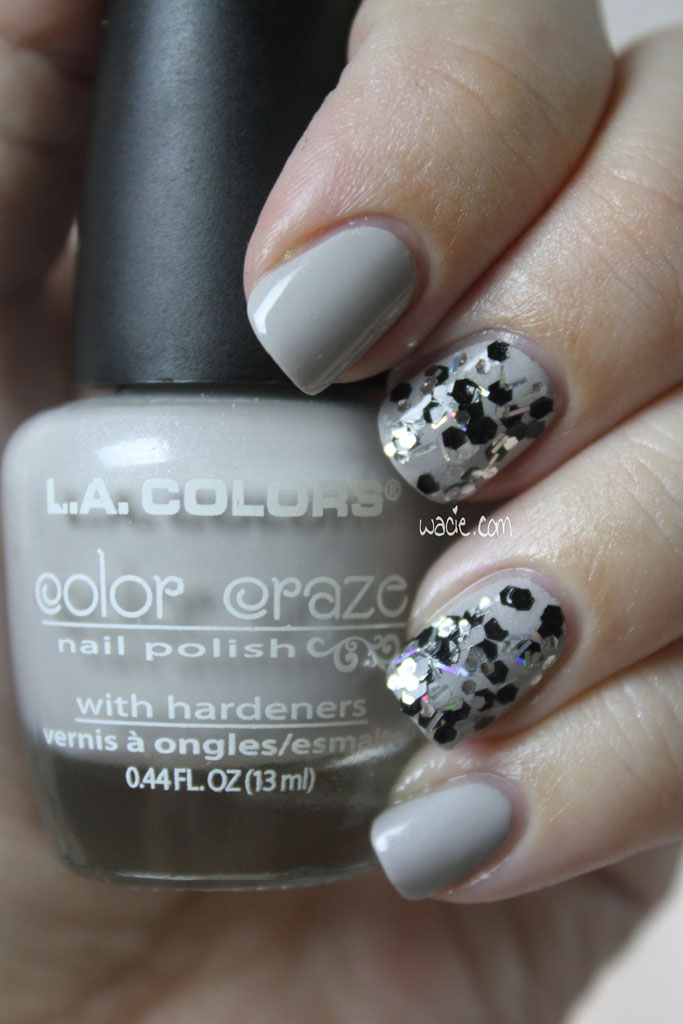
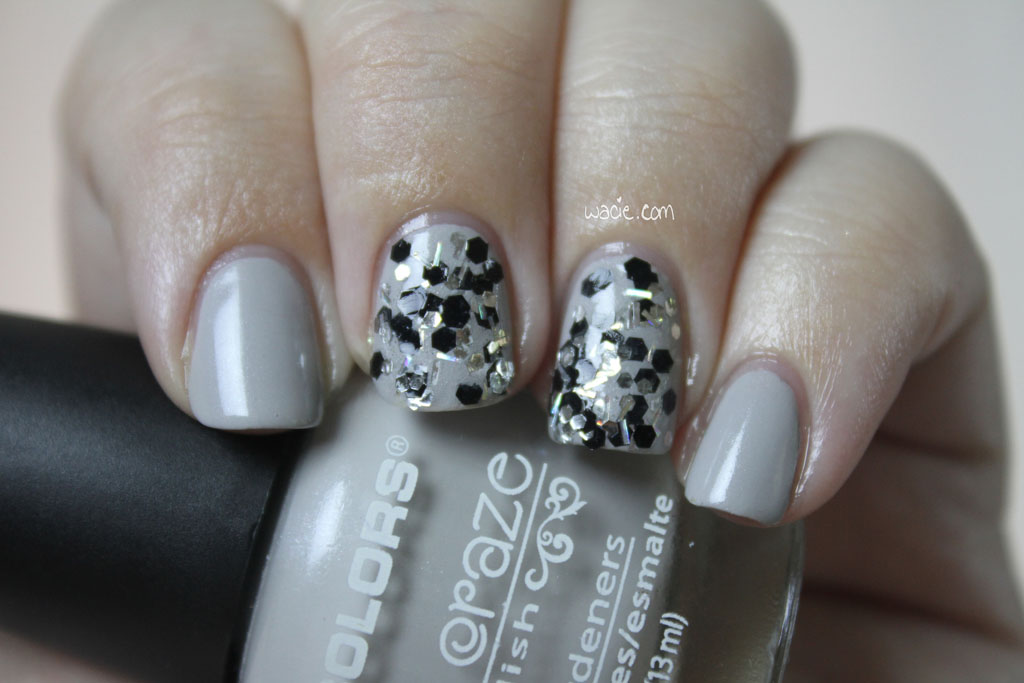
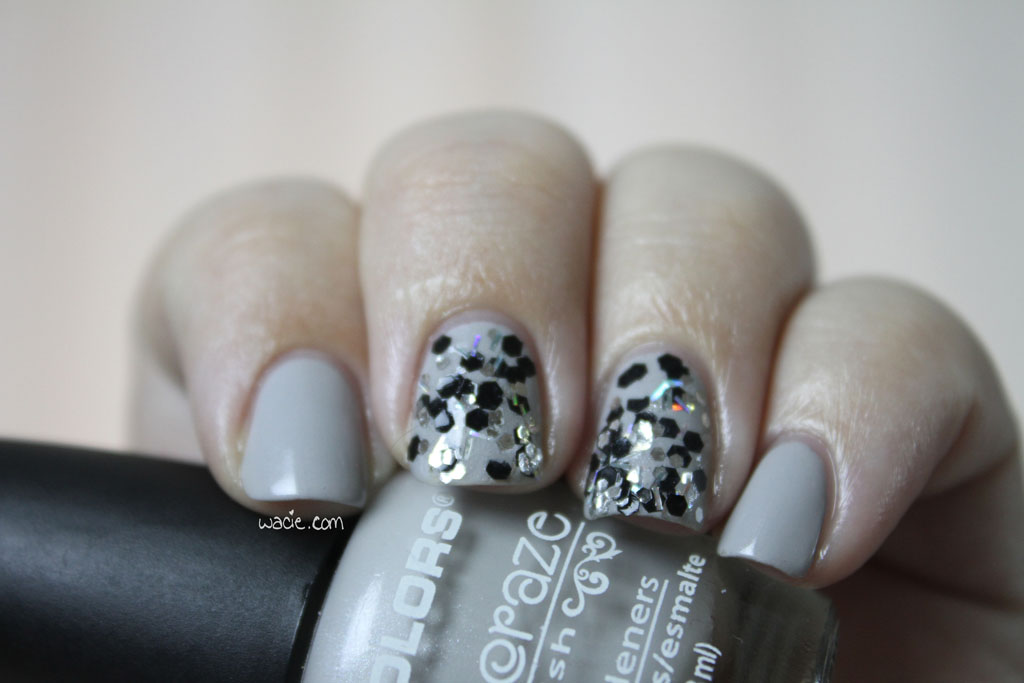
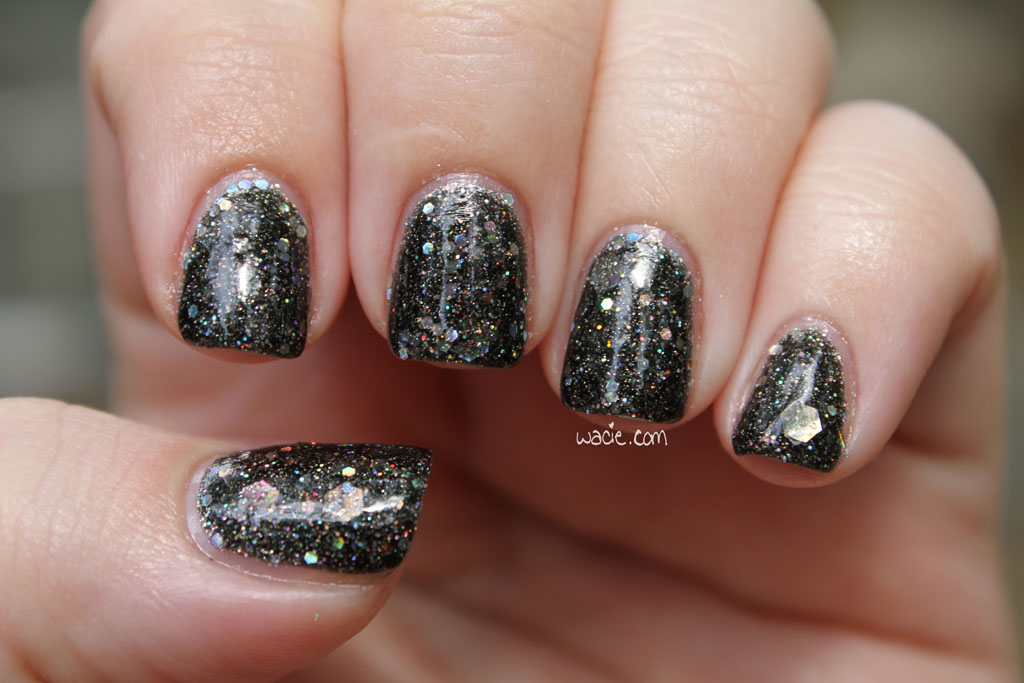
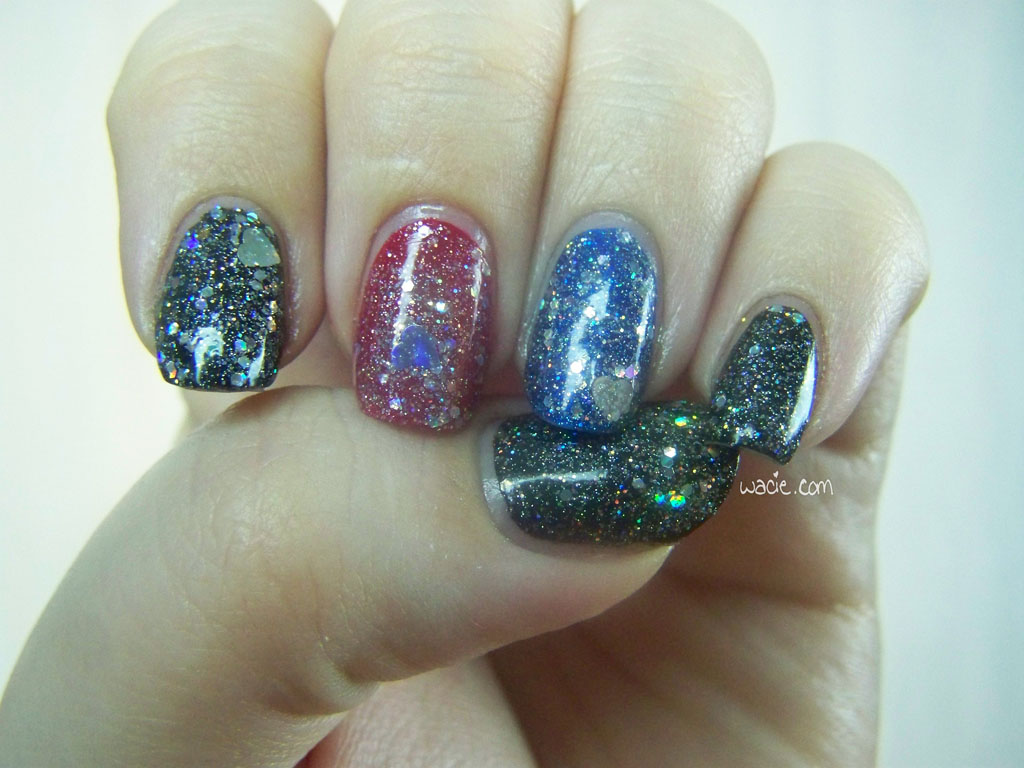
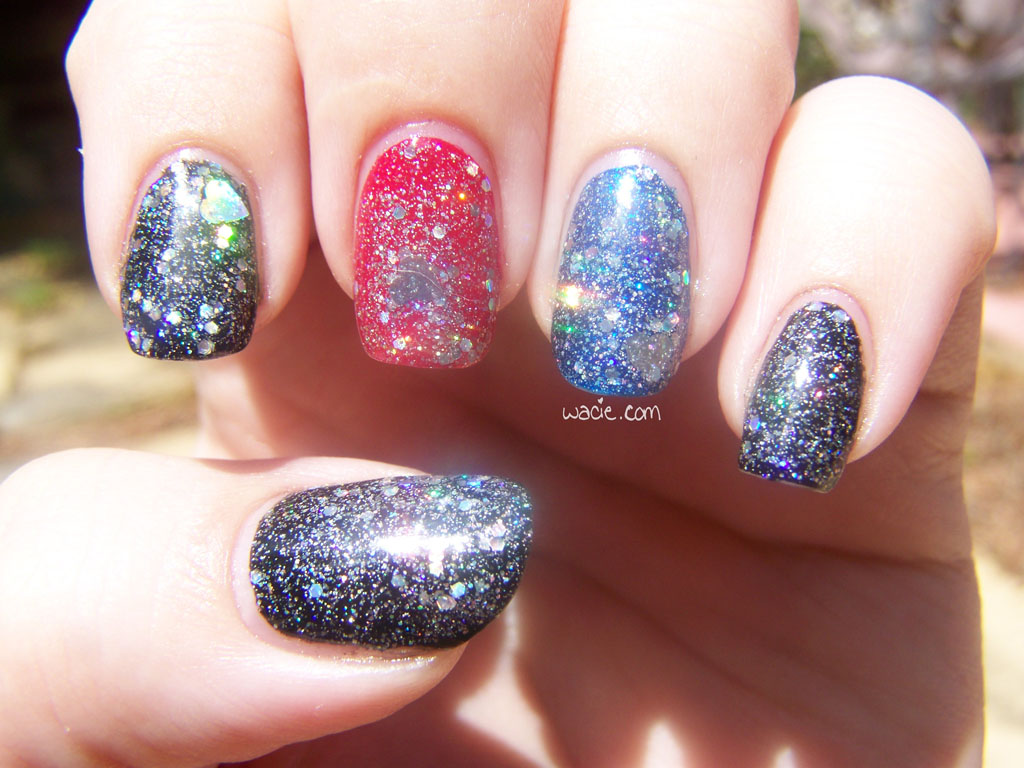
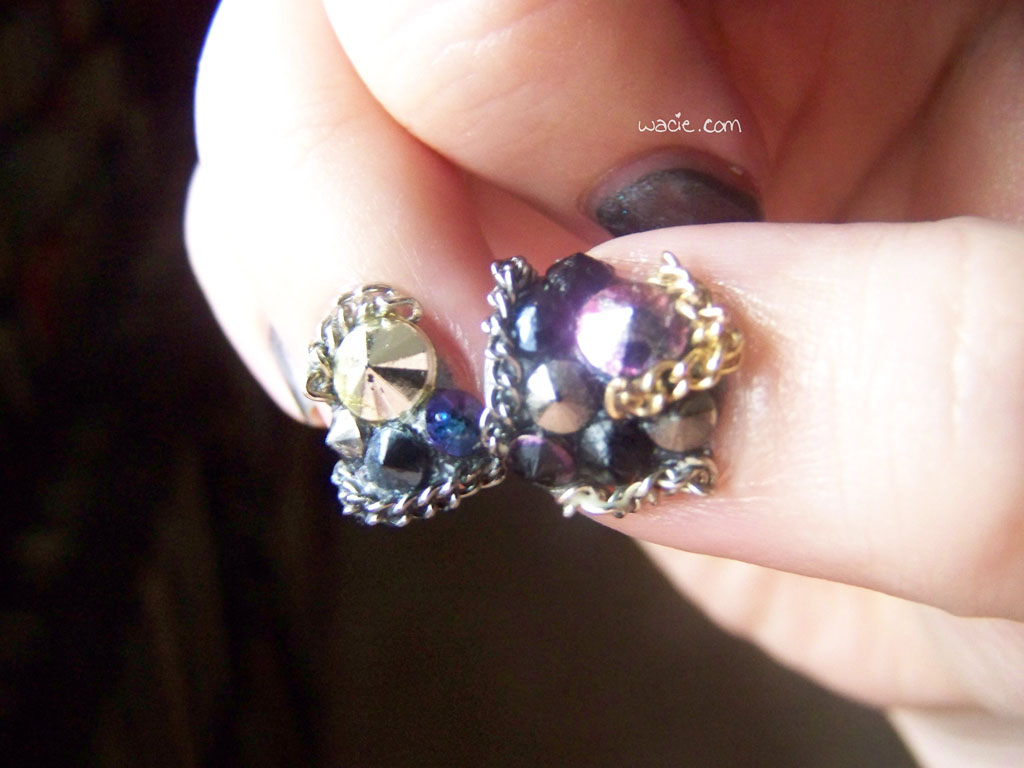
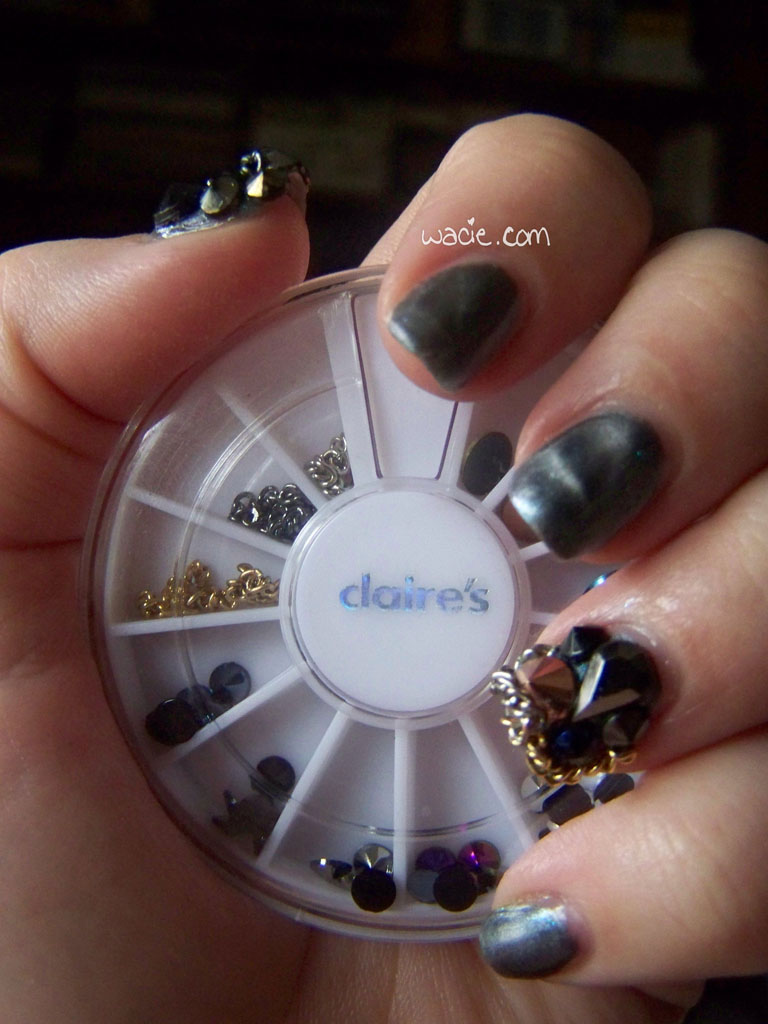
You’re probably wondering what all that crap is doing stuck to my nail. I got this nail art wheel from Claire’s with a bunch of round pyramid studs in it, and I thought that since I was only using one color, I could use a few of these studs. I thought they’d look best paired with a gray or silver polish, and since I was using one, I tried it. These are some of the tackiest, trashiest, most clothes-snagginest nails I’ve ever done. I can’t wait to see what it’s like washing my hair in the morning with these bad guys. There are pyramid studs of various sizes and colors, a teardrop rhinestone, and metal chain segments in a variety of finishes. I know they look like over-the-top hooker nails, but they make me feel kind of badass, like I could cut somebody with them. I might accidentally cut myself.

100_31622

I don't always post my right hand, but when I do, it's tacky as hell.

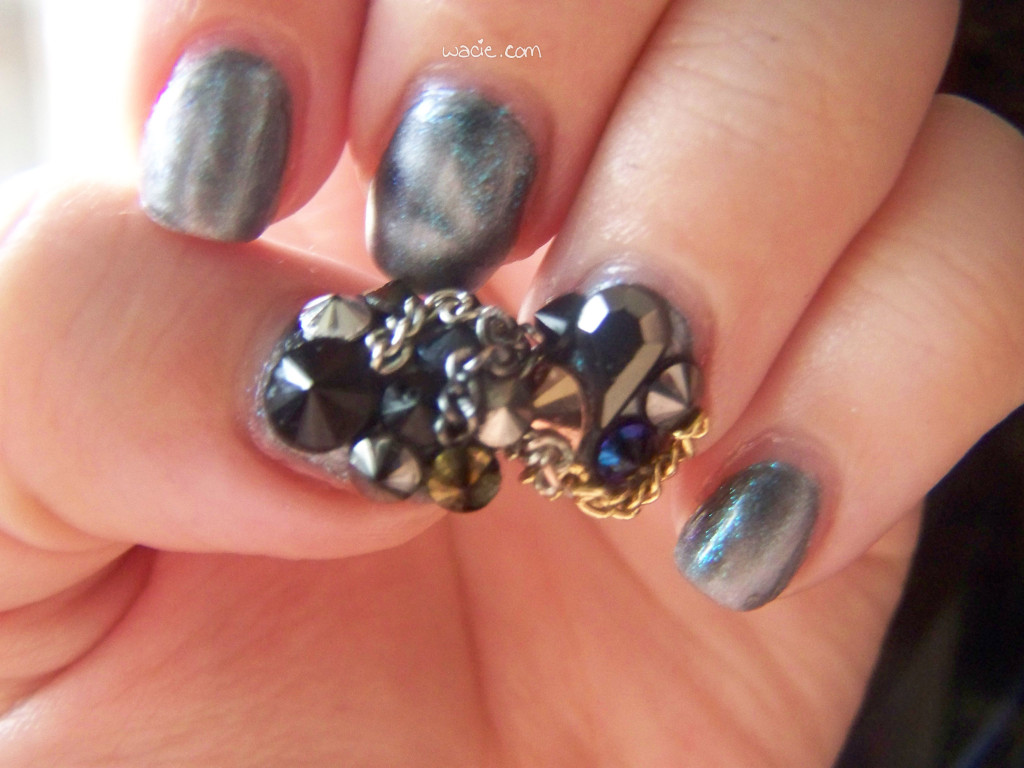
I don’t always post my right hand, but when I do, it’s tacky as hell.

100_31732

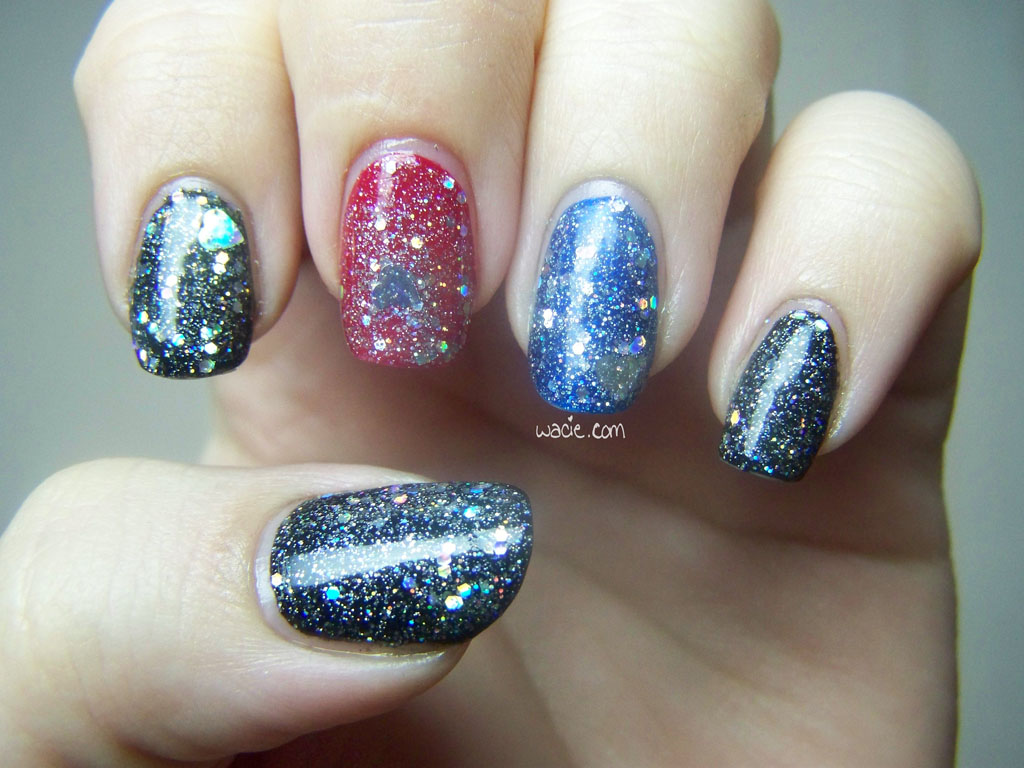
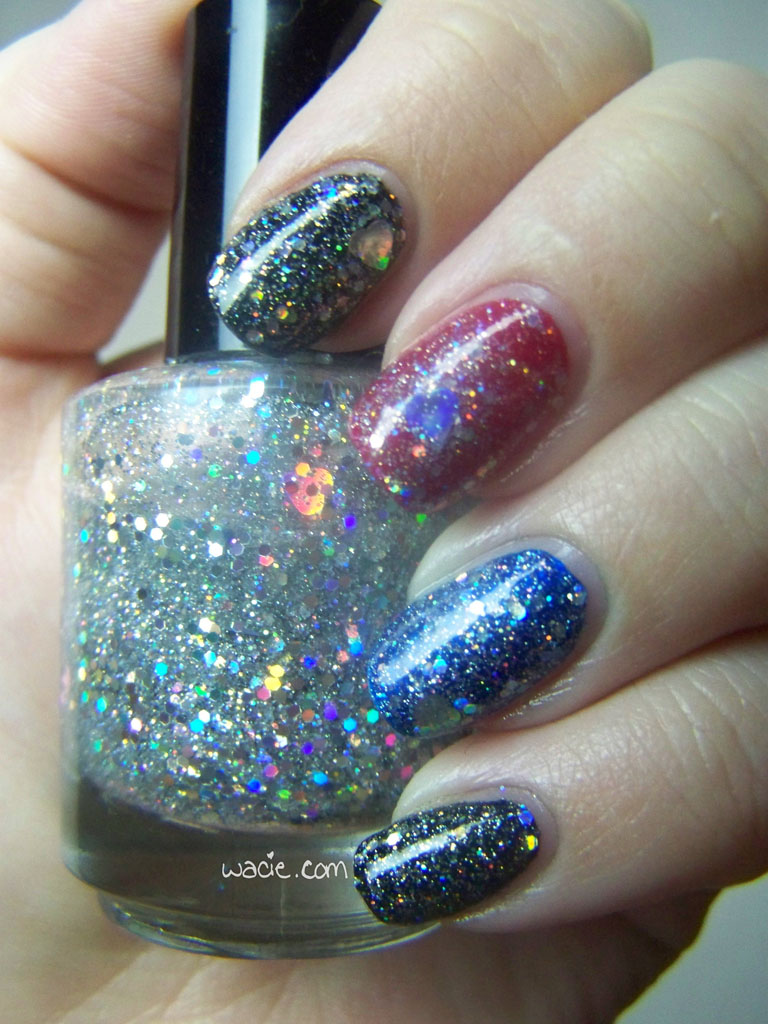
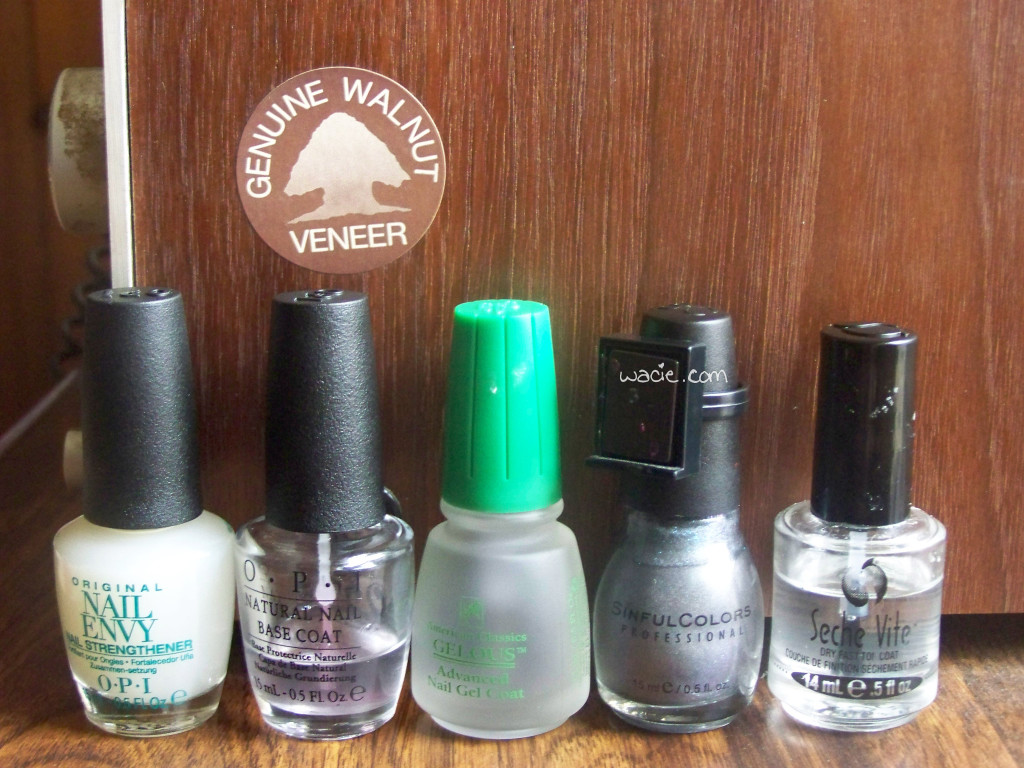
I tried something new this week: the DIY gel manicure. I originally saw a post on Reddit (that I can’t find now, so here’s the tutorial I used), where someone applied layers of Gelous between their color coats to get a durability comparable to a gel manicure. I was in Sally this weekend, I saw the Gelous, and I decided to try it for myself. Application was easy, but took some time; you’re using a few different products in a short amount of time. I didn’t really like this part; I like to let my polish dry for a really long time (like an hour) before I put another down. As a result, when I went to clean up my cuticles, I got some pulling and tugging from where the polish was kind of dry, but not dry enough. I have some weird edges from that. Also, the tutorial skipped base coat altogether and jumped right into the Gelous. I wasn’t okay with that. Having bought my first bottle of Nail Envy this weekend, I started with a base coat of that, then went for my usual OPI base coat (which was probably overkill), and then went into the Gelous tutorial. We’ll see if it holds up. I really hope it does, because now that my boyfriend lives here, I have to wash dishes twice as often, and my manicures don’t hold up the way they used to when I only had to do dishes once a week.

One of these things is not like the others. It's Sinful Colors' Polar Opposites!

One of these things is not like the others. It’s Sinful Colors’ Polar Opposites!

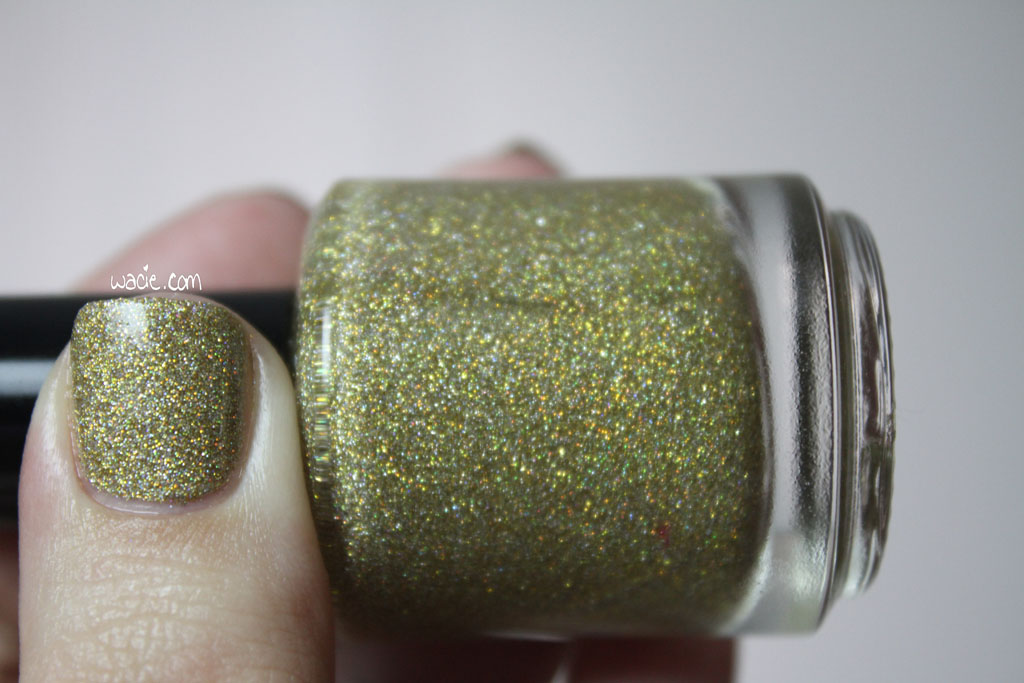
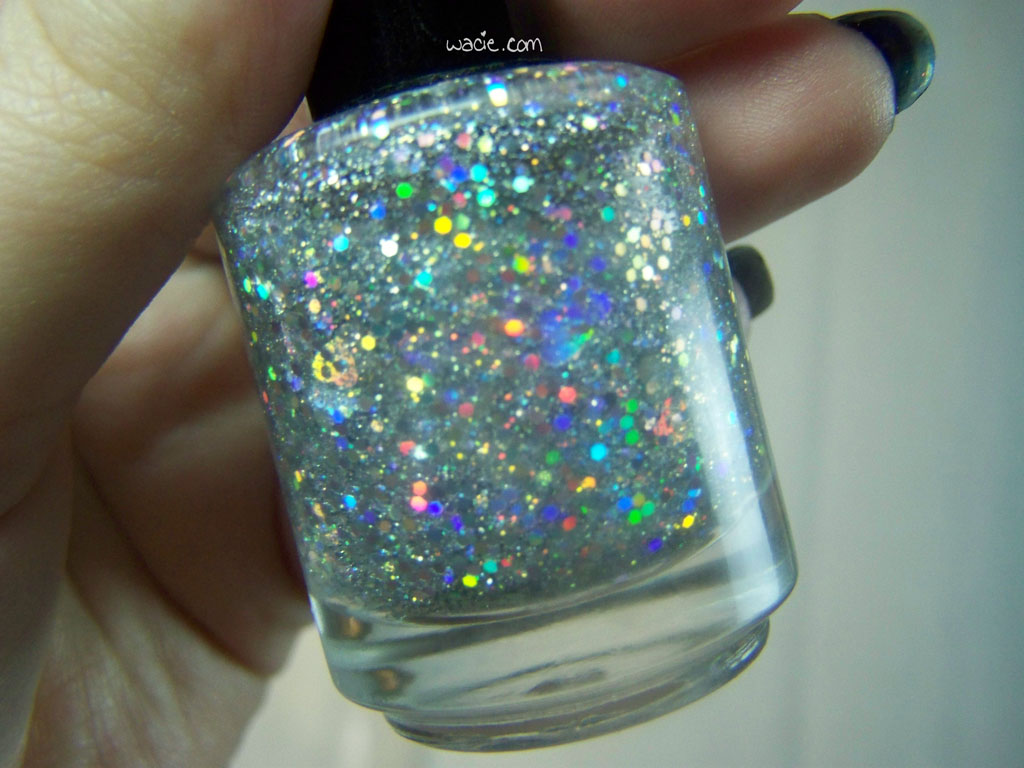
In unrelated news: Wacie Nail Company is a thing that’s really going to happen, and soon. Last week I ordered some supplies for a R&D run, and the last of it will arrive tomorrow. I will probably spend all my free time this week huffing lacquer fumes and inhaling glitter, and hopefully, I’ll have working prototypes by Friday. I’m really excited about making polish, sharing it with everyone, and doing something more constructive with my time than refreshing Reddit. I hope you’re looking forward to it!