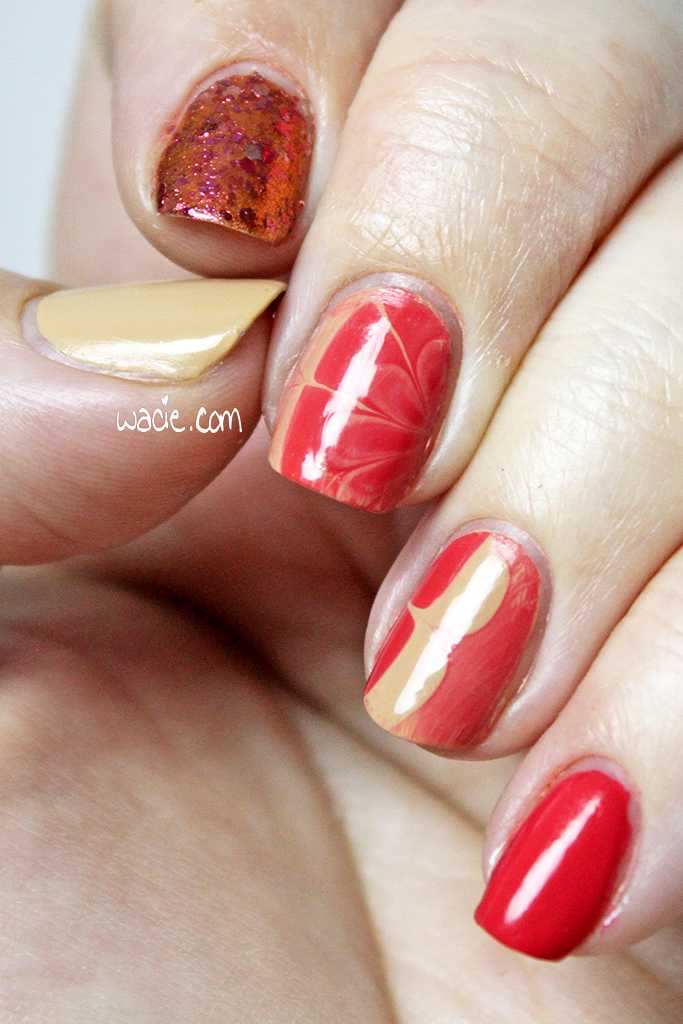
Hello hello! Today’s post is a little different from my usual fare. Makeup posts are pretty uncommon here, and I’m hoping this post will be the start of something new and fun. As you know, in the northern hemisphere, the autumn season is now upon us. Last week, I begrudgingly put away my summer clothes, and this week, I put away my summer makeup. I’m sad about summer ending, but I’m excited about digging some new things out of my collection. Warning: this is a pretty pic-heavy post.
This isn’t a Project Pan challenge as much as a challenge to commit to things I’ve never used, or have had a long time. Sure, hitting pan on these products is an ideal outcome, but really I just want to give this stuff some love. There’s a reason I buy everything I buy, and it deserves better to sit around and languish in a drawer, right?
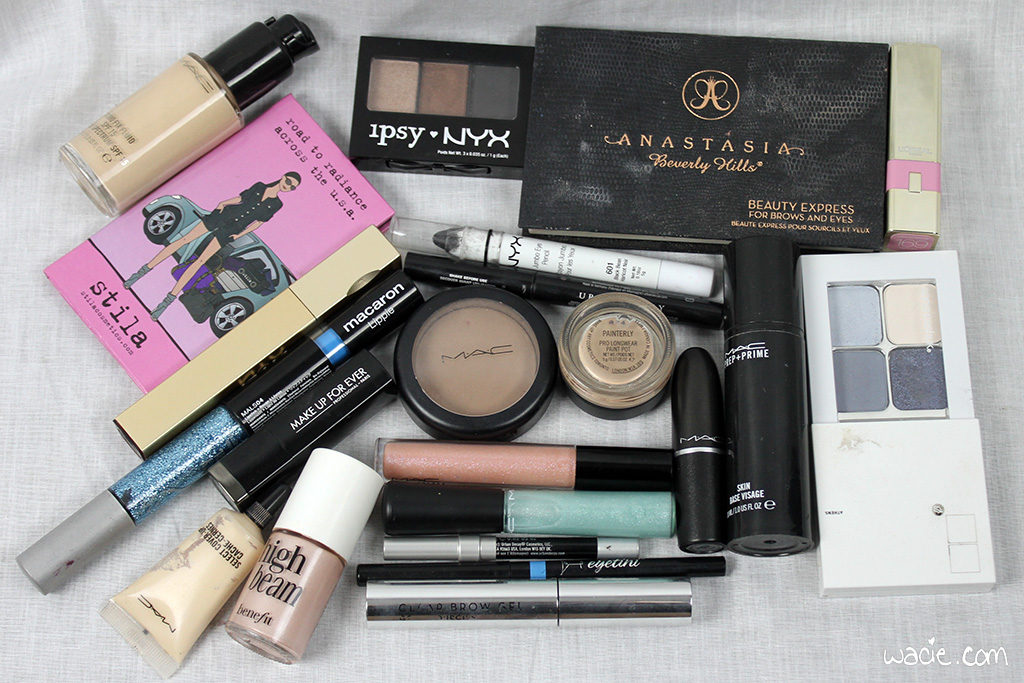
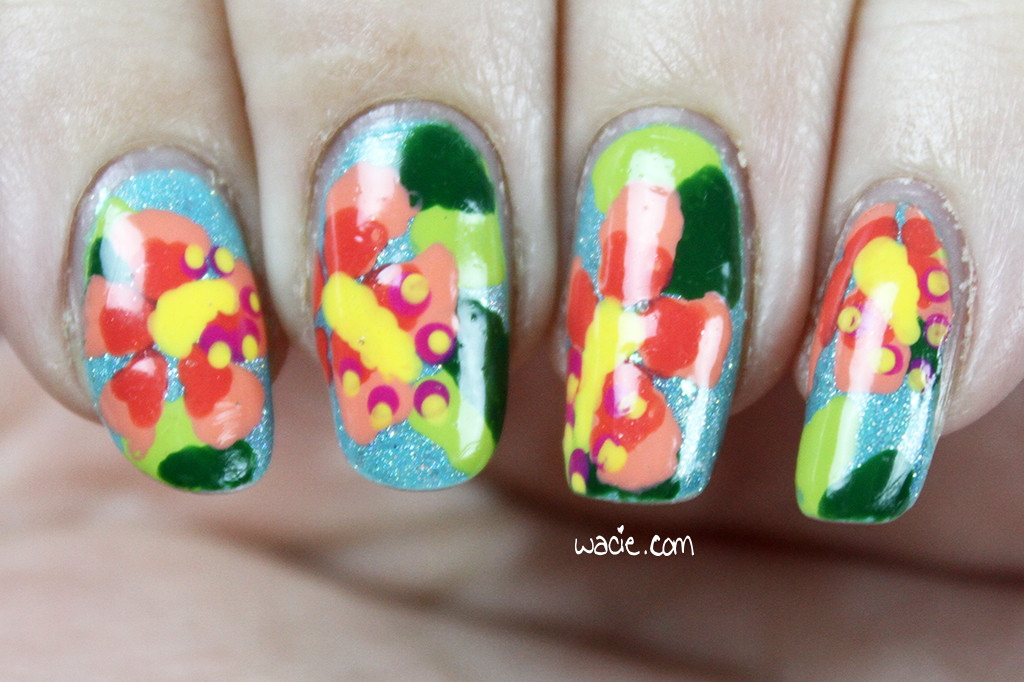
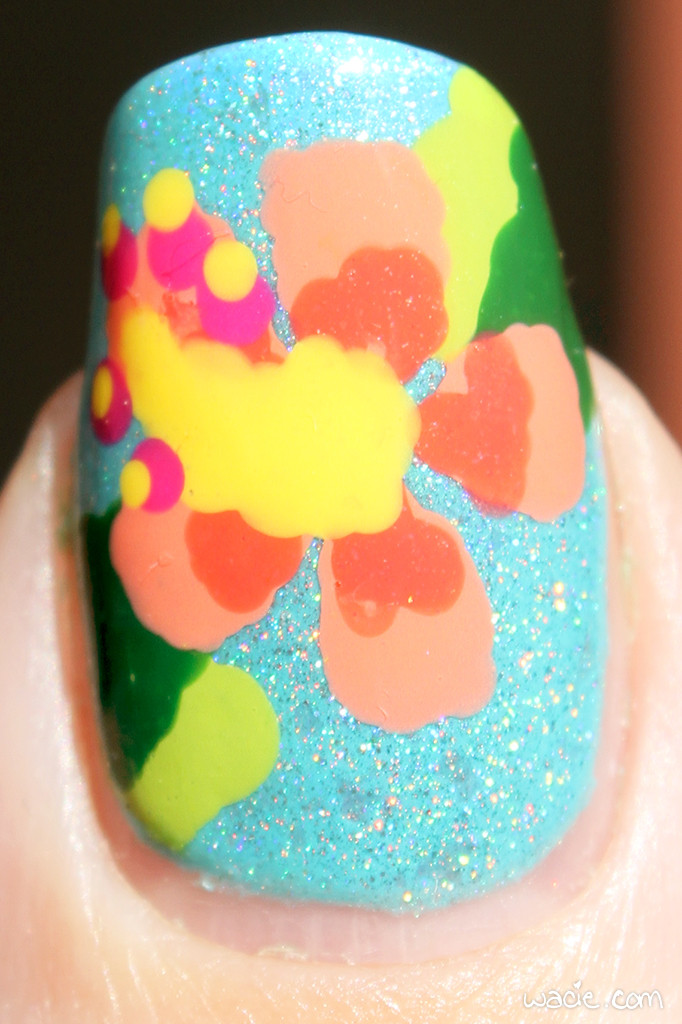
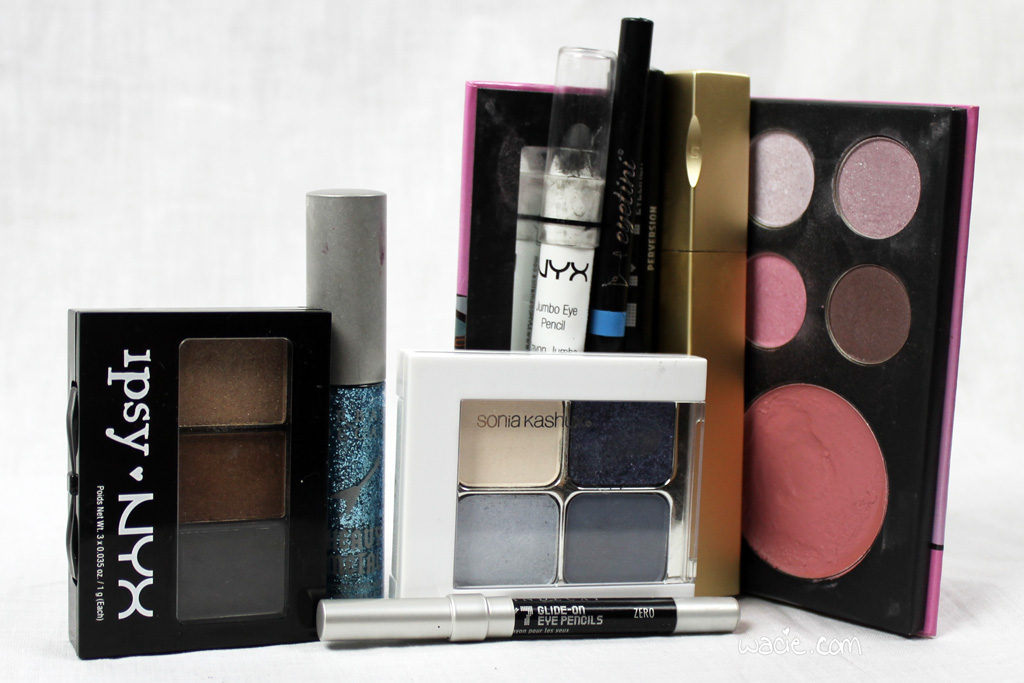
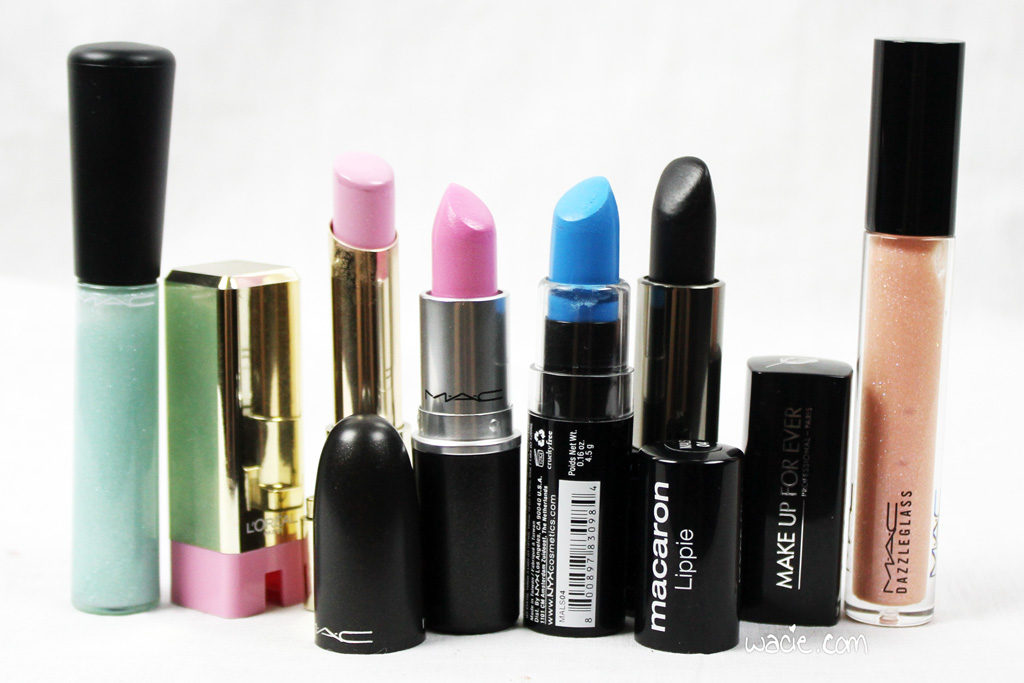
The products I’ve chosen for this season’s challenge were inspired in part by Pantone’s Colors of the Year, Serenity and Rose Quartz. There’s also a lot of black because I read at the beginning of the year black was going to be huge in spring. I don’t know if that panned out (hah) or not, but I loved the idea of pastels and black together, so that’s what this look is about. Typically, I buy the official products from Sephora, but this time I wanted to see if I could pull a look together without having to buy anything new. You’ll also see there’s a ton of stuff here, I guess I should note I don’t plan to wear all of this stuff at once. Let’s get to the products!
Face
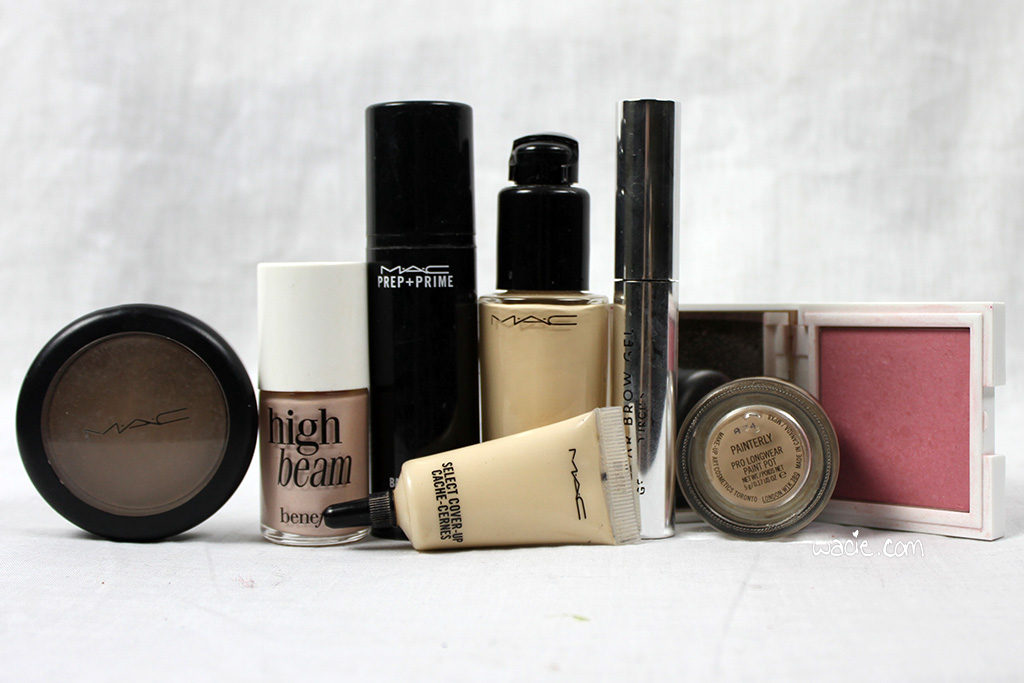
MAC Prep + Prime Skin Primer
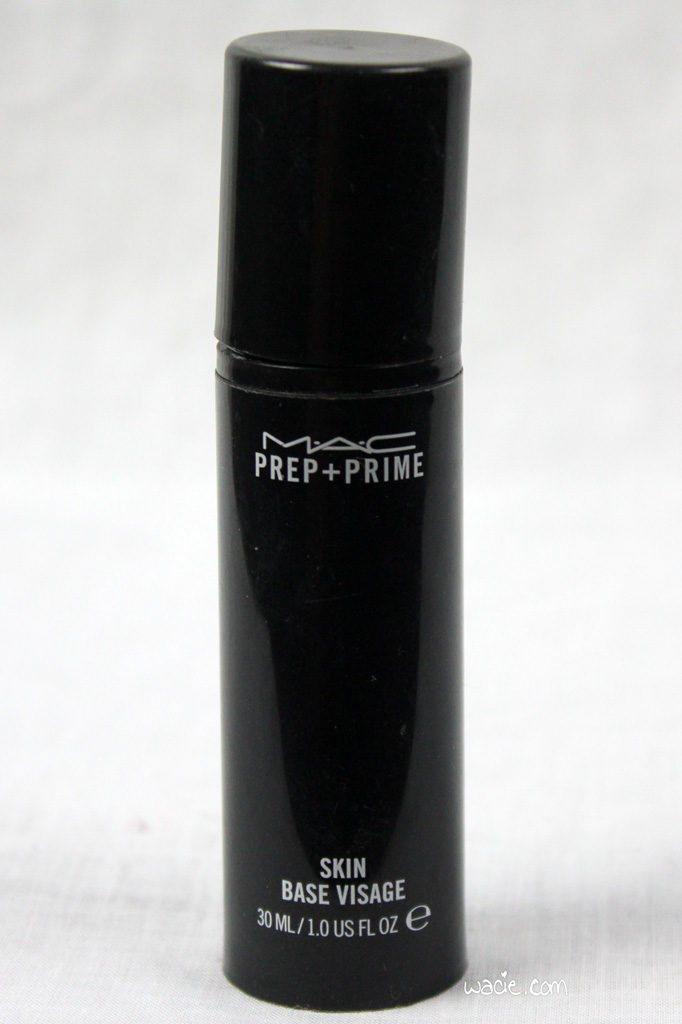
At the start of every makeup look is a workhorse primer. I bought this primer around the time I bought my foundation, so I’ll likely be running out of it before the challenge ends. I rather like how it works with the foundation, but it’s not my favorite primer ever. I really prefer the ones that feel less like moisturizer and more like a balm.
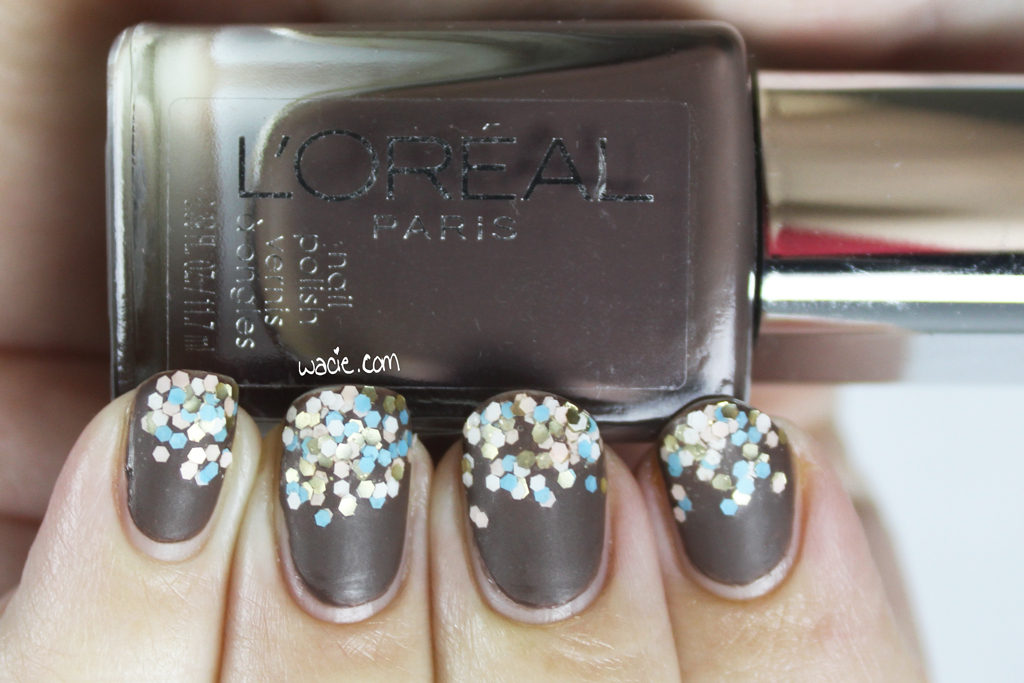
MAC Studio Fix Fluid SPF 15 in NW10
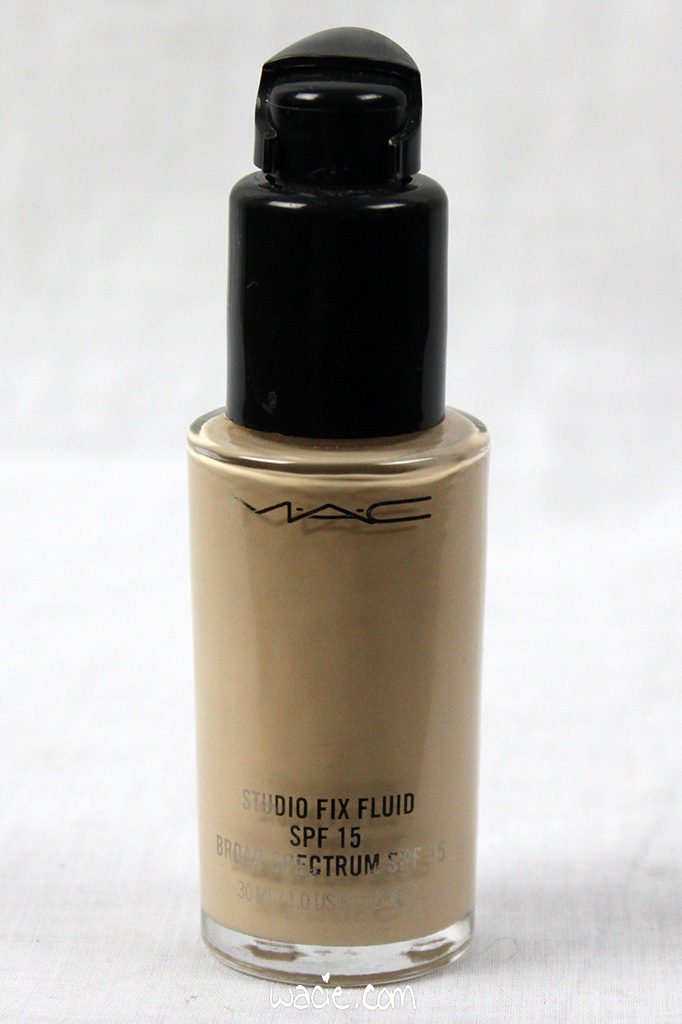
I’ve had this bottle for about two years now, I think. I only use it half the year, so it’s lasted me a long time. I’ve not been too fond of it, actually. I bought it because I was so pleased to have found a pale-enough foundation, but I really wish it had more coverage. If I finally run out this fall, I’ll be trying some new options.
MAC Select Cover-Up Concealer in NW15
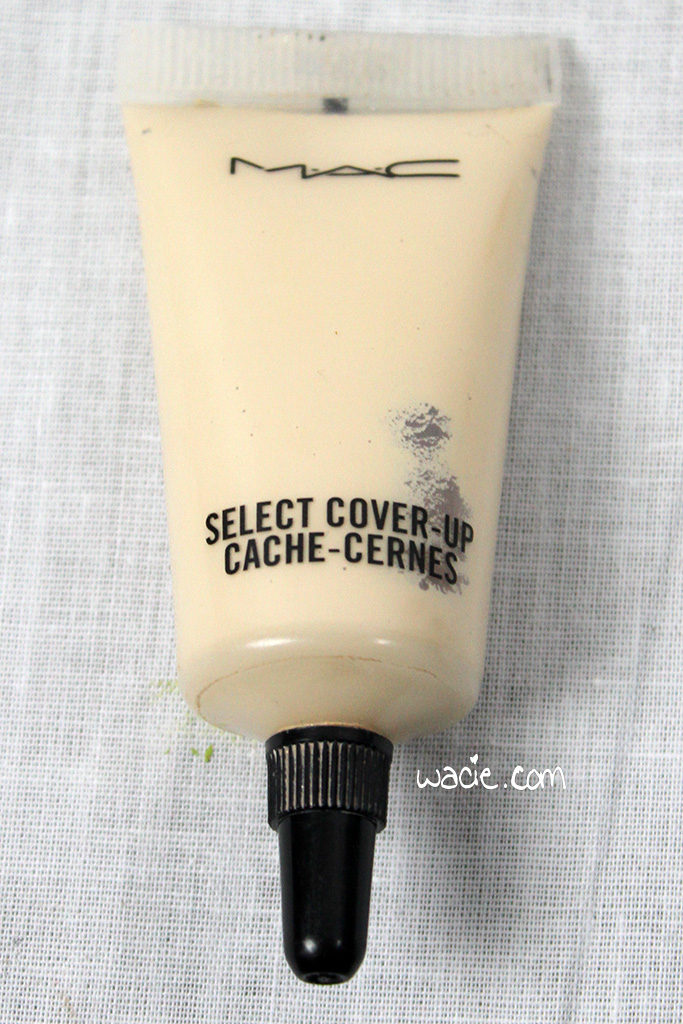
I’ve had this concealer as long as the foundation, and I’ve rarely used it. I didn’t like it under my eyes, but I use it occasionally, when I have a nasty zit or something. This is more of a just-in-case item.
Revlon Photoready Powder in Translucent (not pictured)
I was in a tight spot when I bought this powder and I fully expected to hate it, but I actually kinda liked it. I used it a good bit over the summer and it made my BB cream look like smooth foundation. I’m unsure if I’ll buy it again, but I’ve enjoyed using it.
Benefit High Beam Illuminator
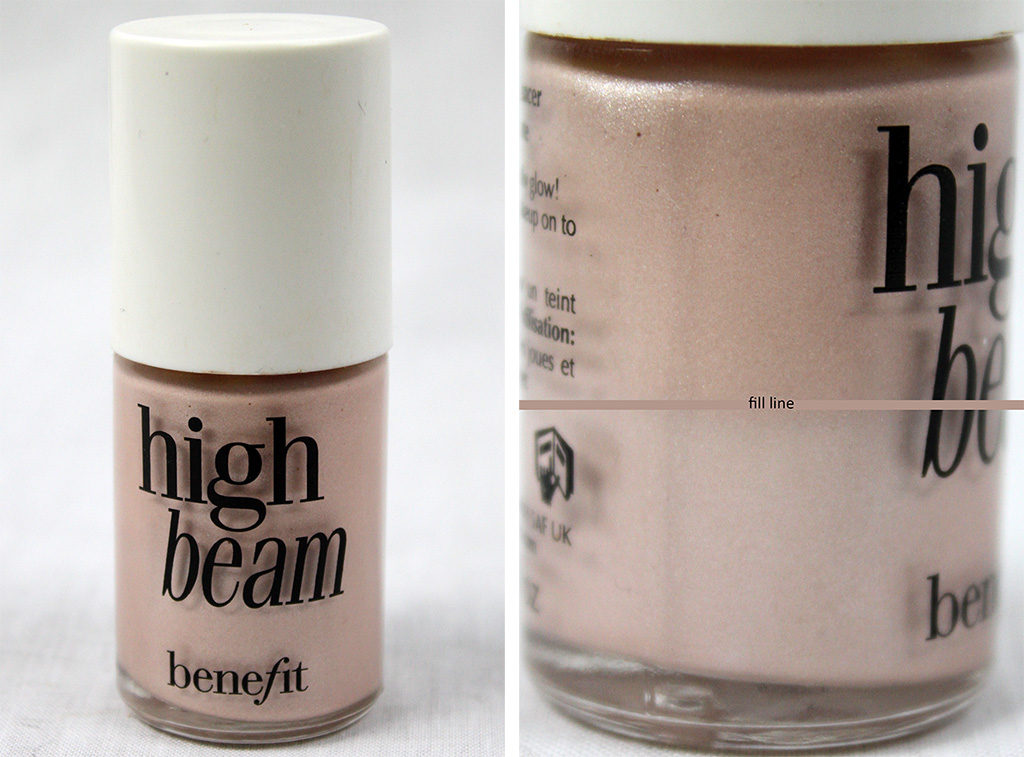
This is a product that’s been in my makeup bag way too long. I never really used it — or any highlighter — because I was afraid of looking too shiny or overdone or what have you. The Marc Jacobs Glowstick post I did some weeks back taught me not to fear the highlighter, and I started using High Beam with my regular routine. I’m not the biggest fan of it; it’s watery and doesn’t blend well into powder, but it’s already halfway gone, I can deal.
MAC Powder Blush in Taupe
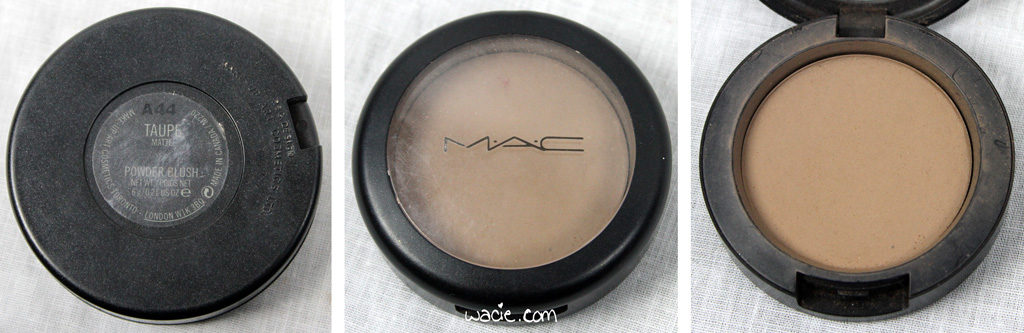
Here’s my contour shade! I feel like it’s a bit dark, but that’s what they gave me at the MAC counter, so here we are. I’m using a light dust around the sides of my nose, my hairline, and my chin. I’m not contouring my cheekbones here because my face lacks the natural cheekbone shape, and I can’t figure out how to contour without just looking like I got dirty.
Korres Zea Mays Blush in 16 Pink
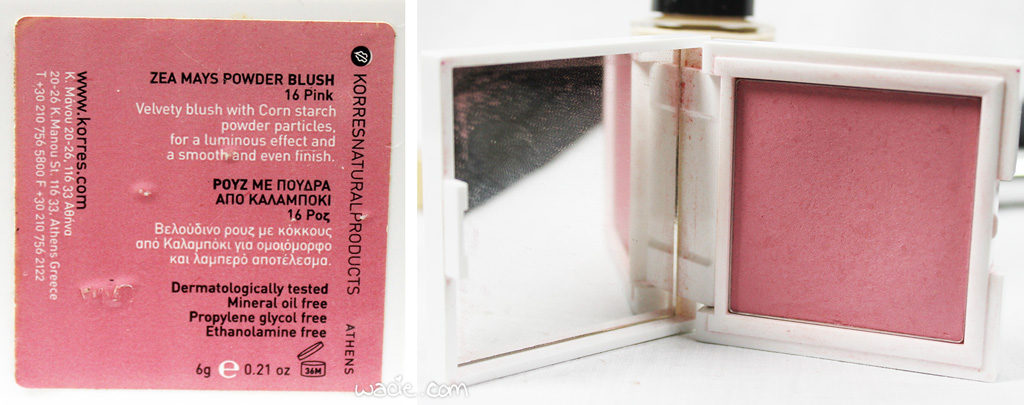
Now this is something I’ve had for a few years now. I love a pretty pink blush, and I thought pink would be the best color for a look with so many cool tones in it. This is also something I have to use with a light hand.
Anastasia Beverly Hills Clear Brow Gel
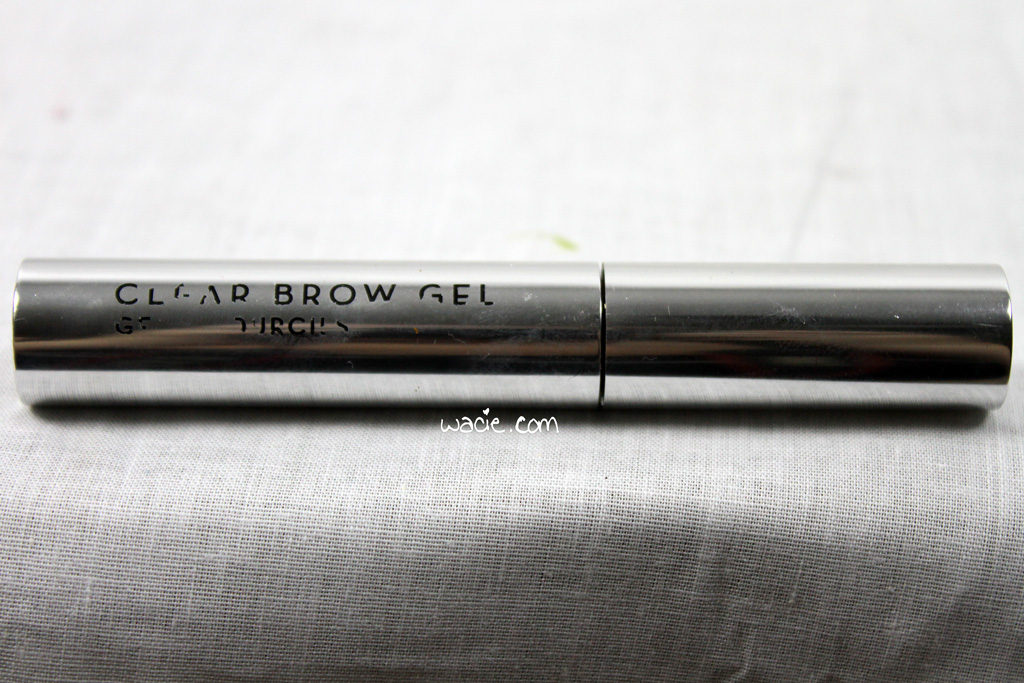
I use this year-round actually, and I’ve probably had this one particular tube for longer than I should. The spoolie is still wet and delivers product, so it’s still good to me. I’ll probably use it until the spoolie is dry and crusty and has dingleberries on it.
Anastasia Beverly Hills Beauty Express for Brows and Eyes in Brunette
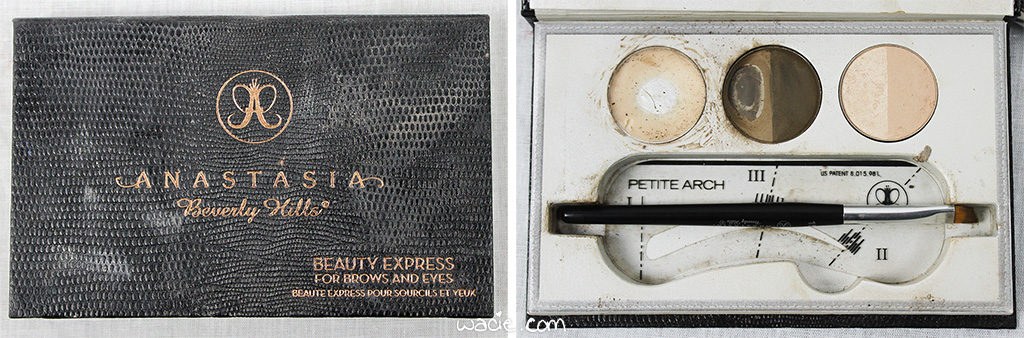
I tend to let my eyebrows go a little in the summer, but in the fall and winter, when I’m putting a little more effort into my look, I actually take the time to fill them in. I don’t use the wax in here too often, and I’m not sure if I’ve ever used the shadows, but the brow powders are pretty great. Sorry about the palette photo, I should have cleaned it up a little before I took it. Even I’m a little grossed out by that one.
NYX Long Lasting Makeup Setting Spray in Matte Finish (not pictured)
I’d heard a lot of good things about NYX’s setting sprays, so when I finally saw one — when my local Target’s NYX display finally looked like it hadn’t been picked over by wild animals — I picked one up. I love a good setting spray, even if it does seem like a really frivolous product.
Eyes
MAC Pro Longwear Paint Pot in Painterly
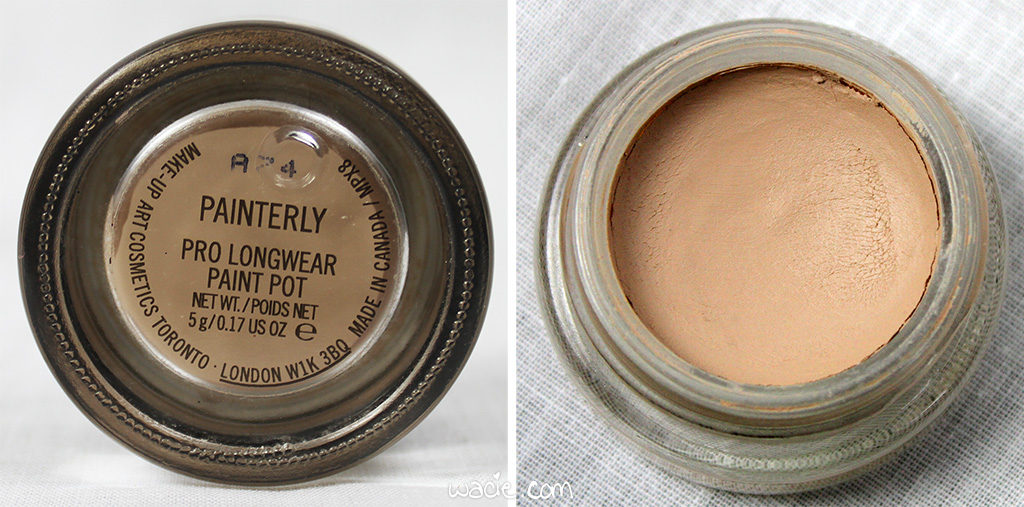
This cream eyeshadow is doing double-duty as my eye primer this round. I love this stuff; it doesn’t budge and lasts forever. Nearly everything I put on over it looks amazing and stays on until I take it off.
NYX Jumbo Eye Pencil in Black Bean
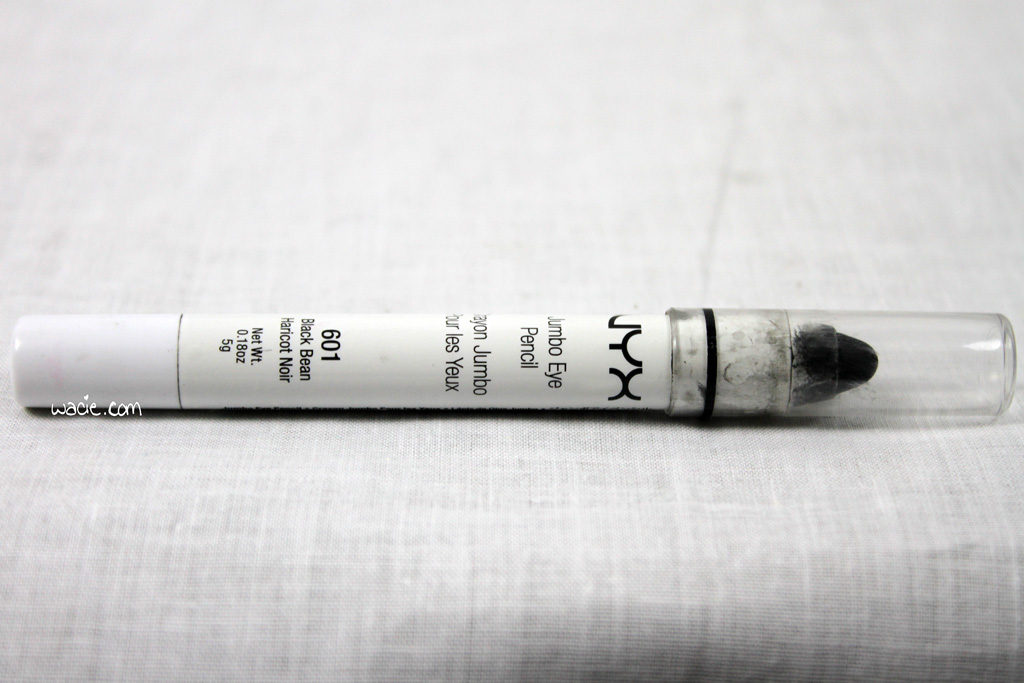
So I said Painterly is a perfect base for nearly everything, right? Black shadow looks fine over it, too, but could still use some help. Black Bean is like a helper primer for this look. When I use this on my lids, I get the blackest smokey eye I could ever want.
ipsy + NYX Neutral Trio
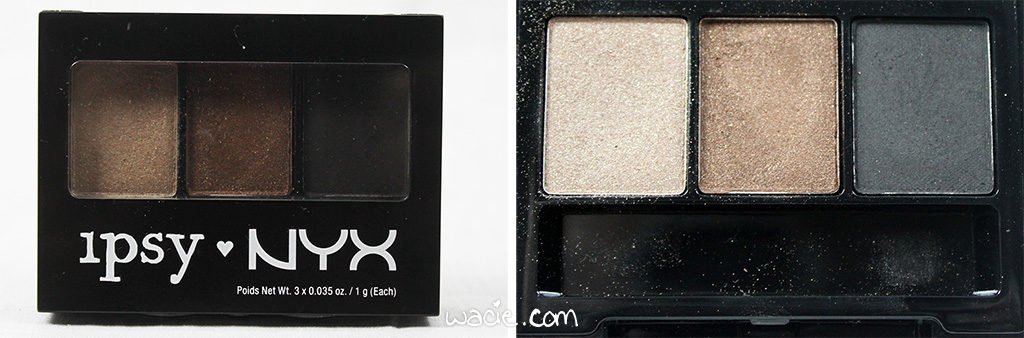
While this will be a mostly bright and colorful look, I also want some black. I chose this palette for the matte black shadow, but the two lighter neutrals are coming in handy for blending and whole-lid coverage.
Sonia Kashuk Eyeshadow Quad in Queen of the Blues
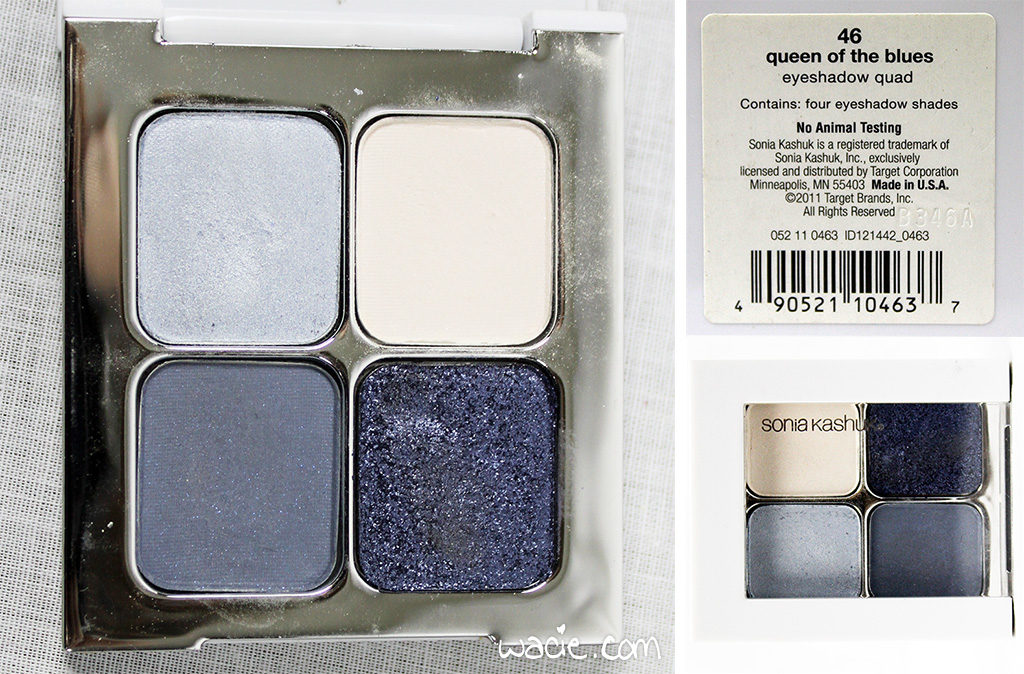
It was really tough to find a blue in my collection that worked for what I wanted. It’s so hard to believe that, out of like the hundreds of single eyeshadows and dozens of palettes I have, I could not find a light blue that actually showed up on my skin. This was the most Serenity-like blue eyeshadow I had, and I decided just to use the whole palette. The mid-tone blue was the one I like the best, but I can’t pass up that glitterbomb in the lower right.
Stila Collectible Travel Palette in Road to Radiance Across the USA
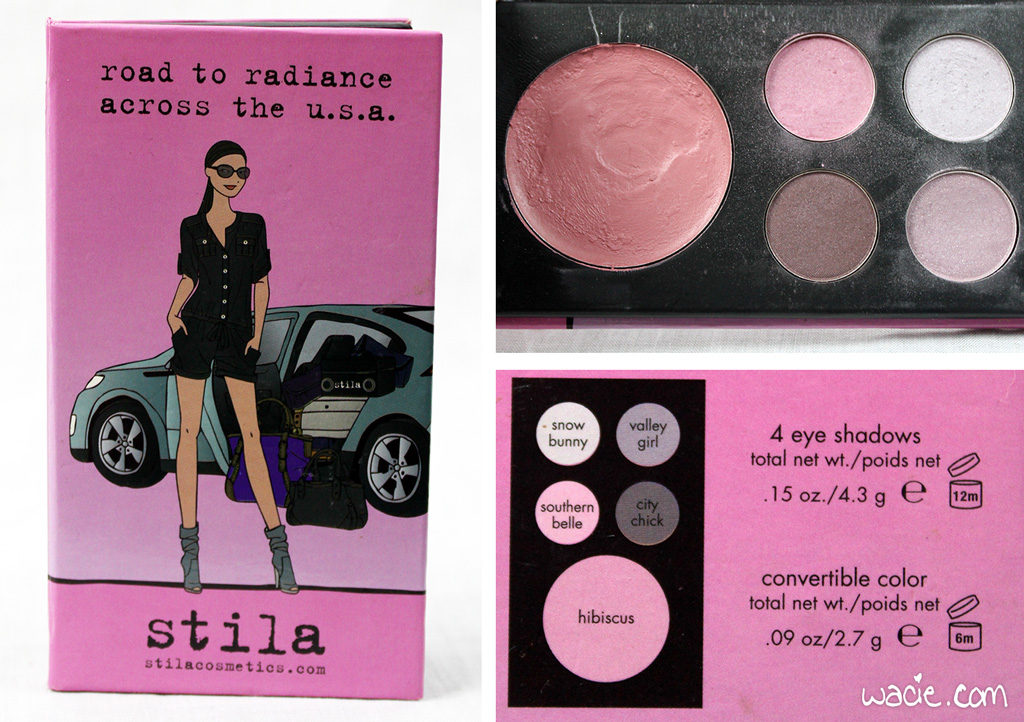
Do you remember these? There was a whole collection of these cute little palettes, each based on a different destination. For a whopping ten bucks, you got four shadows and a cream blush/lip product. This is many years old, so I don’t think I’ll be using the cream product, but the shadows will do nicely for my look. I had the same problem choosing pink colors as I did blue; everything I picked out was either too shimmery or too pale.
Urban Decay 24/7 Glide-On Eyed Pencil in Zero
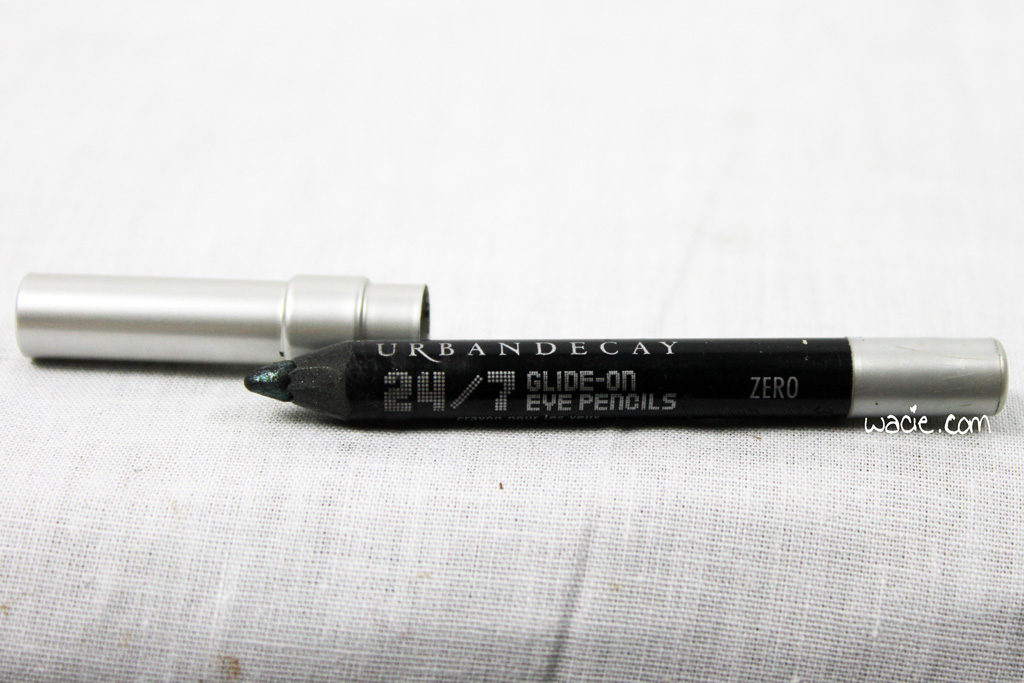
My all-time favorite eyeliner pencil is included in this look, of course. What’s a dramatic makeup look without a black eyeliner?
Urban Decay 24/7 Waterproof Liquid Eyeliner in Perversion
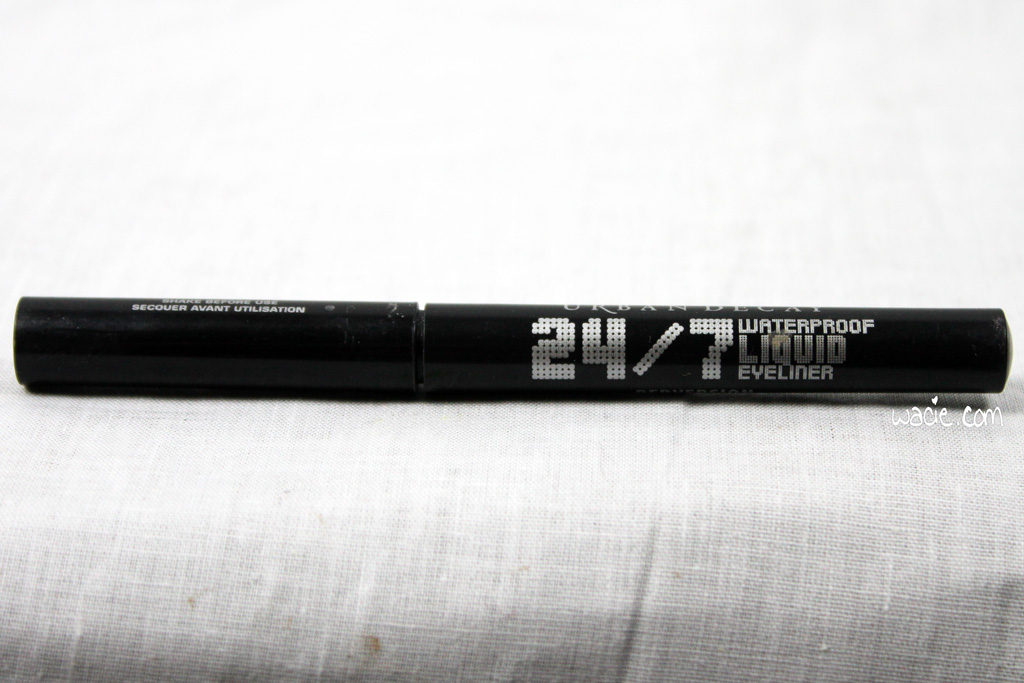
For my liquid liner needs. Liquid liner doesn’t get better than this stuff. Of course, I haven’t tried the new Razor Sharp liners yet.
Eyetini Swizzle Stick in Blue Hawaiian (not pictured)
Another ipsy bag grab! I only realized I had this when I was digging through a drawer looking for something else, and I saw it was just the right blue to match my lips, I decided to give it a go. I don’t know if I’ll use it that often, but I’ll keep it around.
Urban Decay Heavy Metal Glitter Eyeliner in Air Guitar
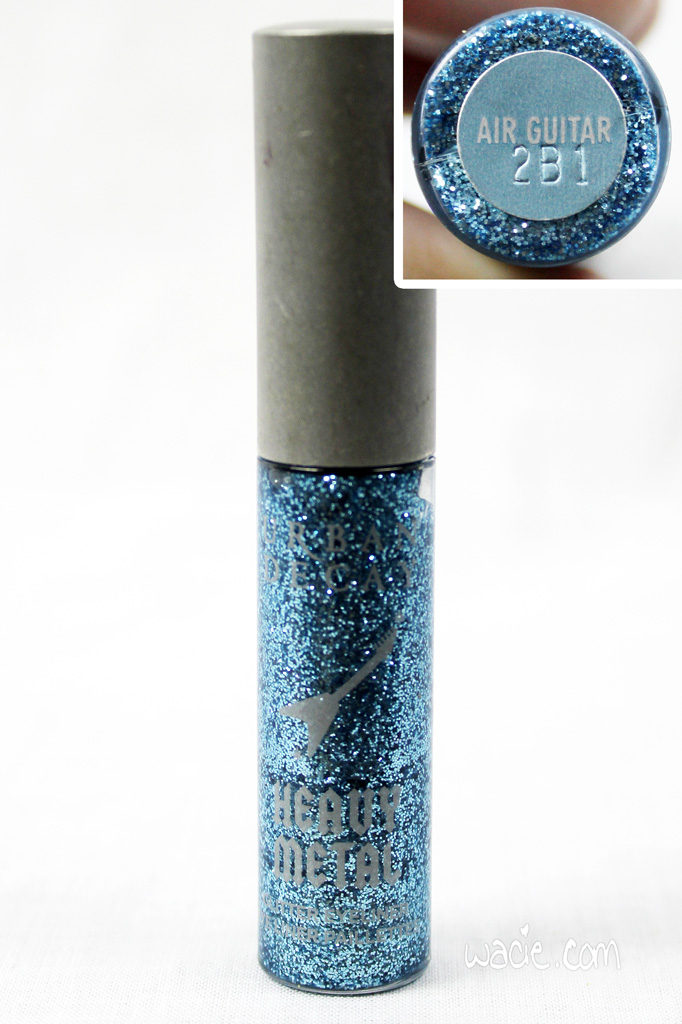
I’ve been buying the Heavy Metal liners for years now. I can’t get enough glitter, and this is my favorite way to add glitter to a dramatic eye. Again, I don’t know that I’ll be using this a whole lot, but if I do, I’ll likely be using it over the Blue Hawaiian liner, because it doesn’t bring enough color on its own. Really, I just like the option.
NYX Big and Loud Lash Primer (not pictured)
Holy cow, you guys. I picked this up on a whim because I was dreading having to buy another expensive Lancôme one. I will never buy that Lancôme one again. I’ve already got pretty long natural lashes, but this one seriously makes my lashes twice as long. I almost want to do a whole post about it, I’m so impressed with it.
Clarins Be Long Mascara in Intense Black
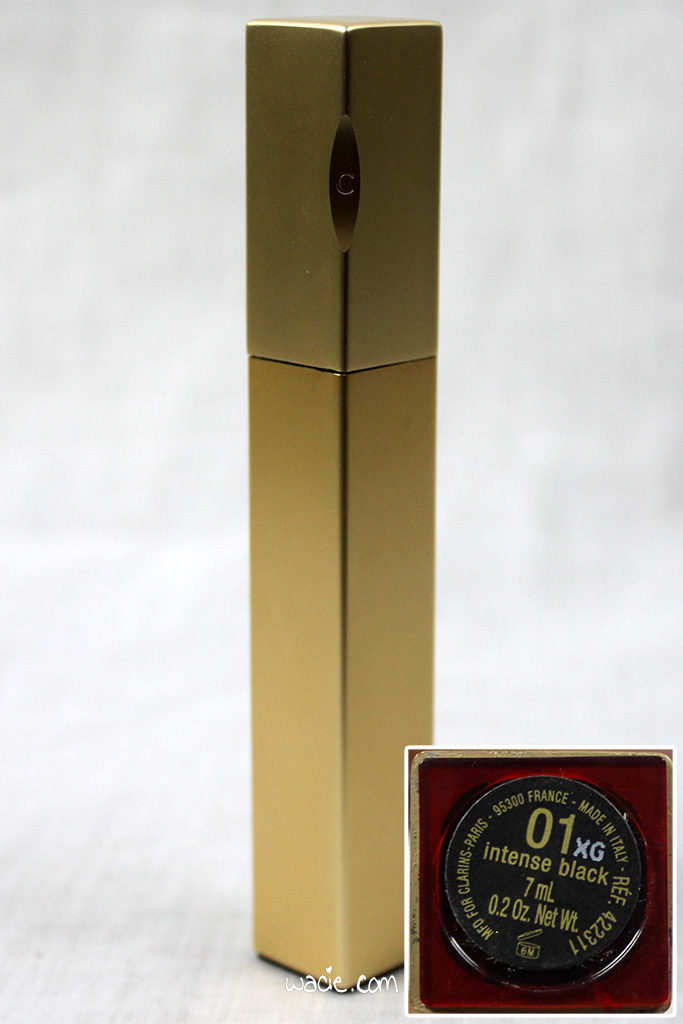
I don’t normally buy high-end mascaras, but a pushy Nordstrom sales lady sent me home with this one. I have to say, it’s not terrible. She assured me that it was going to make my natural lashes even longer, but I never noticed a change. It makes my lashes feathery and long, but doesn’t add a lot of volume or plumpness, so a lash primer is a necessity. I also wore this mascara last winter, which I know is a big no-no, but it was expensive and there was still some in there.
Lips
MAC Prep + Prime Lip Primer (not pictured)
Of course I use a lip primer. I’m not using liquid lipsticks this round like I totally should be, so I need all the help I can get keeping the creamy traditional lipstick on. This is actually my second tube of this.
Obsessive-Compulsive Cosmetics Cosmetic Colour Pencil in Anti-Feathered (not pictured)
This is my favorite clear liner, and I use it for every lipstick I don’t have a matched liner for. It’s already half-used and I’ll probably be done with it by the winter. It’s the best.
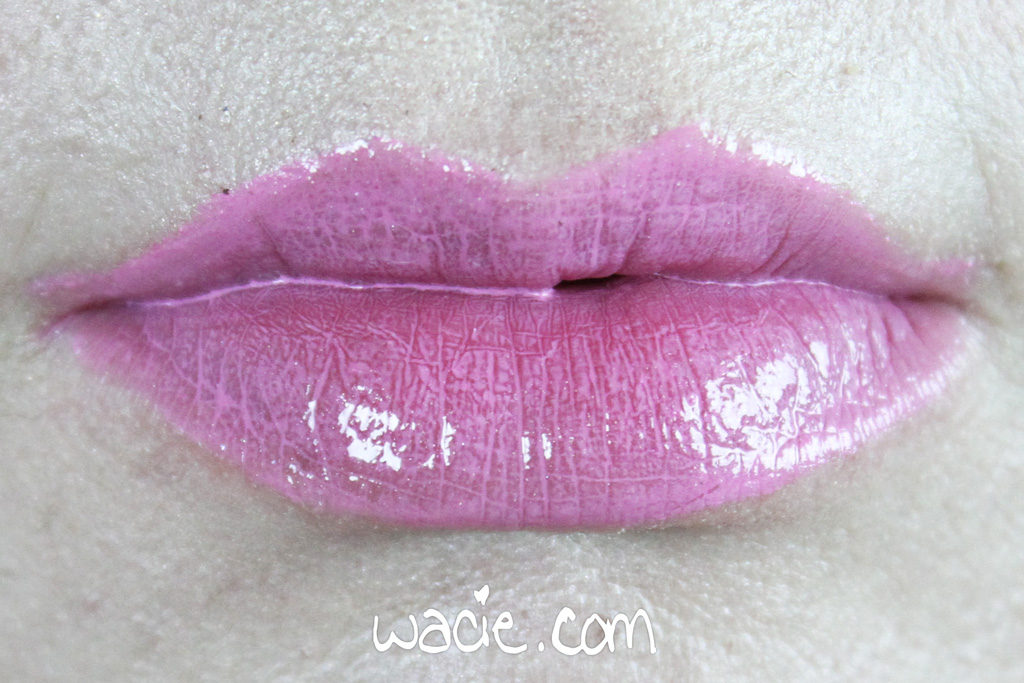
MAC Amplified Lipstick in Saint Germain
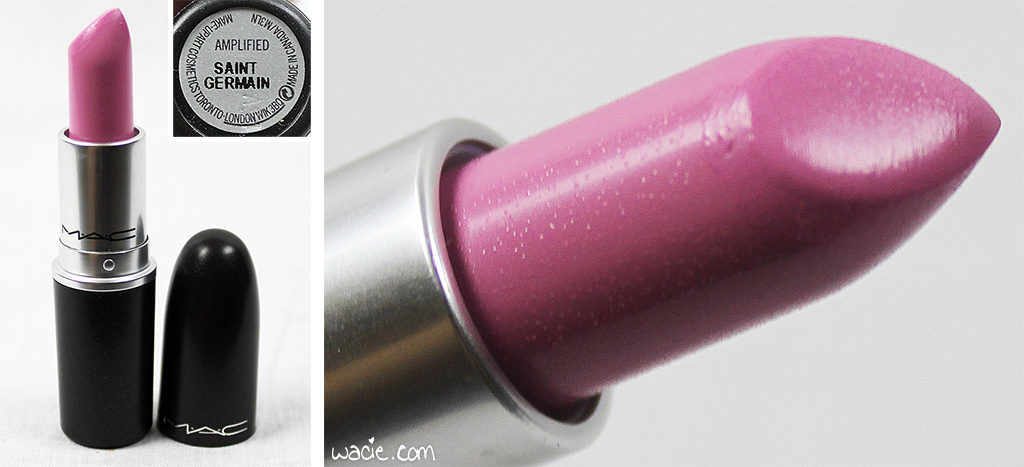
Here comes the good stuff. This pink lipstick is creamy, bright, and so pink it kind of hurts to look at. It’s just what I needed.
NYX Macaron Lippie in Blue Velvet

The first time I saw these, I knew I had to have them, and I ordered all of them. Of course, until now, I’ve not worn any of them. This was the first blue lipstick I’d seen since the ’90s, and it’s both nostalgic and modern to me. I’m really excited and a bit nervous about wearing this out, but at the end of the day, it’s just a color just like pink is.
Make Up For Ever Rouge Intense Artist in 50
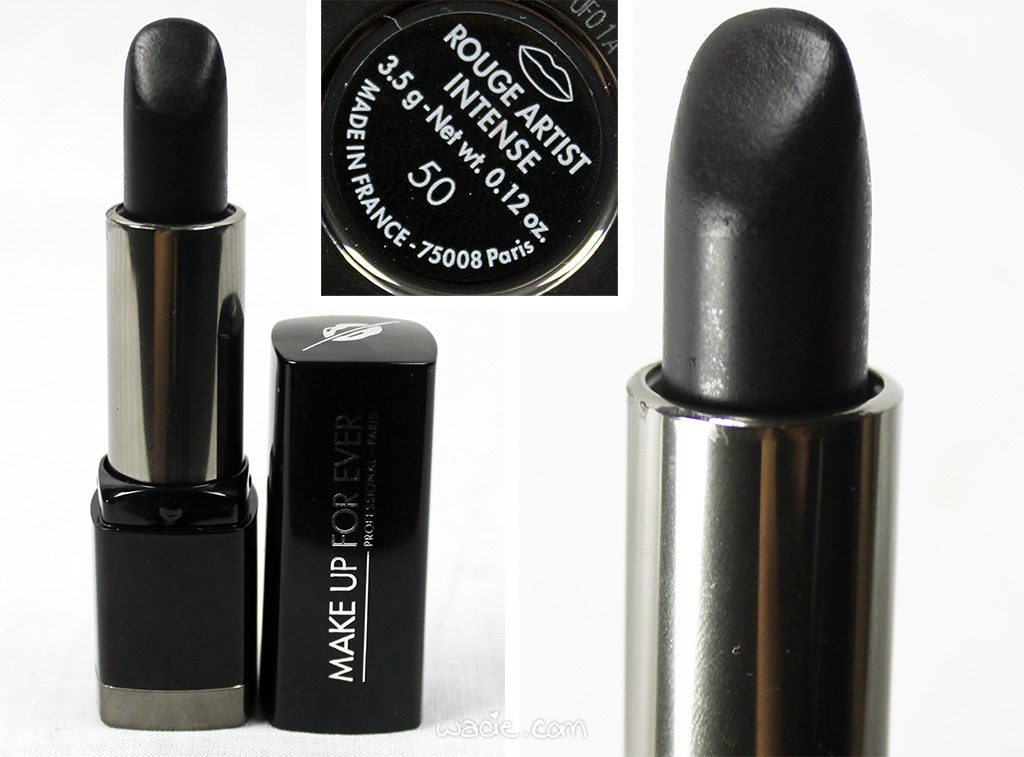
Here comes the black! I gotta be honest, I never dreamed that black lipstick would be sold somewhere other than costume shops around Halloween. Even more, it’s a chic fashion statement. The middle school goth in me isn’t sure if she should be horrified or pleased.
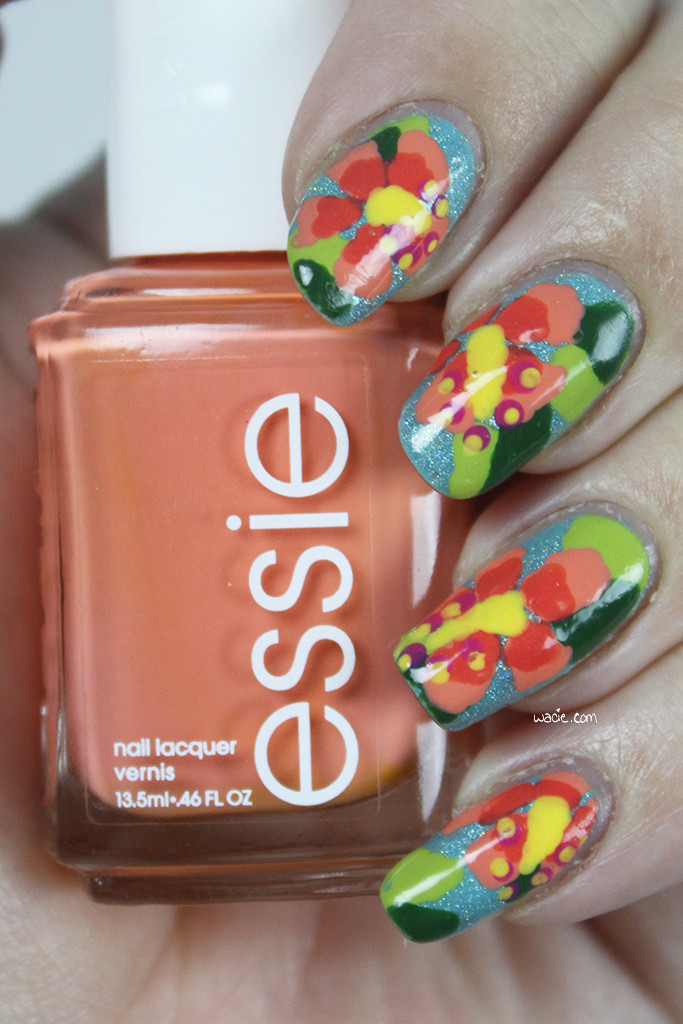
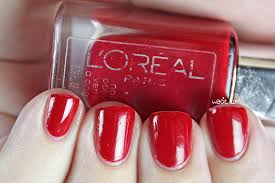
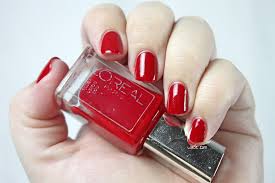
L’Oreal Colour Riche Lipstick in Pink Plum
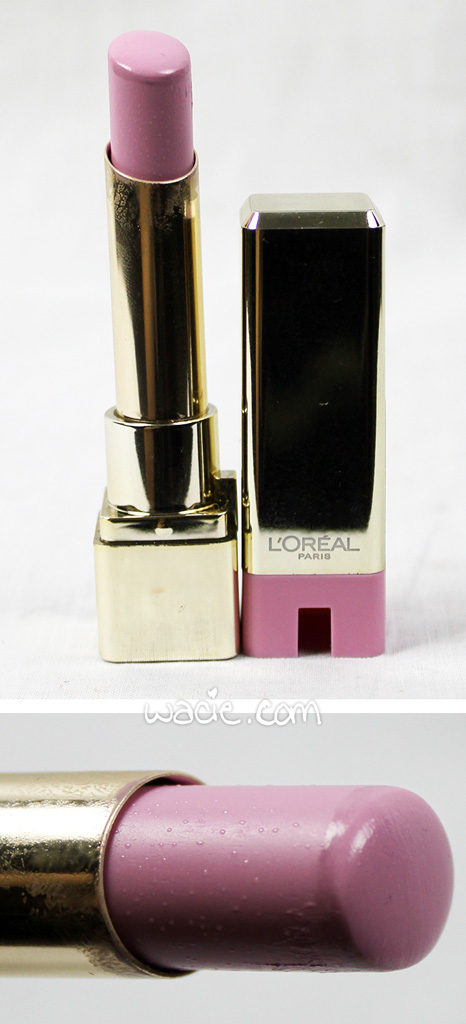
I added a fourth lipstick to this look in case, for some reason, ridiculous lipstick is out of the question. I got this out of a Walgreen’s sale bin, and it’s kind of nice. It’s a sheer pink, so it adds color without being too much. Again, I like having the option.
MAC Mineralize Glass Lip Gloss in Beautiful Moves
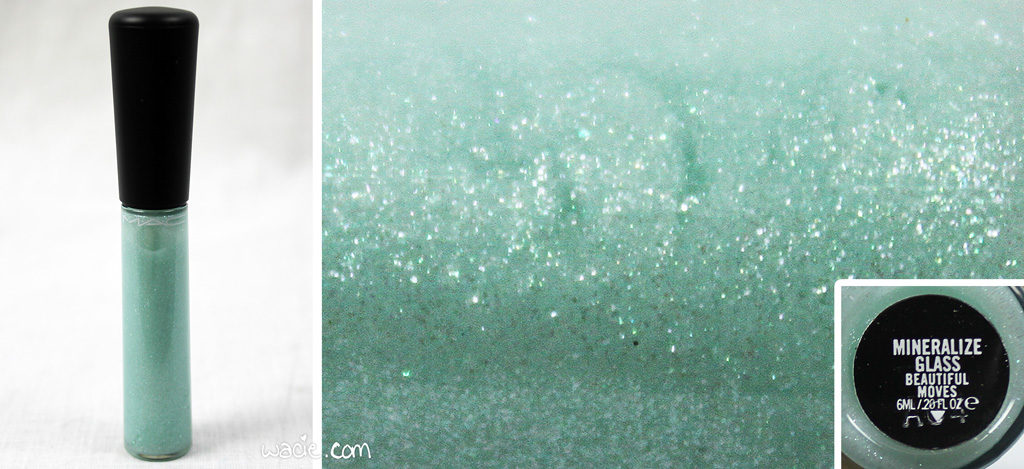
I will admit I bought this because I didn’t know when I’d see a blue-green lip gloss again. I love that I’ve found a use for it! As the challenge moves on, I’d like to be able to wear this over both blue and pink lipsticks, ensuring I get both Colors of the Year in one lip look.
MAC Dazzleglass Lip Gloss in Sugarrimmed
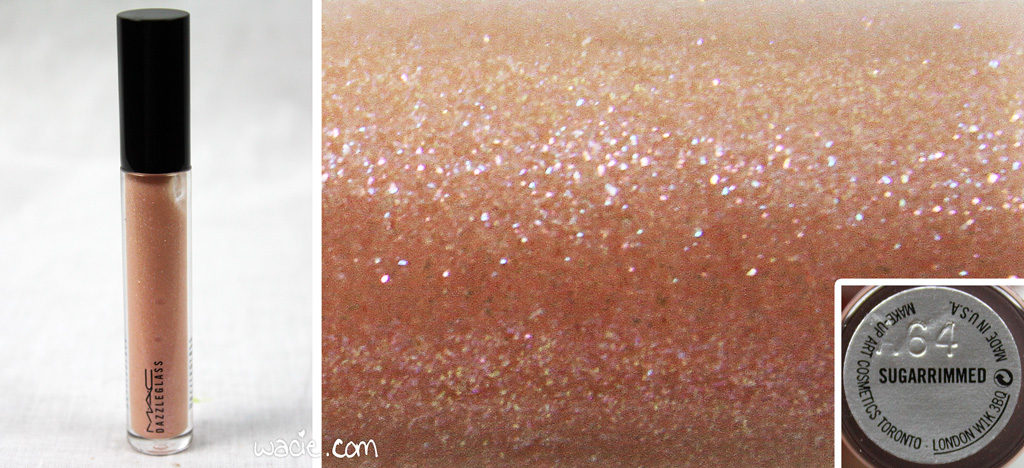
The same for this gloss. I love the pink sparkles over the blue lipstick. It creates a lot of fun dimension.
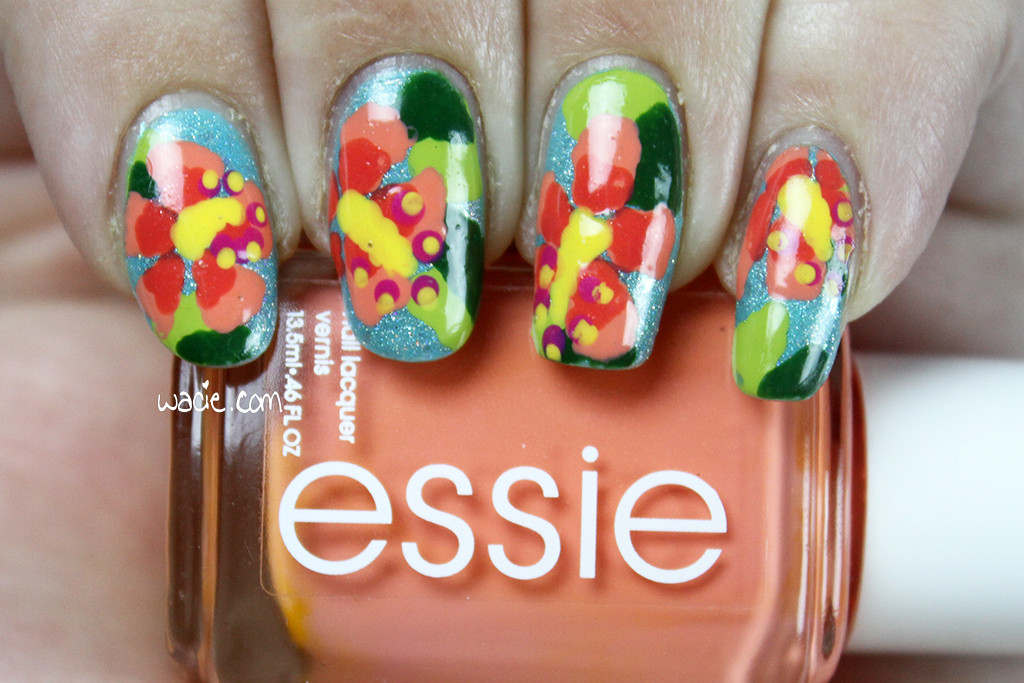
Here are some quick and dirty hand swatches for all of the above products:
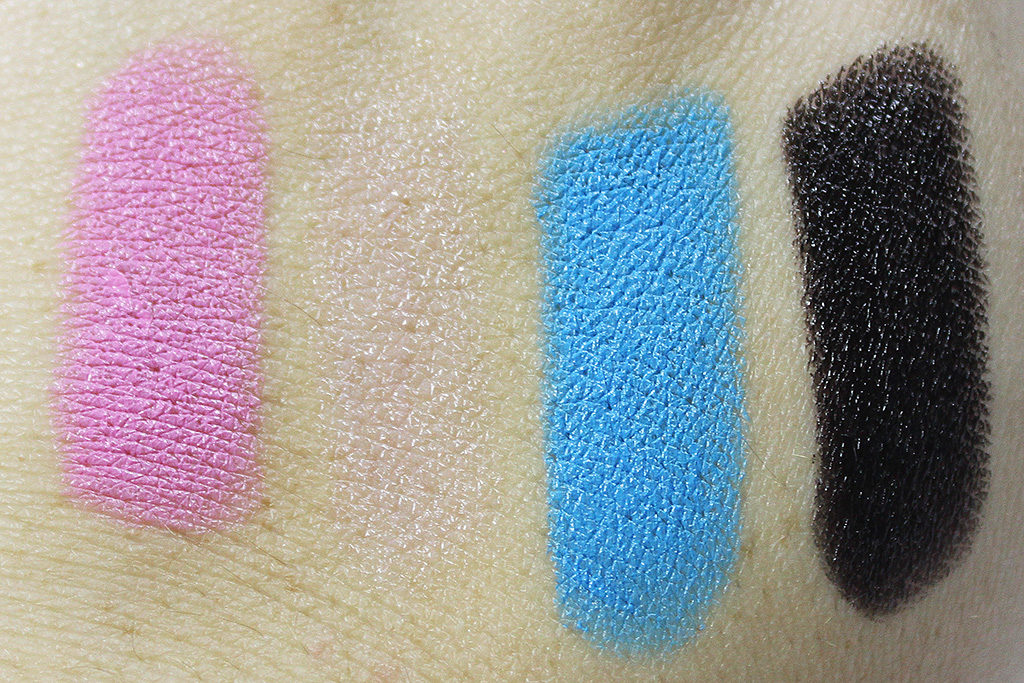
Lipsticks, left to right: Saint Germain, Pink Plush, Blue Velvet, #50
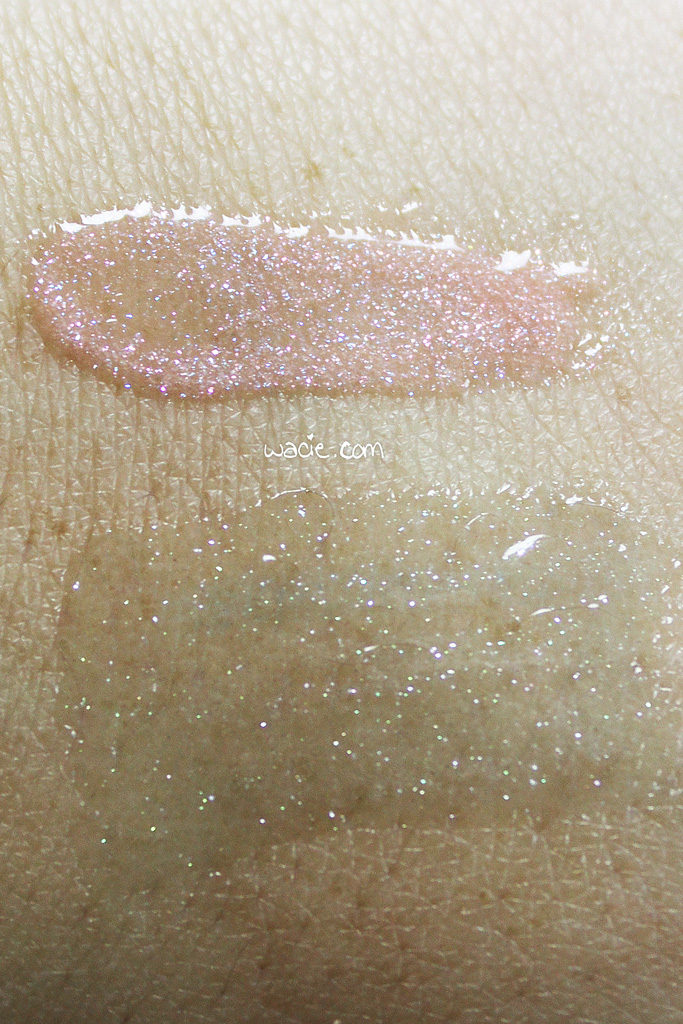
Glosses: Top, Sugarrimmed, Bottom: Beautiful Moves
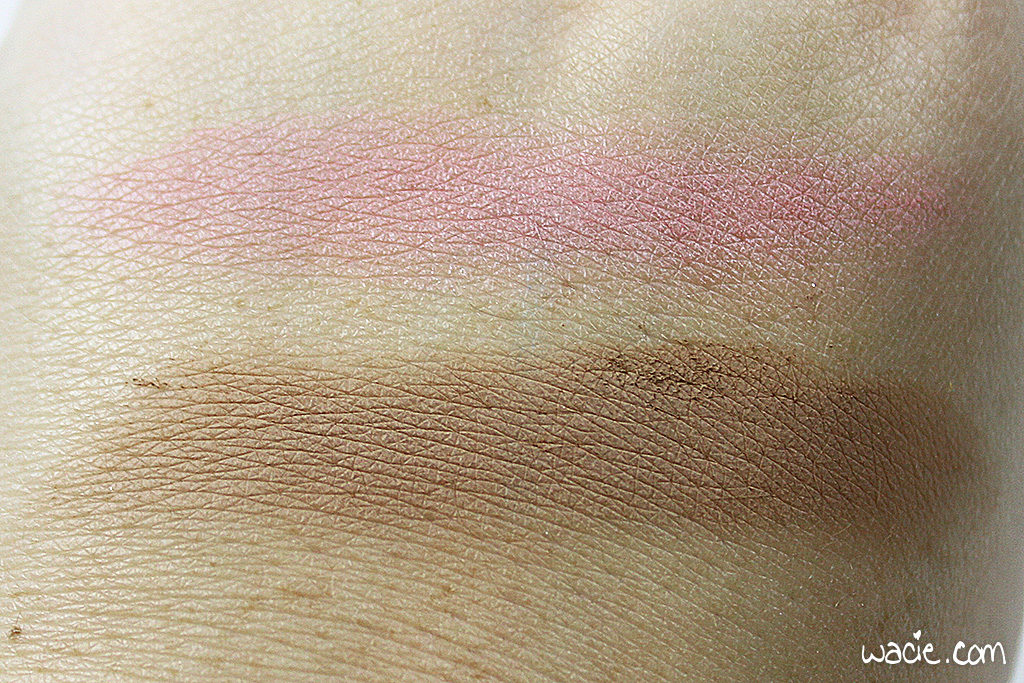
Blushes: Top, Korres Zea Mays blush, Bottom, MAC powder blush in Taupe
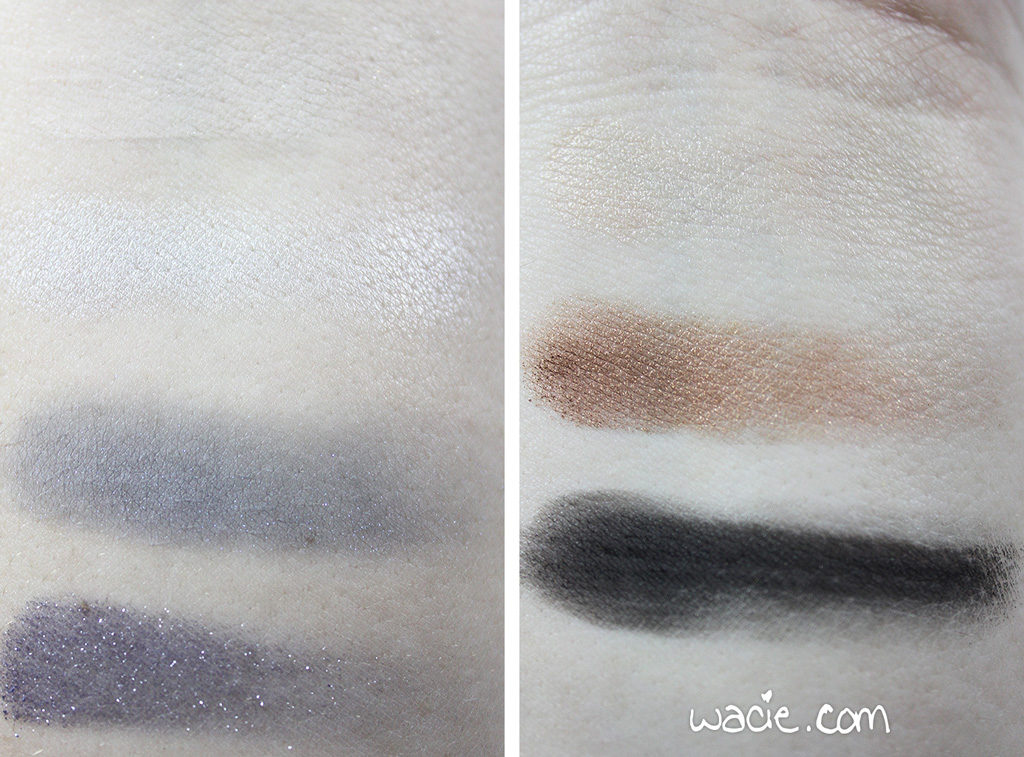
Eyeshadows, Left: Sonia Kashuk Queen of the Blues, Right: ipsy + NYX neutrals palette
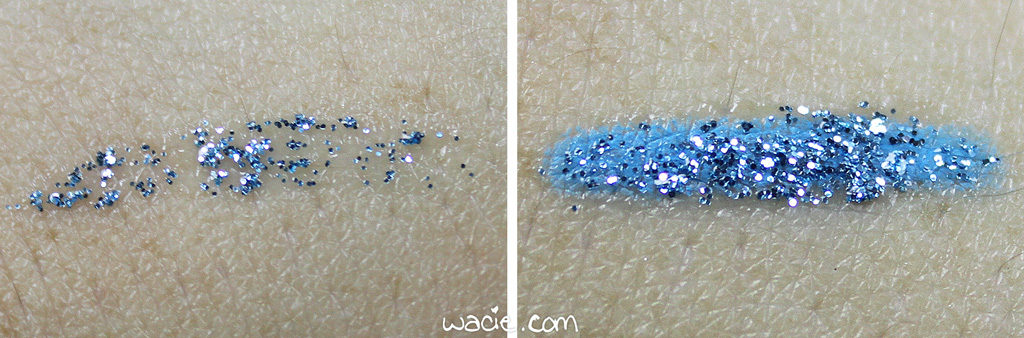
Heavy Metal in Air Guitar: alone on left, over Eyetini Blue Hawaiian on right
And, of course, what’s a makeup post like this without a preview of the whole look? I’m actually surprised how subtle this first round was; looking at the variety of products in this list and bright some of the colors are, I expected something pretty costumey, but it’s all really wearable together. Of course, I’m only dipping my toes in; I’m sure it’ll look a little more clownish when I get the blue lips out. I plan to rotate the products and colors in and out, but generally keep the same look.
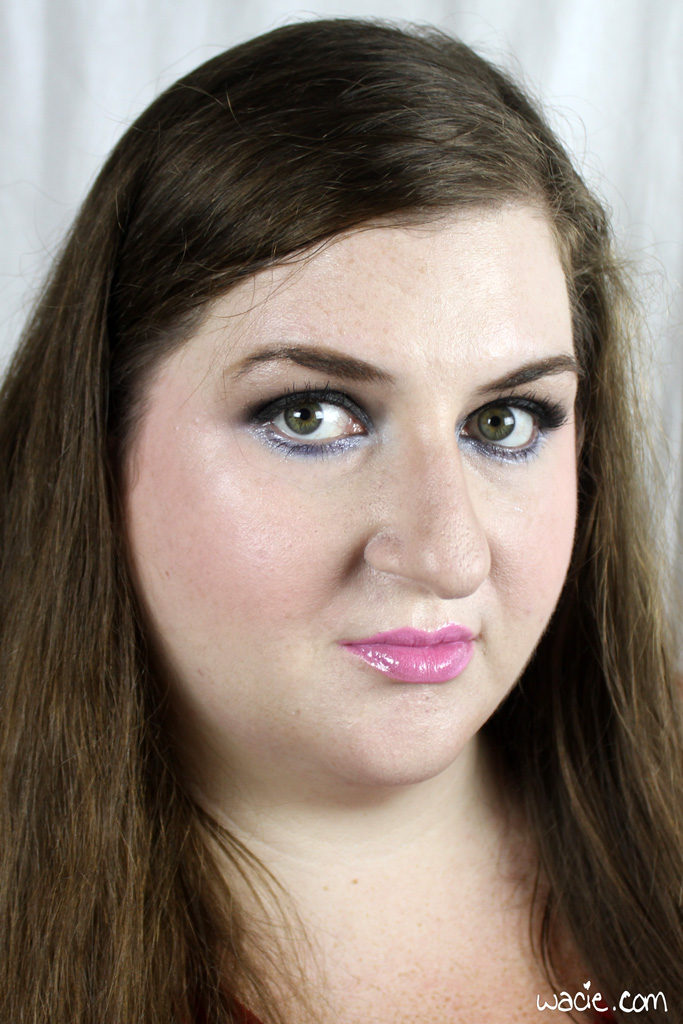
Here are the products I used for this particular face:
Face:
MAC Prep + Prime Skin Primer
MAC Studio Fix Fluid Foundation in NW10
Anastasia Beverly Hills Clear Brow Gel
Anastasia Beverly Hills Beauty Express Brow Powder in Brunette
Korres Zea Mays blush in Pink
MAC powder blush in Taupe
Benefit High Beam illuminator
NYX Long Lasting Makeup Setting Spray in Matte Finish
Eyes:
MAC Longwear Paint Pot in Painterly
NYX Jumbo Eye Pencil in Black Bean
ipsy + NYX neutrals trio palette (all shades)
Sonia Kashuk eyeshadow quad in Queen of the Blues (glitter shade, frosty blue shade)
Urban Decay 24/7 Glide-on Eyeliner in Zero
NYX Big and Loud lash primer
Clarins Be Long mascara in Intense Black
Lips:
MAC Prep + Prime lip primer
Obsessive-Compulsive Cosmetics Cosmetic Colour pencil in Anti-Feathered
MAC Amplified lipstick in Saint Germain
MAC Mineralizeglass lip gloss in Beautiful Moves
If you’ve made it this far, thank you so much for reading! I plan to post updates with new looks and product progress every month, so you’ll have the chance to see how some of these less conventional products are used. I’m really excited about this look, and I’m so happy to be sharing it. What products are you digging out now that it’s cooler outside? I want to know!
I bought these products myself.

 Loading InLinkz ...