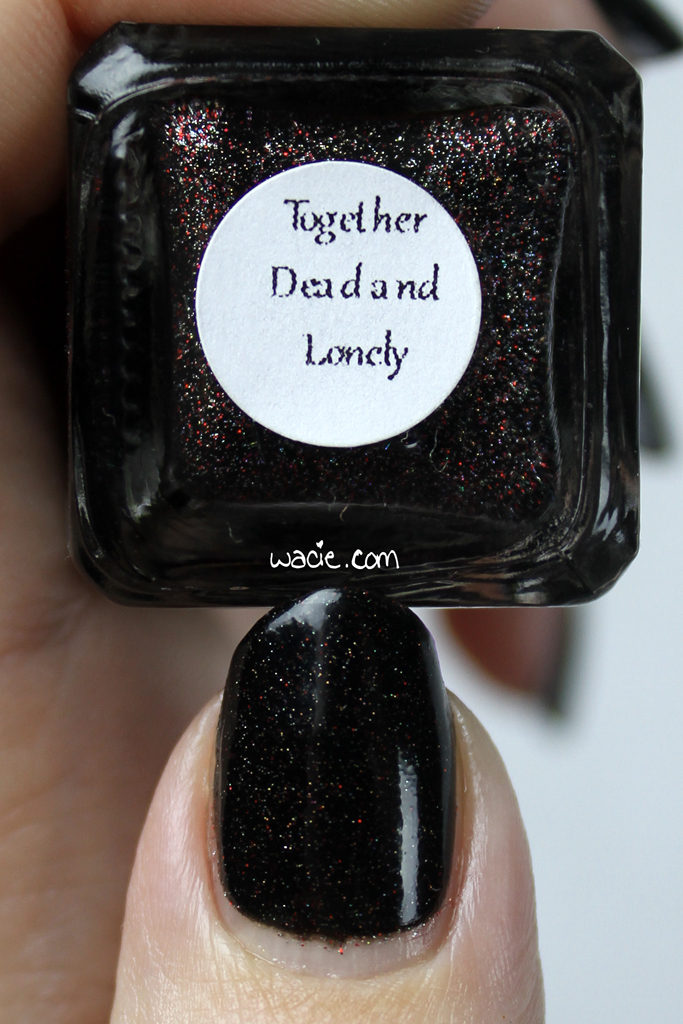
Swatch Saturday: Blue-Eyed Girl Lacquer’s Together Dead and Lonely

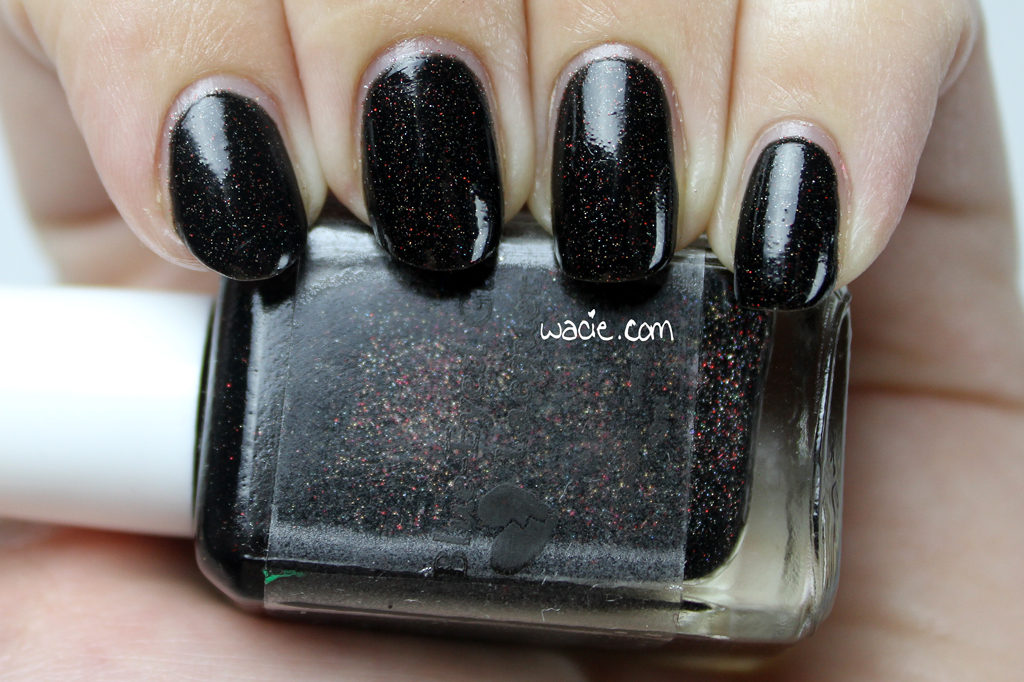
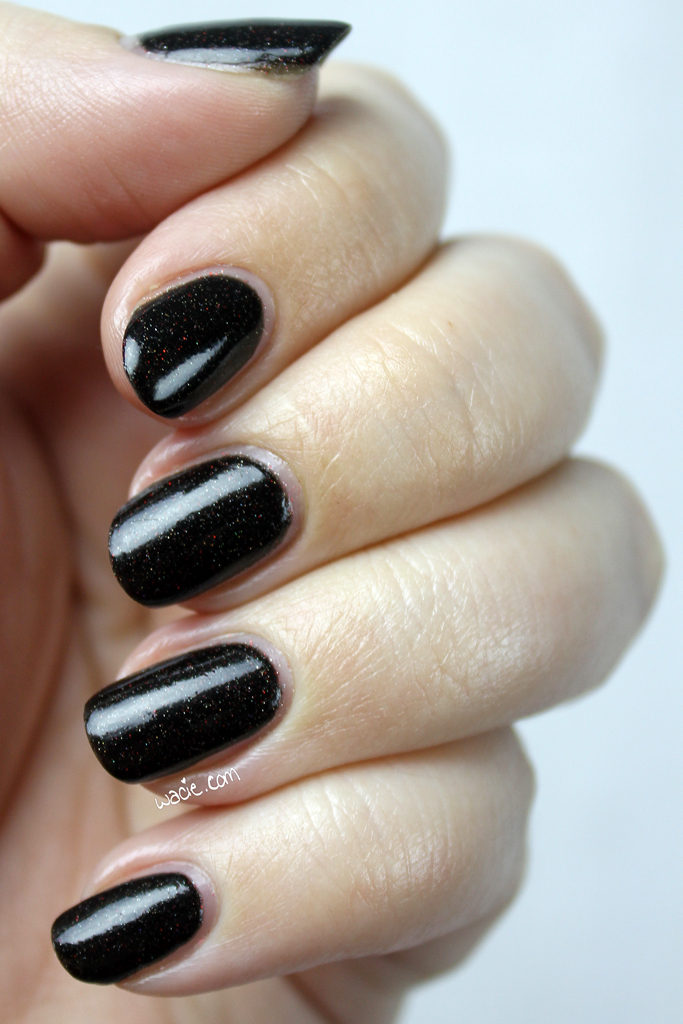
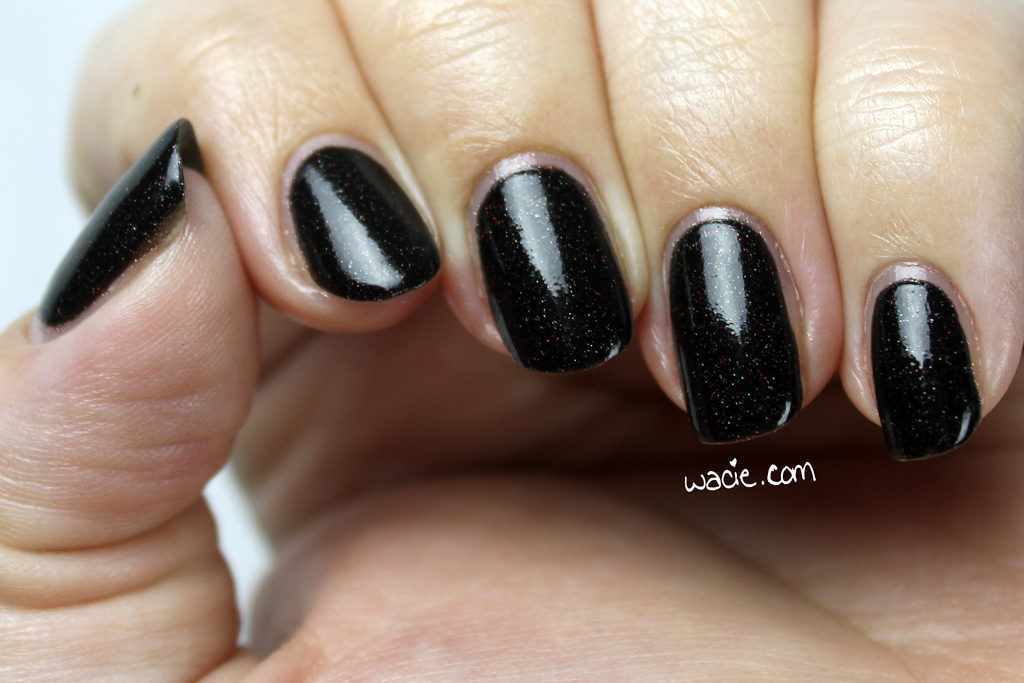
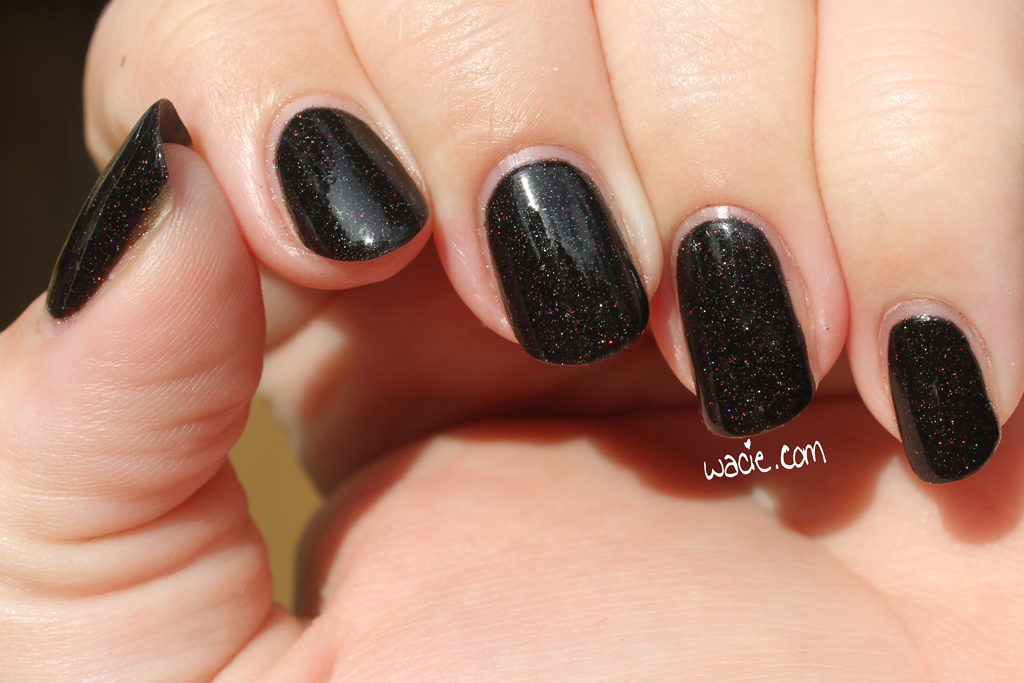
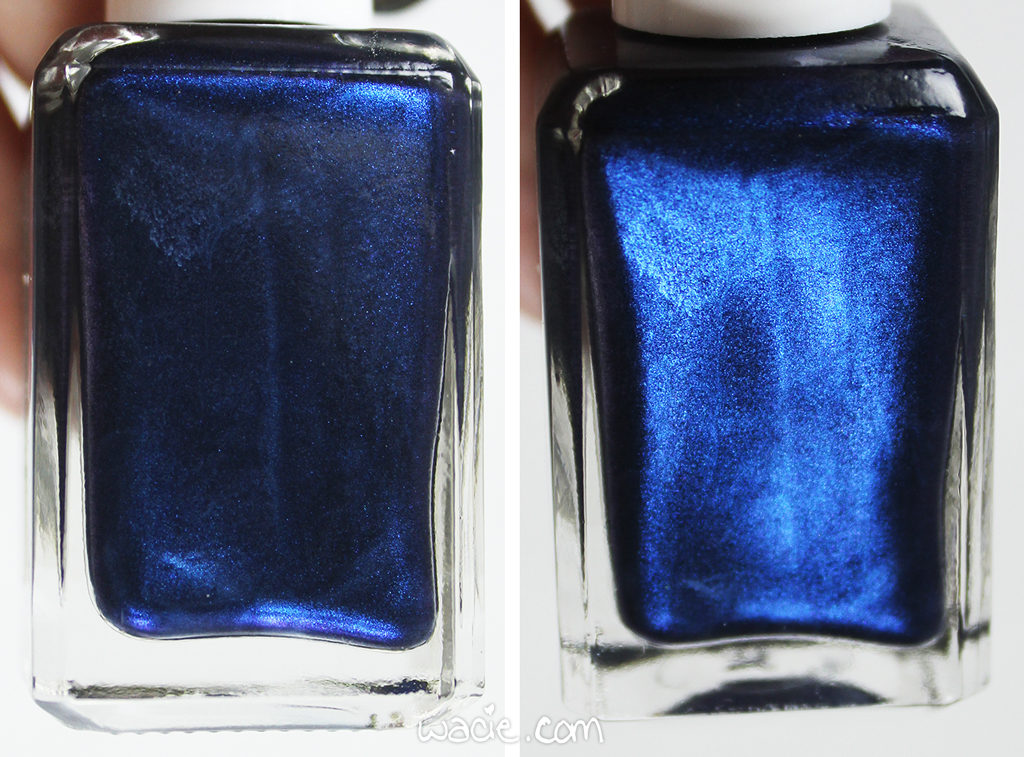
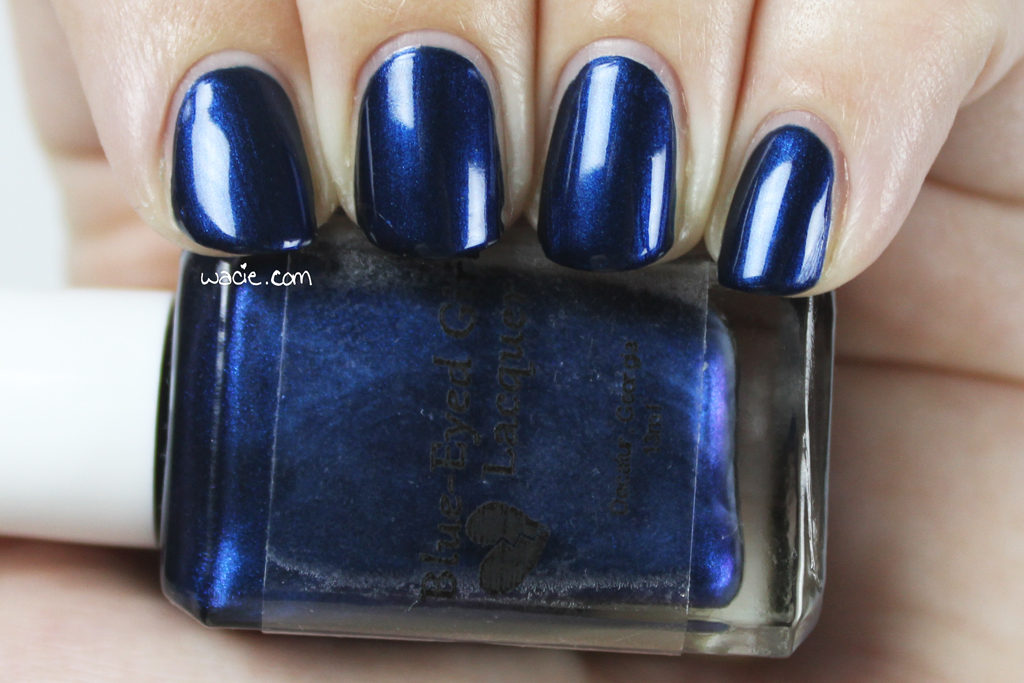
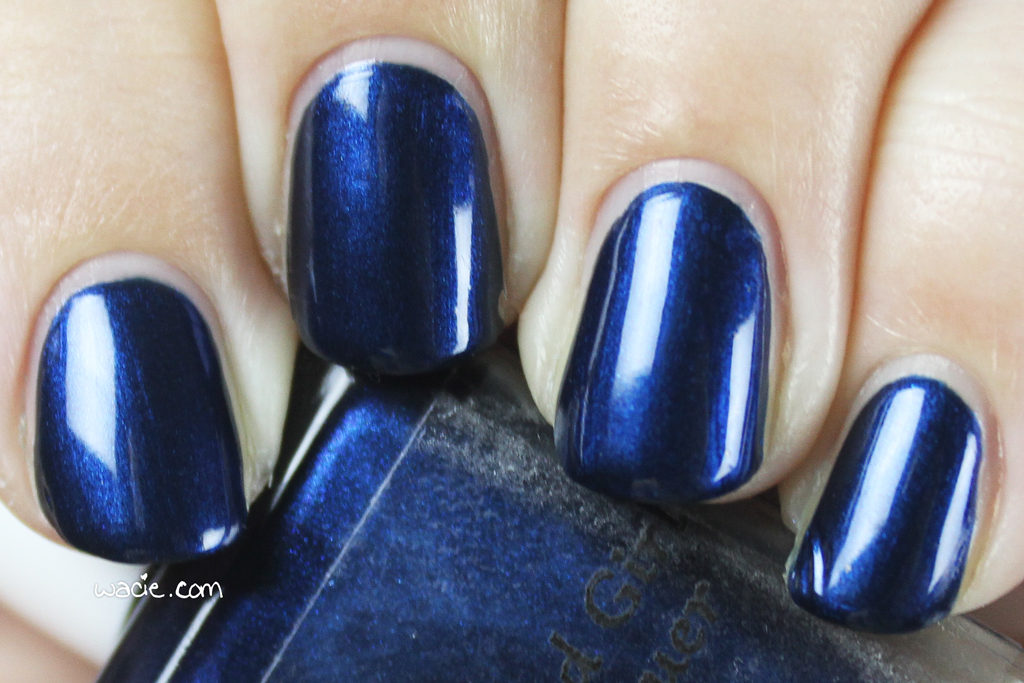
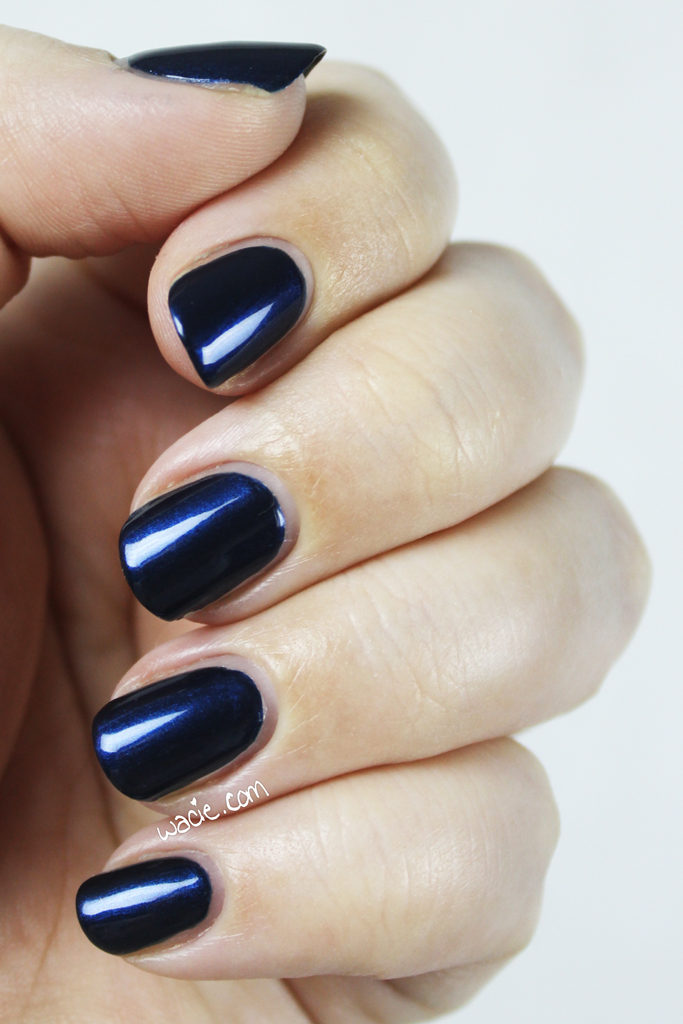
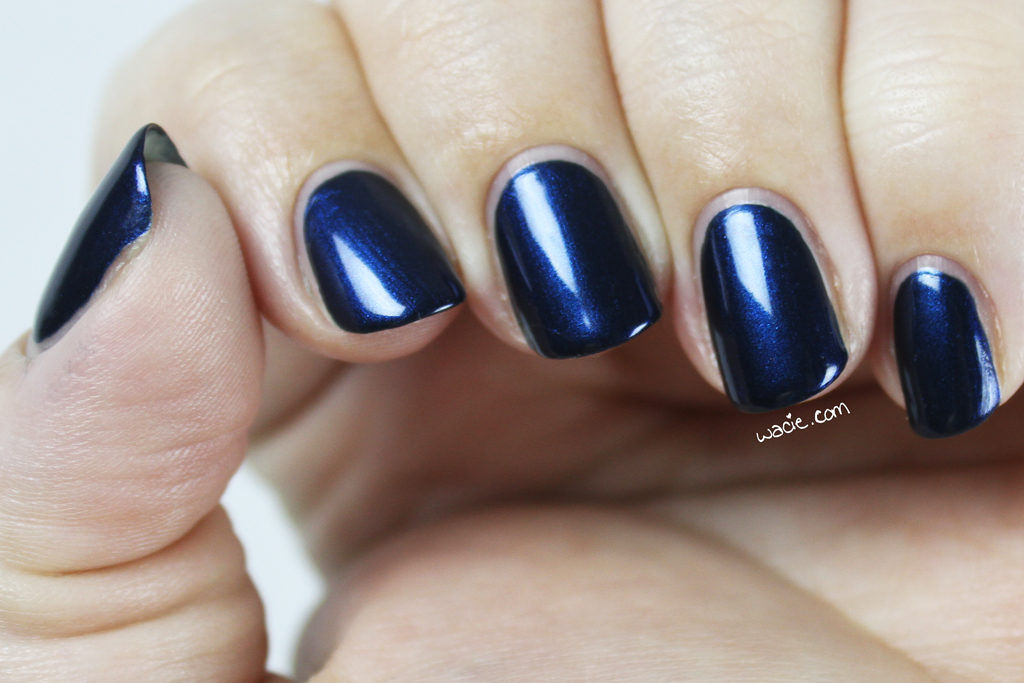
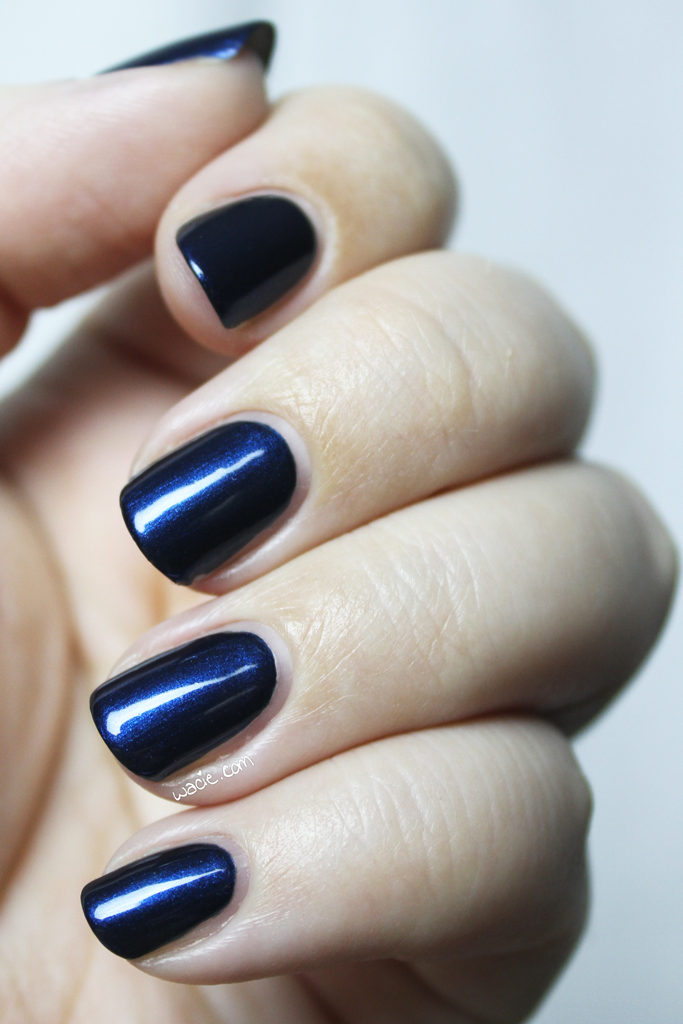
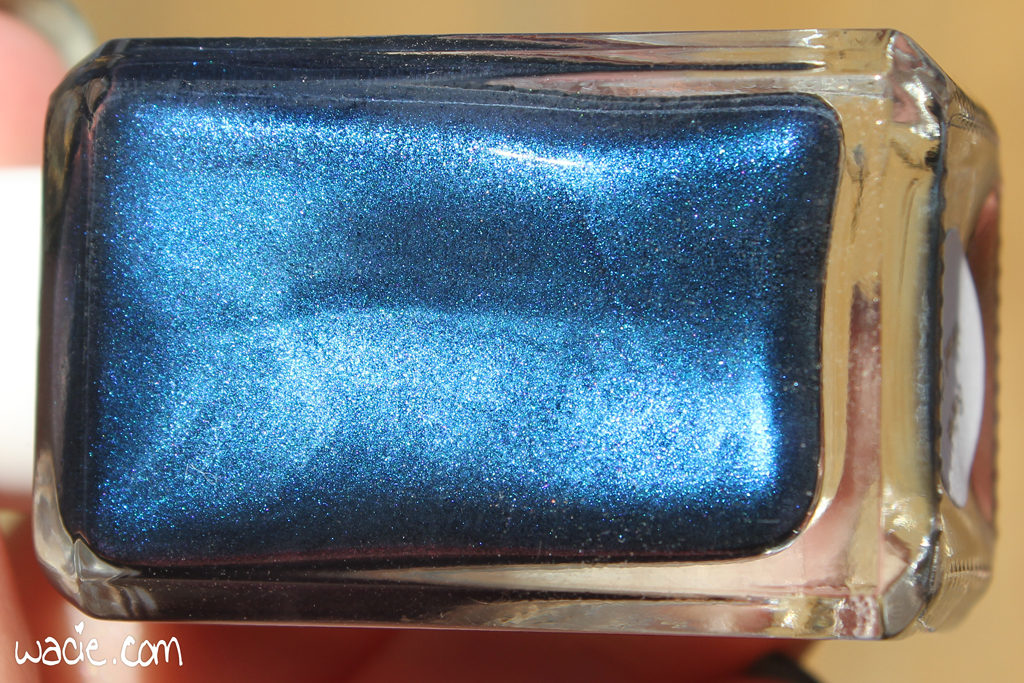
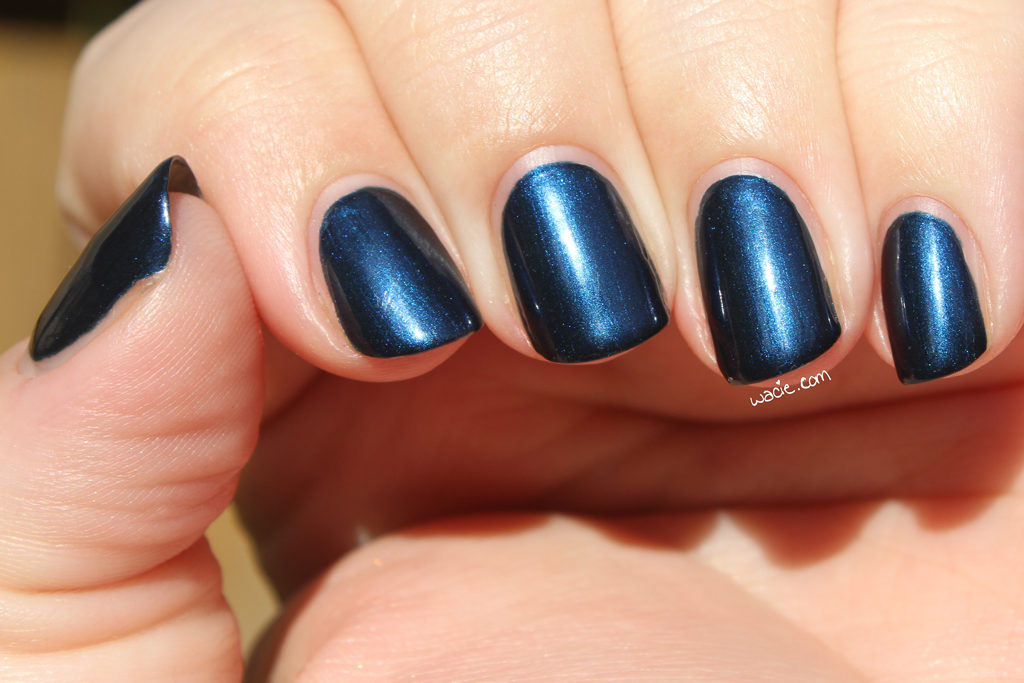
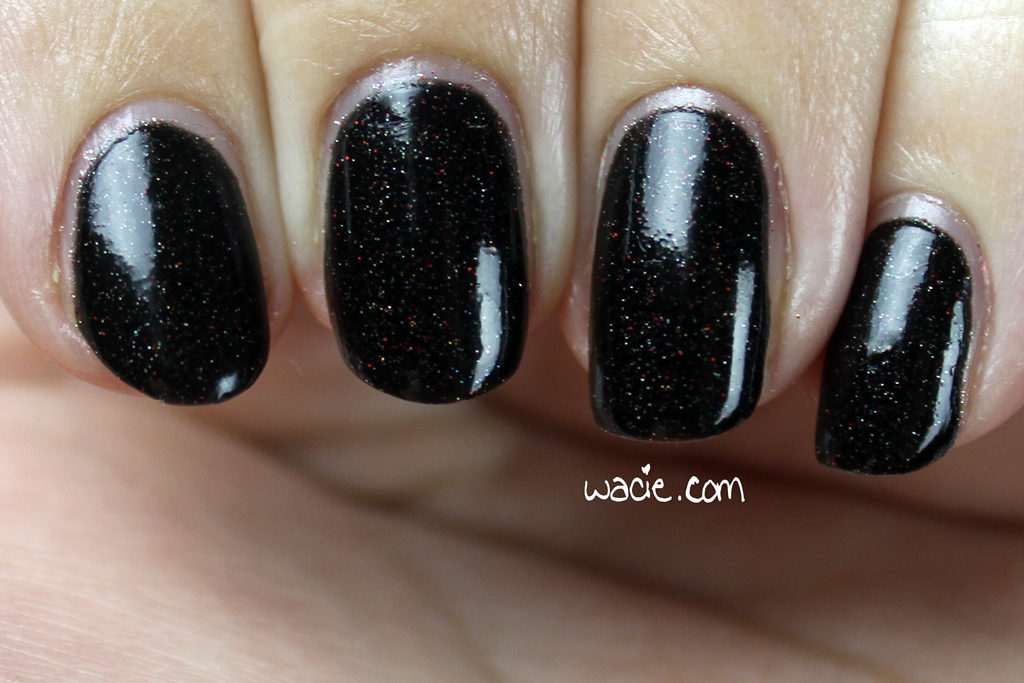
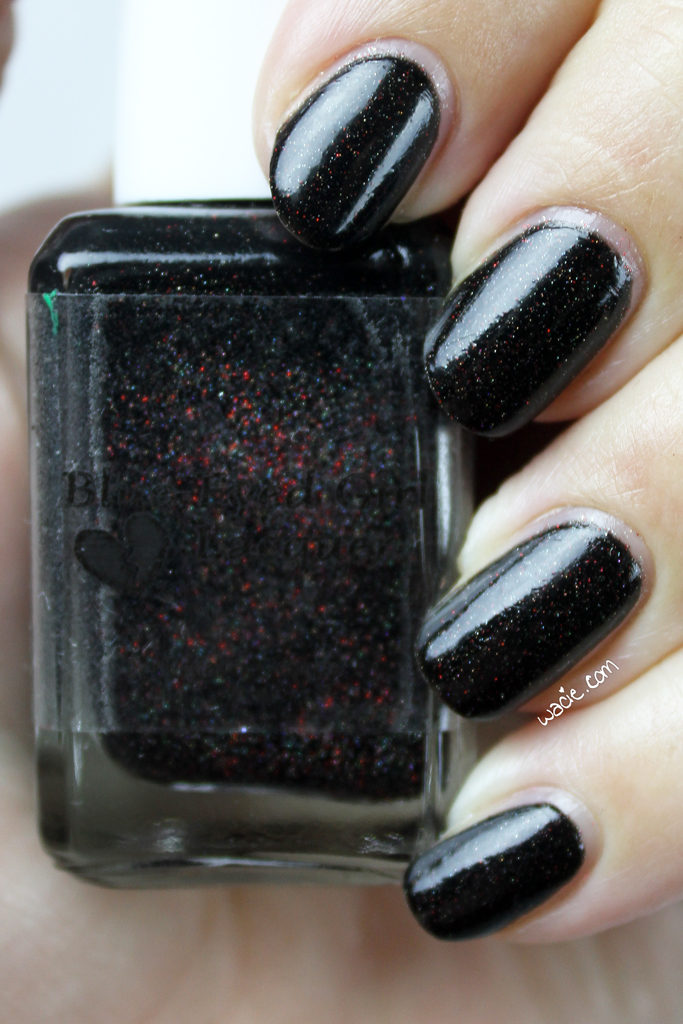
Hello, reader! It’s the last swatch of the year! I’m almost a little sad about that. wacie.com has grown tremendously in 2016, and I’ve tried some new things and I’m so happy that we’ve come so far together. I actually plan to do a 2016 retrospective, so I won’t get too far into the sappy stuff just yet. Let’s look at a swatch! Blue-Eyed Girl Lacquer‘s Together Dead and Lonely is the polish of the day; I’m wearing three coats with one coat of Seche Vite.

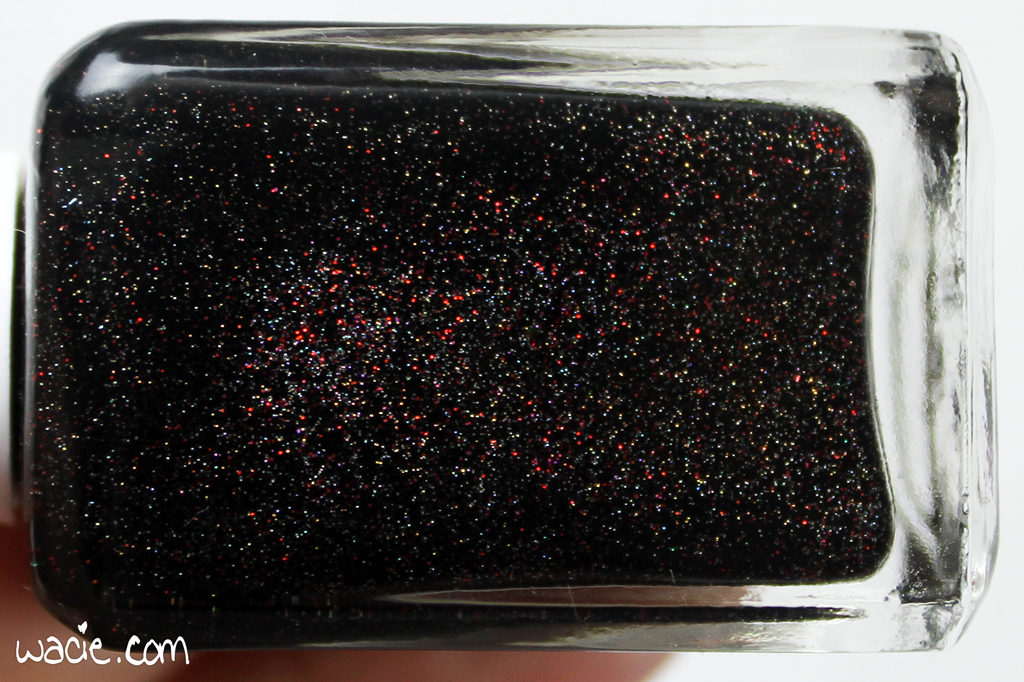
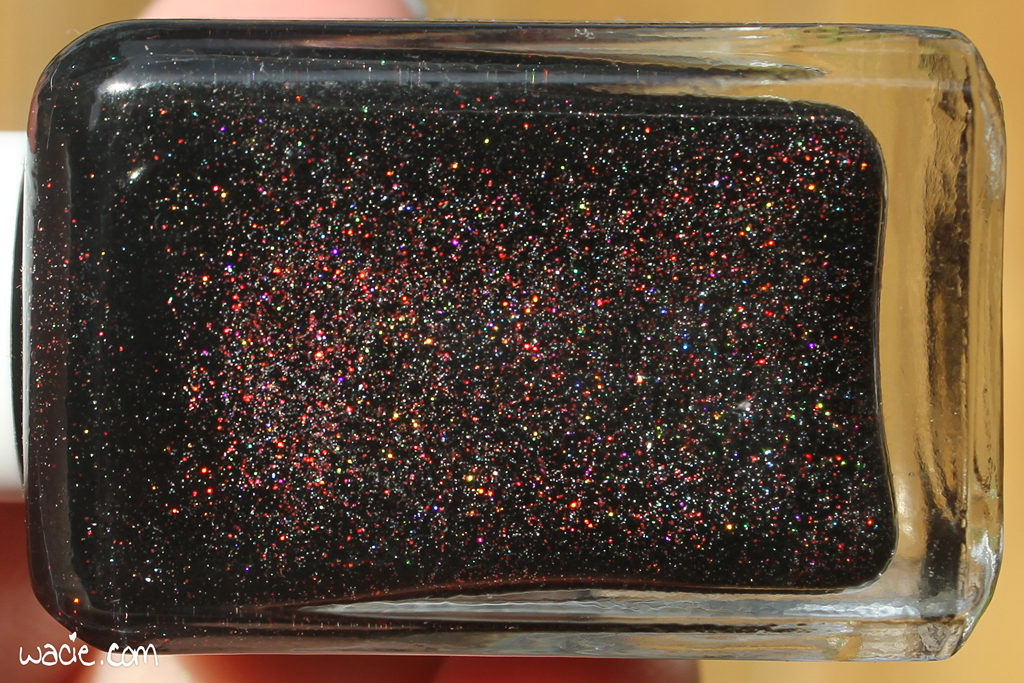
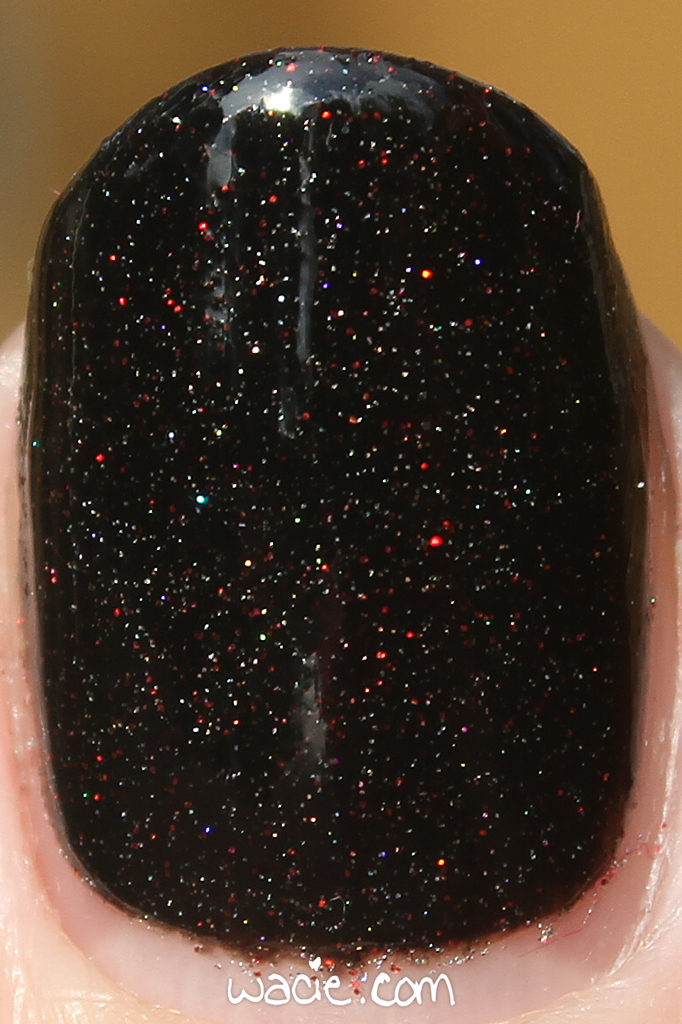
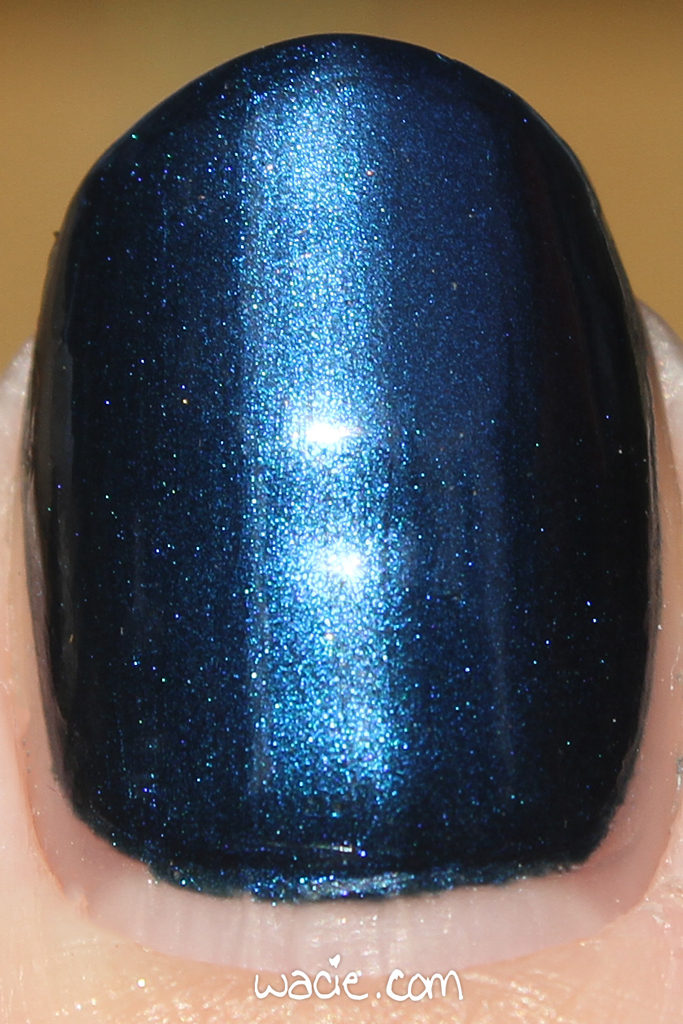
Together Dead and Lonely is a black jelly polish with fine silver and red holographic microglitters. Application was easy; since the polish is a jelly, you can expect a little bit of streaking on the first coat, but it was pretty good compared to other, less pigmented black jellies I’ve used. The streaks, if any, are evened out by the second coat. Consistency was on the thicker side, but worked for me pretty well. The polish dries with a satin finish and some slight glitter texture, so top coat is necessary for smoothness and shine.

This polish is a cousin to Noticing Face and Bound to the City Life, a strong-colored jelly with microglitter that is just amazing. I love the red in this mix; it adds color and sets a mood, so to speak: it’s vampy, it’s melancholy, it’s even a little grunge. Let me remind you that it comes from a Valentine’s Day collection. I love it!

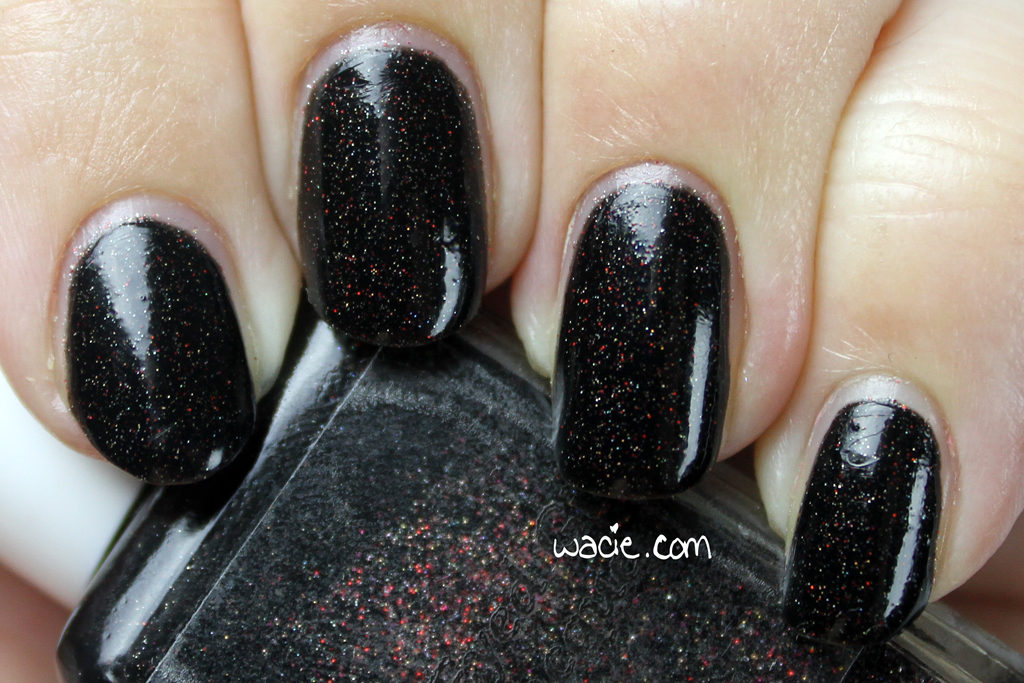
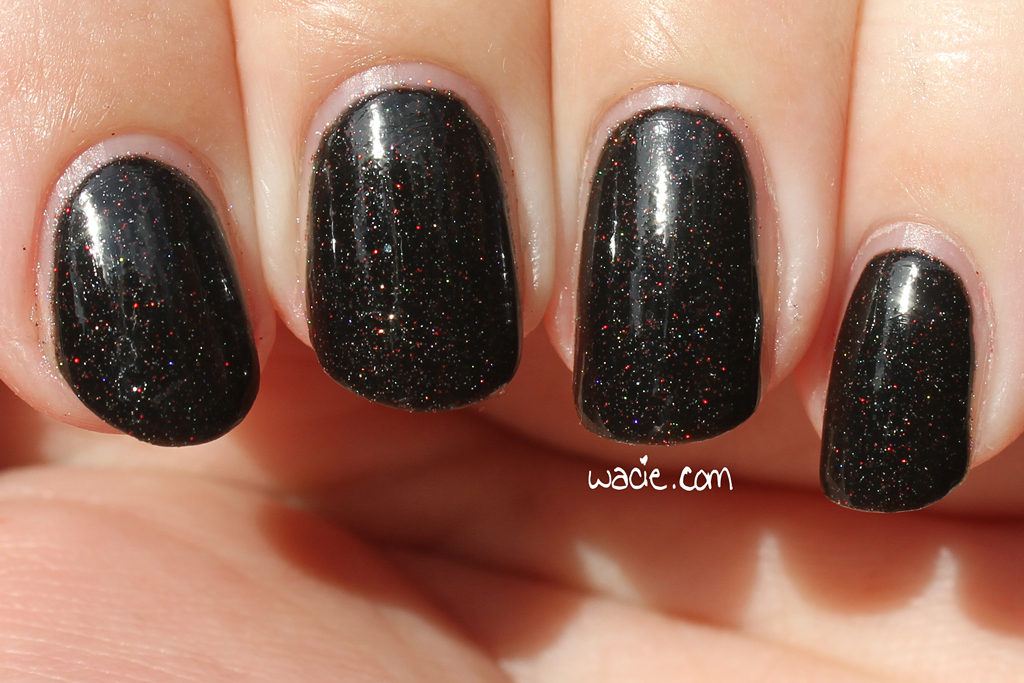
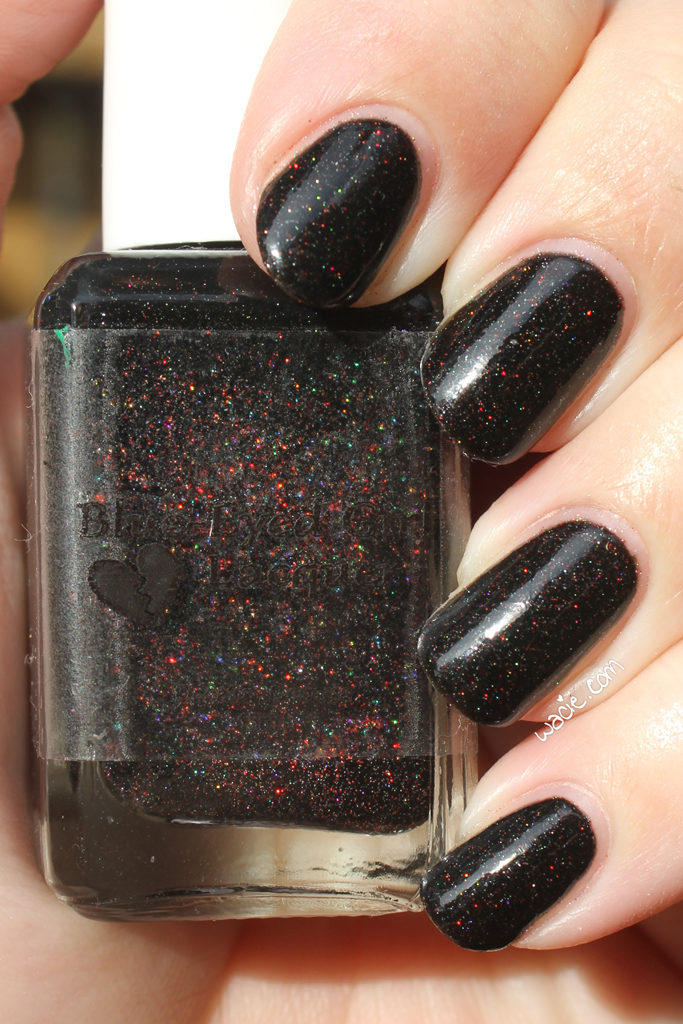
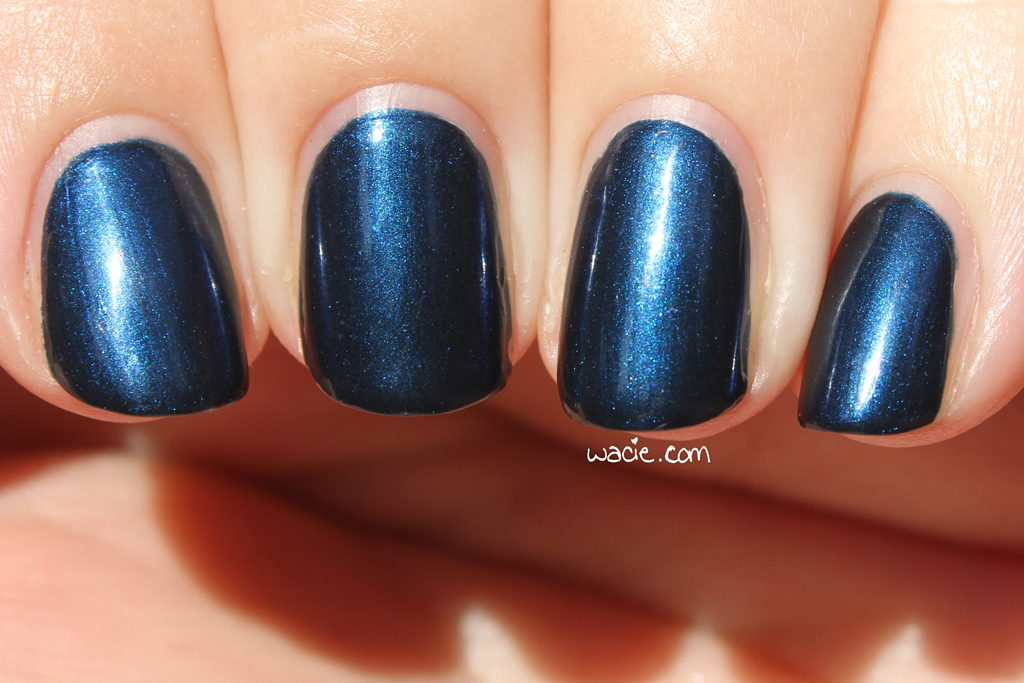
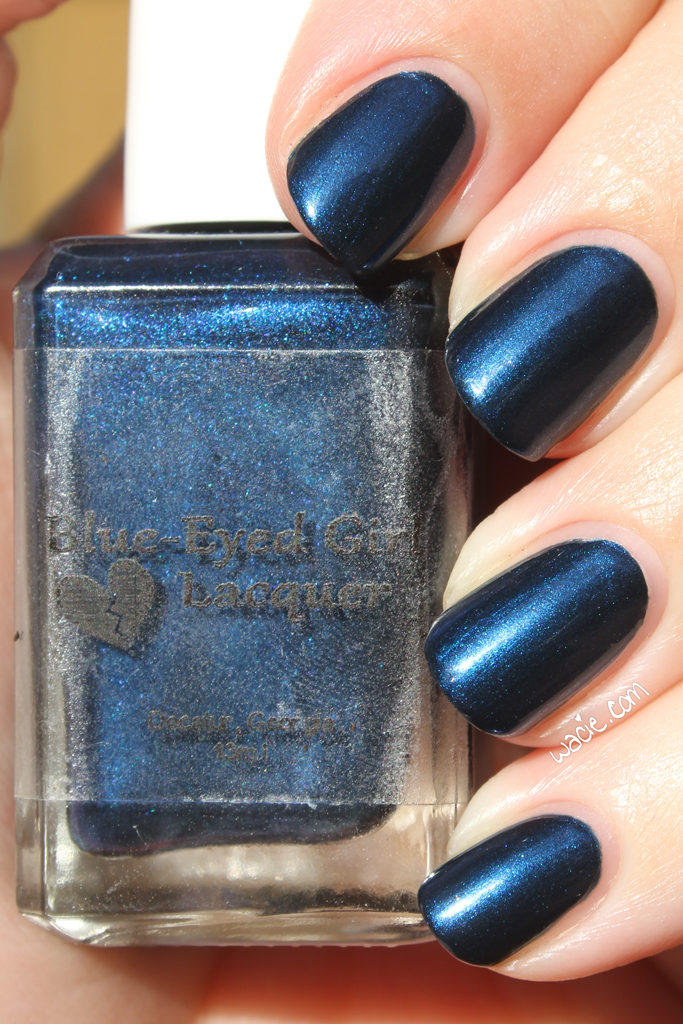
Here are some sunlight photos! The glitters are pretty well-defined out here. In the studio, you can see them, but there aren’t so many; you can see all of it in the sunlight.

Together Dead and Lonely and other BEGL polishes are available in their online shop.

Happy new year!

I bought this polish myself.

Project Pan, Winter 2016: Neutrals and Brights

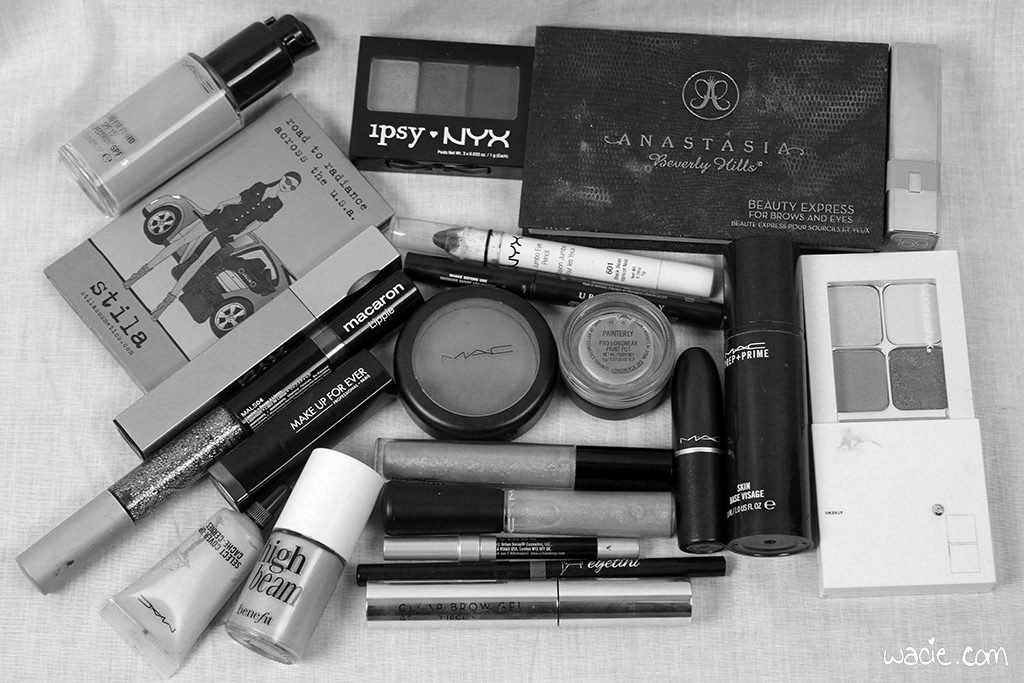
Hello hello! It’s time to share with you the makeup products I plan to use during the Winter 2016 season! Last season, I played around with some extreme smoky eyes and bold lip colors; this season, I wanted to experiment with colorful eyes and neutral lips. I’m excited to try some new things! If you’re familiar with fall’s Project Pan, you know that this isn’t a true PP challenge; this is a way for me to spend some quality time with makeup products I’ve bought and have never really used. It’s like a makeup date. For the next twelve weeks, I’ll be using these products on my face exclusively until the beginning of the next challenge, when I get my summer makeup out in March.
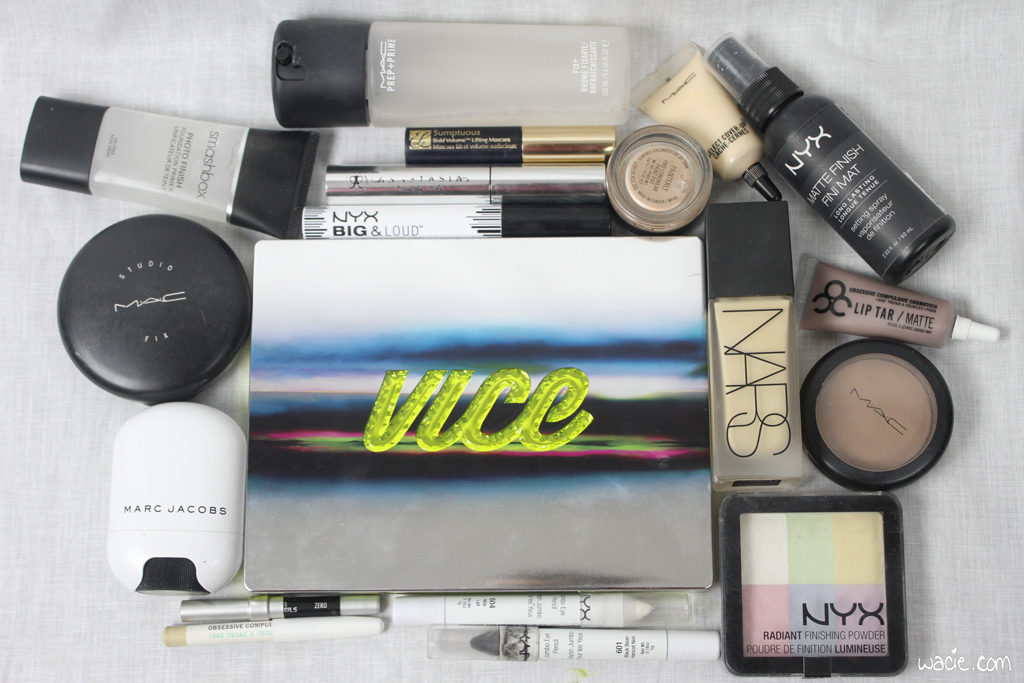
I suppose I’ll start with things that carry over from the last challenge. I won’t mention too much about essential things like foundation and primer, but there is a bit of overlap.

Face
Smashbox Photo Finish Primer
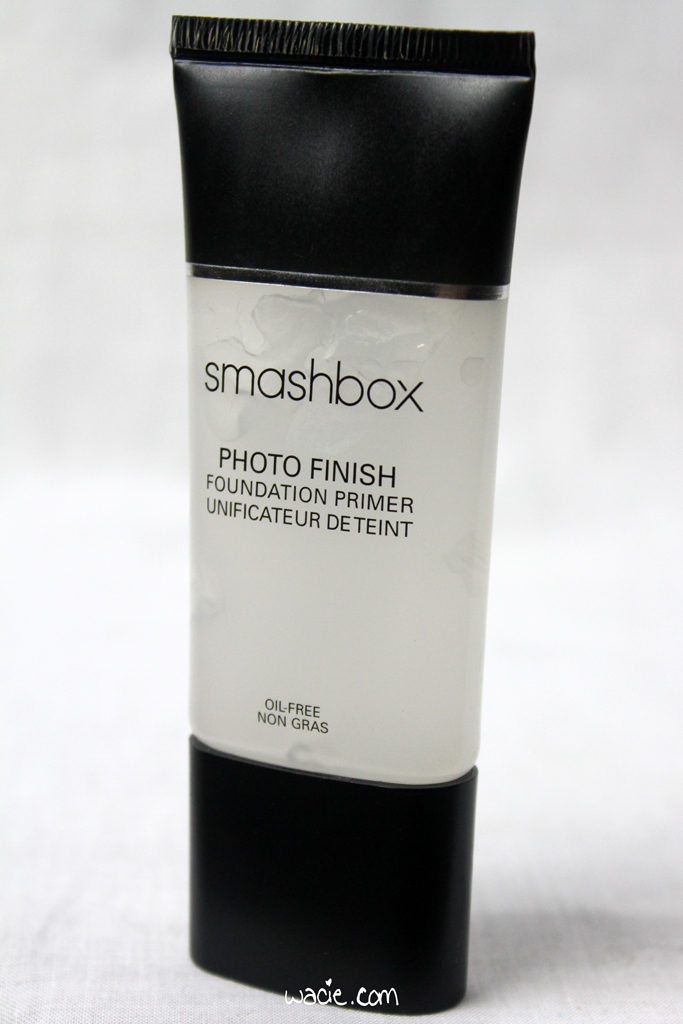
Honestly, I don’t think I’ve written a makeup post lately without talking about this primer. Yes, it’s a big player in this look.

NARS All Day Luminous Foundation in Siberia
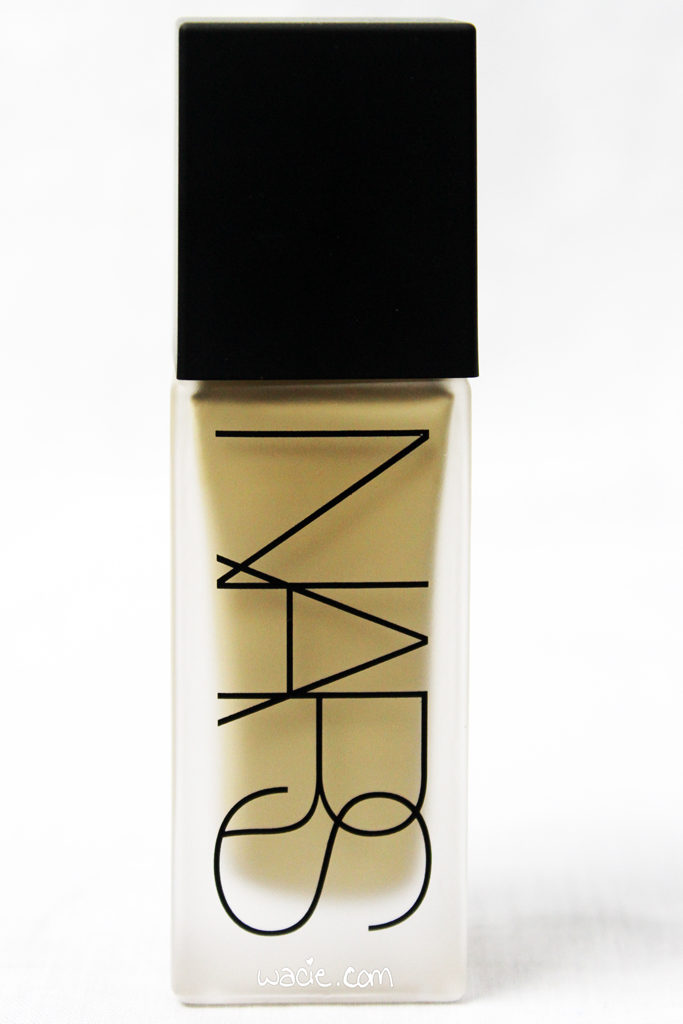
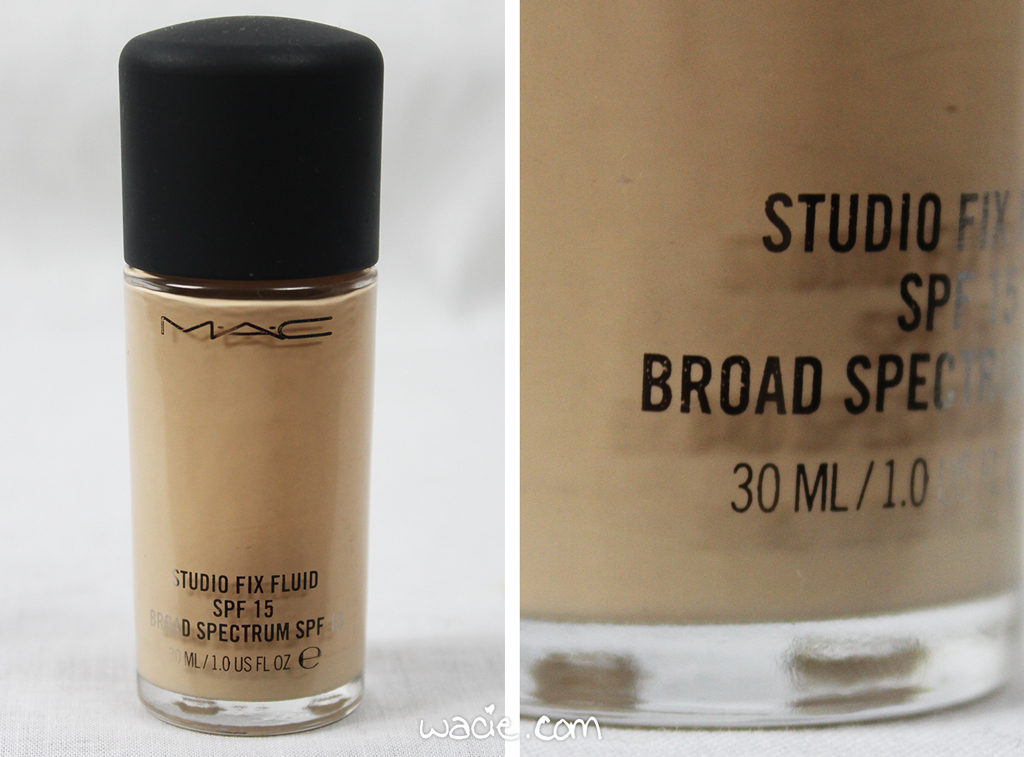
When I ran out of MAC Studio Fix Fluid, I was torn over what to replace it with. Part of me wanted just to get another bottle, because it actually was a good fit for me. I’m a person who likes to try new things, though, so I decided to go for a different foundation. There’s a part of me what wishes I’d just stayed with the MAC, though. I like the NARS foundation enough, but the thin consistency is annoying sometimes, and it’s not as neutral as I thought it would be. I’ll keep using it, but I probably will return to Studio Fix Fluid once it’s gone.

MAC Select Cover-Up Concealer in NW15
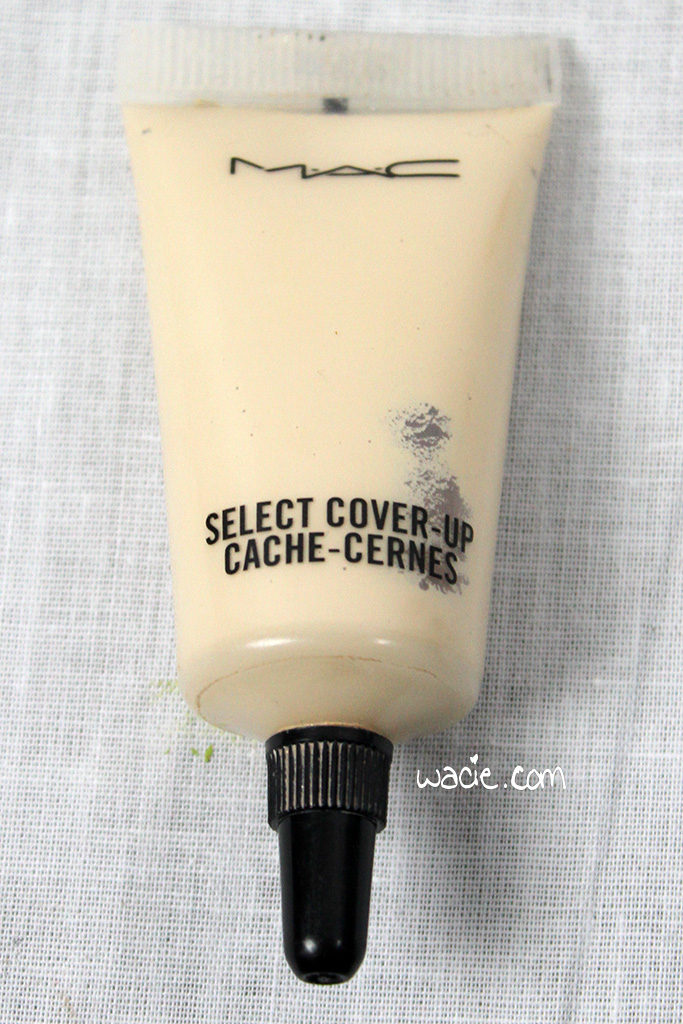
Yep, this again! I probably shouldn’t bother to include it since I used it like all of twice last cycle, but I already had the photo, so here it is.

NYX Radiant Finishing Powder in Brighten (pictured above)

I have a love/hate relationship with this powder. I love how complete it is; not only does it set makeup beautifully, it also brightens, color-corrects, and illuminizes, like it’s many products in one. However, it doesn’t keep oil in check, and the luminizing feature ends up making me look even more shiny than I am. It’s perfect for cool weather, but a no-go in the summer. I’m trying to use it up.

MAC Studio Fix Powder Plus Foundation in NW10
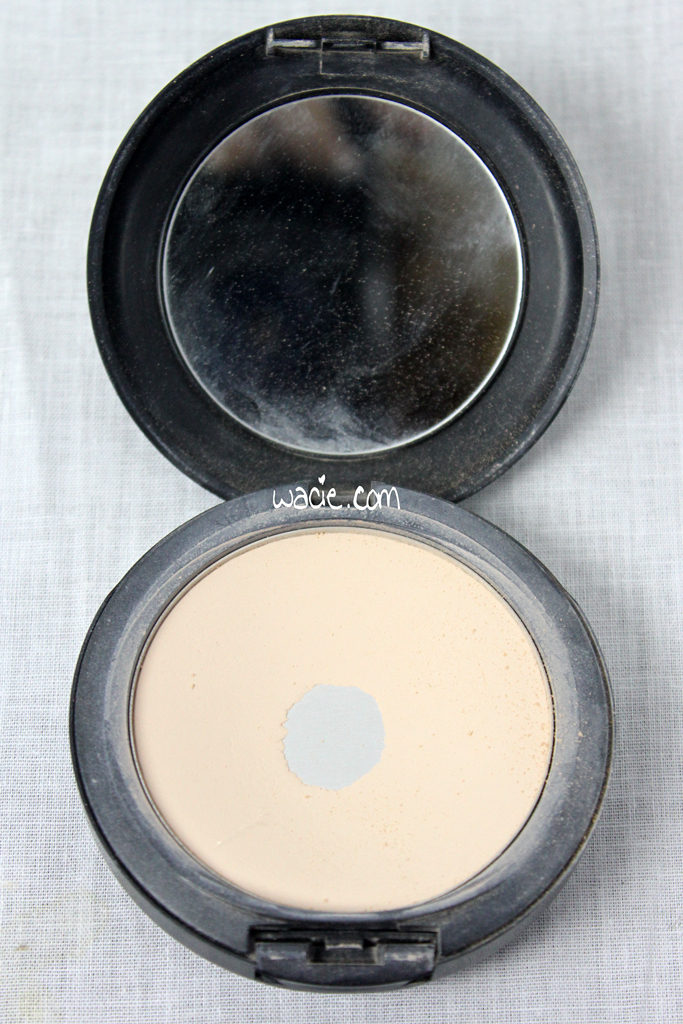
This powder is the best! The full coverage basically renders my concealer obsolete. Using it over liquid foundation is probably overkill, but it’s really the best complement to medium-coverage foundation. In the fall and winter, I want all the coverage I can get, and this helps me get there.

Marc Jacobs Glowstick in Spotlight
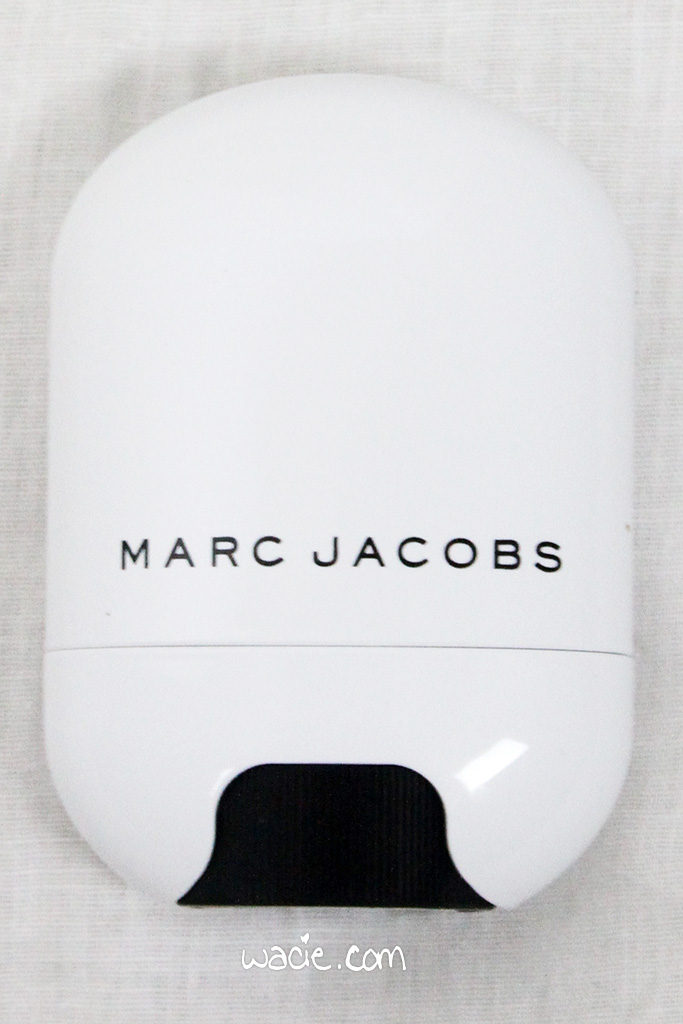
Remember this? Since I’m using neutral colors for my lip and cheeks, I wanted a neutral highlighter, and this was the best one. When I reviewed this, I reported that it was super creamy and blendable, but that was over the summer. Now that tepmeratures are lower, the stick isn’t quite so creamy, and it’s not as easy to use and apply. It’s a little disappointing.

MAC Powder Blush in Taupe

During fall’s challenge, I only used this for contouring my nose, chin, and forehead. I’m also using it as a blush this time around because I wanted a neutral base look. In this capacity, it hovers somewhere between blush and contour, and I really like it.

Anastasia Beverly Hills Clear Brow Gel
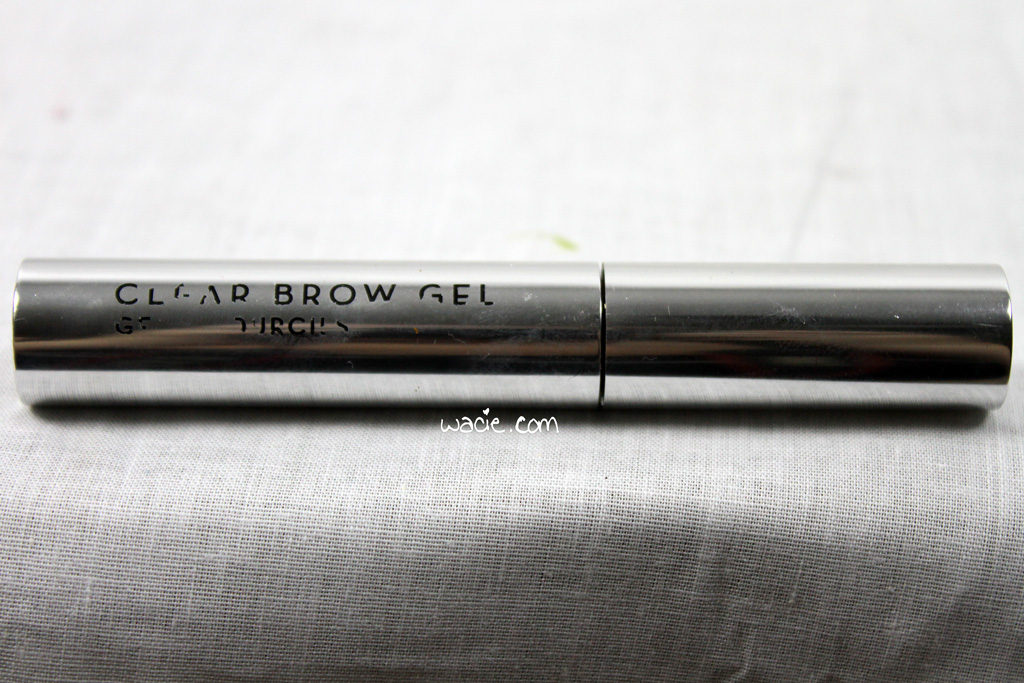
Yes, this again. It’s still not dried out, so I’m gonna keep using it.

Anastasia Beverly Hills Beauty Express for Brows and Eyes in Brunette

Yep, this too.

NYX Long Lasting Makeup Setting Spray in Matte Finish
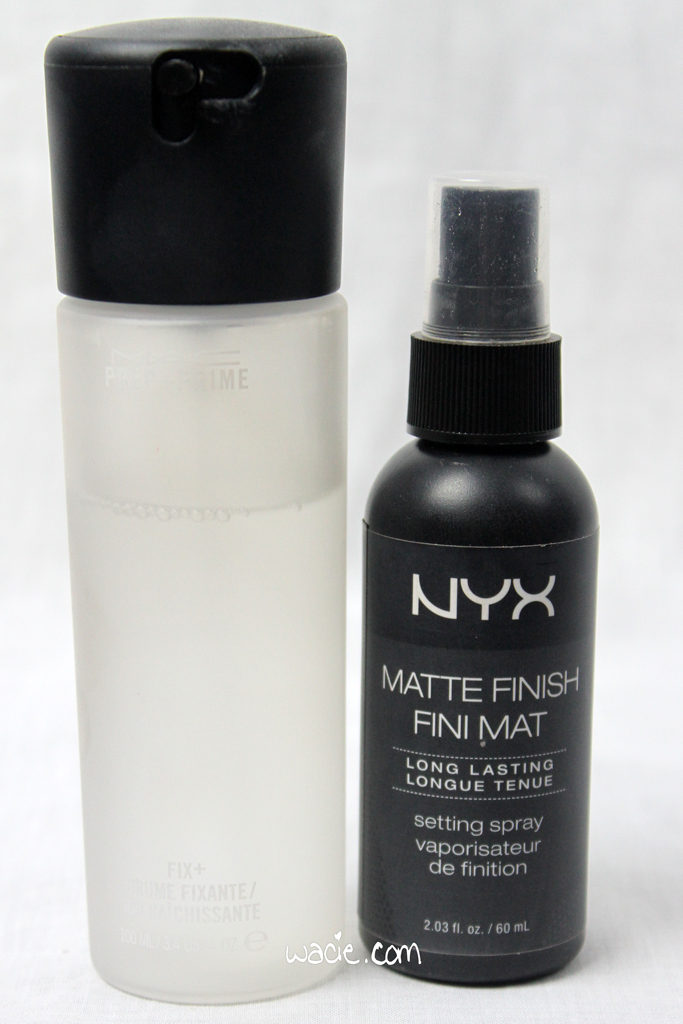
This stuff goes a long way to keep me from looking powdery and unnatural. It doesn’t keep me mattified, but it makes my makeup look dewy and fresh. The bottle is almost empty; I’m definitely going to repurchase.

MAC Fix+ Finishing Spray (pictured above)

Having two facial sprays is probably overkill, but I feel like there’s a place for them both. The NYX spray sets my foundation, but I still use a setting powder, just for safety. The Fix+ spray keeps that last dusting of powder from looking too powdery. Probably unnecessary, but I like it.

Eyes
MAC Pro Longwear Paint Pot in Painterly
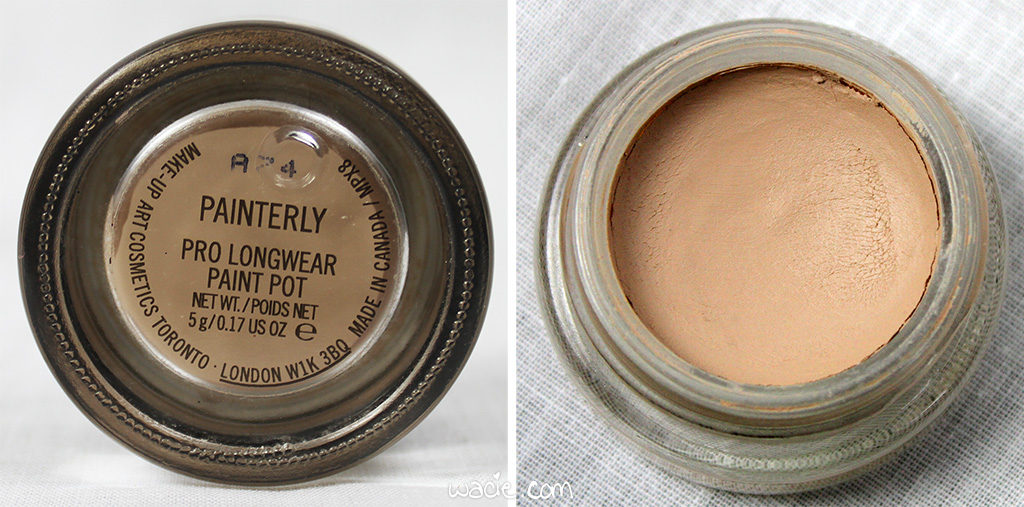
Painterly is also making a return in this cycle. I’d rather be using an actual primer, since my lids are kind of oily and creamy products like this have never worked for me in the past, but I’m making it work.

NYX Jumbo Eye Pencil in Black Bean and Milk
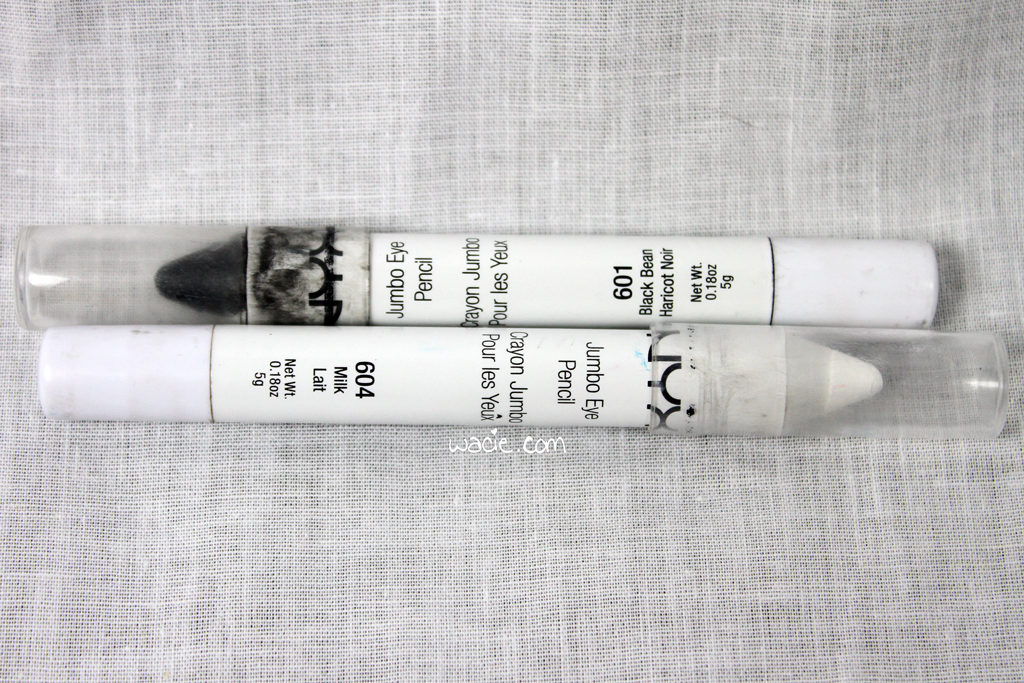
Black Bean was a godsend last cycle for my ultrasmoky eye, so I’ll be using it for the same purpose this time around. I’ll also be using the Milk pencil for extra-white whites and extra-bright brights. These pencils make eyeshadow look the way it’s supposed to look.

Urban Decay Vice 3 Eyeshadow Palette

I’ve had this palette for a while, and I’ve never used it until now. I chose a colorful palette to go with this look that’s otherwise very neutral; I wanted eyes that really stand out. I’ll talk more about this, keep reading!

Urban Decay 24/7 Glide-On Eyed Pencil in Zero
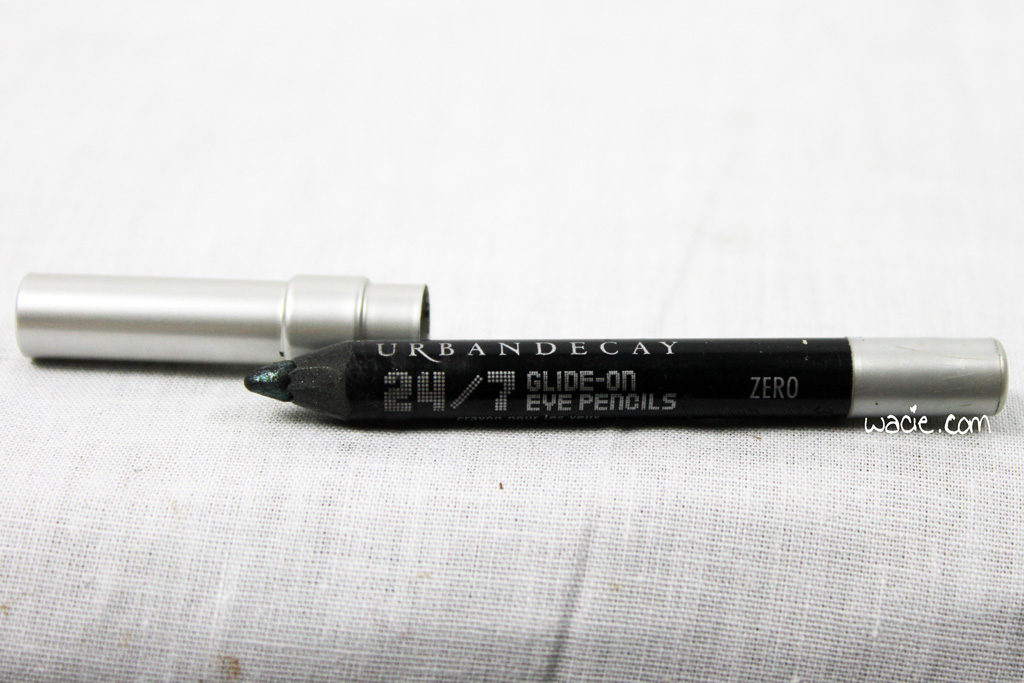
For my eyeliner needs.

NYX Big and Loud Lash Primer (pictured below)

I talked at length last time about my love for lash primers, and I’m still very happy with this one.

Estée Lauder Sumptuous Bold Volume Lifting Mascara
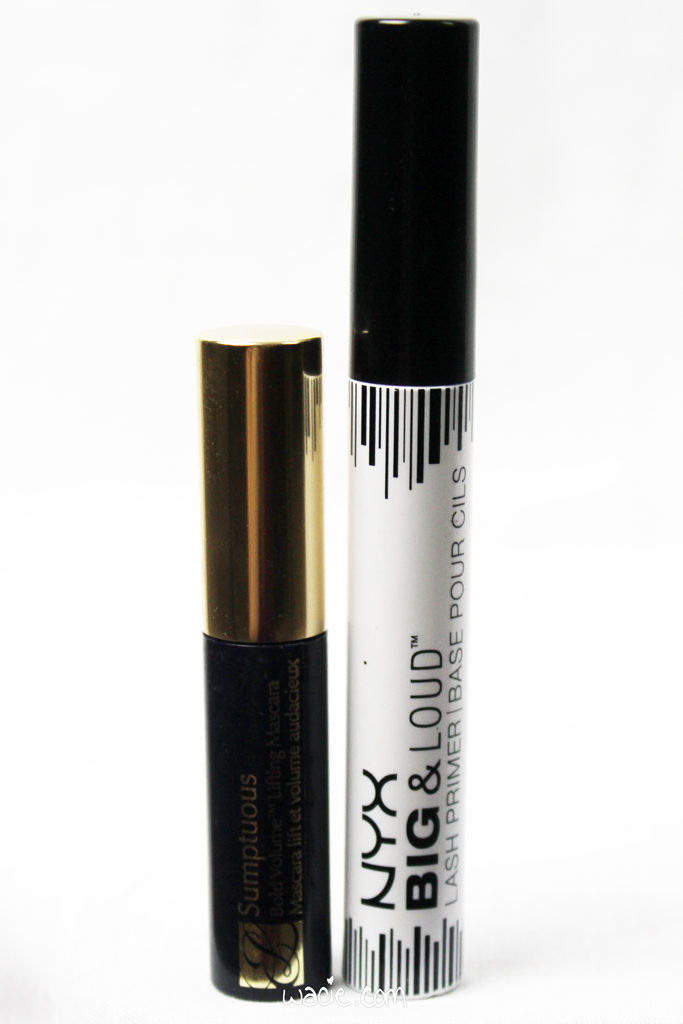
This is a sample I’ve had in the drawer for a while, and I’m finally using it! I don’t really care for it, to tell the truth; the formula is fine, but the brush is huge and I don’t like huge mascara wands. I find them difficult to work with.

Lips
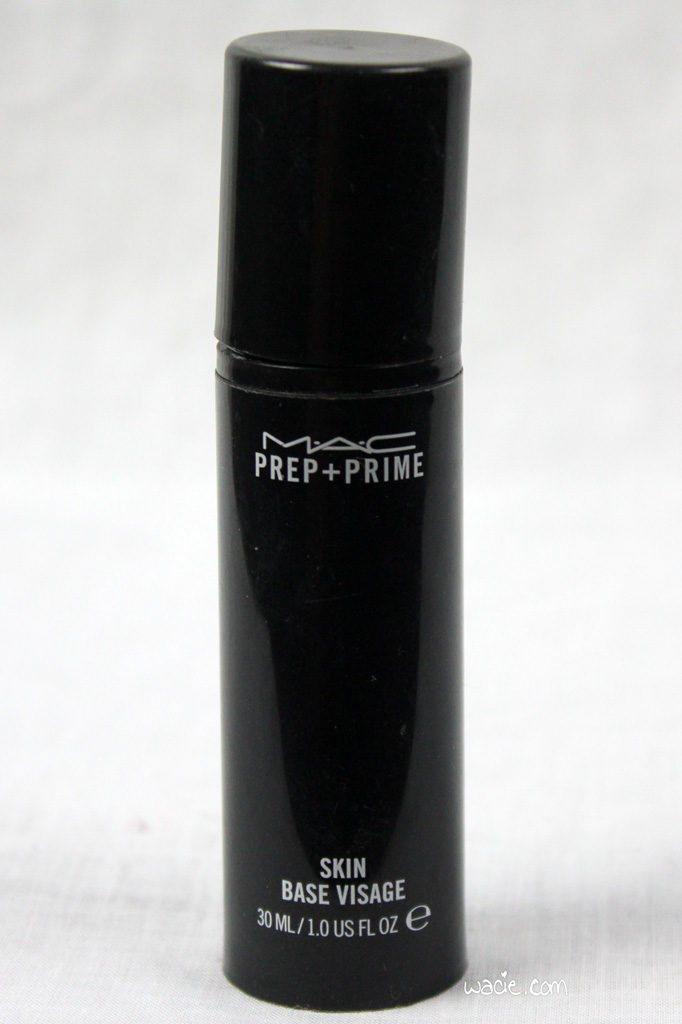
MAC Prep + Prime Lip Primer
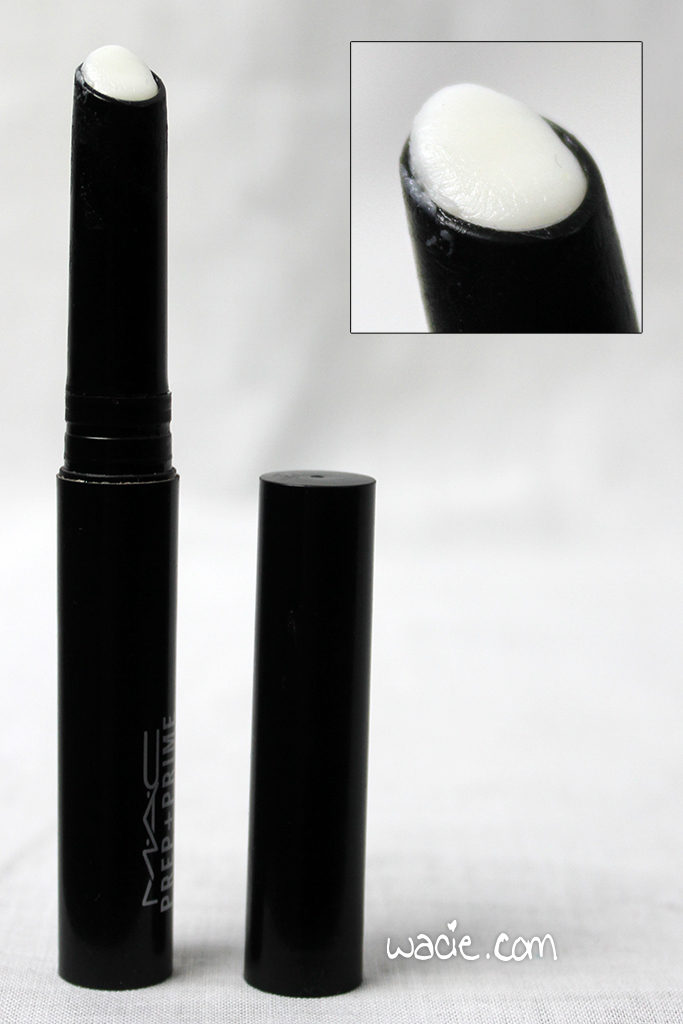
This is my favorite lip primer! It’s practically gone; in this photo, it’s twisted all the way up, and I’ve been using a lip brush to apply it. I can’t wait to buy another one!

Obsessive-Compulsive Cosmetics Cosmetic Colour Pencil in Anti-Feathered (not pictured)

My favorite clear lip liner! Sometimes I overdraw with this, or underdraw, because it’s invisible. Lately, I’ve found that the MAC lip primer is enough to keep my lip color on, so I’ll probably phase this out once it’s gone.

Obsessive-Compulsive Cosmetics Lip Tar in Sebastian
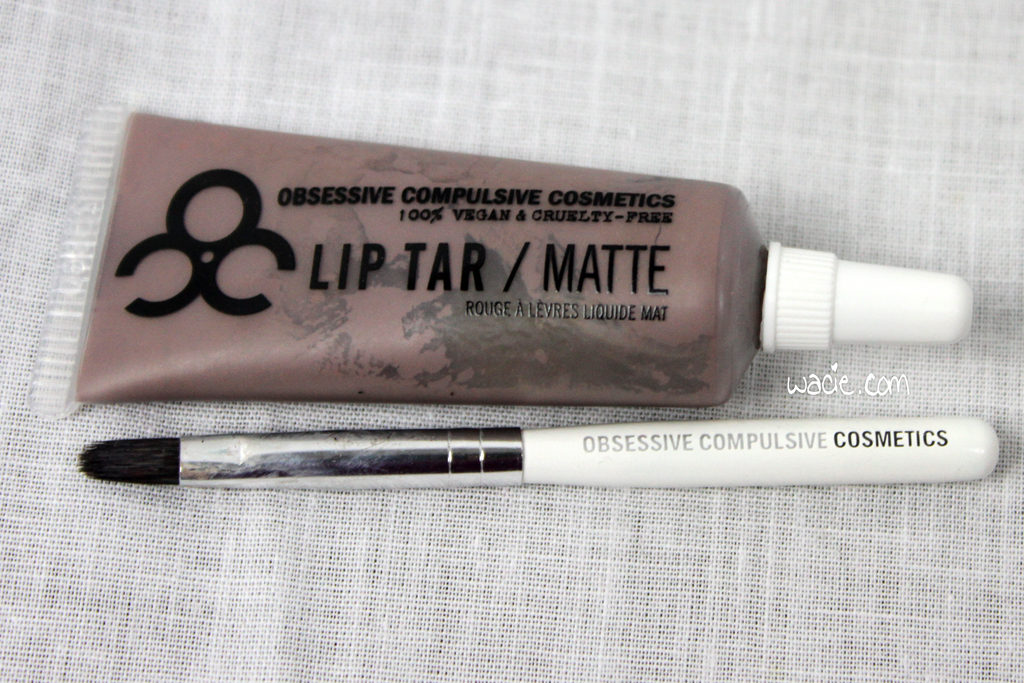
I forgot to shake it up.

When I started building this look, I started by choosing a lip color at random, and this is what I got, and it’s the part of this look I’m the most excited about. It’s a color I’ve never really worn before, a color I’ve never really seen on people. At first, I wasn’t too sure about it and nearly put it back. I put it on, though, and I loved the way it looks on me. Sure, it’s not a conventional color, but it’s strangely wearable while also quite unique. I am really enjoying it.

The Process

While looking at densely populated palettes like Vice 3, I’ve often wondered what would happen if I wore the colors as they’re placed. Sure, it’s not organized to be worn a certain way, but I’ve always wanted to try wearing shadows one line at a time to see what the colors would look like, and just to experiment with different combinations. That’s the idea behind the eye looks I’ll be doing with this palette. In my first week, I’ll be using Vanity, Lucky, Reign, and Bobby Dazzle together.
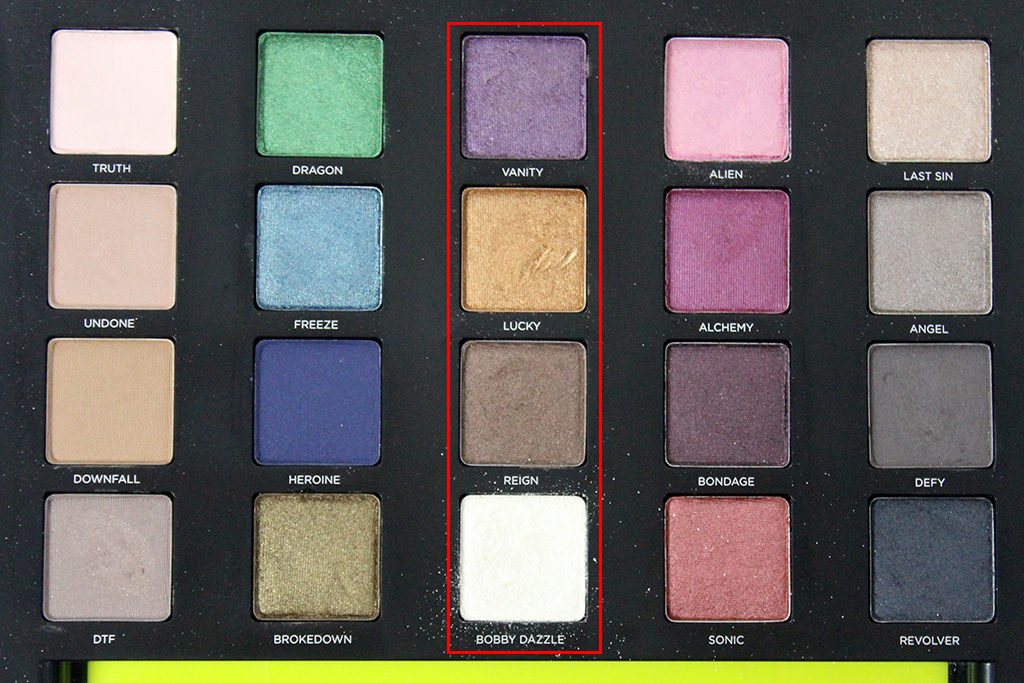
I used the Milk pencil on my lower lid with Painterly on the upper lid and brow bone. I then applied Bobby Dazzle all over my lid. Can you see the difference? It’s a stark white on my lid, but a gentle shimmer on my browbone. I worked Lucky and Reign into my crease, and used Lucky and Vanity on my lower lashline. Starting with this column of shadows made this one easy; I’m definitely looking to some of the others being a challenge.
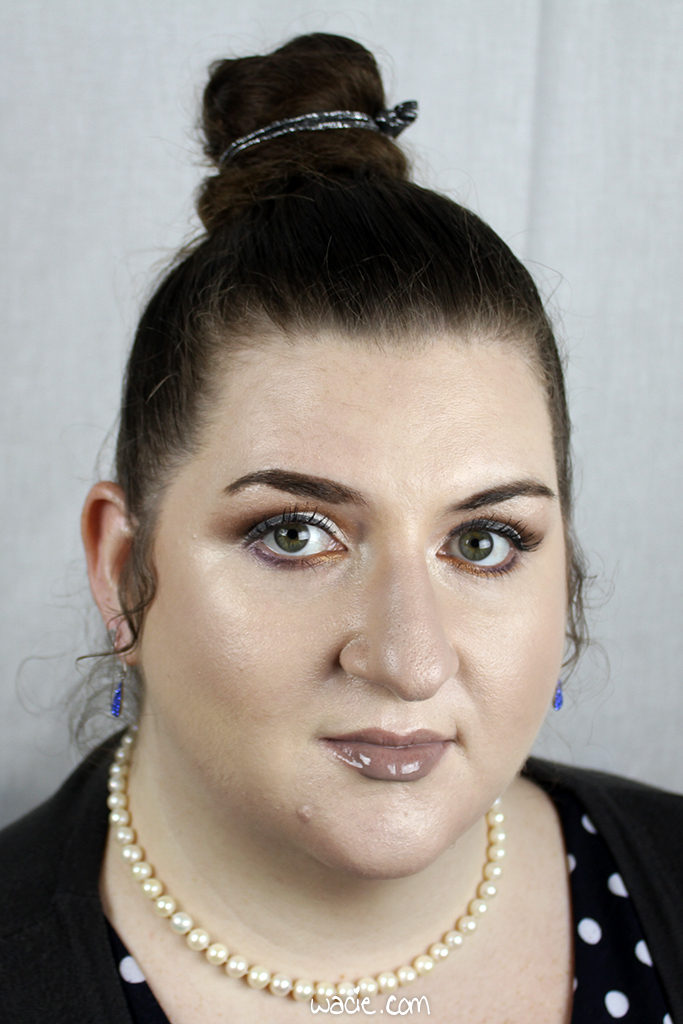
Here’s the whole look! Everything on my face is mentioned in this post. I plan to do a different eye look each week to match my Manicure Monday look, and I’ll post the eyeshadow of the day on Instagram, so follow me there to stay up to date. I won’t do any update posts until the very end. I hope you’ll follow along with me!

The Marc Jacobs Glowstick was sent for review, which is linked here. This post is not related to that review, and my opinion is not swayed by free stuff.
Everything else I purchased myself.
Project Pan, Fall 2016: Rose Quartz + Serenity-Inspired — Conclusion

Hi Reader! You might remember that I started a twelve-week beauty challenge where I committed to a handful of products for the whole twelve weeks. I called it a Project Pan, but since I’m not using them until I hit pan or use them up, it’s not the most accurate name for it. I did, however, completely my twelve-week obligation to them, so I’m doing one last update post to talk about what I did use up or hit pan on before I move onto the Winter 2016 challenge. For detailed product information and swatches, please see my first post for this challenge.

The sun has set.

As I mentioned in my first post, the products I chose were based loosely on Pantone’s Colors of the Year for 2016, with some black thrown in for fun. I had a blast with these looks. I left the house with black or blue lipstick on for the first time since middle school. I felt edgy, fashion-forward, and bold. I forgot what I looked like without crazy raccoon eyes. I’m a little sad I’m putting all this stuff away, but I made some progress with these products, and I’m sure they’ll come out of the drawer again someday. For now, I’m happy to be moving on to new things.

Empties: 4
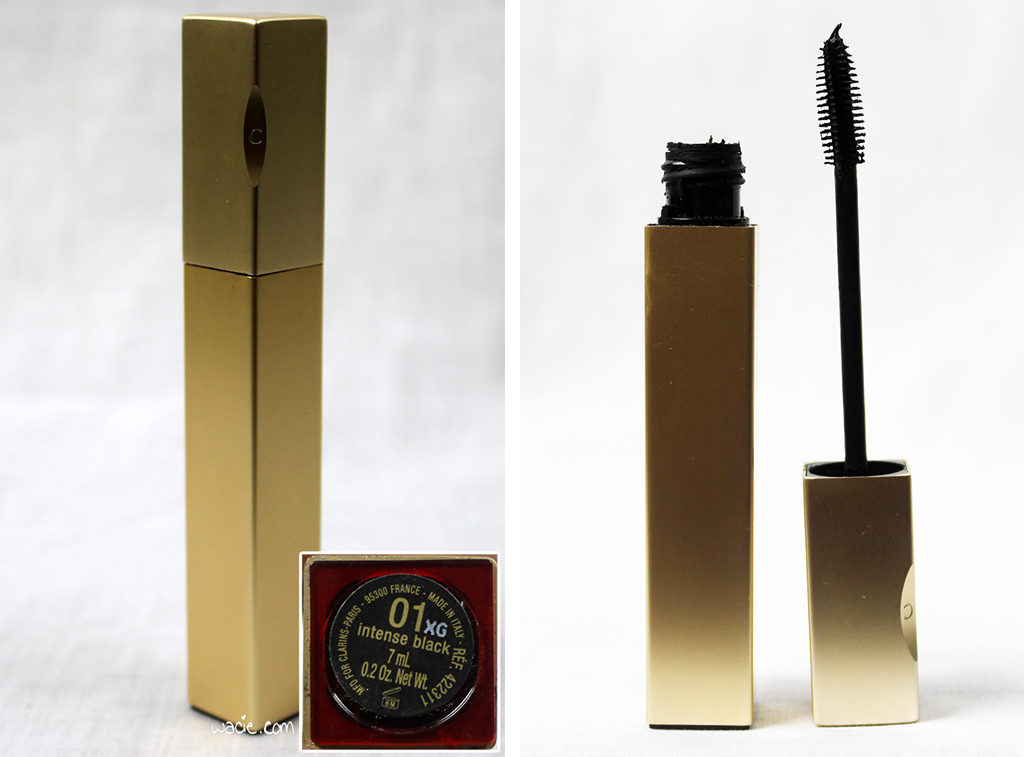
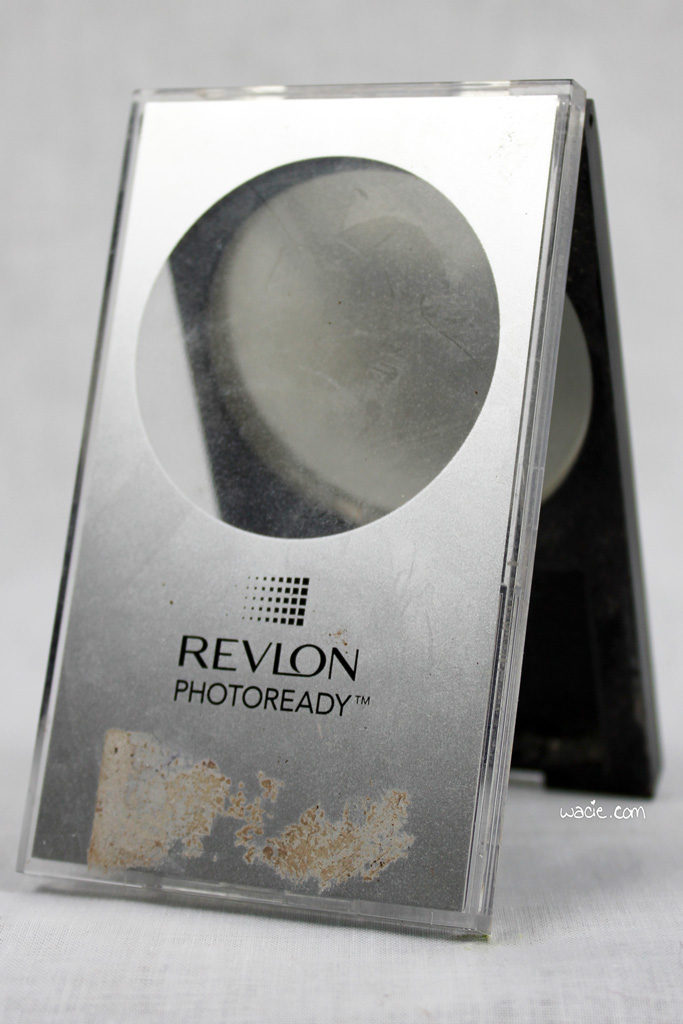
Let me talk first about the things I used up. I didn’t use up any products unique to the challenge, but instead used up some essential products and replaced them. I wrote about the MAC primer and foundations I used up in previous Empties Roundups. I also finally decided it was time to part with the Clarins mascara. I finished my MAC foundation up and went for NARS, I used up a Revlon powder and went back to MAC Studio Fix powder, I used up the MAC primer and went back to Smashbox, and I tossed an old mascara. That’s four empties.

Pans: 3
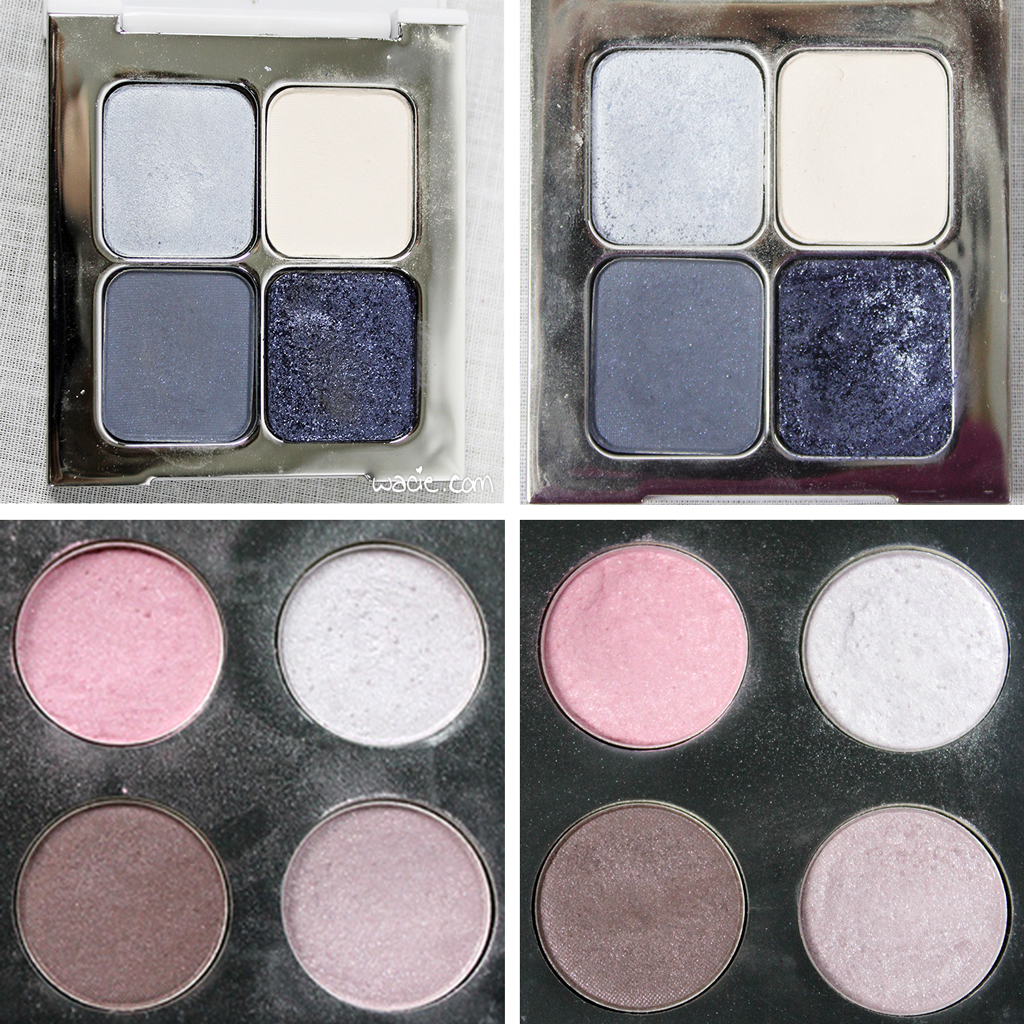
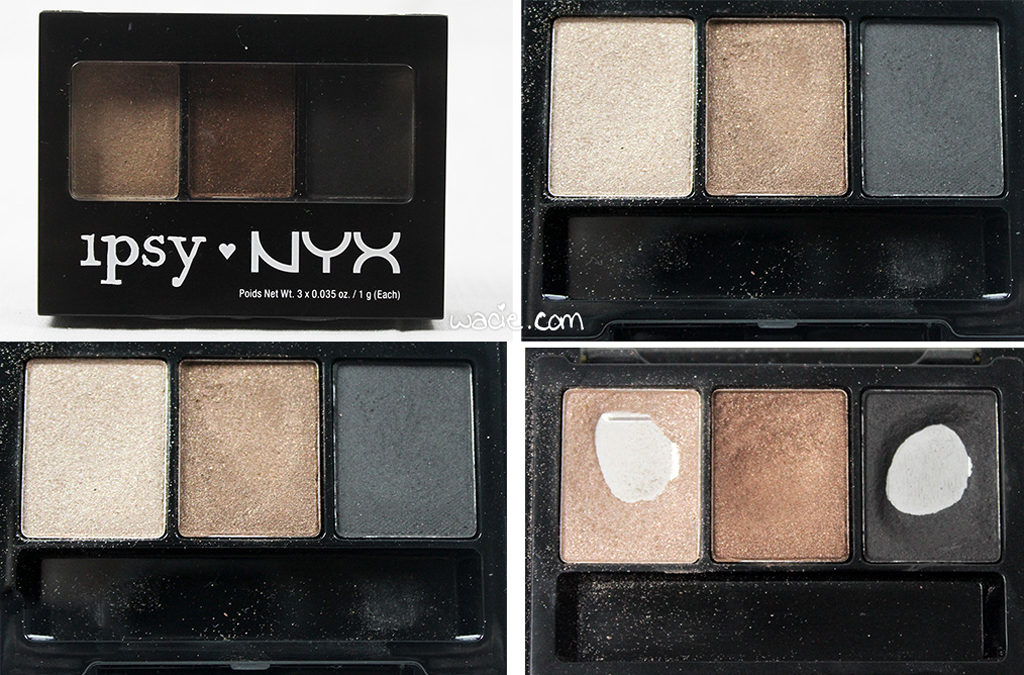
Honestly, I’m surprised I hit pan on anything. I hit three, though, and I’m pretty proud of myself! Have a look at that NYX eyeshadow trio. The champagne and matte black were my workhorse shadows for this look, so I guess I shouldn’t be surprised I hit pan on those. It’s just that I’ve used some shadows for years and I still have yet to pan those, but I can pan these in twelve weeks. Maybe they’re small pans. I’m happy I panned the compact, because that’s a thing I’ve had for years. It’s nice to see progress made!

Notable Mentions
Lipglosses
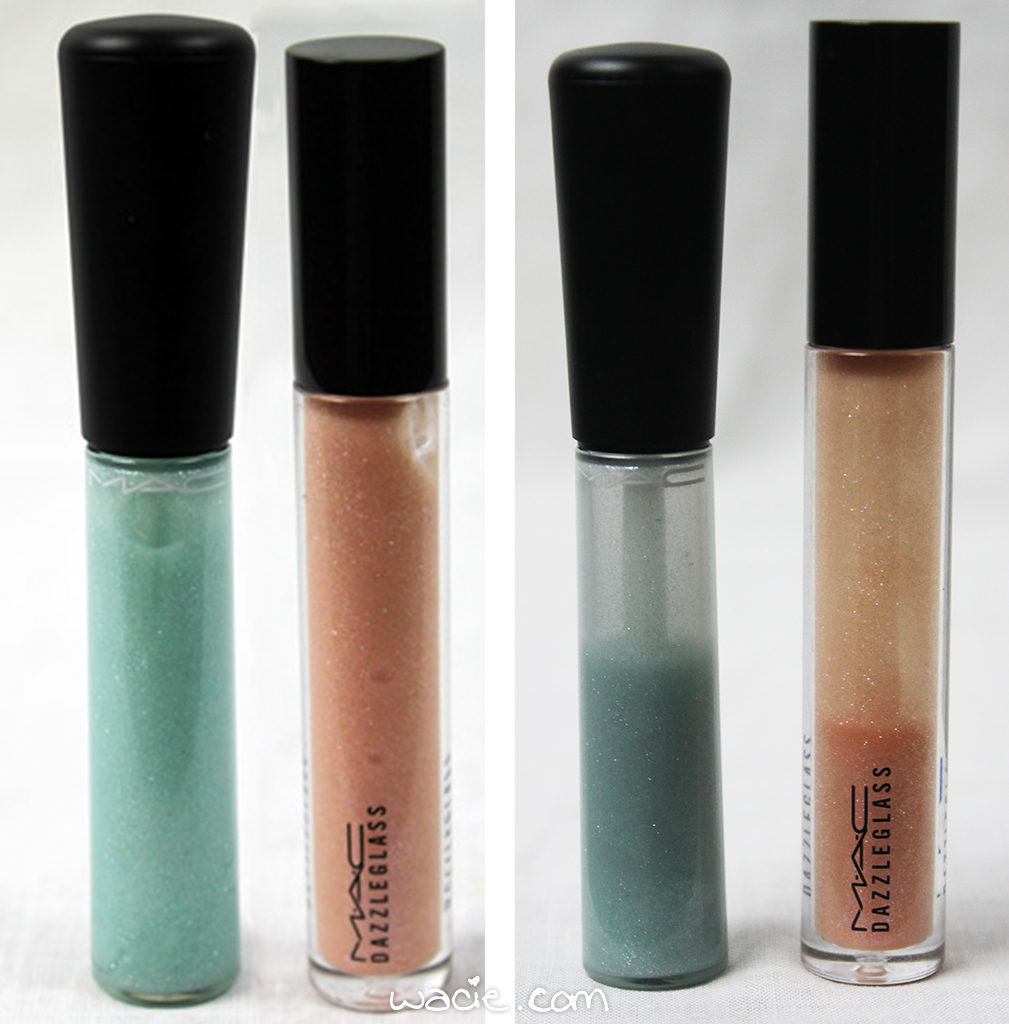
I didn’t think I used up so much of the glosses, and I almost feel a little bad about it. These are two great colors that I should really think about wearing on their own someday.

The quality is low on these before photos because, foolishly, I didn’t keep the originals, only the edited versions.

Highlighter
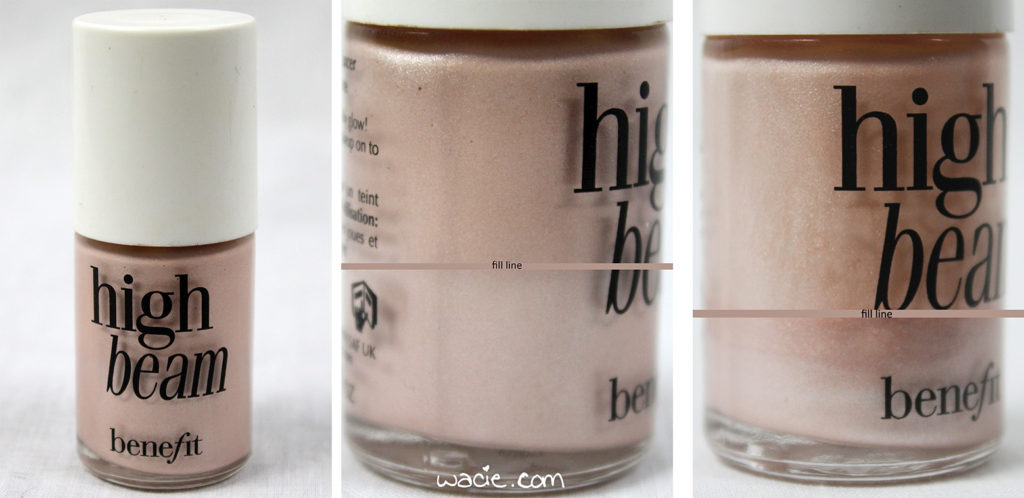
Check out the fill lines on the High Beam! I’m surprised I used that much of it. A dab here and there really makes a difference!

Lipsticks
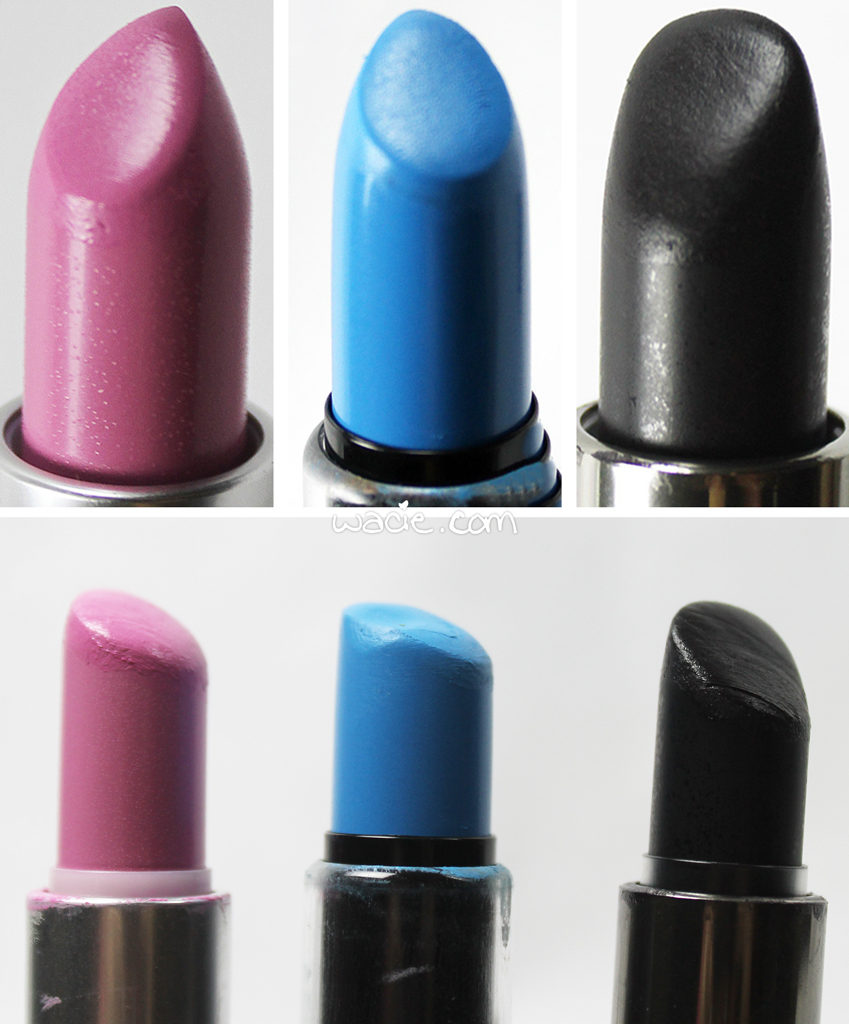
I didn’t put too much of a dent on Saint Germain, but Blue Velvet and MUFE #50 are visibly used. Blue Velvet looks the most worn-down. It seems like every time I went out, I had the blue lip on, and I feel like maybe I did use it more than the others because I was always touching it up. Obviously, when your attention is divided over three lipsticks, you’re not going to wear them down as mucha as if you’d only focused on one. You’ll also remember I had a fourth lipstick in the main post, but since I only used it once (when I saw family), I didn’t include it in the final post.

Lip Primer
Here’s my MAC Prep + Prime Lip, turned all the way up. Yeah, I’ve got to dig in there with the brush now to get to the product. It’ll be time to replace it soon!

The other eyeshadows
I don’t really want to include these, but I made the graphic, so I have to include it. Compared to the NYX shadows, I didn’t really use these at all, and so there’s practically no difference between the befores and afters. No surprise there. I really did think I was going these more when I started.

Facial sprays
While the MAC Fix+ is a relatively new purchase, so it’s not as used-up as the NYX Setting Spray is. You can see the fill line through the clear bottle. The NYX spray, while I can’t tell how full it is, it feels pretty light and, when shaken, it doesn’t sound like much is in there. It’ll be time to replace that soon, too!

I only included the products that show visible use or wear. There were a lot of things I included in the look that weren’t used-looking enough to warrant sharing. Some of the products in this look were being used for the first time and didn’t really show signs of wear. Some of them were only applied once, like blush and eyeliner, and don’t show much use. Some of them, like the Eyetini and Heavy Metal liners, were used all of twice. The most often used products were the ones with the most drastic signs of use, and that’s what I included.

And there you have it, twelve weeks of weird blue lips and raccoon eyes is over! Stay tuned for the Winter 2016 Project Pan!

I bought these products myself.

Manicure Monday: Year-End Glitter

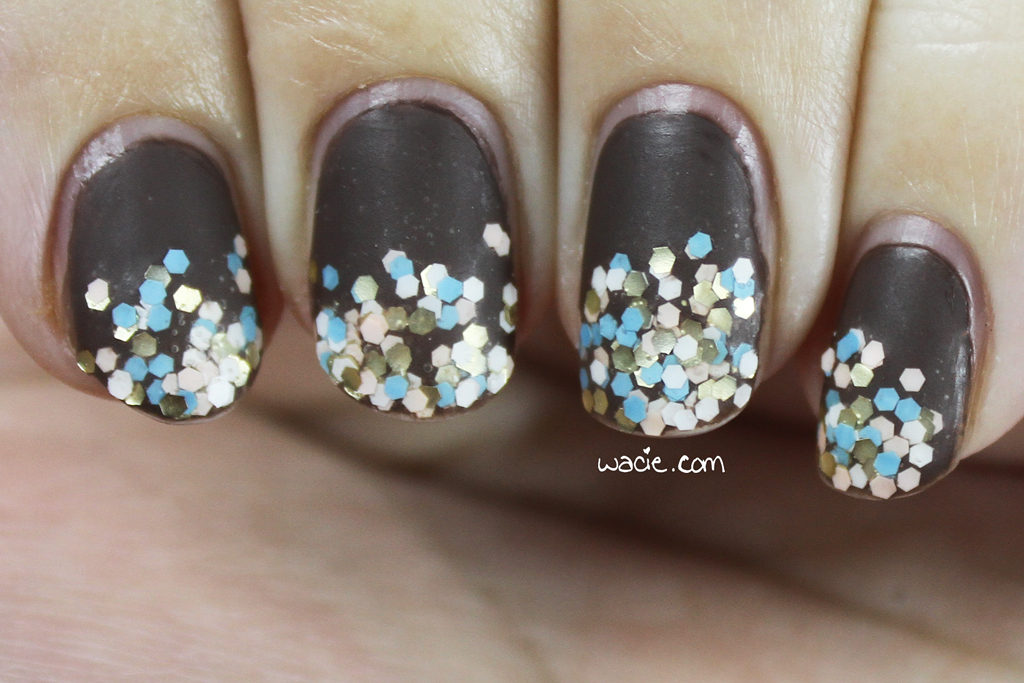
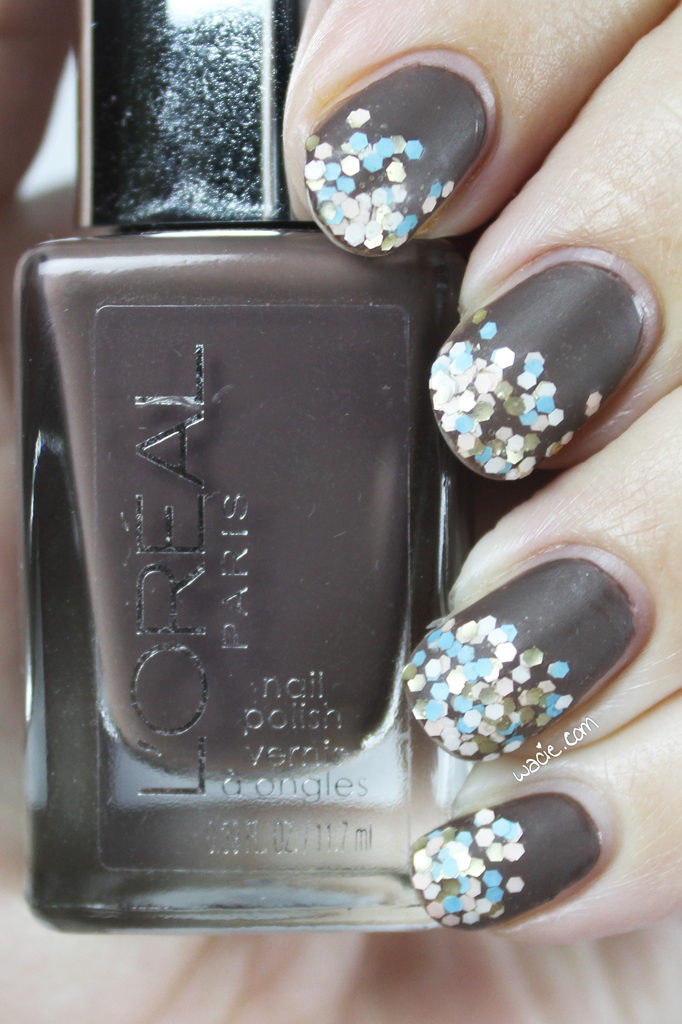
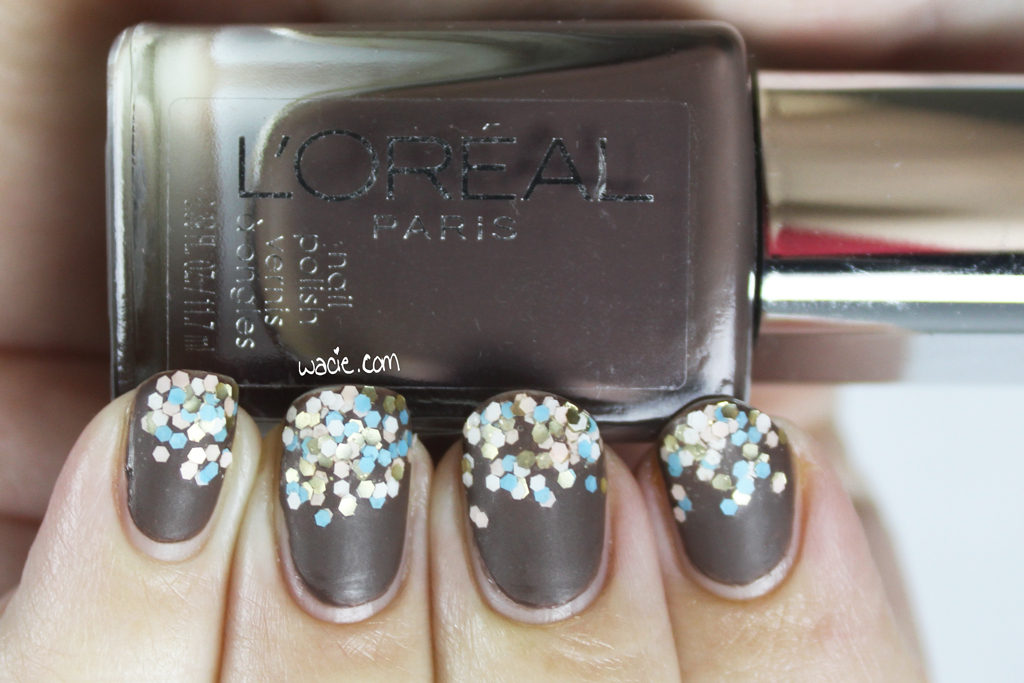
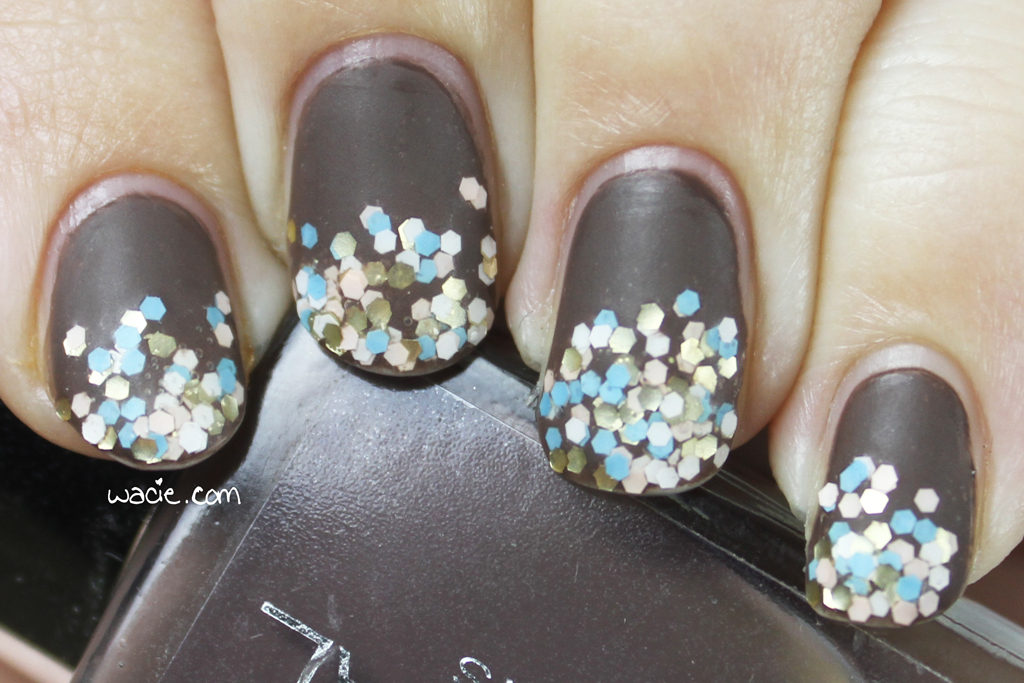
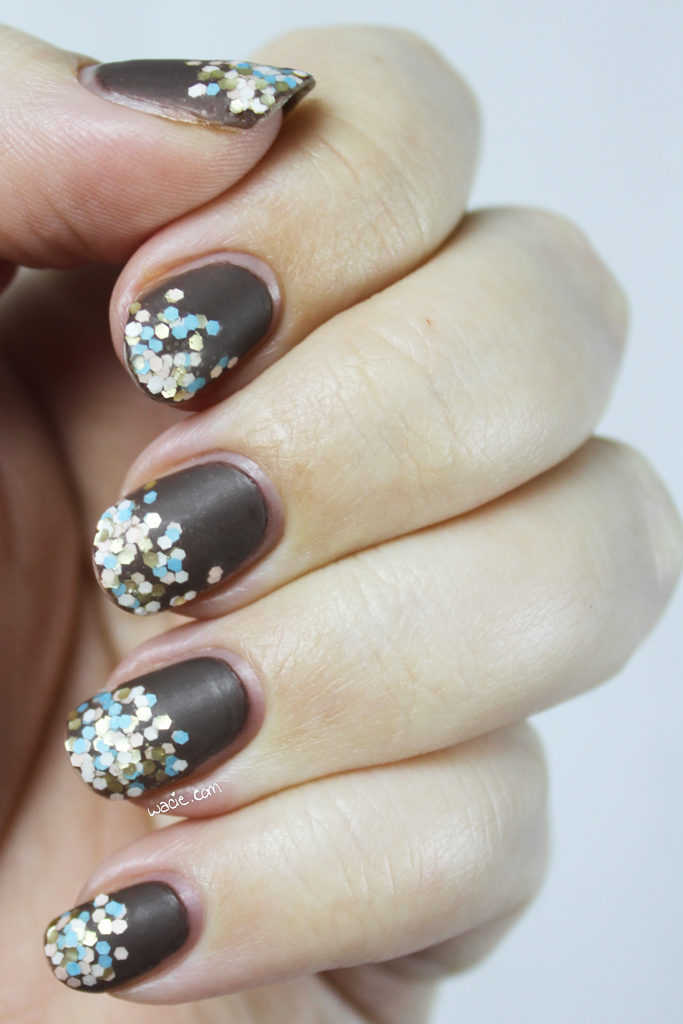
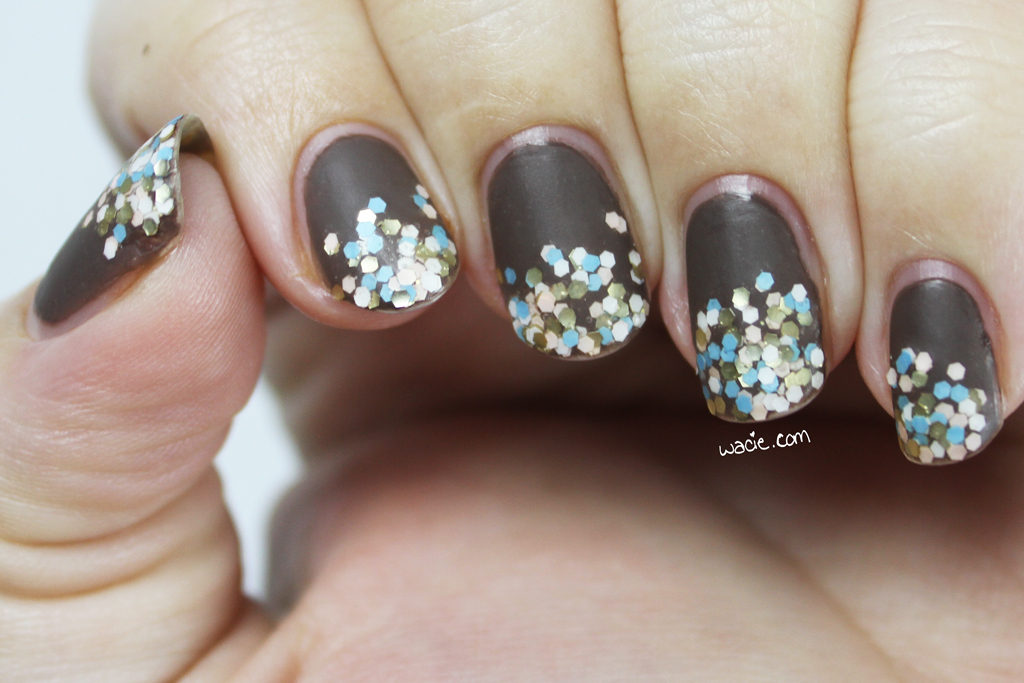
Happy Monday! It’s the last Monday of the year, and hopefully you got through it unscathed. There’s only a week left of this dreadful year, and I cannot wait to leave it behind. I’m going to send it off right, with a glitter gradient! For this look, I used L’Oreal’s Cockatoo’s Wisdom and Nails Inc.’s Upper Street.

I loved Cocktaoo’s Wisdom in the bottle; it’s this rich, cool brown, but it was hard to get opaque on my nails. It’s why I put the glitter on the top of the nail instead of the bottom, where I would have rather put it, but I needed it to cover the streaks that were still somehow left behind, even after three coats. It was really disappointing. On the plus side, despite coverage being wonky, it had a lovely shine to it. I felt a little bad mattifying it.

Upper Street is a pretty fun topper. By indie standards, there isn’t a lot going on in it; all of the glitters are the same shape and size, and it’s just color and finishes that are different, but I think it’s fun. I wanted cool colors to complement the cool brown base, and I think the pink and blue pastels do that very well. There are some metallic gold hexes in here also, but mattifying them hid them somewhat. I was hesitant to use this, because I’ve broken two Nails Inc. caps recently and had my polishes dry out. Hopefully this one is fine.

Cockatoo’s Wisdom has been discontinued by L’Oreal, but other L’Oreal products are sold nationwide. Upper Street is also discontinued; Nails Inc. is available at Sephora.

I bought these polishes myself.

Skincare Review: RevivSerums’s HA7X Multi-Molecular Hydrator Serum

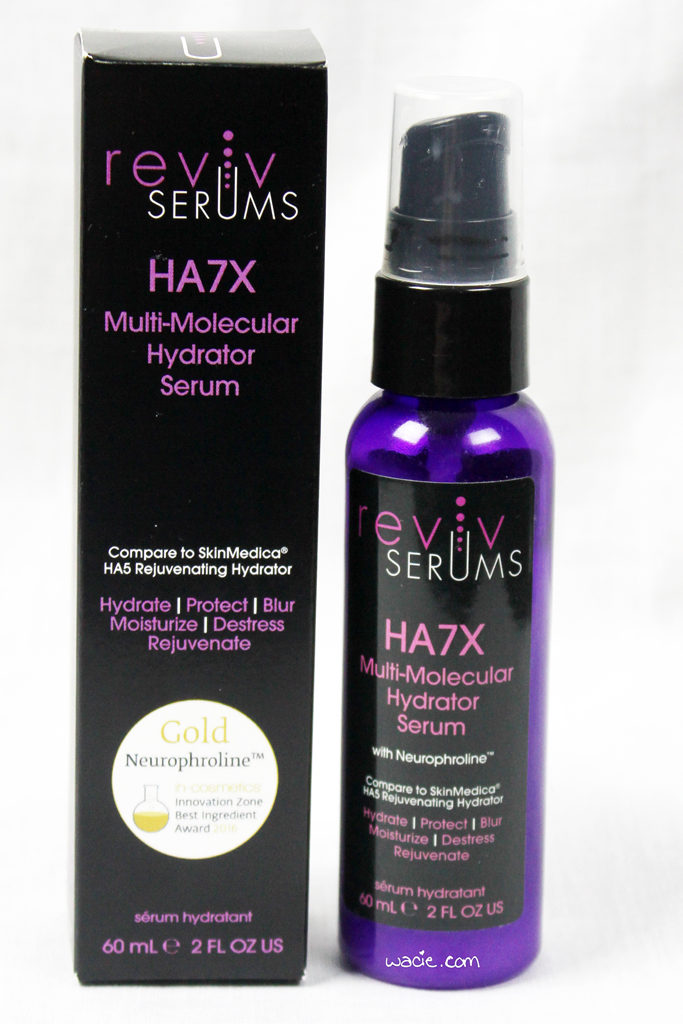
Hello reader! It’s another skincare review! The product we’re talking about today is the HA7X Multi-Molecular Hydrator Serum from RevivSerums. I used the serum with the rest of my skincare regimen for ten days and, believe it or not, I saw some interesting results.

I was given this product by Brandbacker and RevivSerums. My opinions are my own and are not swayed by free stuff.

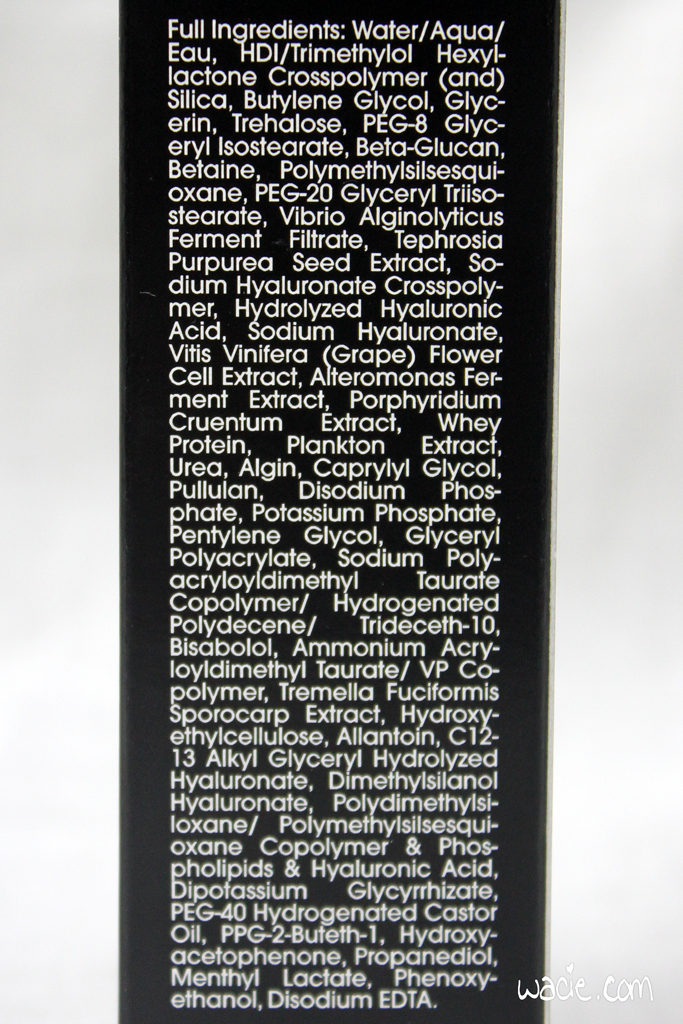
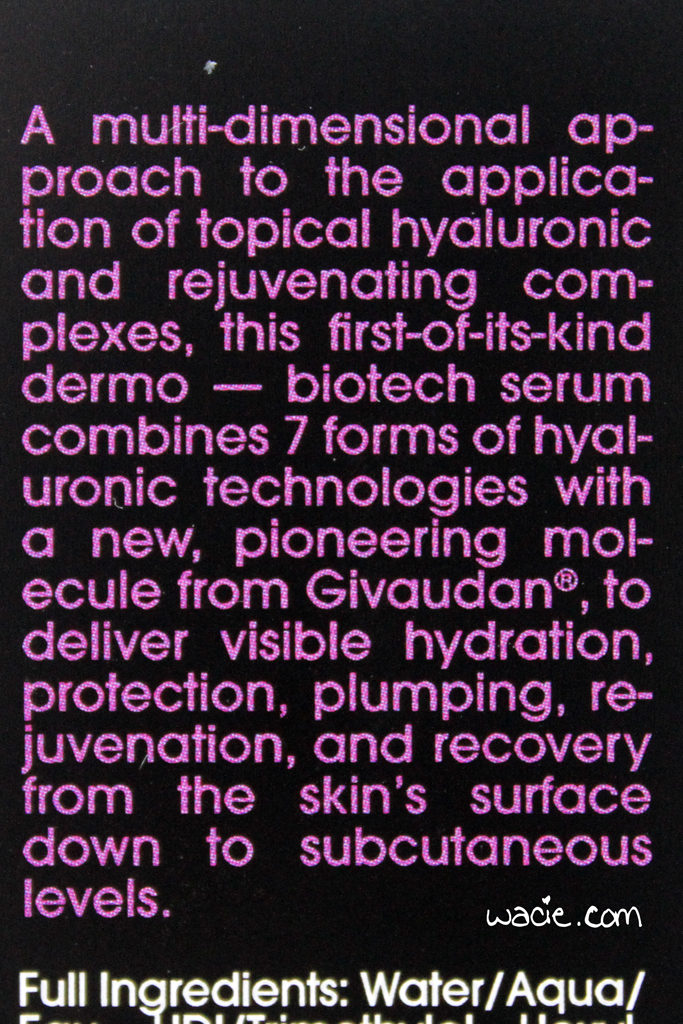
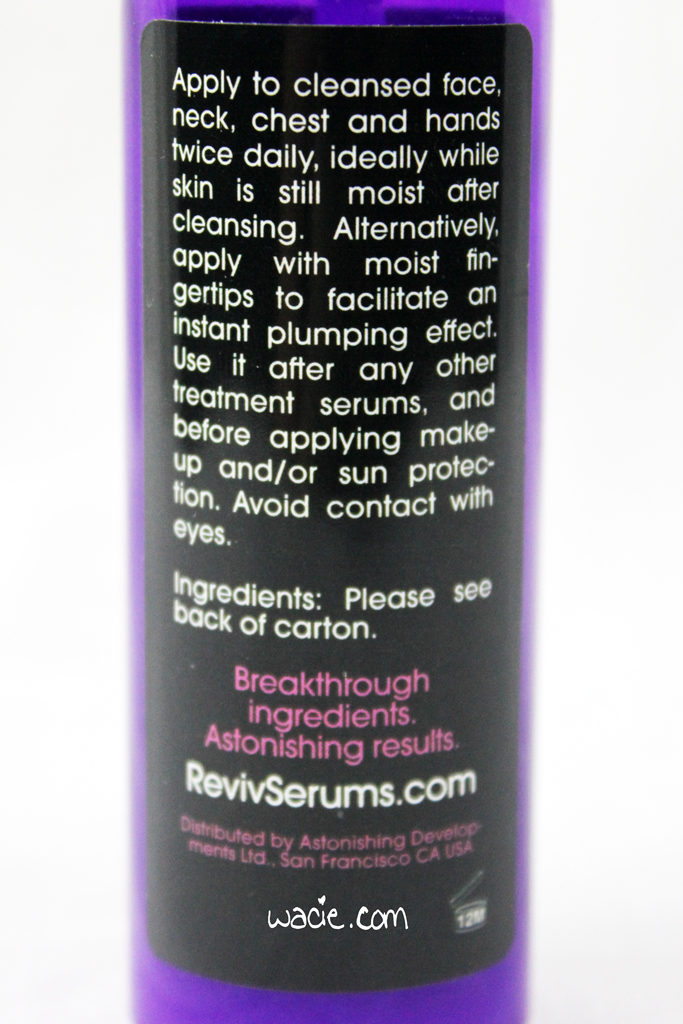
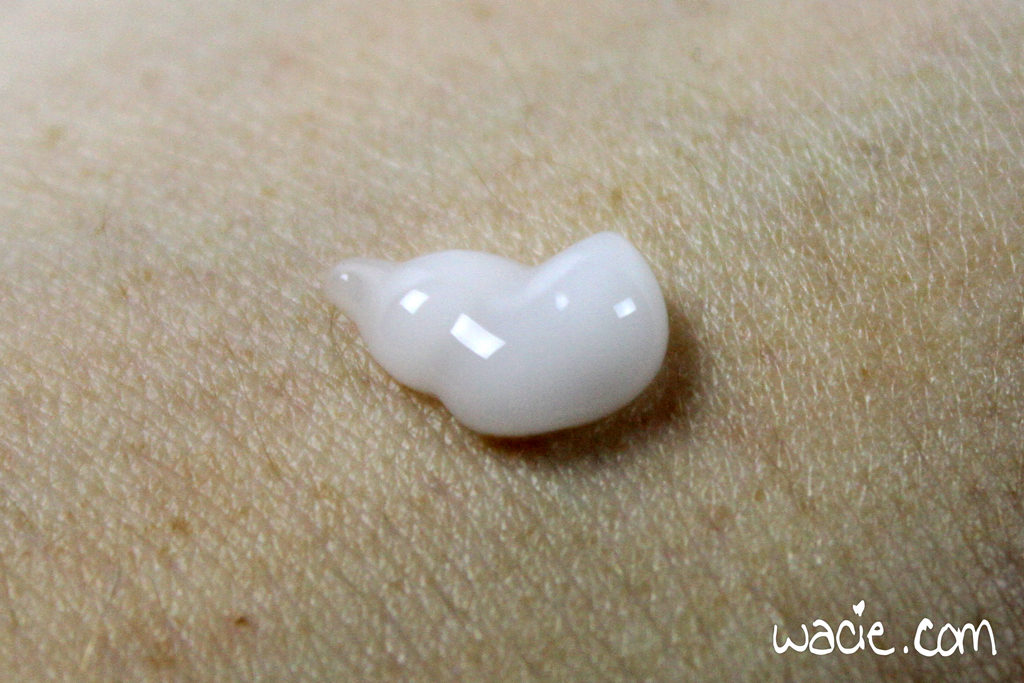
The HA7X serum is a multi-purpose serum aimed at treating a wide variety of skincare woes, including dryness, wrinkles, and dullness. It comes in a plastic bottle with a pump delivery. The product has a pleasant scent and a lightweight gel consistency. I used two pumps to cover my whole face, neck, and decolletage. The bottle also recommends using it on your hands, which I only did when I remembered to. Here’s the Cosdna entry for the ingredients.

Ingredients list, from the box


Product info, from the box


Instructions for use, on the bottle

I have to tell you, I really loved using this. I used it twice a day, morning and night, and since the instructions I was given said I could keep using my other serums and treatments with it, I kept using those too. The first thing I noticed is that it’s instantly moisturizing; I did not feel dry at all after applying, and even skipped my regular moisturizer most of the time I used it. Of course, I have very oily skin, and the hydration from this product exacerbated it. Those of you with normal to dry skin will like this.

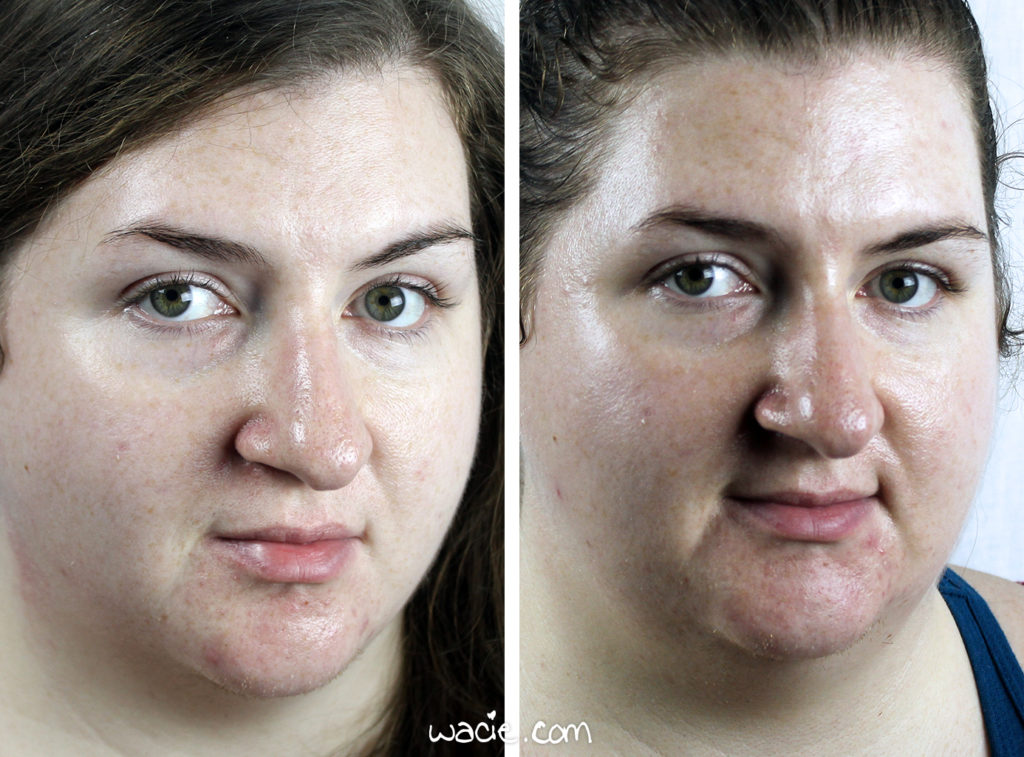
Here’s a before and after comparison. Of course, ten days isn’t nearly enough time to judge a skincare product’s long-term results, but I will tell you this: I have a wrinkle. It’s on my forehead over my right eye, and it’s about an inch long. I found it on my 25th birthday. It’s a pretty fine line, and whenever I try to show it to people, they just say “I don’t see anything, are you sure you’re not imagining it?” Well, it’s definitely there, because I can feel it. It feels deeper than it looks. Since I’ve been using this serum, I don’t notice it anymore. I can barely see it in the mirror, and I have to really poke around with my fingertip to find it. It doesn’t feel like a deep crease anymore, but just smooth. It’s kind of alarming, actually. My skin also seems brighter. Apart from that, I still have a lot of discoloration and hyperpigmentation from acne, I don’t see any improvements there yet.

Just so we’re clear, I hate posting photos of myself without makeup. I feel so naked!

Here is my skincare routine, just so you can see what else I used and how it fits in:
Origins Checks and Balances Cleanser (AM), Cetaphil Daily Facial Cleanser (PM)
Nameraka Sana Honpo Soy Milk Isoflavone Lotion Toner
Burt’s Bees Sensitive Eye Cream (AM)
Up and Up 2% Salicylic Acid Acne Treatment (AM)
Cetaphil DermaControl Oil Control Moisturizer (AM)
Valentia Night Revive Retinol Serum (PM)
CeraVe Moisturizing Facial Lotion PM (PM)

The HA7X was developed as an affordable alternative to Skinmedica’s HA5 Rejuvenating Hydrator, using 29 of the same ingredients and ultimately adding in two new and different actives. However, it’s nearly a hundred dollars cheaper, a mere $89 compared to $178. Of course, I don’t have the Skinmedica product to test simultaneously, but I find that this one works very well indeed. My one gripe is with the packaging; for $89, I would like something better than a plastic bottle.

The HA7X Multi-Molecular Hydrator Serum is available from RevivSerums.com.

I was given this product by Brandbacker and RevivSerums. My opinions are my own and are not swayed by free stuff.

Manicure Monday: White Snow Blue Lava

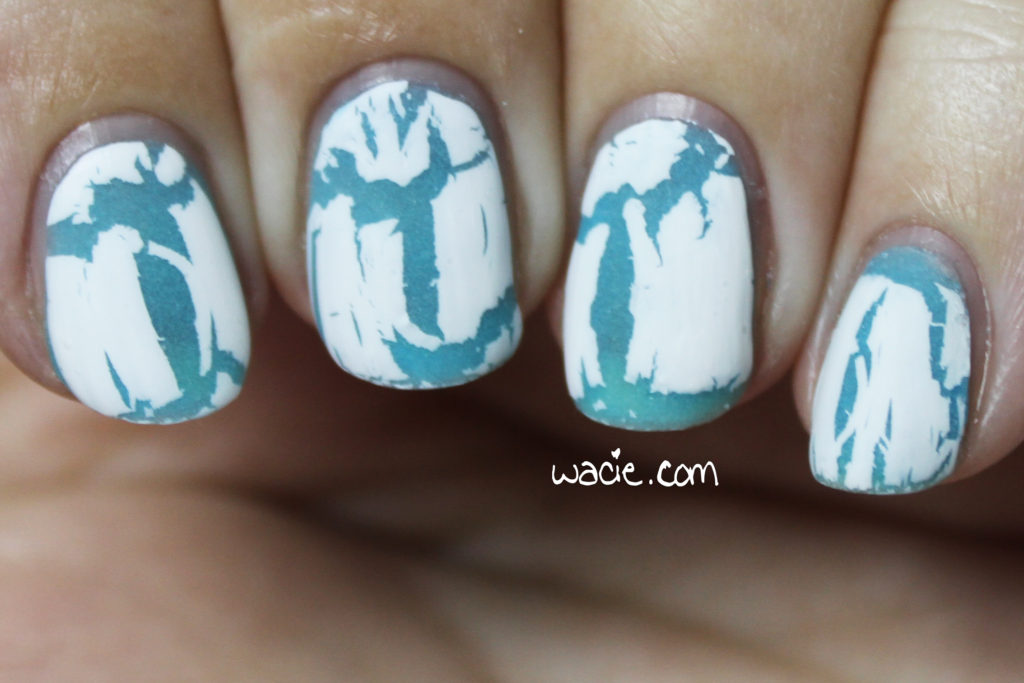
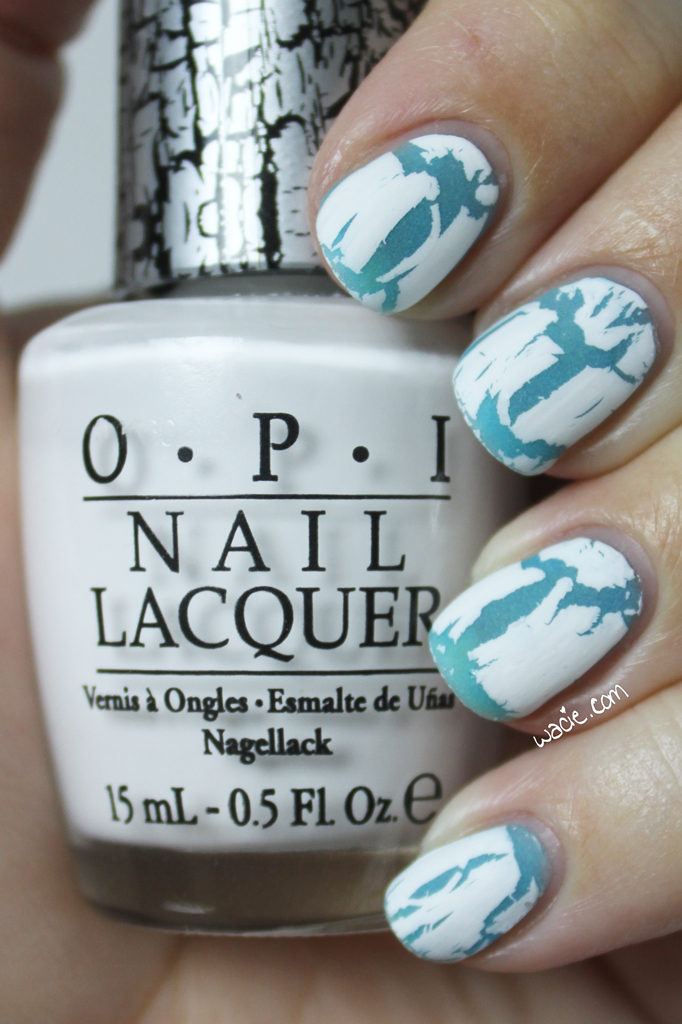
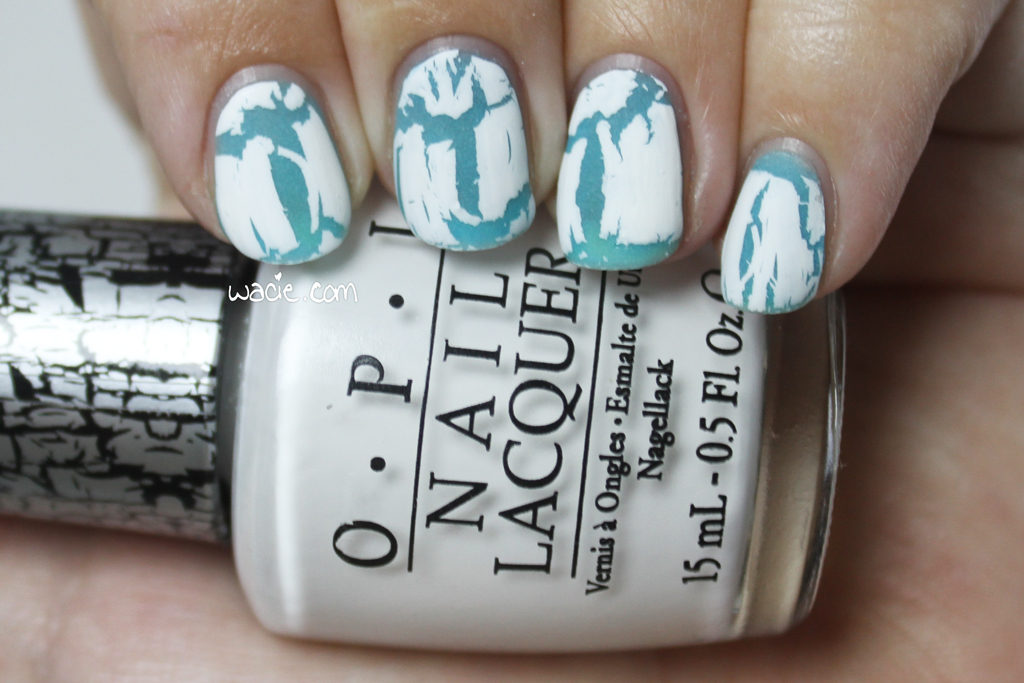
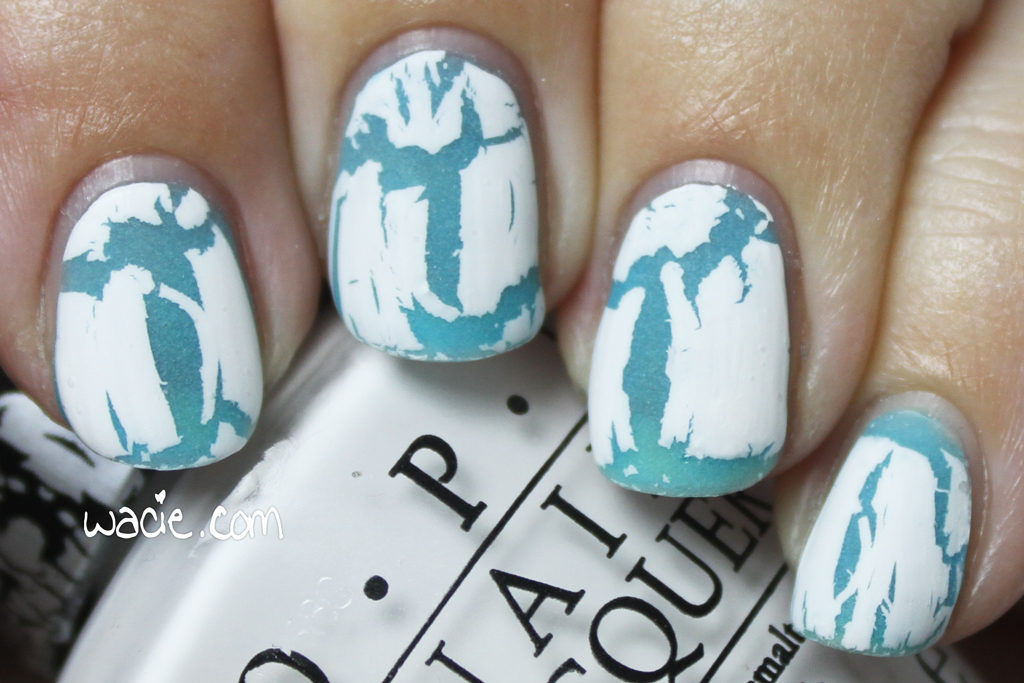
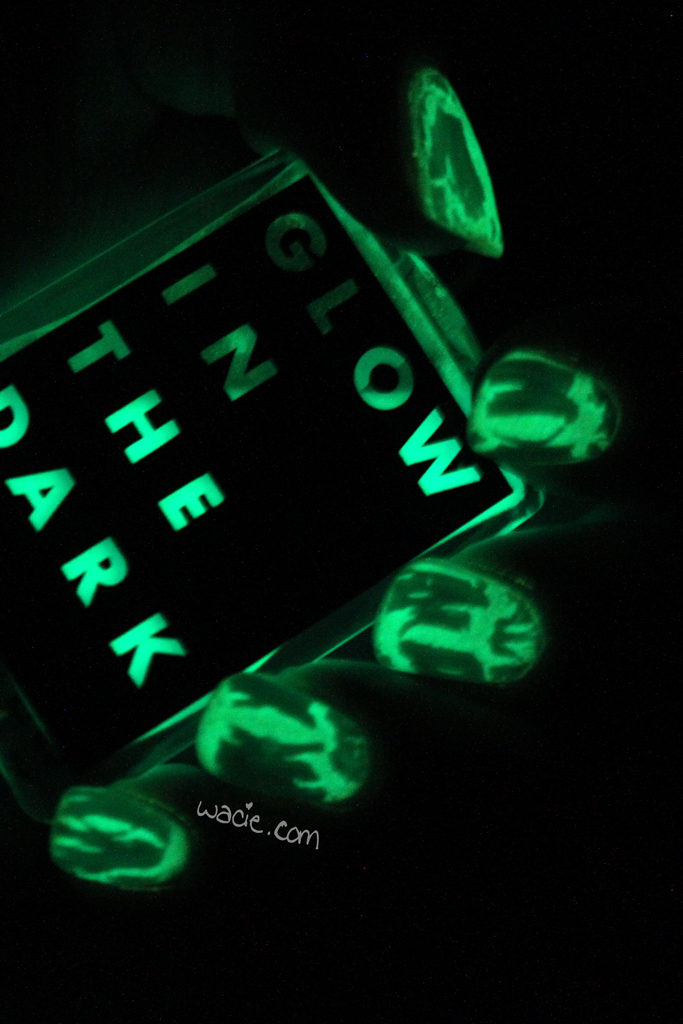
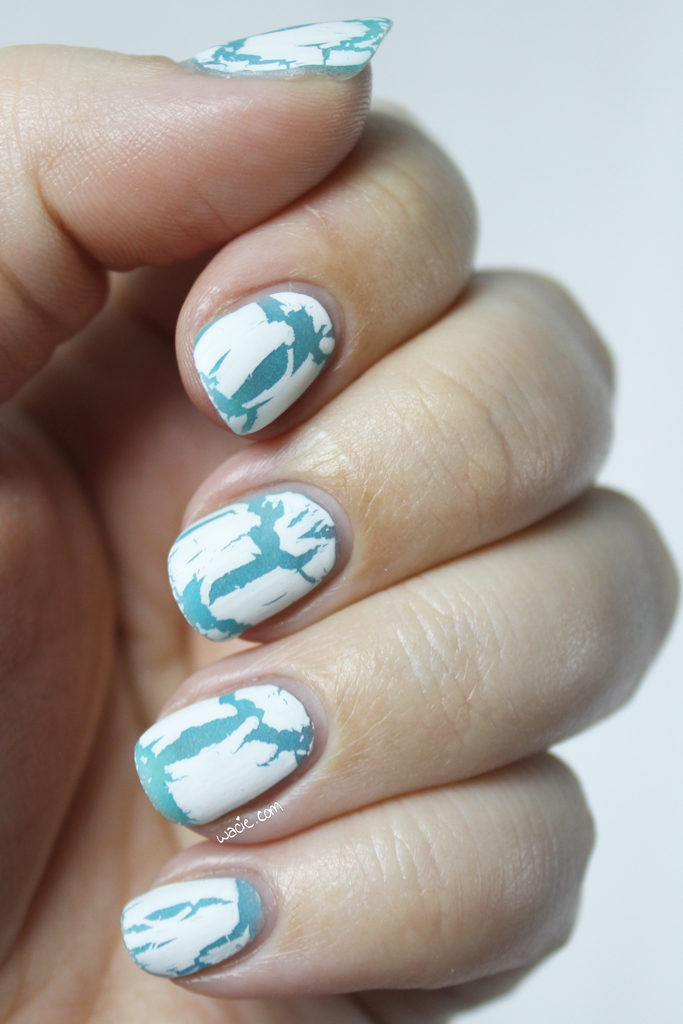
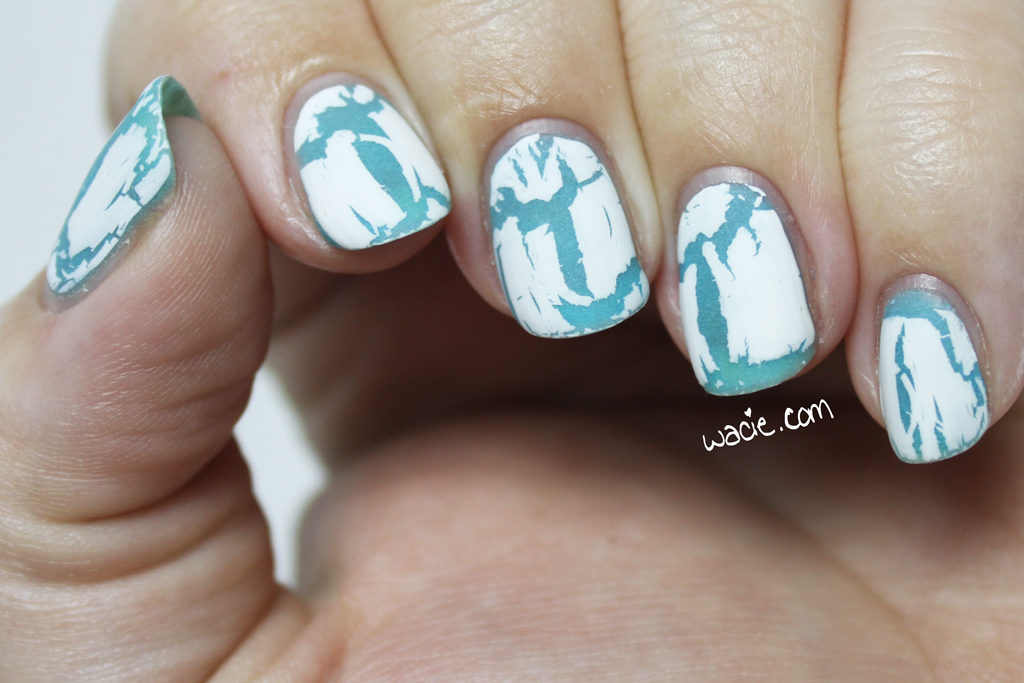
Happy Monday, reader! Today’s manicure is accidentally wintry. Some rain finally brought some chilliness to Florida, but it’ll be warming up again by Christmas (I hope). By chilliness, I mean it’s 59 degrees right now. Anyway, onto the look; I used OPI’s White Shatter over American Apparel’s Neptune, as well as Seche Vite and Essie’s Matte About You matte top coat.

Crackle polish is so over, even Boyfriend knows it’s over. I showed him my nails today and he said “Come on Wacie, crackle polish is so 2011.” I know it is, but I’m still going to keep using it if I have it around. I get tons of compliments on crackle polish whenever I do wear it, and since it’s almost certainly going to be in fashion again in the future, why should I toss it? Not that I plan to hoard it for another ten years, but as I already have plenty of ten year old bottles, it’s not unlikely I won’t still have them.

glooow

Something I like about topper polishes — not just crackles, but glitters and shifters, too — is that I can get creative with what I use as my base. Sometimes I’ll use it as an excuse to use a high-end or indie creme, a thermal, just something that I wouldn’t normally use. I’ll even try to use a color that makes a contrasting or unlikely combo. I used the glow-in-the-dark Neptune for this because I loved the idea of the glow coming through the cracks. It mostly just glows through the white, but you can still see the difference. Neptune also isn’t completely opaque, and it changes color a bit based on whatever part of my nail it’s on. It’s a bit brighter when it’s on the white free edge of my nail, and makes a mini gradient.

Of course, old crackle polish can be unpredictable. It didn’t crack on a few nails and I had to redo them. The pinky nail you see here had to be redone twice. It wasted a lot of time and polish. I love the matte finish, though. Usually I’m not a fan of the matte finish, but I feel like it was the way to go today.

White Shatter is discontinued, but other OPI polishes are available in stores nationwide. Neptune and other American Apparel polishes have also been discontinued.

I bought these polishes myself.
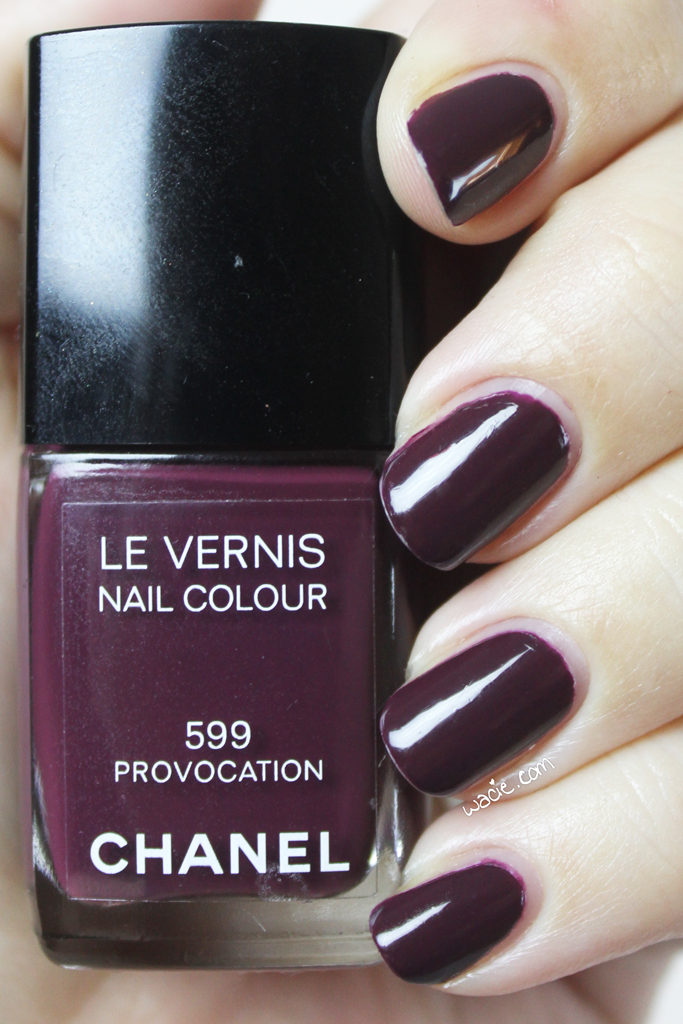
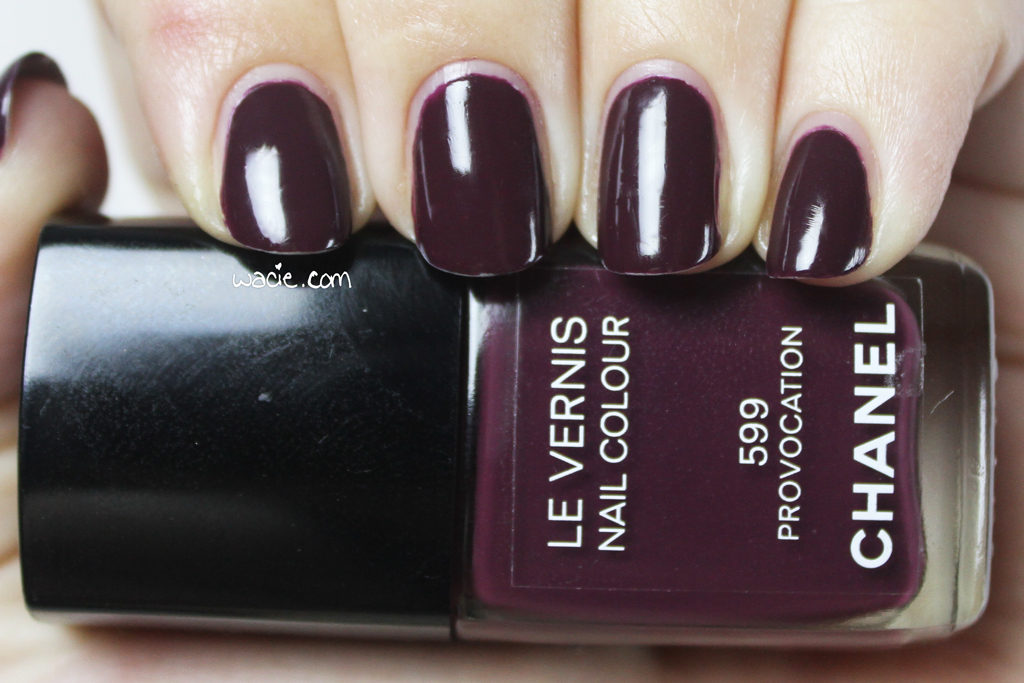
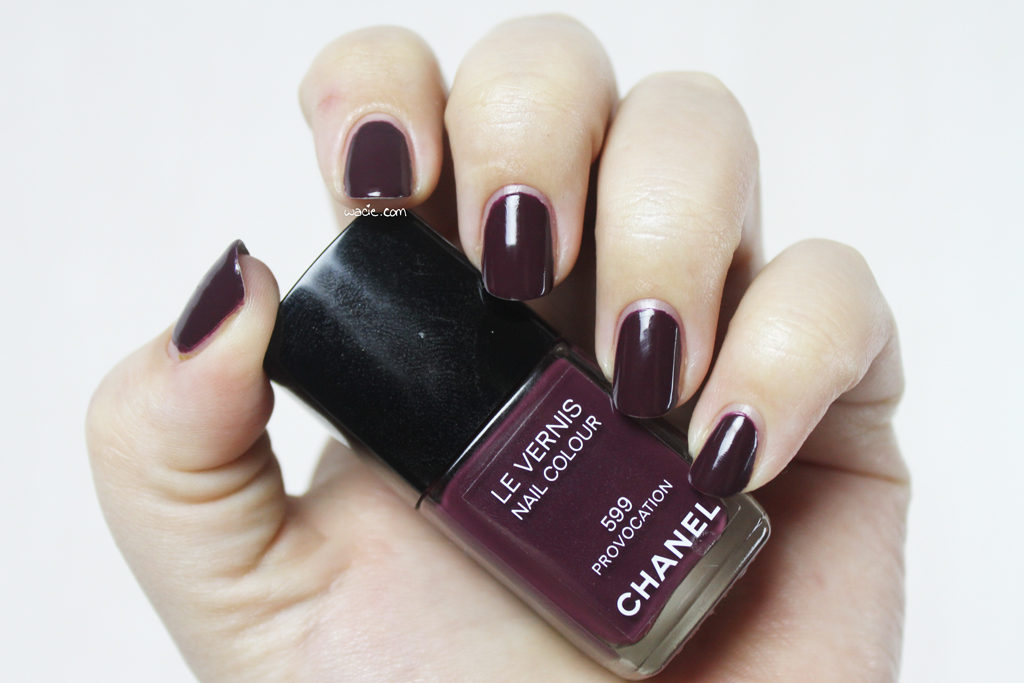
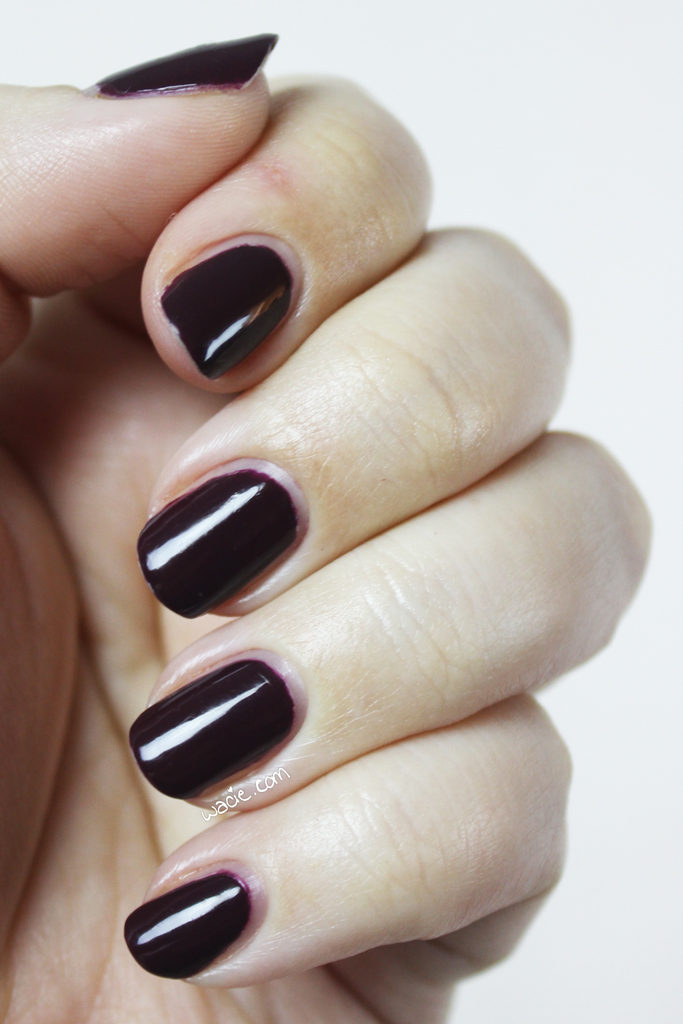
Swatch Sunday: Chanel’s Provocation

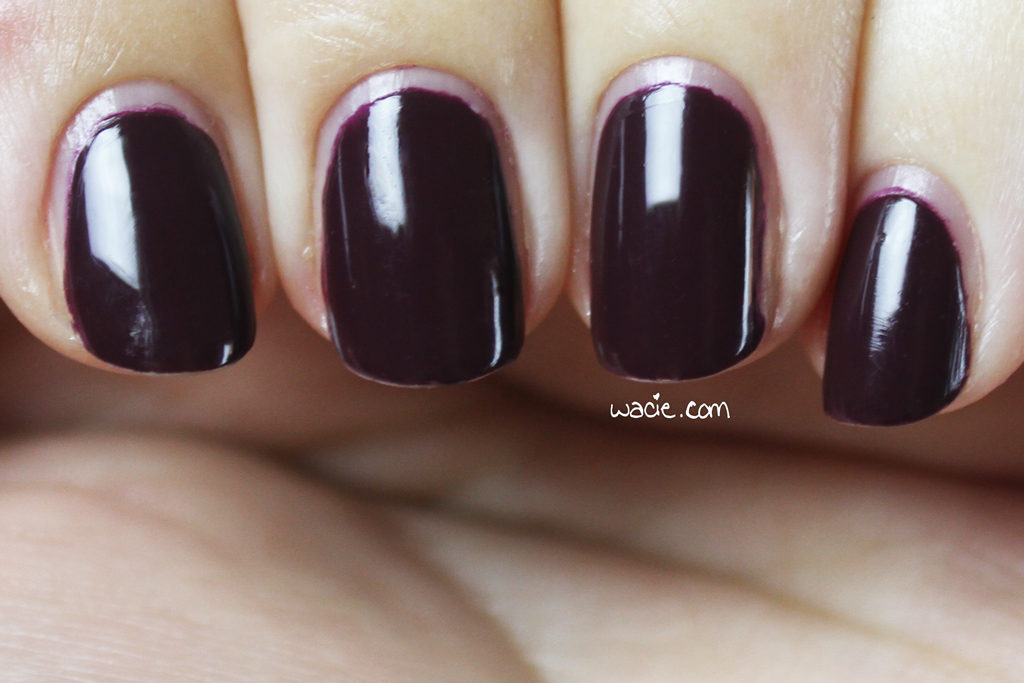
It’s Sunday, and I have a swatch! My swatch today is Chanel’s Provocation; I’m wearing three coats with one coat of Seche Vite top coat. I should note that I took these photos about a day after I put the polish on, so there is a slight bit of wear on the tips.

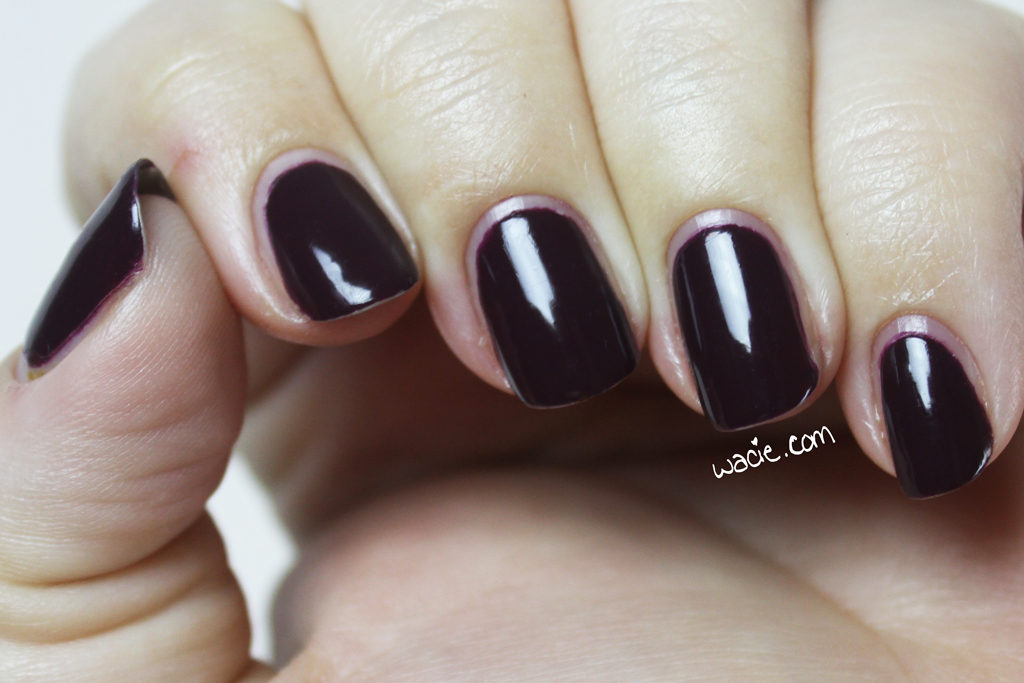
Provocation is a darkened plum creme. The product formula is very smooth and easy to work with. I had some opacity issues with the first coat, but additional coats evened it out. I think it still looks a little off in photos, but it’s opaque in real life. The polish dries with a glossy finish; I used top coat for extra shine.

This is the second of my birthday Chanel polishes from Nordstrom. The Nordstrom in my city opened on my birthday weekend a couple years ago, which I took as a sign I had to go. I’d also always wanted a Chanel polish, so I got two, this one and Blue Satin. I love the color of this polish. In some of these photos the color on my nails looks a bit darker than what’s in the bottle, and I’m not sure why that is, but it’s exactly the color I wanted: vampy, dark, and sexy.

I think Provocation may have been discontinued, but it’s an easy color to dupe, and any plum polish is probably comparable. Chanel polishes are sold wherever Chanel cosmetics are sold; mine are from Nordstrom.

I bought this polish myself.
Swatch Saturday: Blue-Eyed Girl Lacquer’s Believin’ Won’t Fly

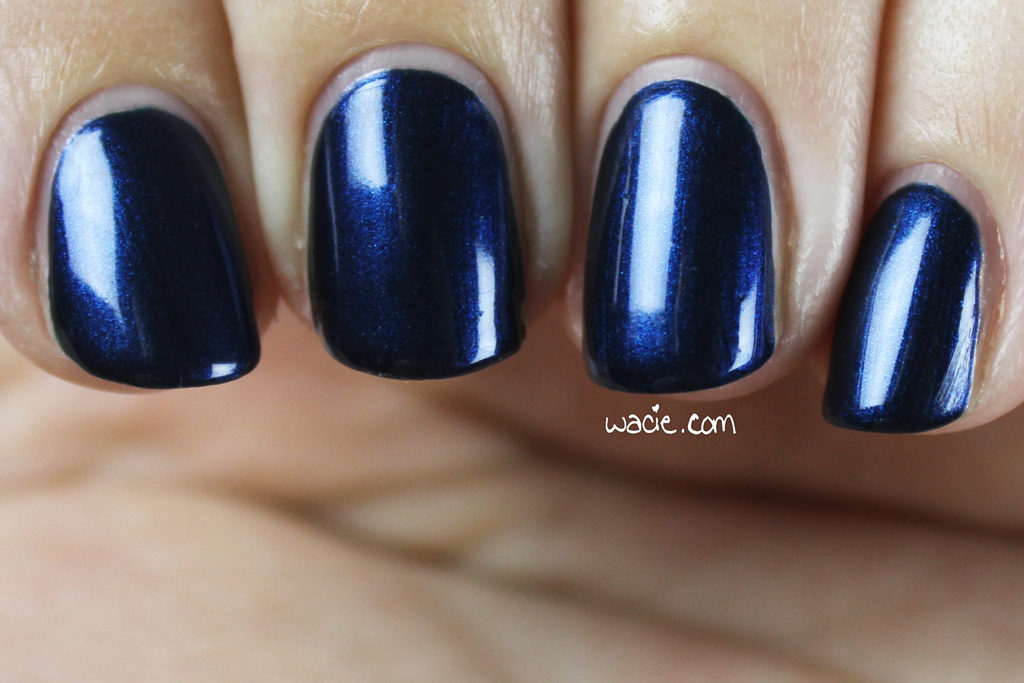
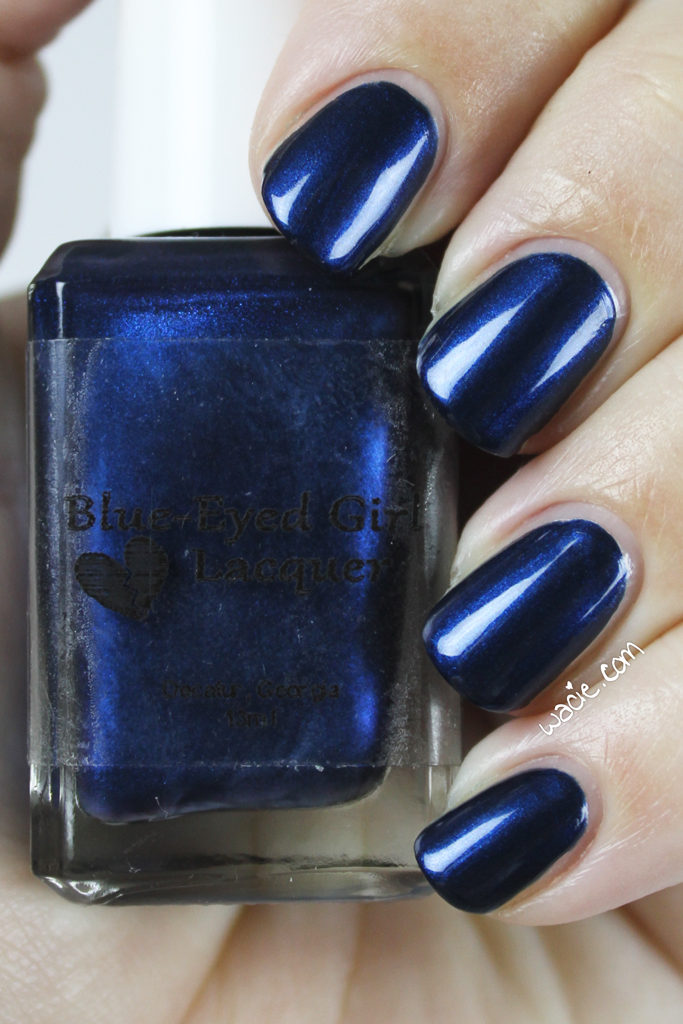
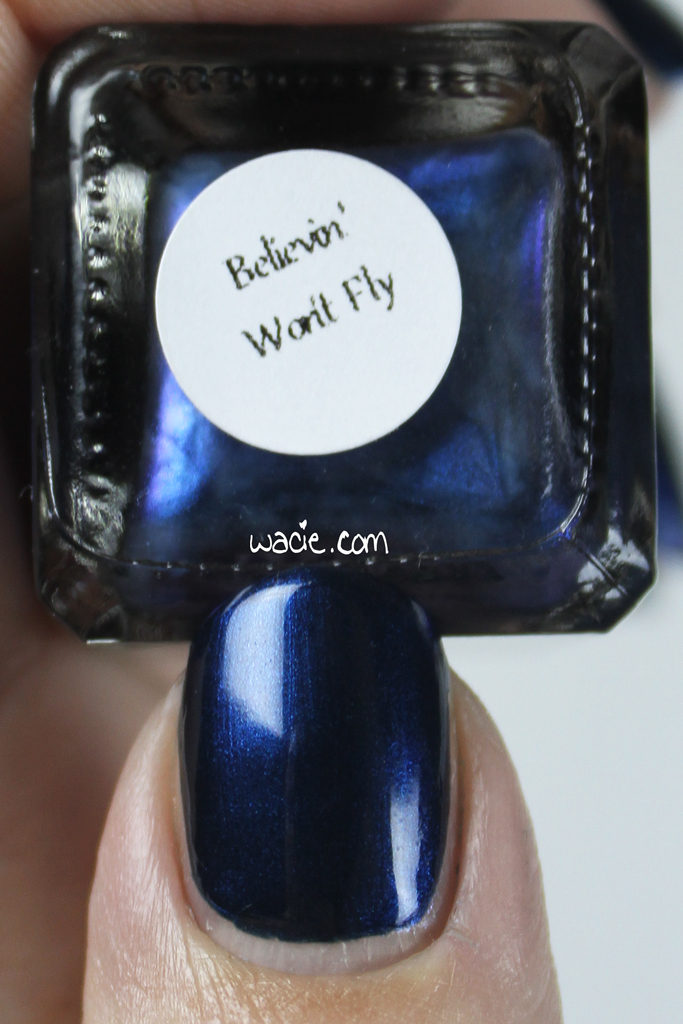
Swatch Saturday!! Today’s post is a little late due to Christmas parties, but it is still Saturday somewhere. For today’s post, I’m wearing Blue-Eyed Girl Lacquer‘s Believin’ Won’t Fly. I’m wearing three coats with one coat of Seche Vite top coat.

Believin’ Won’t Fly is a deep blue creme with a strong bright blue flash. Application was a breeze; the product consistency was a little on the thin side, but it covers unbelievably well. I had an opaque first coat, if you can believe that. Of course, I added additional coats because I like the thickness of it, but I could have gotten away with that first coat if I wanted to. Drying times were good, and the polish dries with a satin finish.

Here’s a second polish in the Crooked Hearts collection. I love that there’s nothing about this polish that says Valentine’s Day; the deep color and sapphire flash make it seem more wintry than romantic, and I think that’s awesome. I was seriously impressed with the product quality, but the look itself is just so spot-on. It’s pretty simple for an indie, so much so that I kind of forgot it was an indie while I had it on, but it’s a nice change of pace.

The following photos were taken in direct sunlight. This almost looks like a different polish in the sun. In the studio, you can see how the polish is mostly dark, and the shimmer appears wherever the light hits it. OUtdoors, whrere the light is diffused and everywhere, the shimmer is activated all over the nail. It’s a very cool look.

Believin’ Won’t Fly is available in the Blue-Eyed Girl Lacquer online shop.

I bought this polish myself.
Manicure Monday: Orange Holo Crush

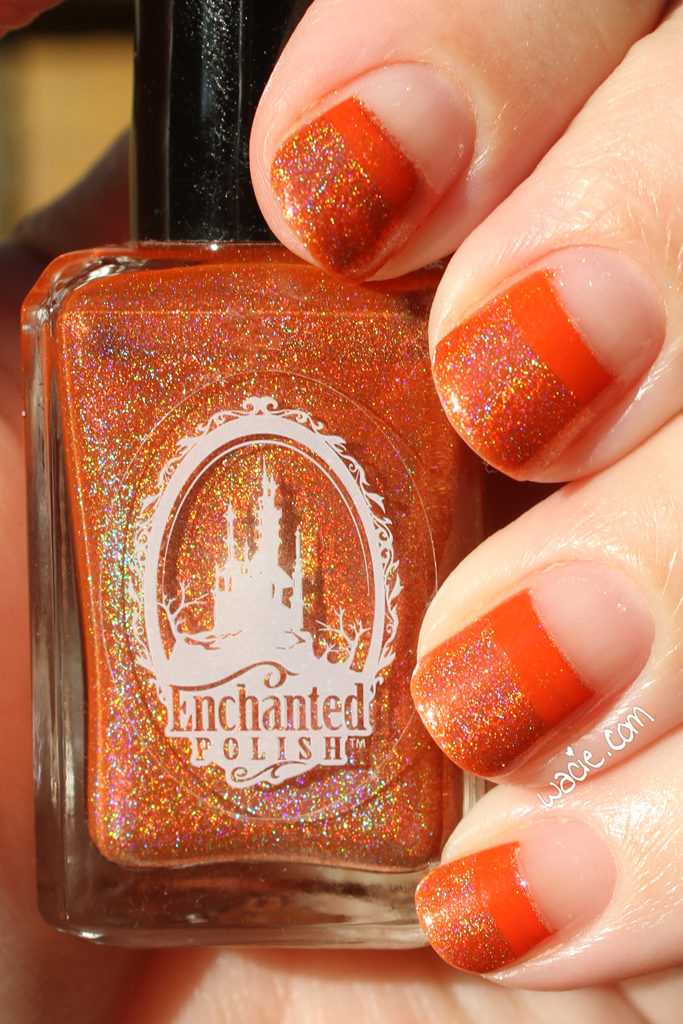
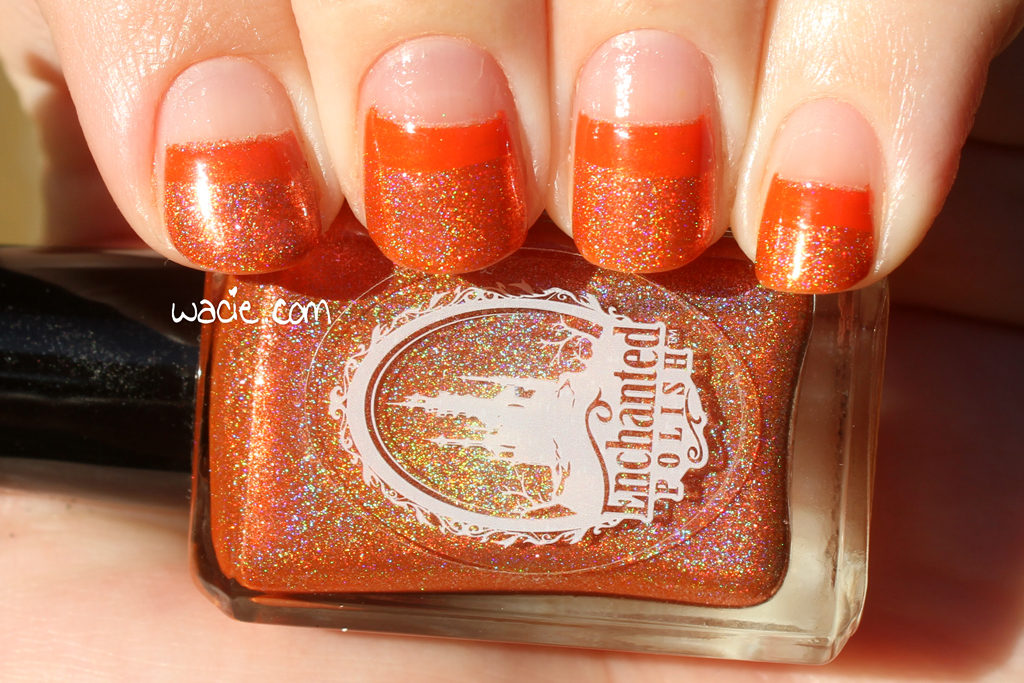
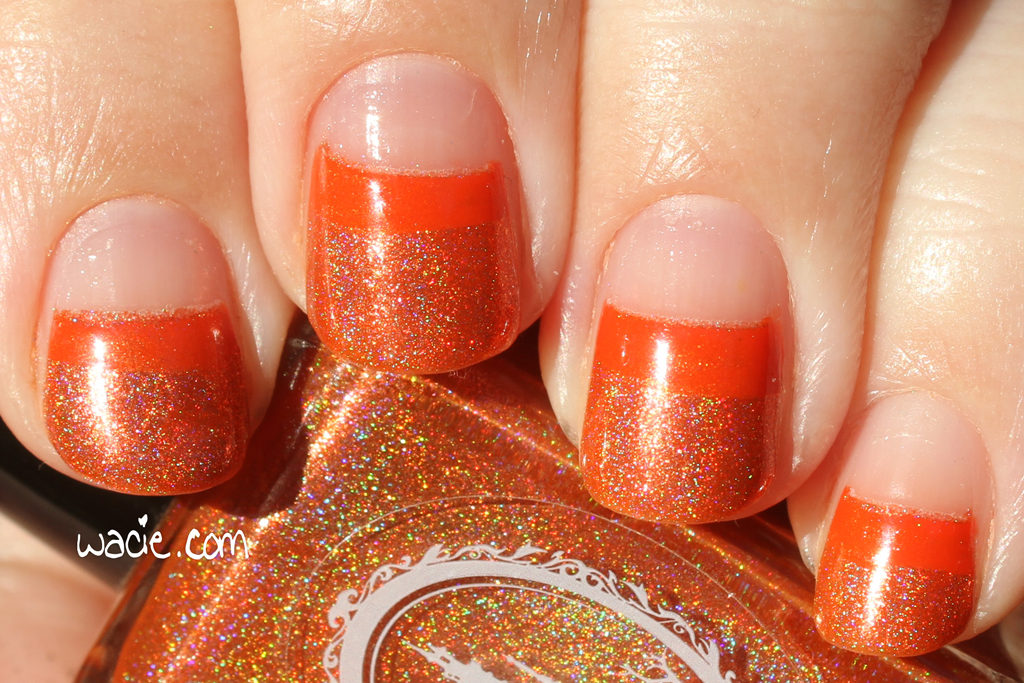
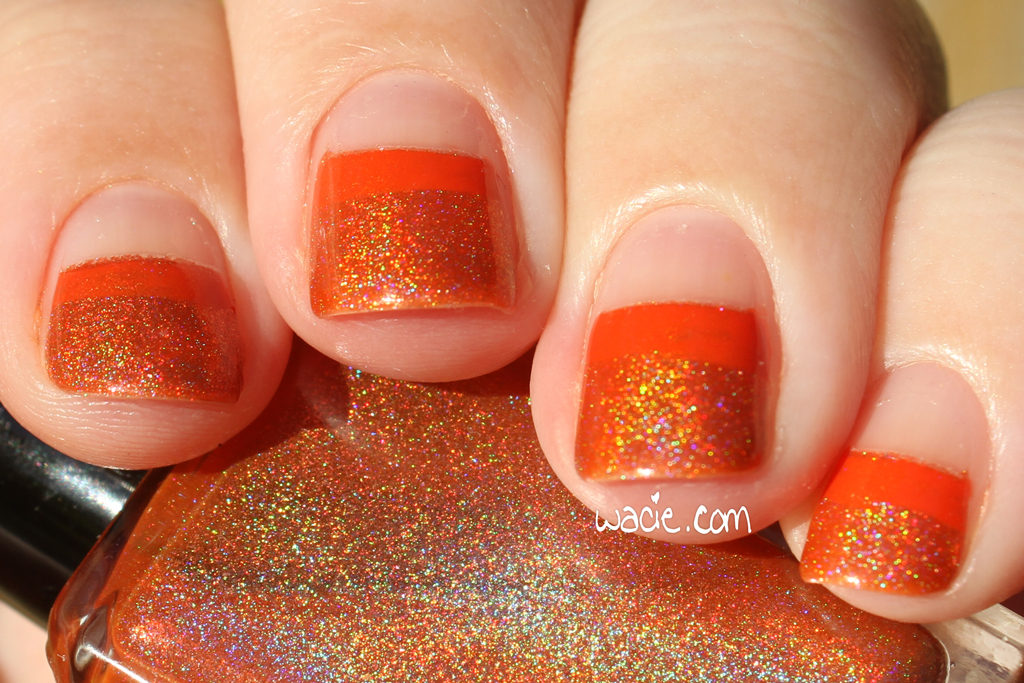
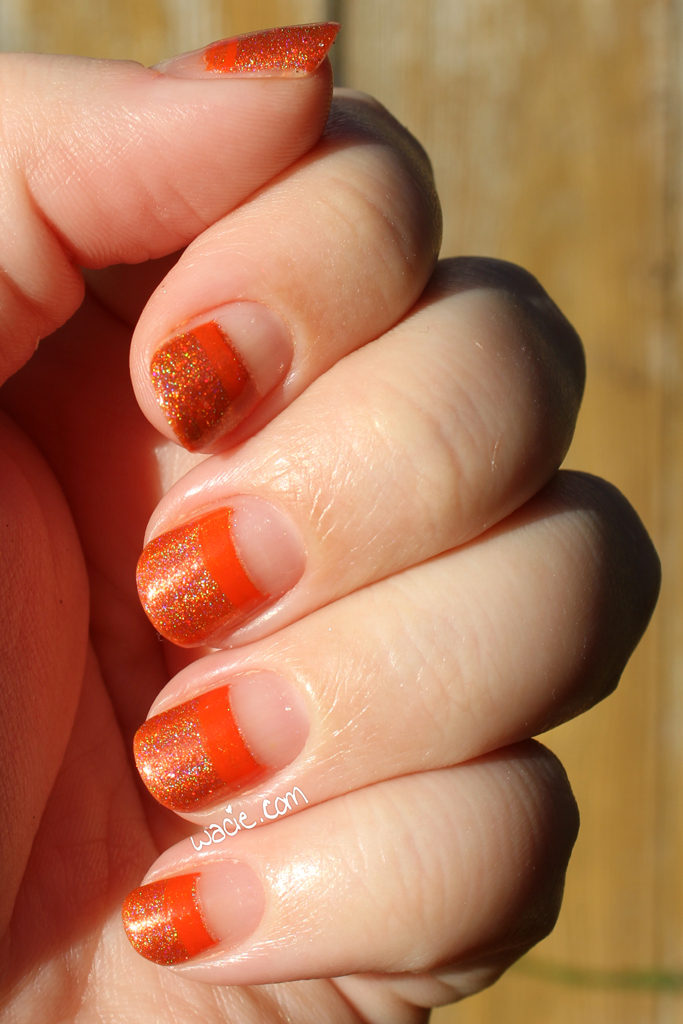
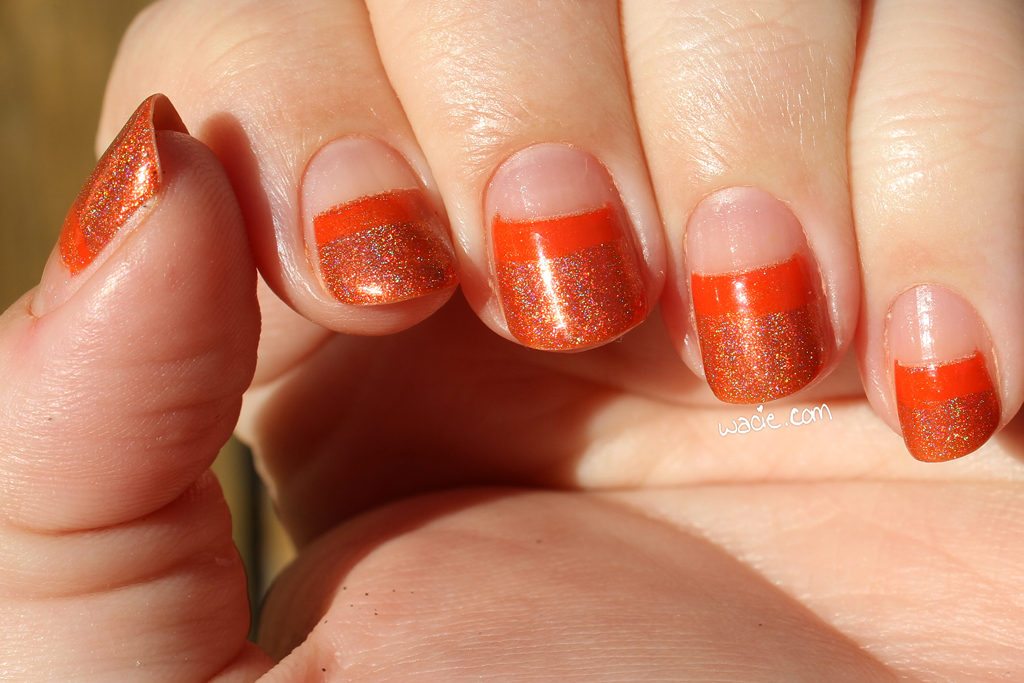
Happy Monday! This is post is late because I’m lazy. I’m excited about this mani, though, because I don’t often use my Enchanted Polishes. I try not to feel bad about using discontinued or special polishes, but I feel bad about using the Enchanteds. I don’t want to use them up! This mani started as just a half-moon mani with May 2014, but I added a stripe of Ciaté’s Encore! for a little extra color. Let’s get started! All photos were taken in direct sunlight.

Most of my Enchanteds are used. This one is; it was one of the first ones I ever bought. At the time, I was just buying up whatever ones I could find that were under $20. I could never get in on the pre-orders or surprise restocks in time, so buying them used was always a better option, even if it sometimes cost a little more. I love orange, so I knew this was one I would want. Boyfriend’s birthday is in May, so there’s that, too.

I like Encore! in this mani because it’s a similar orange, but also different enough to be apparent. I wanted something between the negative space and May 2014, and after considering a few different things, this was what I picked. I felt a little bad covering up some holo, but I think it works. Also, good news, Envy didn’t stain me! Two coats of Seche Base did the trick.

May 2014 is no longer sold by Enchanted Polish; other polishes are available in their online shop. Ciaté is sold at Sephora.

I bought these polishes myself.
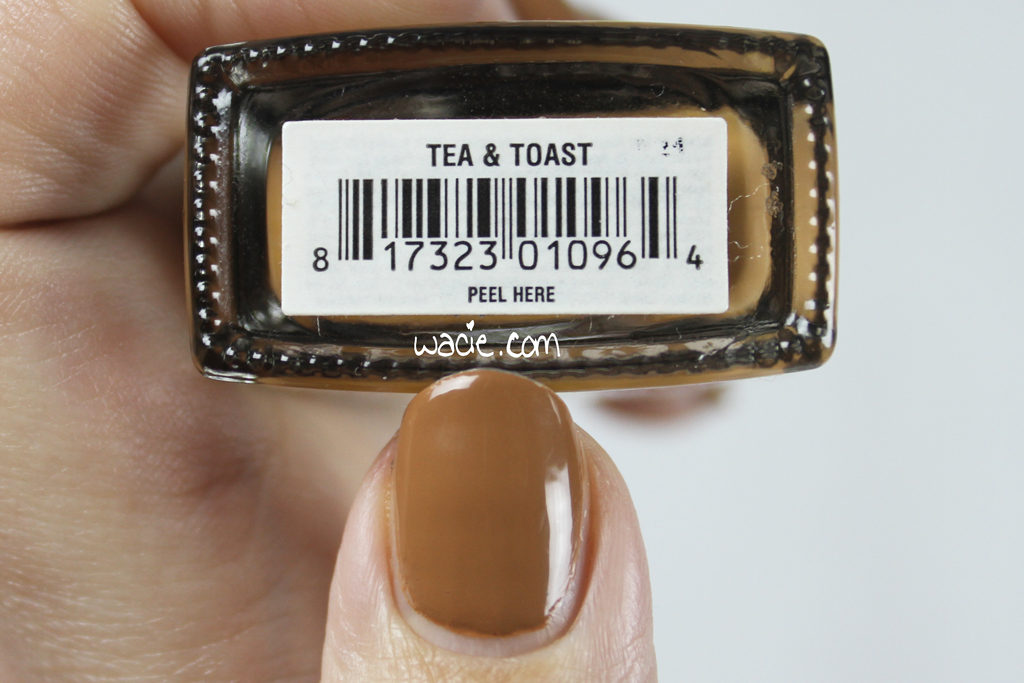
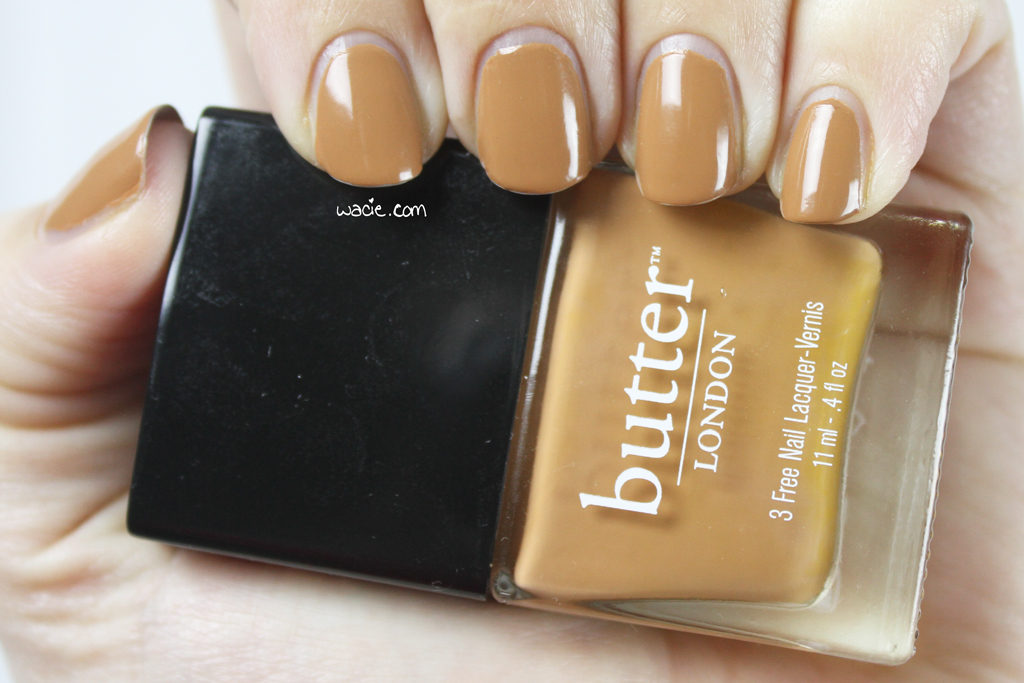
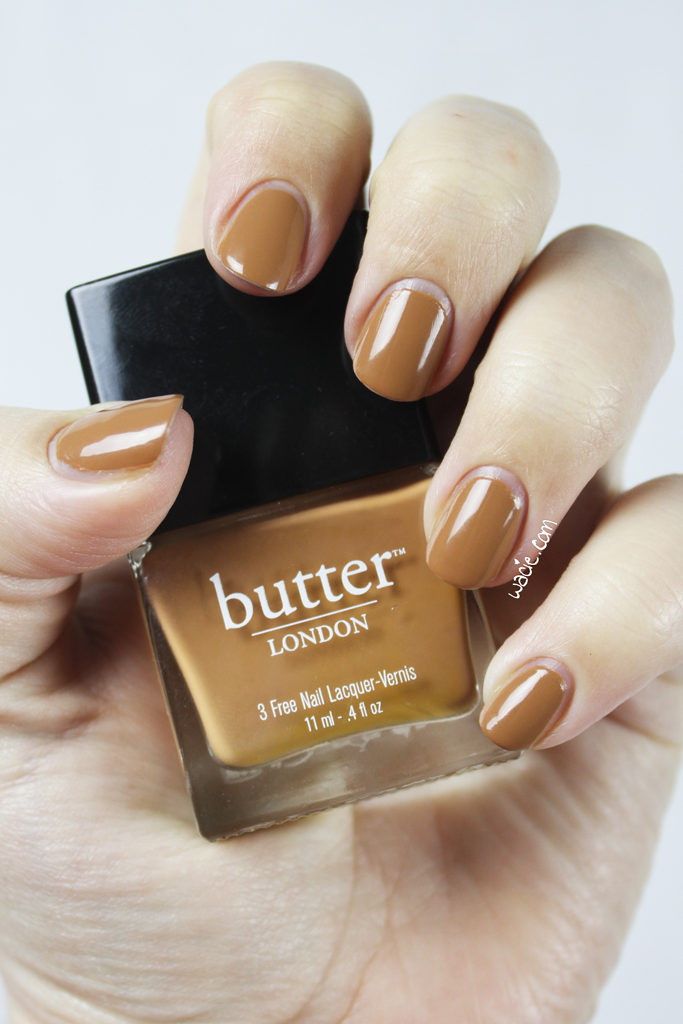
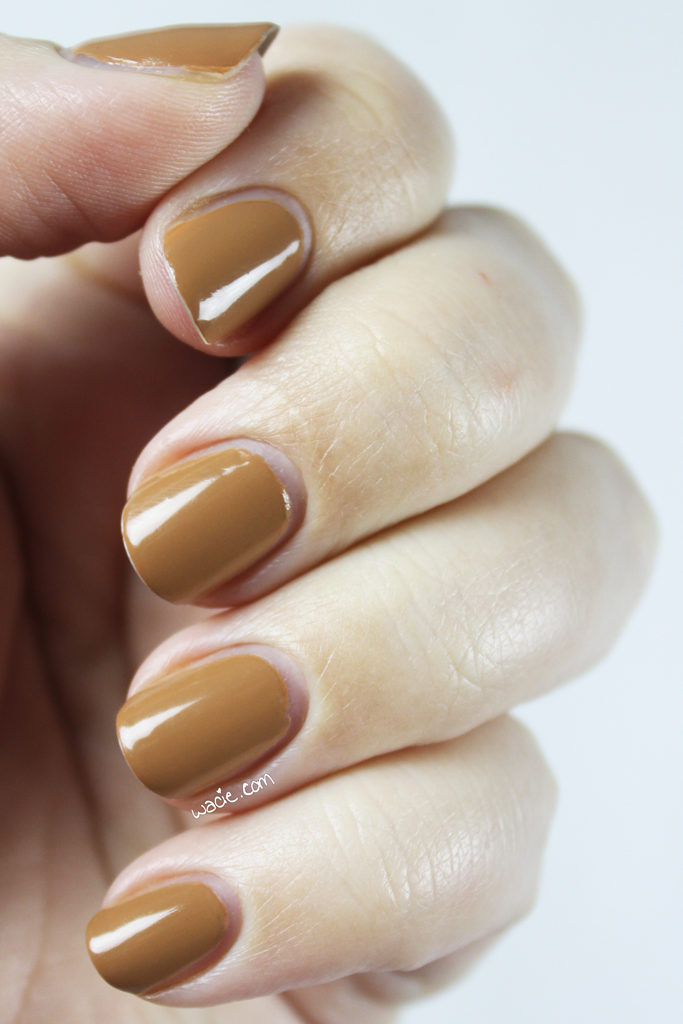
Swatch Sunday: Butter London’s Tea & Toast

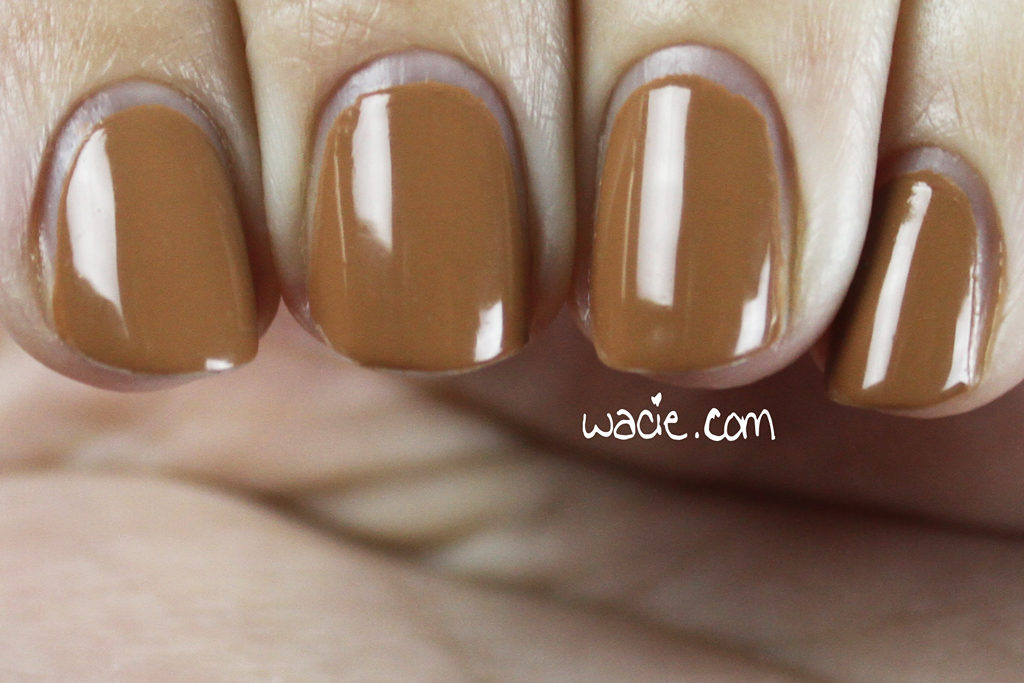
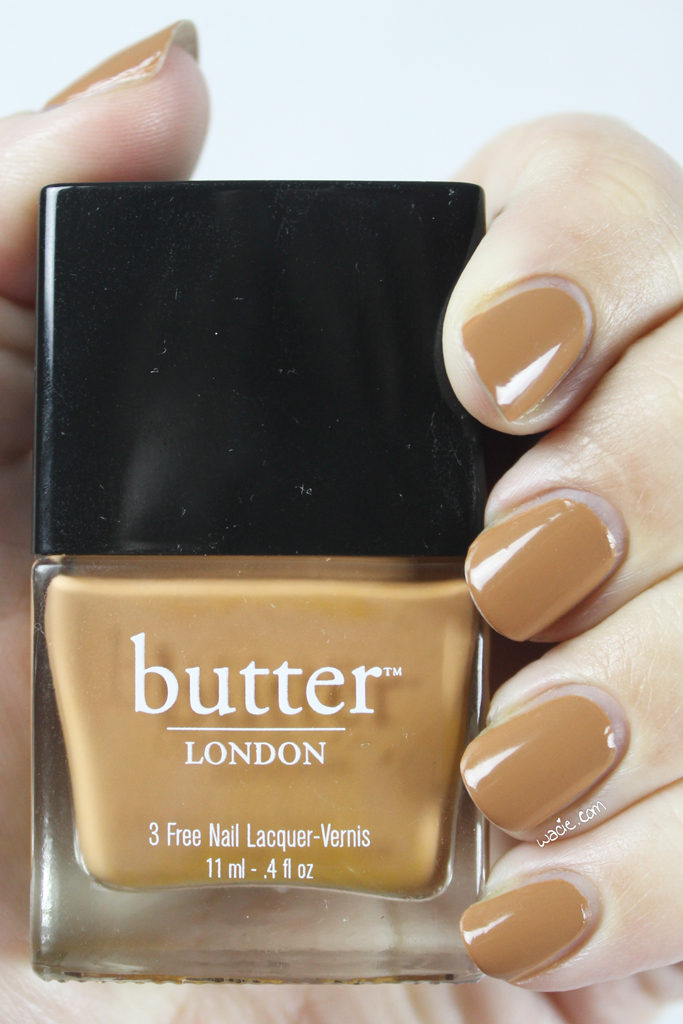
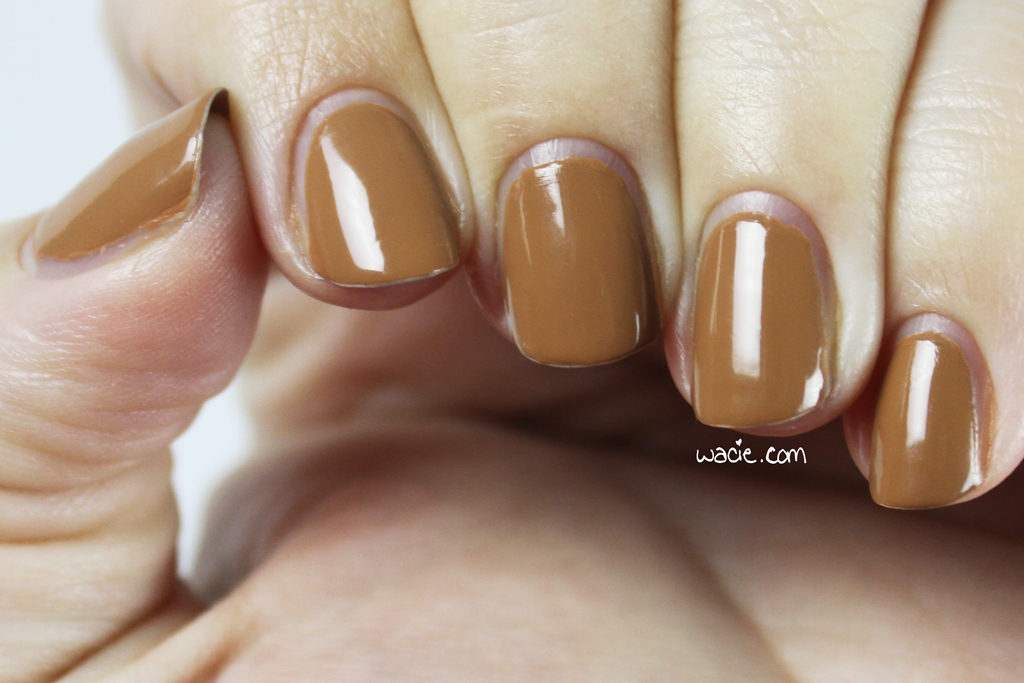
Sunday, Sunday, Sunday!! Here’s a swatch! This is Butter London’s Tea & Toast; I’m wearing three coats with one coat of Seche Vite top coat.
Tea & Toast is a toffee brown creme. Application was very nice; the product consistency was pretty typical for a creme, and is such that I had an almost-opaque first coat, though I tend to do pretty thick coats. Drying times were good, and the polish dries with a glossy finish. I used top coat for extra shine and protection.

I love this shade! I think it’s a pretty unique color in my collection; despite having so many bottles of polish, I don’t own a whole lot of cremes, and especially not many warm caramel ones. It’s elegant and stylish, and I love the look. I thought it was going to be boring!

I think Tea & Toast is discontinued, unfortunately; other Butter London polishes are sold at Ulta and Nordstrom; I got mine at Nordstrom Rack!

I bought this polish myself.