Manicure Monday: Dreams of Mermaids

Hello reader! I’m so excited for today’s post. I’m wearing a thermal polish! Dreams of Mermaids was a very early indie polish purchase, and today’s the day I’m giving it some love. I’m wearing three coats with one coat of Seche Vite top coat.

IMG_27532

IMG_27562

Dreams of Mermaids is a green-to-teal thermal polish with gold, blue, and green glitters, as well as a green shimmer throughout. Unfortunately, because it’s a very hot day in sunny Florida, I wasn’t able to capture the thermal effect well. In July, it doesn’t matter how long my nails are, the polish is always in the hot stage. Dunking my nails in ice water effects the change, but as soon as I pull it out, it goes right back to hot. This is why my cold stage and transition photos are so watery; I had to work fast. I do apologize.

IMG_27622

IMG_27642

IMG_27692

IMG_27752


I’m actually surprised the thermal effect still happens at all; this is a three year old polish, after all. I bought it at the same time I bought Pretty Chameleon, another beautiful Pretty & Polished thermal. Not only does it still change, it still has a pretty dramatic change. Something I notice about old thermals is that even though the effect still happens, it doesn’t happen as quicky or as powerfully as it used to. This one still works like it’s brand new.

IMG_27822

IMG_27882

In the sunlight, you can see exactly why this polish is called Dreams of Mermaids. The colors are definitely evocative of the ocean, and the shimmer really lights up out here! These photos were taken in direct sunlight.

IMG_27132

IMG_27252

IMG_27212

IMG_27342

mmpnpdommc

It looks like Dreams of Mermaids has been discontinued by Pretty & Polished; other P&P polishes — including thermals! — are for sale in their etsy shop and on their website.

I bought this polish myself.

Swatch Saturday: Blue-Eyed Girl Lacquer’s Void Stuff

Happy Saturday, reader! I’m so excited to share today’s swatch with you, because it’s an incredible polish, possibly even my favorite BEGL holo to date! This is Void Stuff from Blue-Eyed Girl Lacquer; I’m wearing three coats with one coat of Seche Vite top coat. All photos were taken outdoors in direct sunlight.

IMG_21062

IMG_21112

IMG_21172

IMG_21192

Void Stuff is a deep turquoise linear holo with color-shifting shimmers. Sometimes the shimmers appear pink, sometimes they disappear into the green polish. Application was so easy because the consistency is so smooth and velvety; though it was a bit thin, it glided right on and gave me near opacity on the first coat. The linear holo effect was a bit stronger in Void Stuff than in previous BEGL holos. It dries quickly and with an almost glossy finish; I used top coat for shine and extra sparkle.

IMG_21292

IMG_21312

IMG_21372

Though it’s a deep color, it’s very appropriate for the season! It’s the color of the happiest ocean. In the shade, the turquoise is still very vibrant and has a metallic finish, and in the sunlight, the holo is very intense. I could seriously look at this polish all day. I think it might look even better on the nail than it does in the bottle! It is summer happiness.

IMG_21512

IMG_21562

IMG_21602

Void Stuff, unfortunately, has been discontinued by Blue-Eyed Girl Lacquer. Other BEGL polishes are available at their online shop.

I bought this polish myself.

Swatch Sunday: Rica’s Alchemical Seas of Hope

Welcome back! Today’s swatch is a fun one; it’s my first-ever Rica polish! This is also a charity polish from the Lighthouse of Hope box curated by Blue-Eyed Girl Lacquer. This is Alchemical Seas of Hope; I’m wearing three coats with one coat of Seche vite top coat.

IMG_15502

IMG_15582

IMG_15612

IMG_15672

Alchemical Seas of Hope is a green jelly with green and gold glitters, as well as a fine golden shimmer throughout. Application was good; even though there’s a lot of glitter in the bottle, there isn’t a lot that comes out on the brush. Additional coats deepen the jelly while only adding a few bits of glitter. I kind of like this look as is, but I wish there’d been more glitter. The green jelly is wonderfully squishy. The polish dries quickly enough and with a textured glitter finish. I used top coat for smoothness and extra shine.

IMG_15752

IMG_15802

You might notice the edges on some nails to be ragged and chipped at the tips. I’m not completely sure what caused this. I can tell you that some nails have thicker coats of polish than others, and that might have led to easy chipping. Also, Seche Vite never seems to play nice with glitter jellies and crellies, shrinking the edges away from the tip of the nail. Either way, I do apologize for how terrible it looks. I didn’t really realize it was this bad until I took photos.

IMG_15812

IMG_15902

As I mentioned, Alchemical Seas of Hope is a polish in a charity box called the Lighthouse of Hope. $60 from each box is donated to I Need a Lighthouse, a depression awareness network. Rica had this to say about their polish:

“I named it Alchemical Seas of Hope because sometimes depression can feel like you’re in turbulent seas. As hard things may seem to be, there is always a lighthouse of hope in the horizon. Don’t lose sight of that.”

The Lighthouse of Hope Box contains eight polishes from eight makers, including Rica’s Alchemical Seas of Hope. The box is $80; $60 of it goes to charity. It’s available from the Blue-Eyed Girl Lacquer shop. Other Rica polishes are available from their etsy shop.

I bought this polish myself.

Swatch Sunday: Reverie Nail Lacquer’s Secret Garden

Hope you’re having a good Sunday, reader! Today’s swatch is from a new-to-me brand, Reverie Nail Lacquer! I bought this polish because I’d seen Reverie around the nail polish internet, and being so smitten with the sheer amount of glitter in their polishes, I had to try one. This is Secret Garden; I’m wearing three coats of Secret Garden with one coat of Seche Vite top coat.

IMG_11542
IMG_11592

IMG_11652

IMG_11722

Secret Garden is a deep green jelly with, according to the maker, a “pastel rainbow of glitters”. Application is good; though the jelly is dense with glitter, it’s very easy to brush on and apply; you get a great amount of glitter on the brush, but it’s never clumpy. I could have stopped at two coats, or even just wear one coat over a deep green creme like Zoya’s Envy. Three coats was total overkill. Surprisingly, the glitter lies flat on the nail and very little texture is felt with top coat. The polish dried quickly and with a glossy-glitter finish.

IMG_11792

IMG_11832

So I am astonished by how much glitter they packed into this bottle. It’s really incredible! There’s no dabbing or sponging to do here, you just brush it on and you get all the glitter you could ever want. I am so impressed by the formula. The intensity of the jelly color, the huge variety — as well as quanitity — of glitters, and the ability to apply it without issue, it’s basically my ideal polish. It may be the best glitter jelly I’ve ever worn.

IMG_11852

IMG_11952

In the sunlight, you can see the layers of jelly and glitter interacting with each other. I mentioned wearing this over a creme earlier, and though you could do that, I don’t think I would. Seeing the layers of glitter is just so nice. There is nothing I dislike about this look.

IMG_11212

IMG_11332

IMG_11352

IMG_11262

IMG_11412

Secret Garden is out of stock; other Reverie Nail Lacquers are available from the Reverie etsy shop.

I bought this polish myself.

HPB Presents Neon Splatter!

Hello, reader! Today’s post is a special Hobby Polish Bloggers linkup! Every month, the bloggers from the HPB Facebook group get together and do a themed mani; the mani can be as simple or elaborate as we want, so long as it adheres to the theme. The theme for May is neons and neutrals. For this look, I used Zoya’s Chantal and American Apparel’s Moon as the nude base, and American Apparel’s Neon Pink, Neon Coral, Neon Yellow, Neon Green, and Essie’s I’m Addicted as the colors. I actually did this post two weeks ago before I went on vacation, I’m excited to finally show it to you!

IMG_89032

IMG_89092

I really love this month’s theme, and I had a lot of ideas on how to work with it. My first thought was a watermarble, but I did that for last month’s theme, so I skipped it. I also considered the dry brush technique, but ultimately chose the splatter, because I saw an excellent one on Casual Contrast that totally made me want to try it, and also because I’d never done it before. I put my base colors down, got the straws out, and commenced to splattering. I had so much fun with this mani. It reminded me of when we were bored in middle school and we’d dismantle pens to blow the ink out all over stuff. I gotta say though, the cleanup was way worse than I expected. Totally not for the faint of heart.

IMG_89152

IMG_89182

For these HPB manis, and really every challenge mani, I try to use untried polishes, but this is the first one where all the polishes have been used multiple times. When it comes to neons, the American Apparel neons are my go-tos; they’re vivid without having to use a white base, and the product consistency makes them very easy to work with. However, there’s no blue, so that’s where the Essie comes in; I had it sitting out from a previous swatch, and it was just the right blue to work with my other neon shades. I love that the theme calls for nudes, because as cool as this would be with a white base, it means you can’t use just any neons, you’ve got to use some that are worth a crap.

IMG_89232

IMG_89282

Remember I mentioned Moon used as a base? This is why: super secret glow-in-the-dark action! I put a coat over Chantal, just before adding the splatters. I wasn’t totally satisfied with just nudes and neons, I needed one more element to make this look really special. Between the glow and the neons, this mani is like the ’90s threw up on my nails. These photos were taken in compelete darkness.

IMG_89352

IMG_89392

And these photos were taken in direct sunlight! Really harsh sunlight tends to wash neons out, so they’re not as bright out here as they could be.

IMG_88622

IMG_88752

IMG_88672

hpbpnsmc

Chantal and other Zoya polishes are available from Ulta. Essie polishes are sold at Walgreens and other stores nationwide. American Apparel polishes have been discontinued.

I bought these polishes myself.
 Loading InLinkz ...

Manicure Monday: Minty Fresh and Clean

Happy Monday, reader! Today’s look is a pretty simple one. I had a nail break — my nails were already pretty short — so I felt a simple look was best for nails this short. Today’s look was done with a vintage Maybelline mystery color, Lynnderella‘s The Full Minty, and rhinestones.

IMG_88092

IMG_88132

As you can see, this Maybelline polish is at least ten years old. That’s as long as I’ve had it, anyway. I don’t know anything about it; its name and other labels got peeled off, leaving its identity lost forever. It’s a really nice polish besides being old; it’s a warm nude with a subtle shimmer, it dries pretty quickly, and application was easy, even though I remember one of the last times I used it the brush dropped a strand in the wet polish. I’m always impressed by how long a polish can live.

IMG_88312

IMG_88362

I never know what to pair nude polishes with. Nudes are a great base for anything, and I couldn’t decide what to use with it, so what I did this week was pick a random Helmer drawer, shut my eyes, and grabbed a polish out. It was this one, Lynnderella’s The Full Minty. This was one of the first Lynnderellas I ever bought, and I’ve had it at least a year now, so I’m happy to be trying it out. At first I wasn’t sure about it; I thought the green would overwhelm the nude, and it kind of does, but I like it. The rhinestones, the final afterthought, pulls it together.

IMG_88502

IMG_88422

In the sun, this is really nice; you can see the full variety of glitters in The Fully Minty, as well as the subtle nude shimmer in the base.

IMG_87502

IMG_87632

IMG_87562

mmmfacmm

As the Maybelline mystery color is old and likely discontinued, I can’t offer any buying notes for it. The Fully Minty and other Lynnderella polishes are available on both eBay and Storenvy. My rhinestones are from Amazon.

I bought these products myself.

Swatch Saturday: Blue-Eyed Girl Lacquer’s Amas Veritas Spell

Happy Saturday! This week we’re looking at another selection from Blue-Eyed Girl Lacquer‘s 2014 What Wouldn’t I Do? collection. This is Amas Veritas Spell; I’m wearing three coats with one coat of Seche Vite top coat.

IMG_82202

IMG_82332

IMG_82342

IMG_82432

Amas Veritas Spell is an emerald jelly with green-to-blue shifting iridescent glitters. Application with this polish was very easy; the first coat of this polish had great color and coverage, and it just got better with additional coats. Indoors, the jelly seems dark enough to be opaque; though the glitter does shine nicely through, it’s a bit muted. The full jelly depth is visible outdoors in full sun; see photos. The shift occurs in any lighting conditions, through brighter ones return a better shift. The polish dries quickly and with a smooth satin finish; I used top coat for shine and to emphasize the glitter.

IMG_82572

IMG_82612

IMG_82832

I think I have to say this polish is my favorite from the collection. It doesn’t look like much in the bottle, but on the nail, it’s unexpectedly stunning. The jelly, though translucent, is still deep and rich. The glitter sparkles beautifully, and the color shift is bonus, really. There’s so much dimension and depth and sparkle, it’s kind of hard to take it all in and really appreciate it. My camera struggled a bit with that, as you can see. I don’t feel like I did this polish justice at all.

IMG_82682

IMG_82702

IMG_82902

In the sunlight, you can really see the jelly depth and glitter definition a bit better. I think the shift occurs better in sunlight, but it looks great nevertheless.

IMG_81772

IMG_81832

IMG_81892

IMG_81982

dat glare

dat glare

IMG_81972

Amas Veritas Spell is currently discontinued by Blue-Eyed Girl Lacquer; other BEGL polishes are available in their online shop.

I bought this polish myself.

HPB Presents Dusty Watermarble

Welcome back, reader! Today’s post is a special Hobby Polish Bloggers link-up post! Every month a theme is selected by the group, and this month’s theme is dusty colors. The look itself is up to the blogger; as long as it adheres to the theme, it can be as simple or elaborate as the blogger wishes. I like to raise the difficulty a bit and use only untried polishes, but this month I couldn’t, because I have very few unused polishes that fit the theme. For this look, I used Essie’s Spin the Bottle, Sew Psyched, and Marathin, Zoya’s Bevin, Ciaté’s Pillow Fight, and China Glaze’s Fairy Dust.

IMG_80502

IMG_80542

As I mentioned, I don’t have a lot of colors in this dusty family, so I’m using a lot of polishes I’ve used in the past. I think Spin the Bottle and Sew Psyched were unused, but the others were probably only used once, so it’s not really a big deal. It took a lot of digging through the polish looking for the right colors; I have a lot of pastels and a lot of deep colors, but not too many in between. Marathin was actually the first polish that came to mind, and after a little bit of trial and error, I found a great combination, as well as the perfect way to wear them together.

IMG_80642

IMG_80722

Watermarbling is one of those things I want to do all the time, and yet, I rarely do. I’ve done a few marbled accent nails here and there, but it’s usually as an afterthought; when I’m planning a mani, I usually just pick a glitter topper that pairs well and that’s it. A lot of the time, I’m working with polishes that don’t seem conducive to marbling. I don’t want to use anything with fine glitters or shimmers because it may not spread well, I don’t want to use anything rare, discontinued, or expensive, and I don’t want to use anything with a really unique finish, like a holo. If I’m creating a look around a creme, I’m rarely thinking about other cremes. It’s a shame, because I love cremes; I think the glossy creme finish is the most underrated of them all, and yet I rarely take advantage of them. Even with all these beautiful creme shades and the marbling, I still had to top it with glitter. Fairy Dust counts as a dusty color, right?

IMG_80812

IMG_80882

The following photos were taken outdoors in direct sunlight. The colors are a bit washed out here, making the dusty colors look lighter and more pastel. Fairy Dust looks overwhelmed as well. On the plus side, I was able to get macros of all my favorite swirls. My ever-elusive right hand even makes an appearance.

IMG_80132

IMG_80172

IMG_80232

From left to right: Left thumb, left ring finger, left middle finger, right thumb

From left to right: Left thumb, left ring finger, left middle finger, right thumb

Essie, Zoya, Ciaté, and China Glaze are all sold in stores nationwide; mine are from Walgreens, Ulta, Sephora, and Sally Beauty Supply respectively.

Also, remember this is a group project, and there are links below to the other dusty manicures done by members of the group. Show them some love, too!

I bought these polishes myself.
 Loading InLinkz ...

Manicure Monday: California Pearl

Happy Monday, reader! Today’s mani was done with Sinful Colors’s San Francisco and Lynnderella‘s Chef Kitty. I was a little disappointed with how sheer San Francisco went on, but I still I got a pretty cool look. More photos below!

IMG_78062

IMG_78152

San Francisco is a polish I’ve had a long time; you can tell in the photos that the bottle is only about half full. I’ve had it for many years, and it was one of the first few I bought when I was just starting my collection. That said, I knew to expect sheer coverage from this polish, but I forgot just how sheer it gets. The color is a deep and rich shimmering emerald, but the nail line is still very visible, even after three coats. This is especially true in bright lighting conditions; see the outdoor photos.

IMG_78192

IMG_78232

Chef Kitty is such a fun polish. It was my introduction to Lynnderella, and set me off on an exciting and financially draining journey. I think it’s a great addition to San Francisco; the green glitters are a little invisible over the green base, but the whites and the other colors stand out very well. It’s a great polish for adding a little extra color and sparkle without having it take over the whole manicure.

IMG_78312

IMG_78322

Here are some outdoor photos. You can see how sheer San Francisco is, but you can also see how lovely its shimmer is. The glitter in Chef Kitty is a lot more defined. The pearls I stuck on to finish the look are much smaller than they appear in these photos.

IMG_77822

IMG_77932

IMG_77882

mmcpmc

San Francisco and other Sinful Colors polishes are sold in stores; I got mine from Walgreens. Chef Kitty and other Lynnderella polishes are available on eBay and in their Storenvy shop. My pearls were purchased on Amazon, and my bow charm is from Claire’s.

I bought these products myself.

HPB Presents: Spring Hibiscus

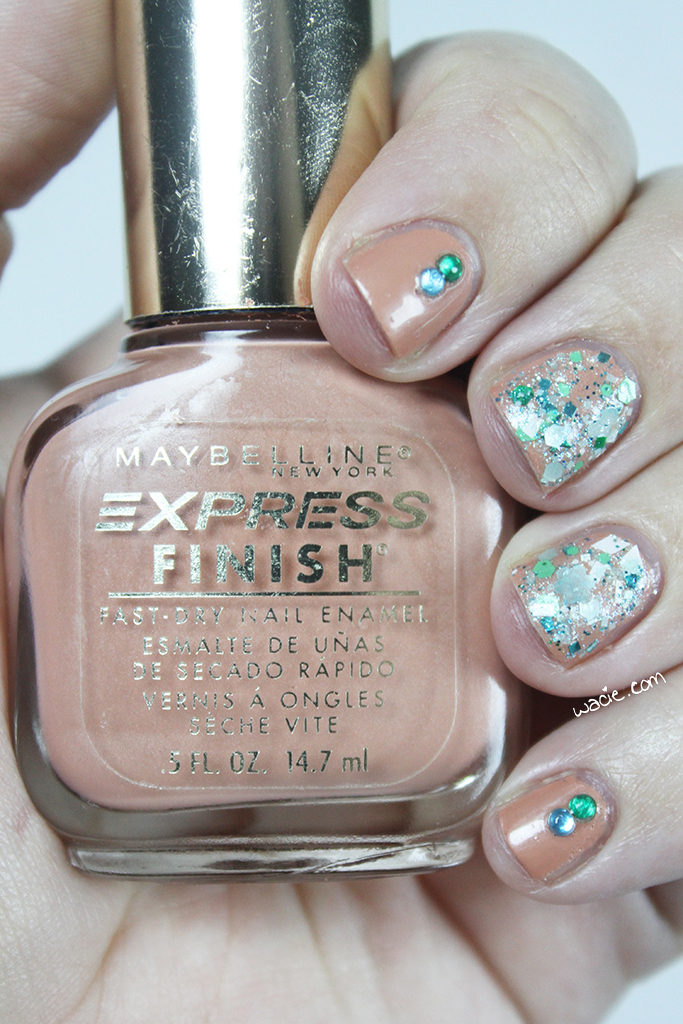
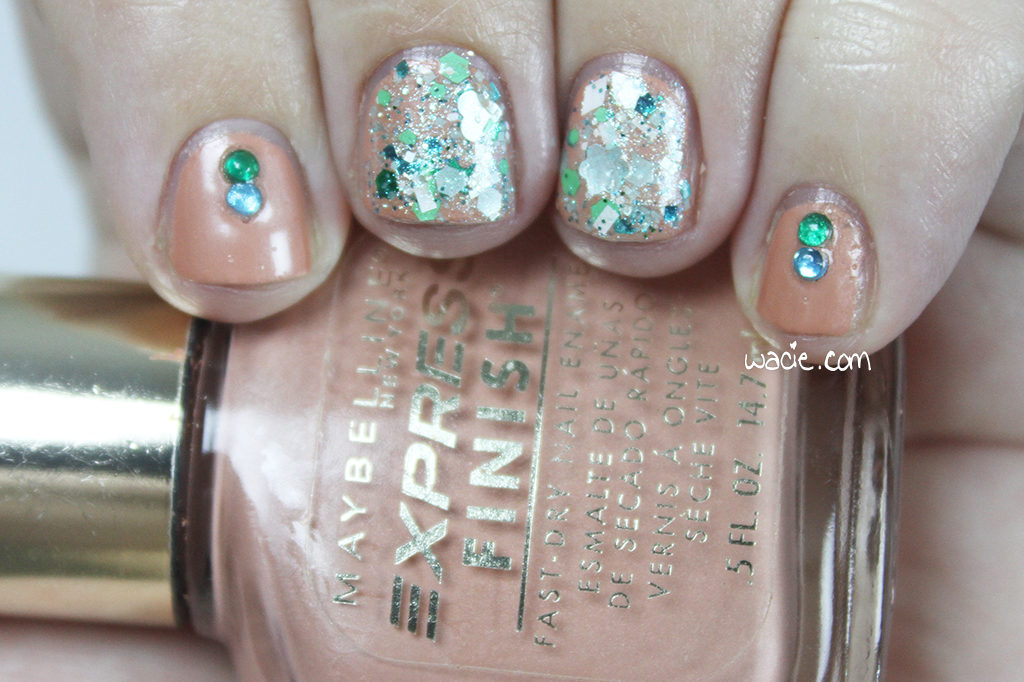
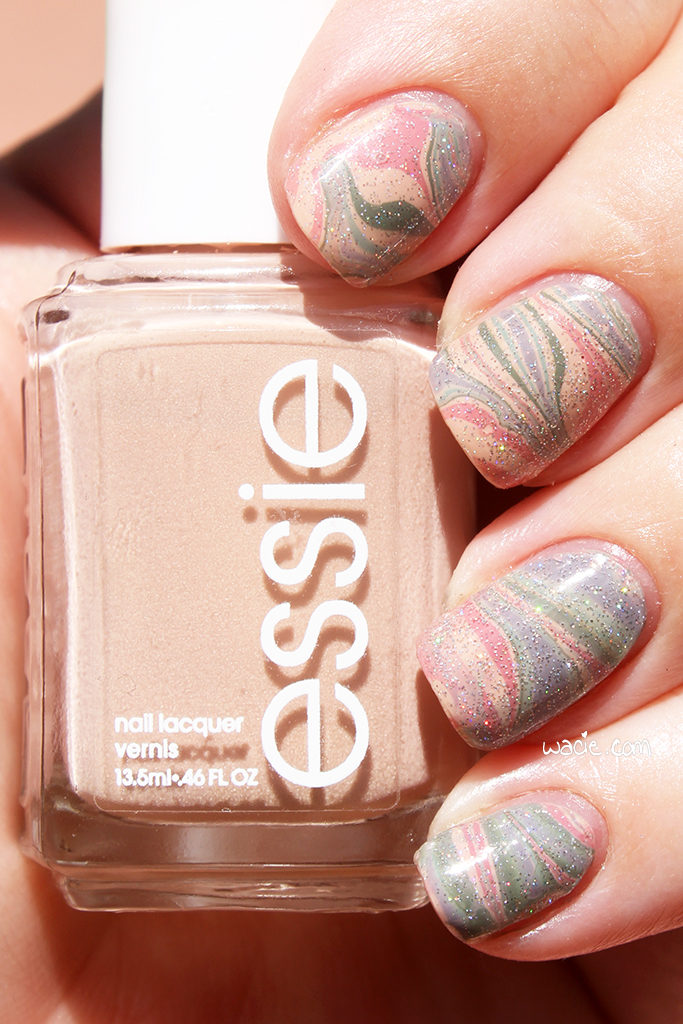
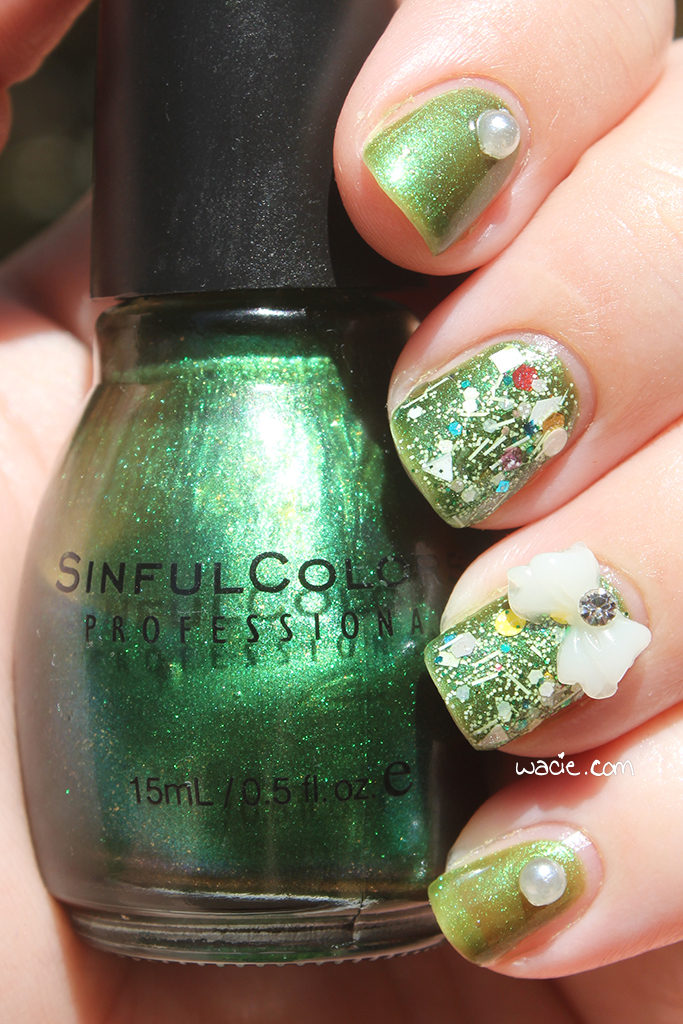
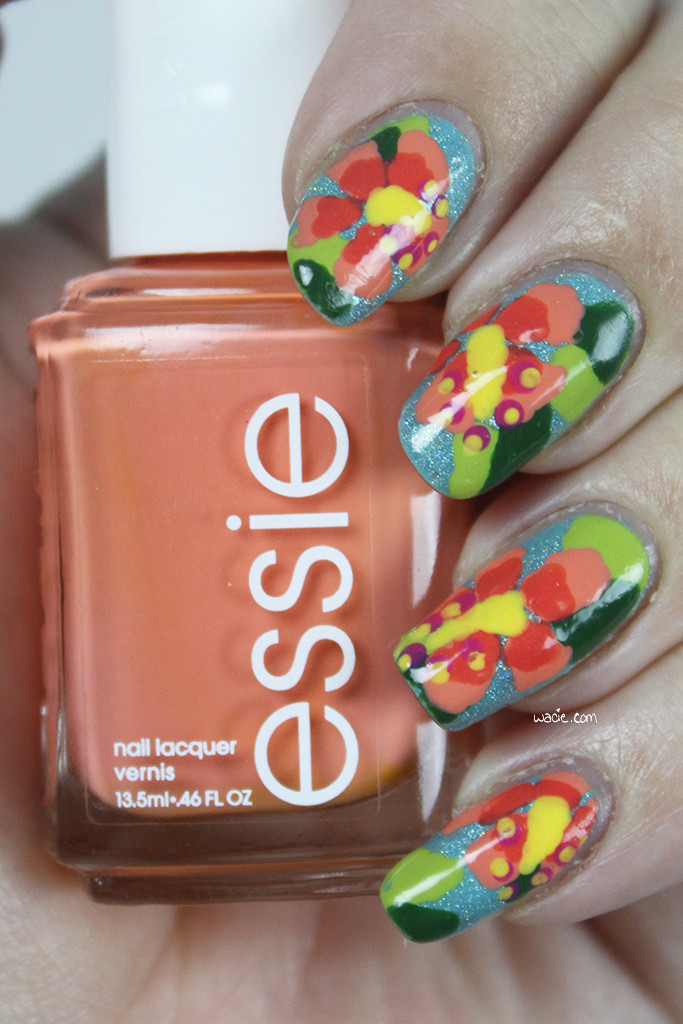
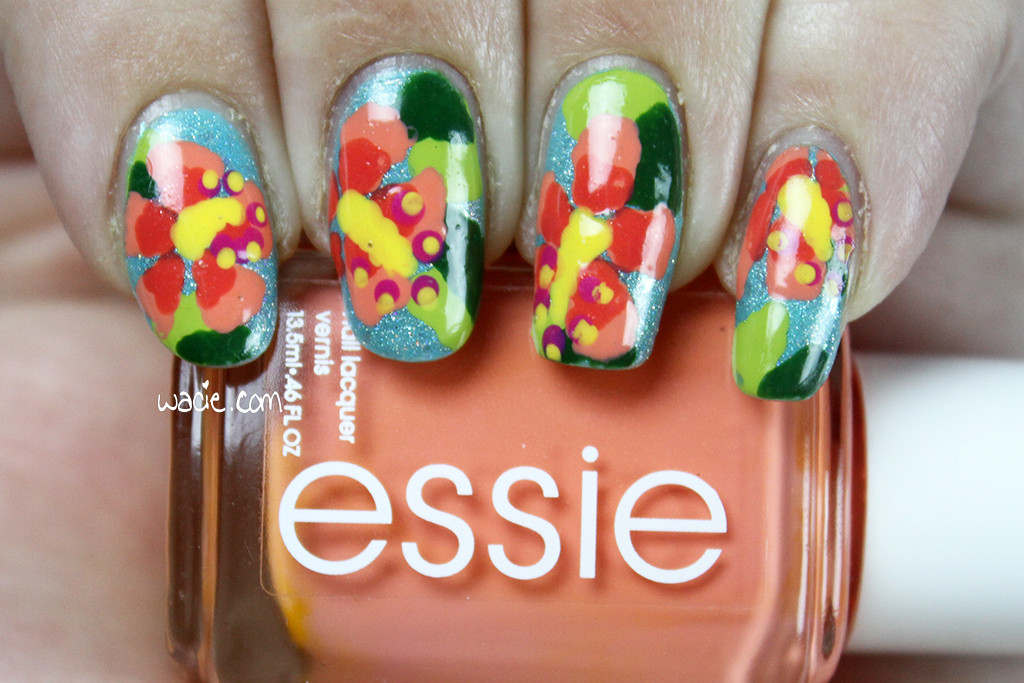
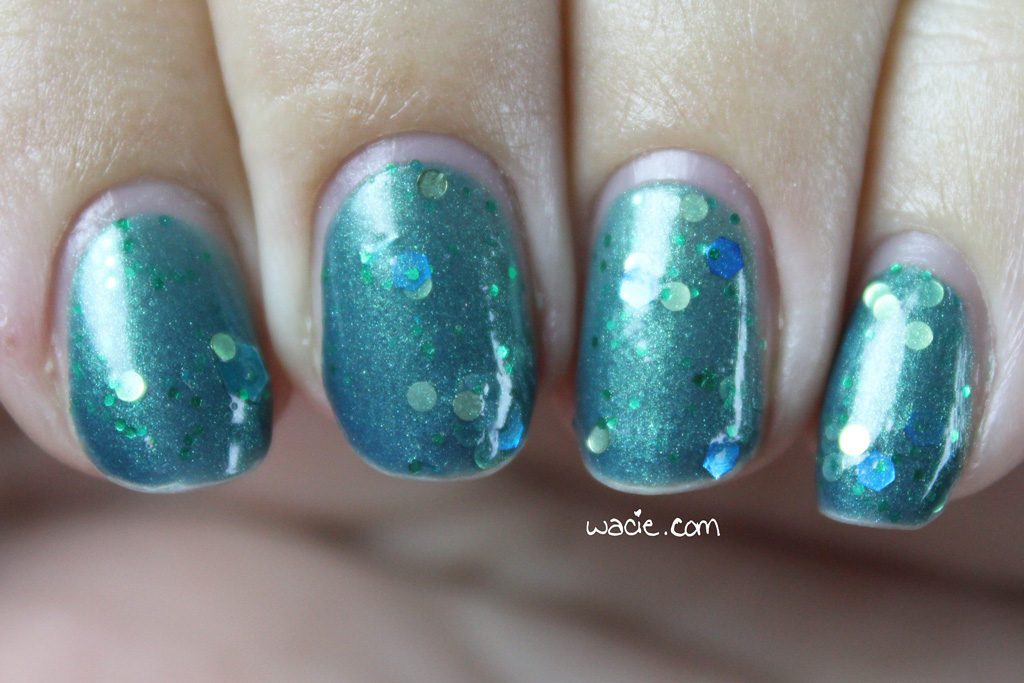
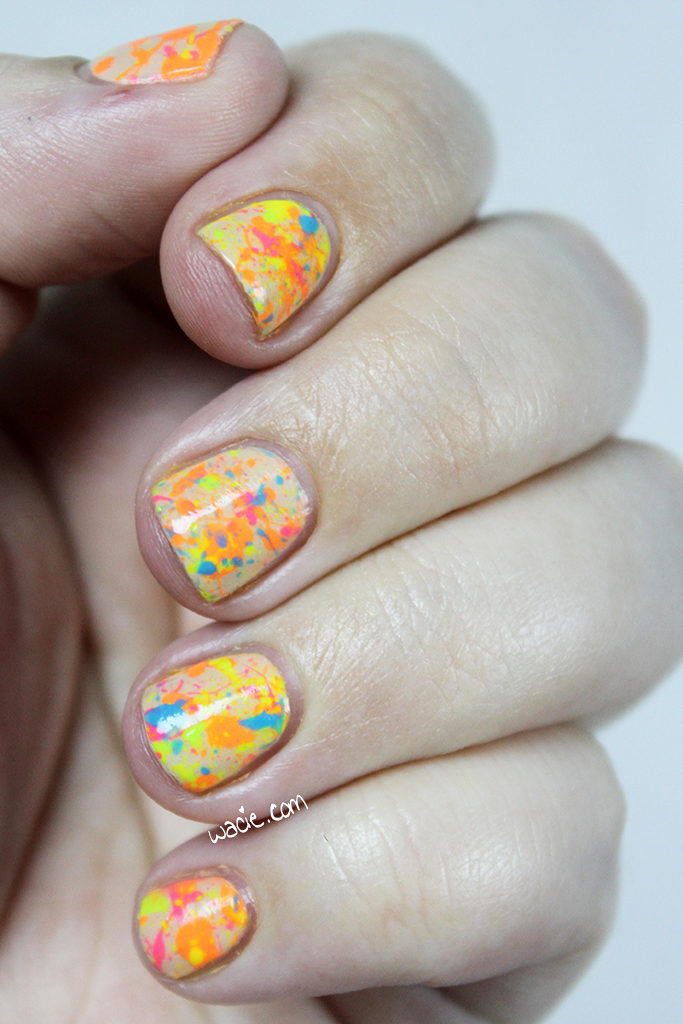
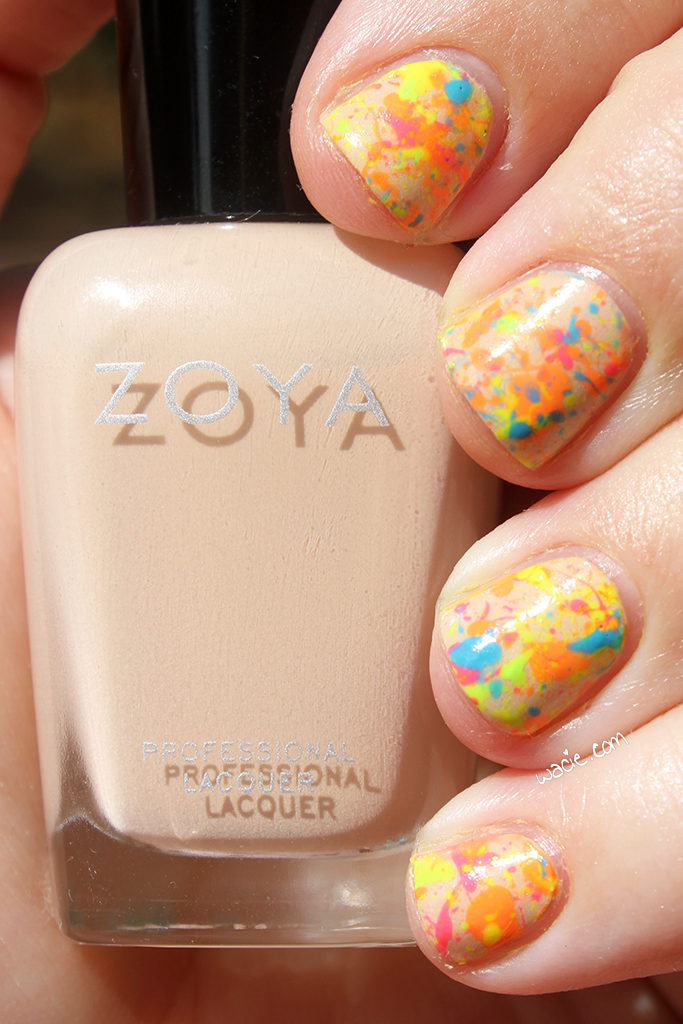
Hello hello, reader! Today’s a special Hobby Polish Bloggers link-up post. Every month we get together and do a themed mani, and the theme for March is spring. The mani can be as simple or elaborate as we like as long as it fits the theme; as a personal challenge, I try to use polishes I haven’t used before. For this look, I used Elevation Polish‘s The Merchant’s Son, Ellagee‘s Breena, Essie’s Tart Deco and Sunday Funday, L’Oreal’s New Money and Hyde Park, and Revlon’s Sunlit Grass and African Tea Rose, all topped with one coat of Seche Vite top coat.

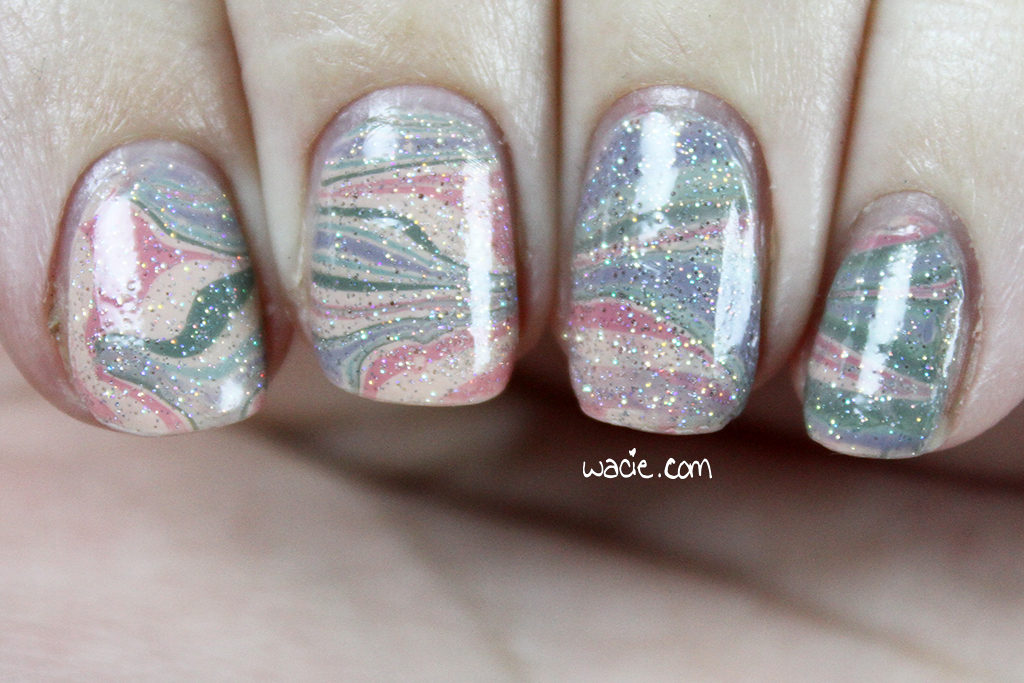
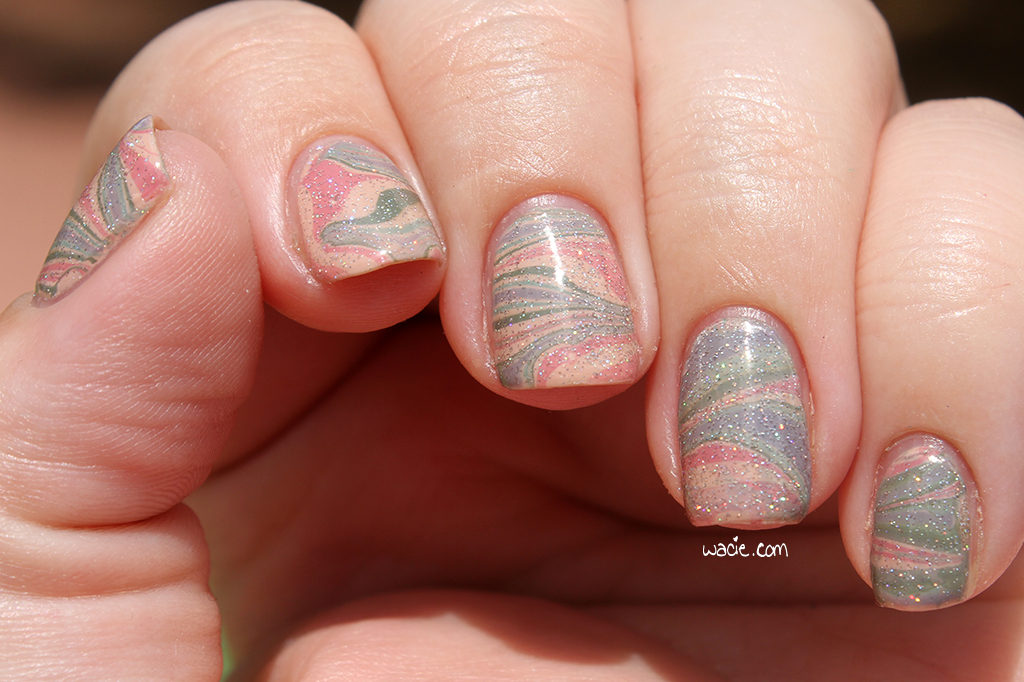
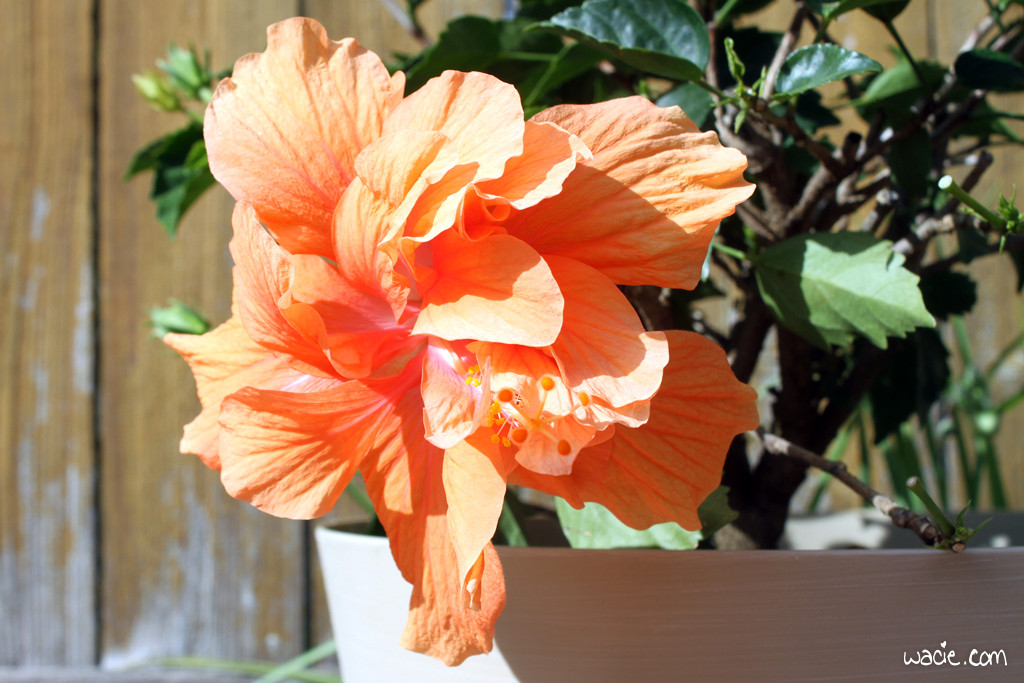
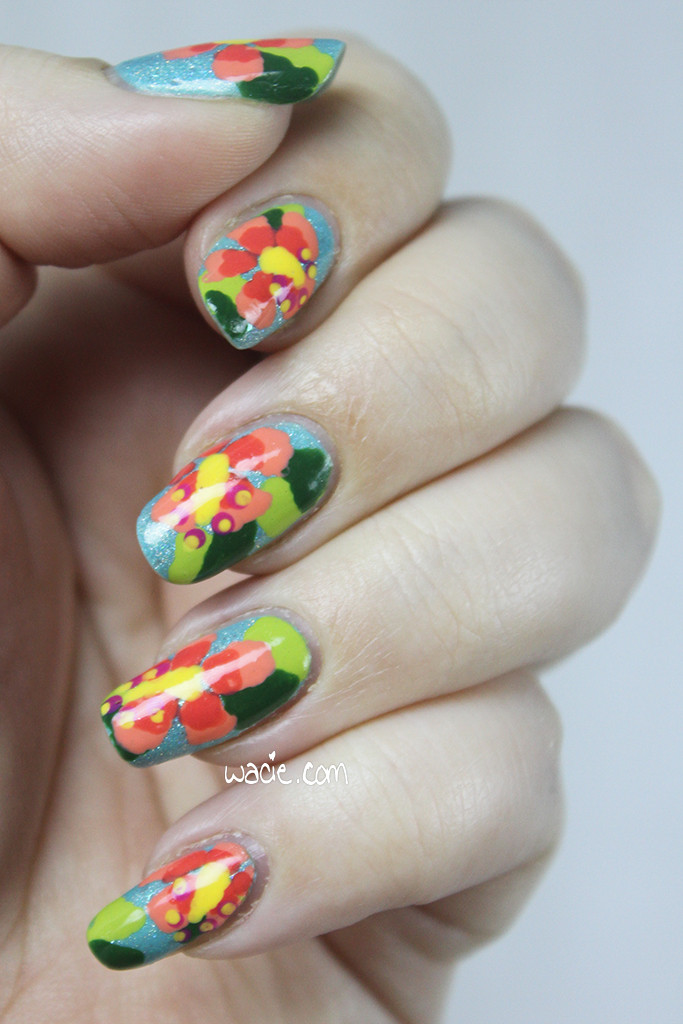
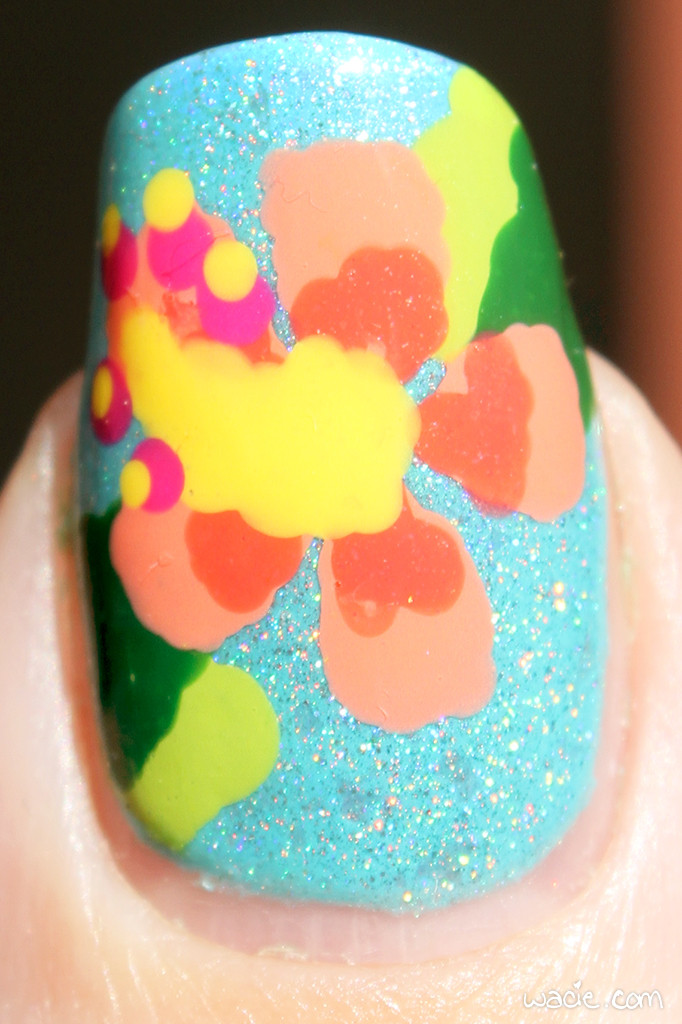
Of course, flowers are the harbingers of spring, and as beautiful as they are, I didn’t want to do a floral mani for spring because I knew everyone else would be doing it. I did it anyway. Boyfriend and I are very into tropical plants, and we wanted to make our backyard space even more tropical, so we got a few new hibiscus plants. I snapped a photo of this beautiful peach hibiscus, and I knew I had to make a mani out of it. Boyfriend is also quite the connoisseur of Hawaiian shirts, and this look is inspired by those as well.

IMG_6568

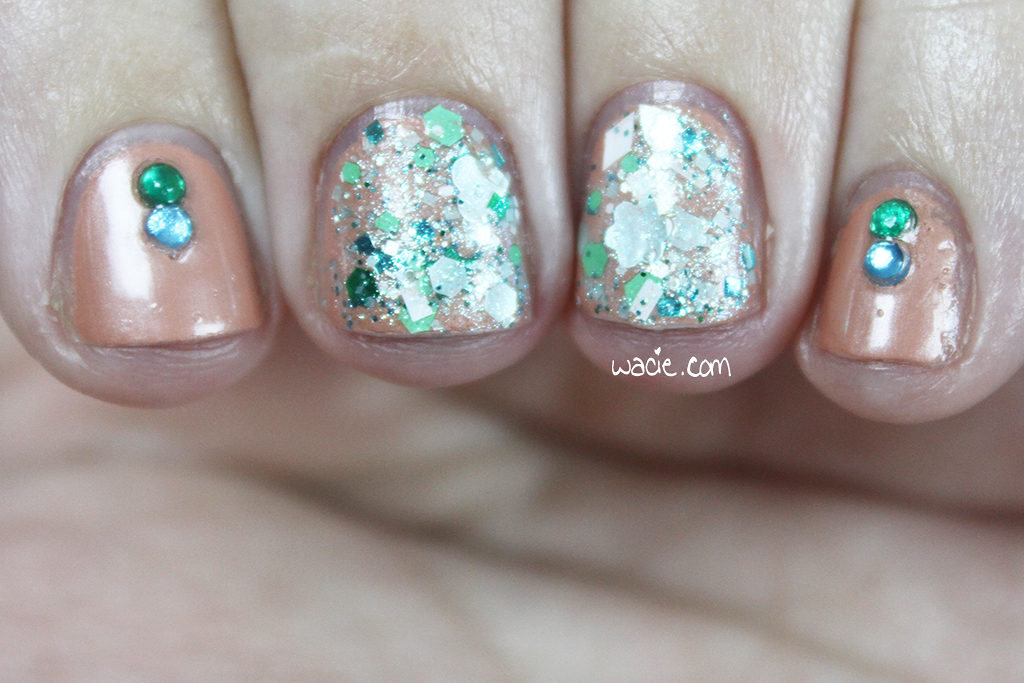
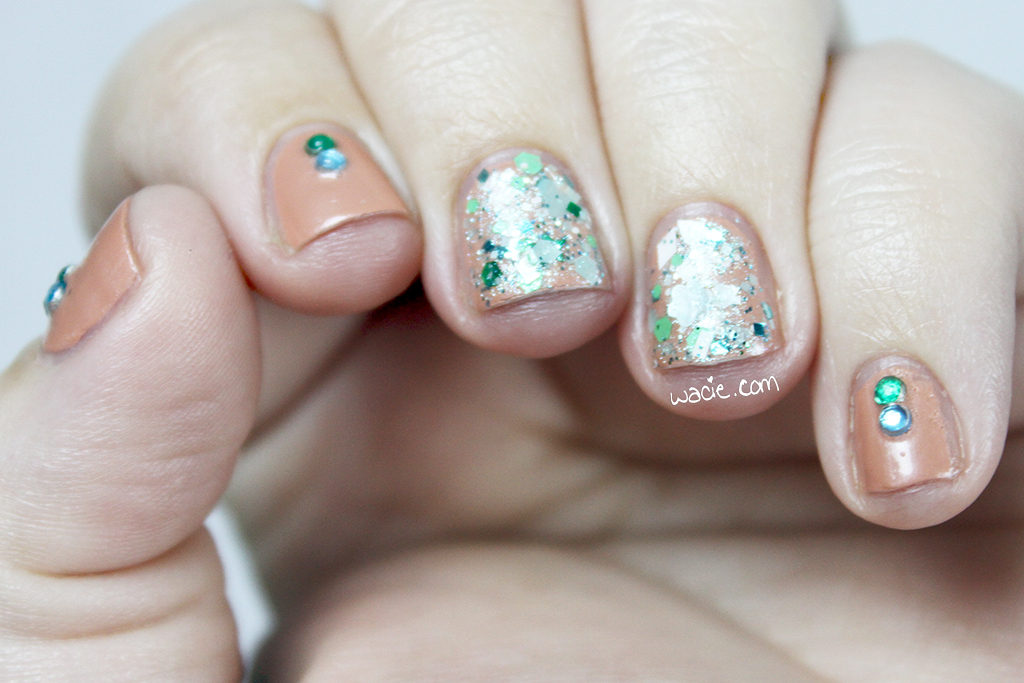
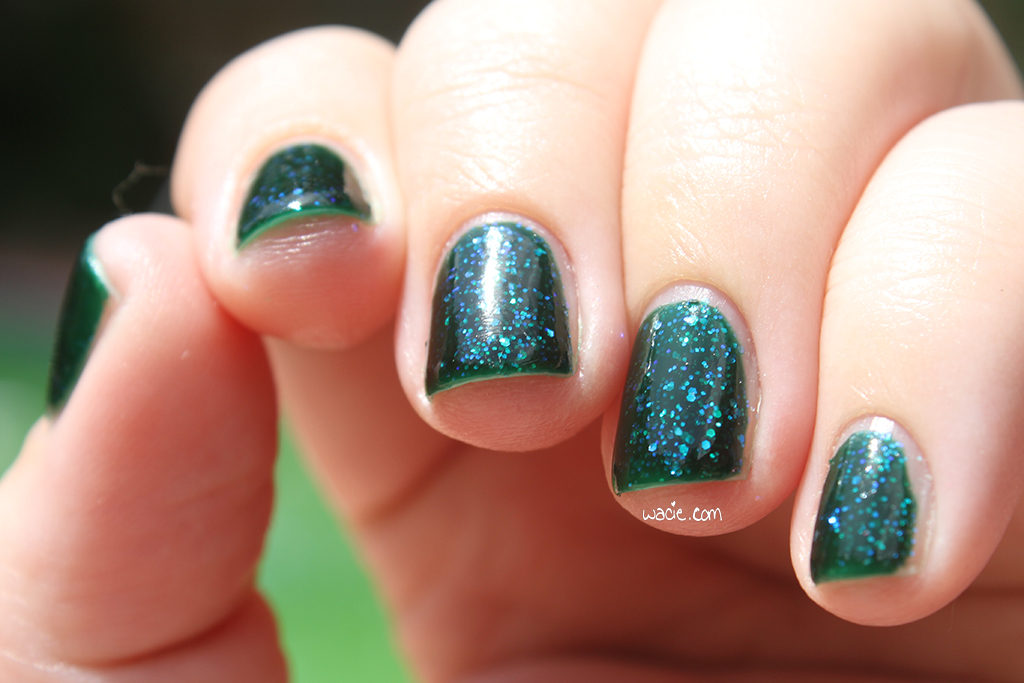
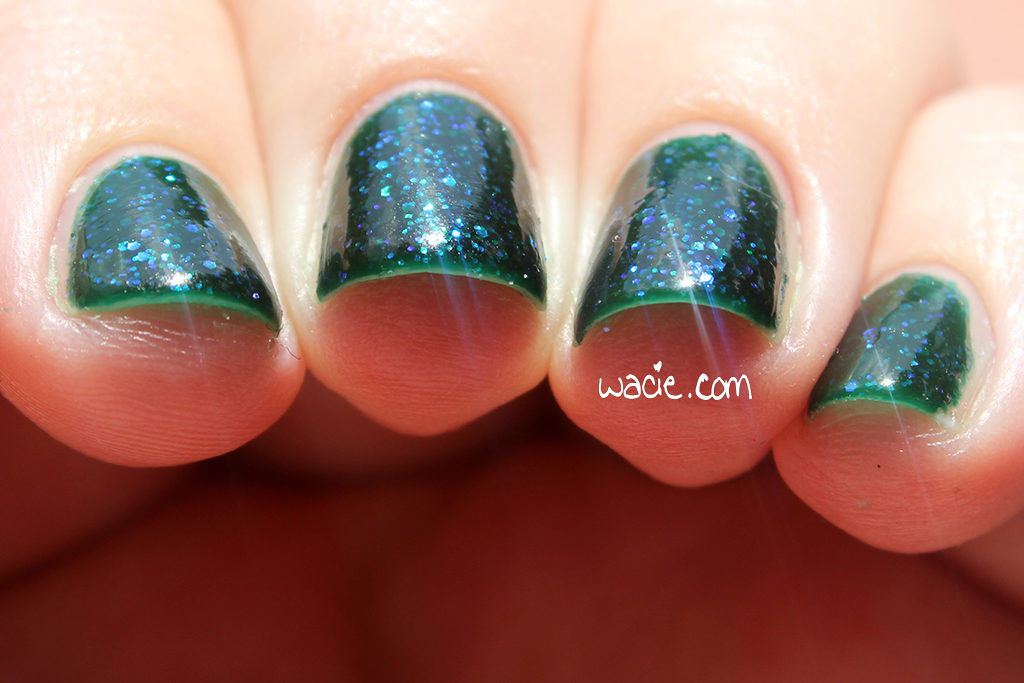
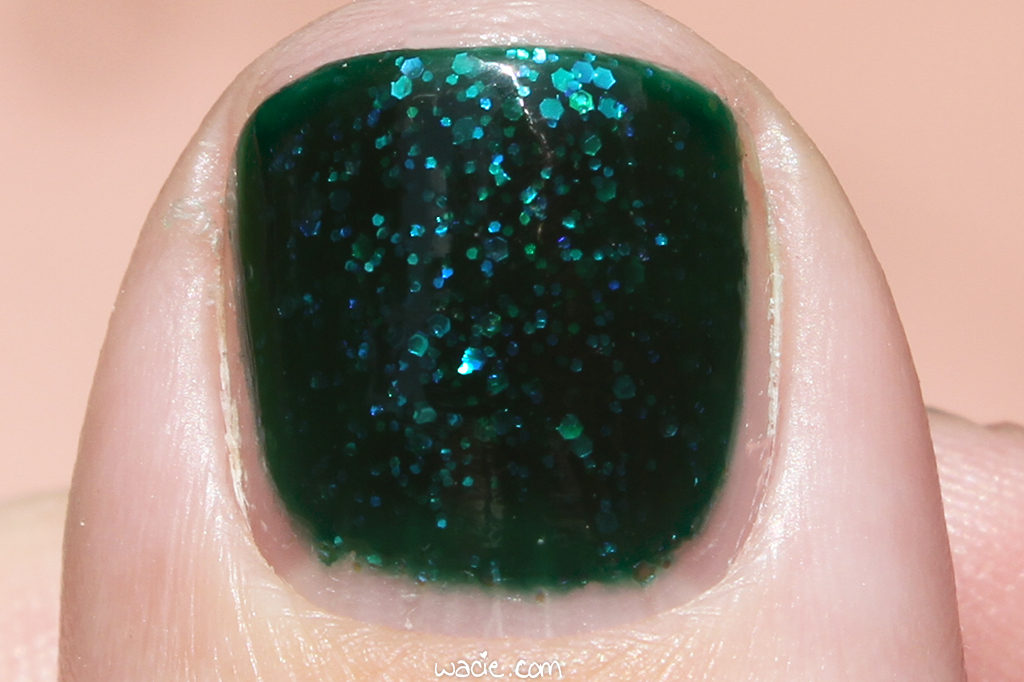
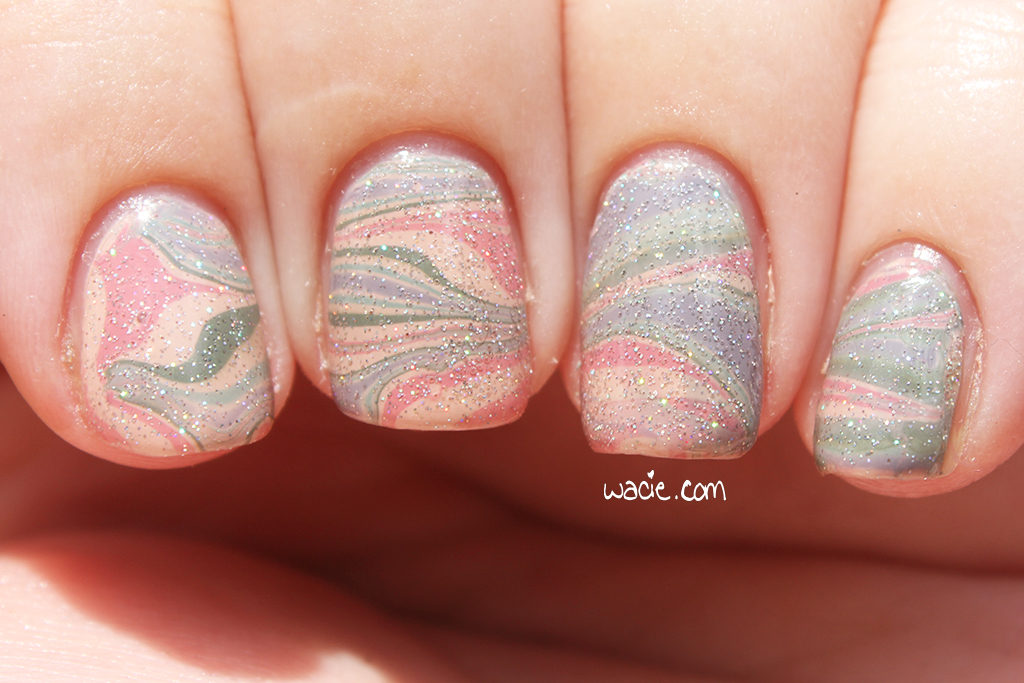
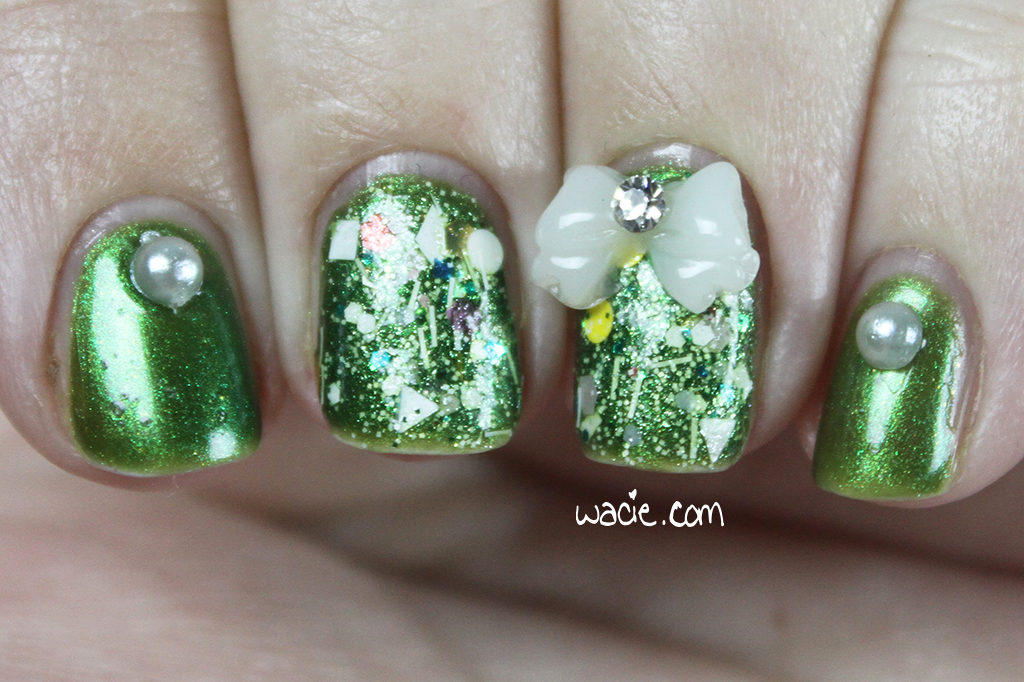
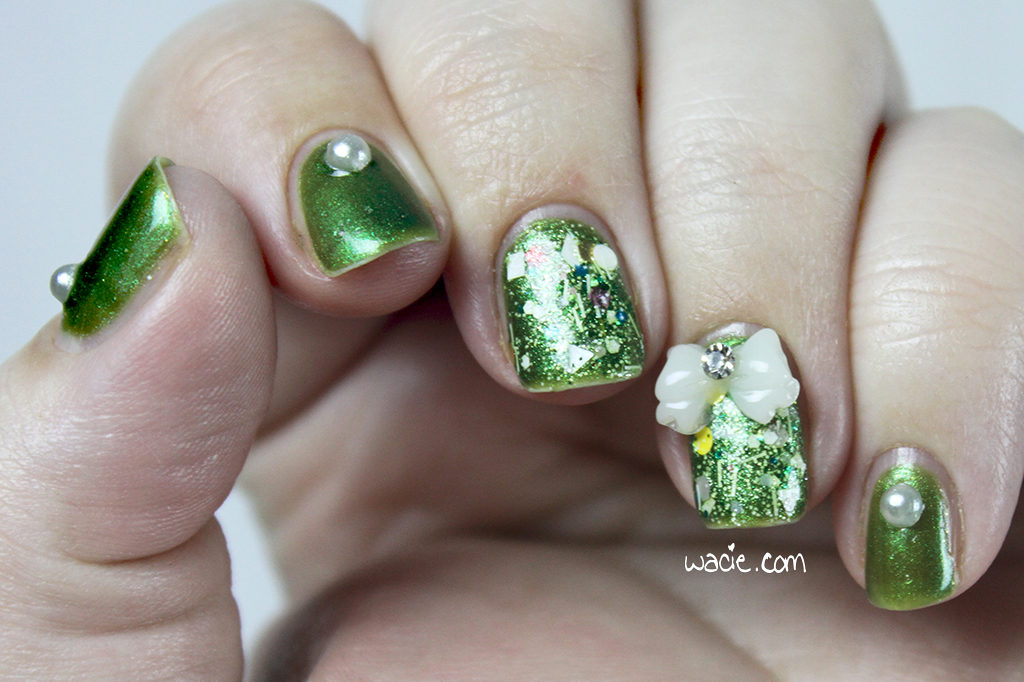
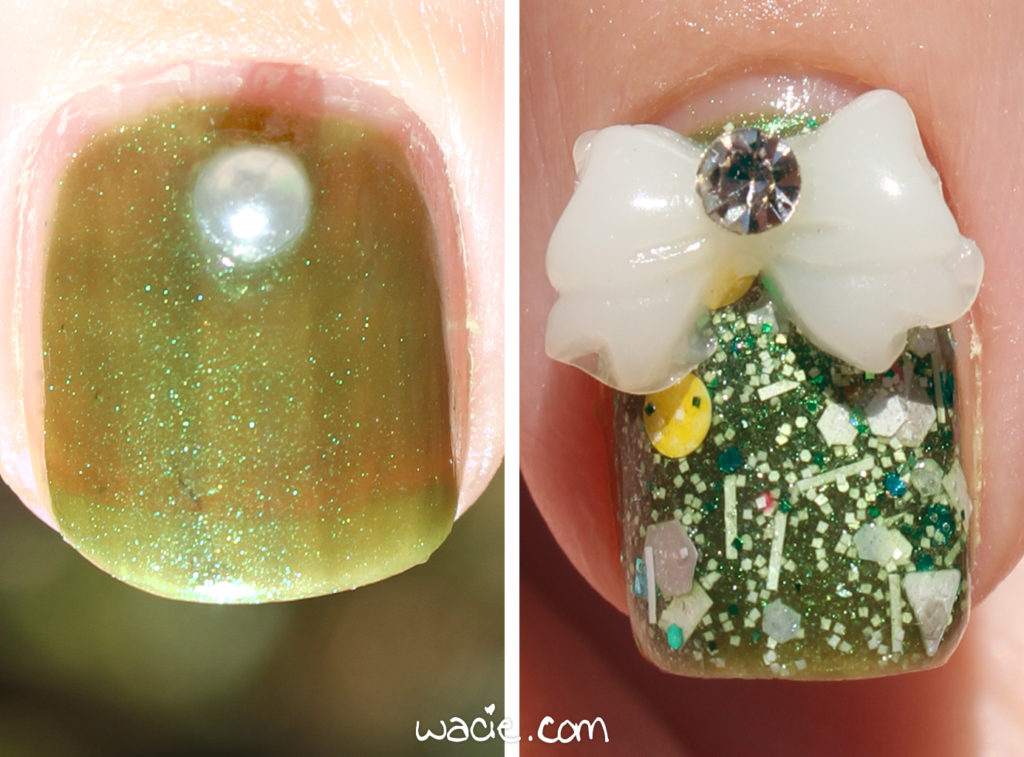
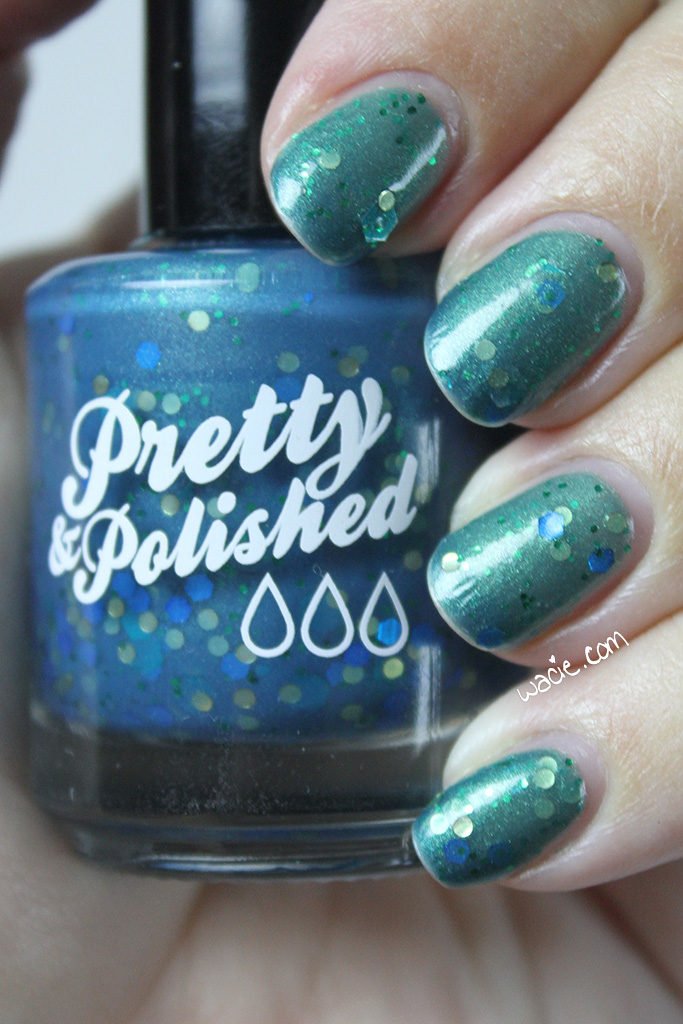
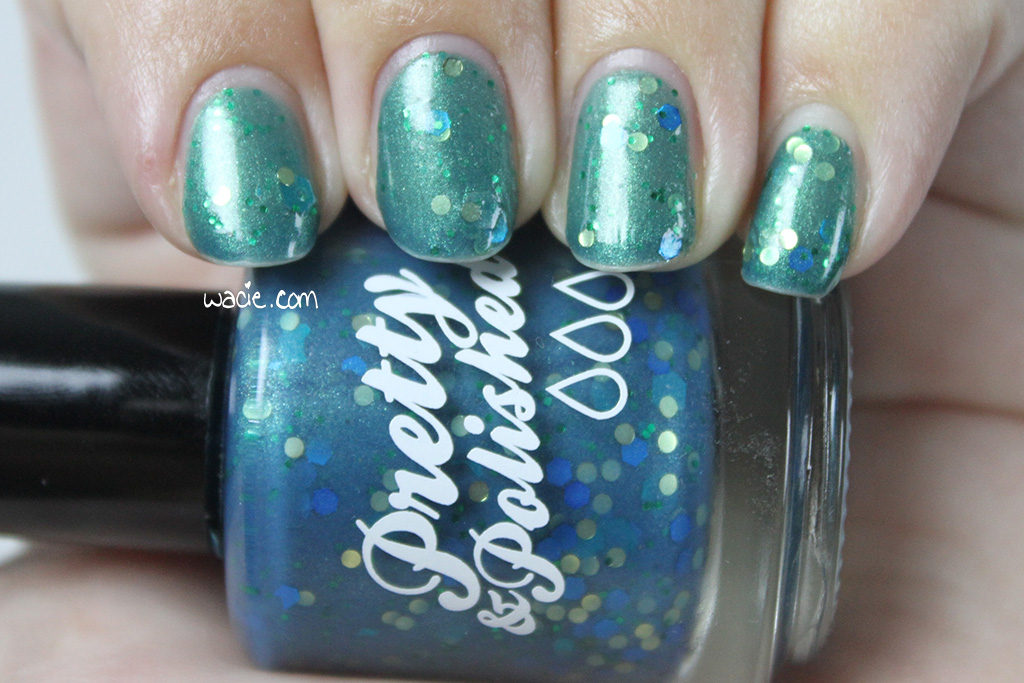
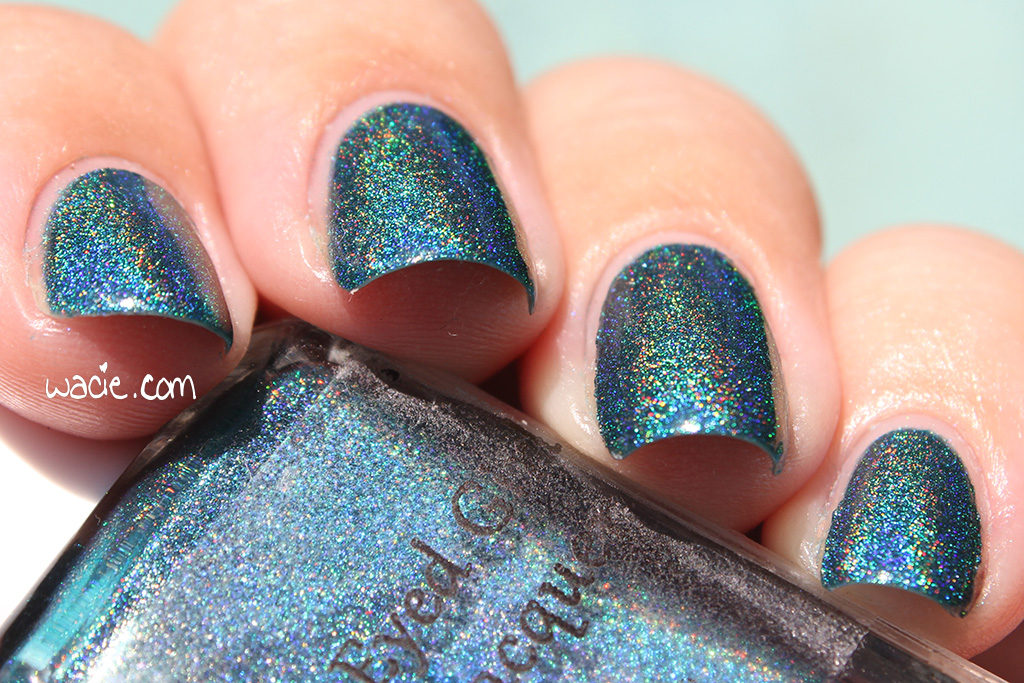
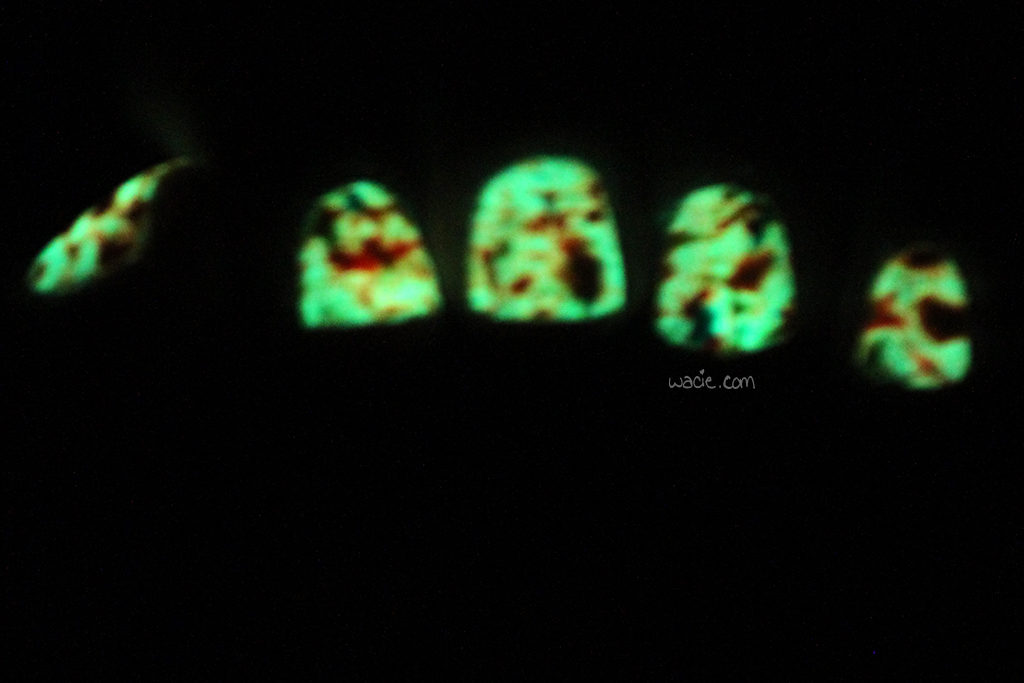
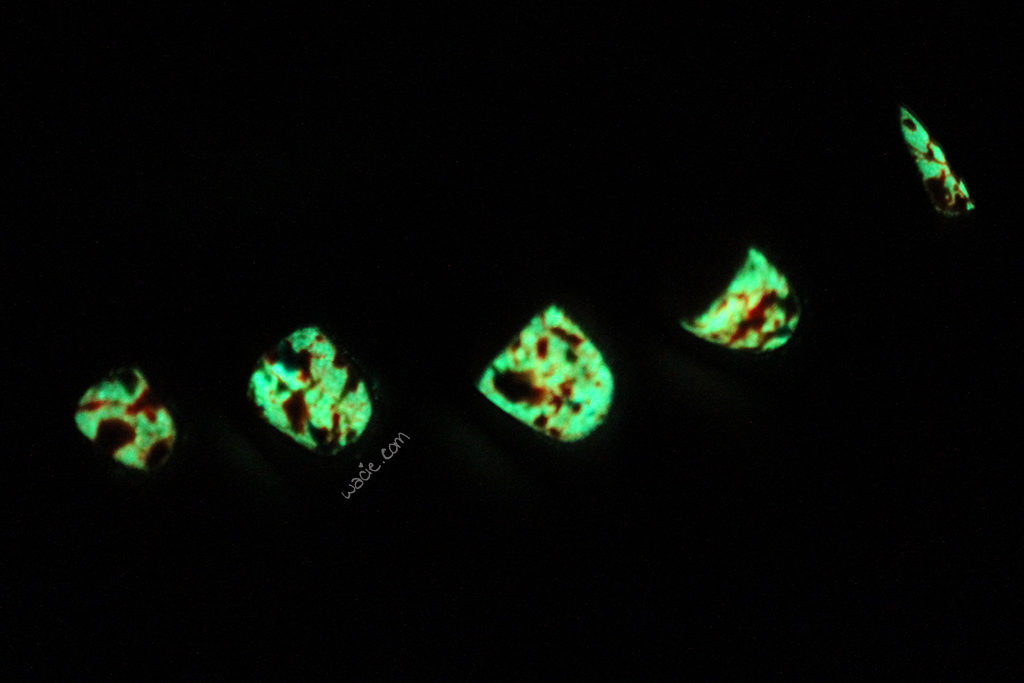
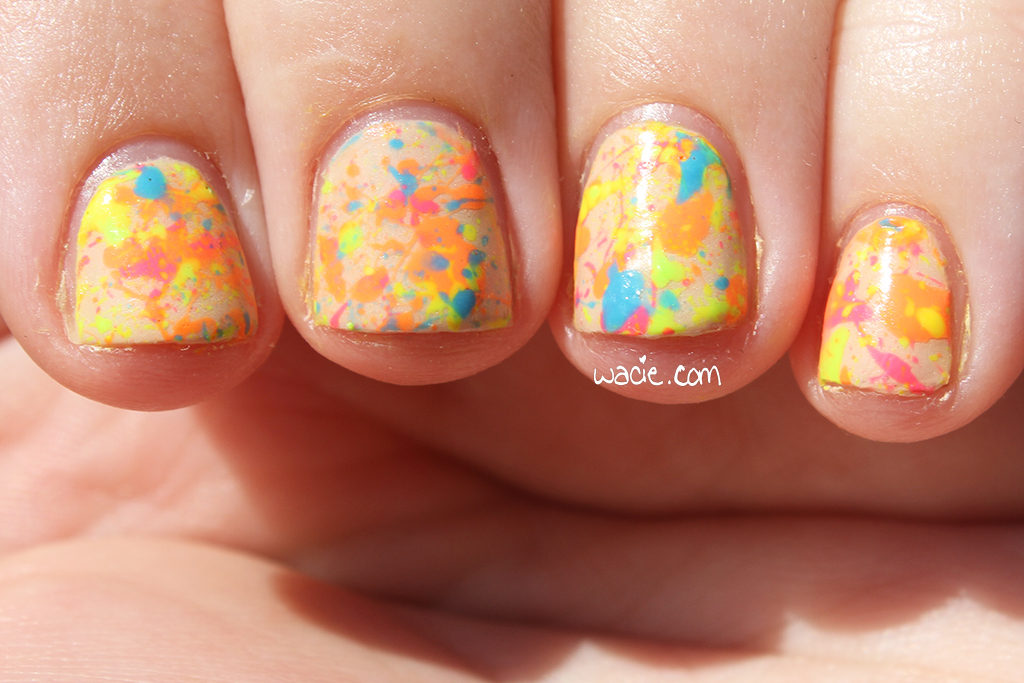
I started this look out with two coats of The Merchant’s Son, three on some nails where it was still a bit translucent. The Merchant’s Son is a thermal, but you can’t really tell under all the flowers. I didn’t even bother to show the thermal effect in action because it would be impossible to see. I picked a thermal because my original idea was to use a gradient. I also used a thin coat of Breena — that’s where the flakie holo comes from — just to add a bit of sparkle. When you can see the thermal effect of The Merchant’s Son, it shows right through Breena. The addition of Breena was probably unnecessary, but I needed one more polish to make an even eight.

IMG_69552

IMG_69632

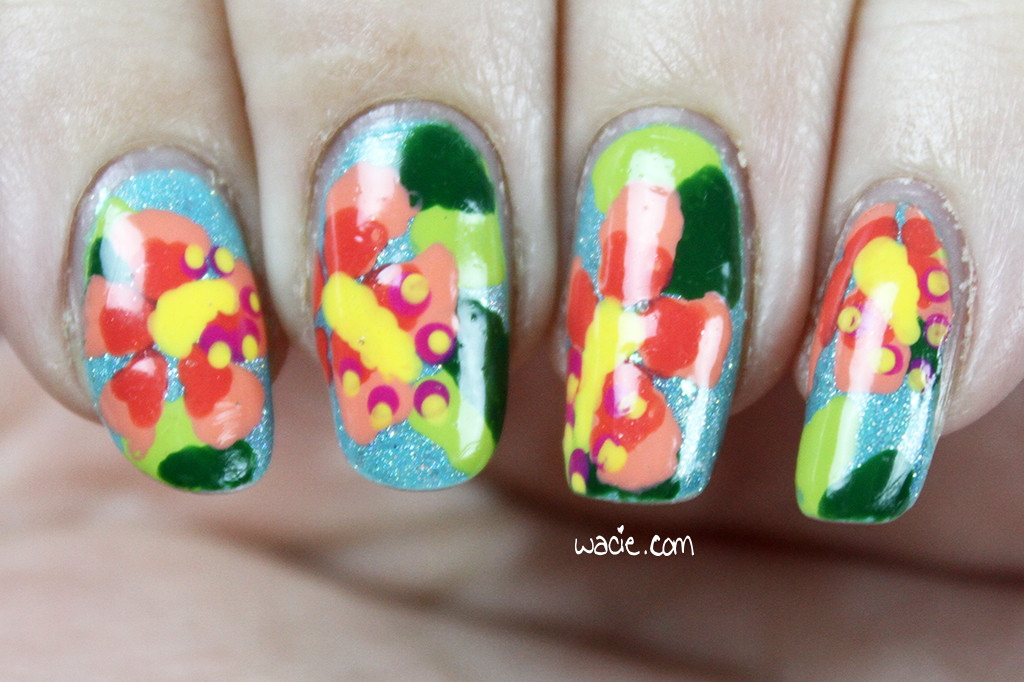
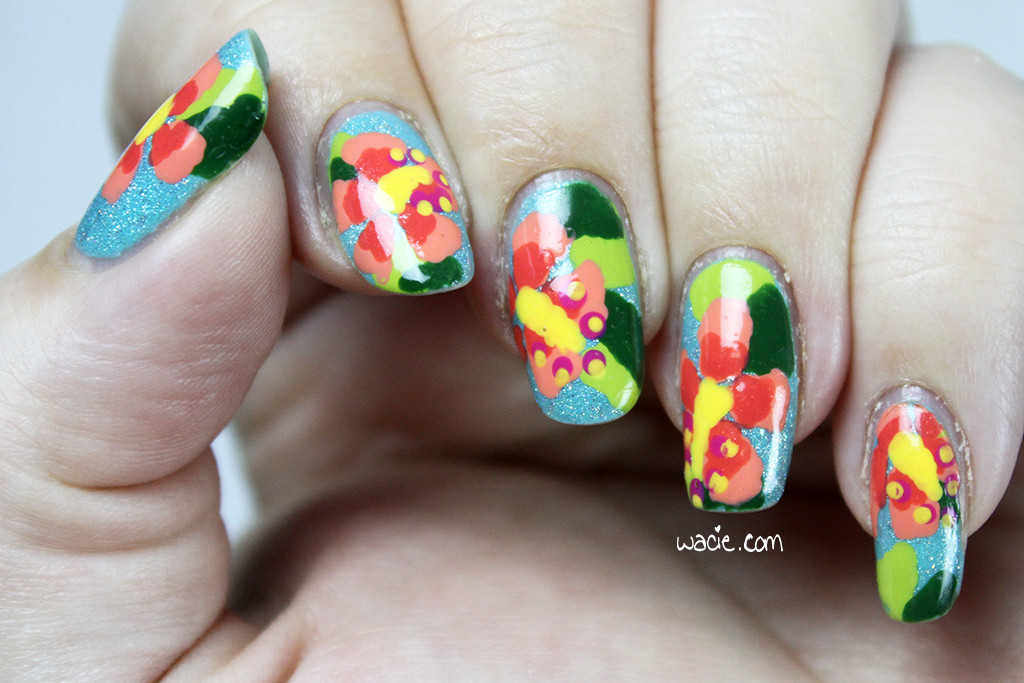
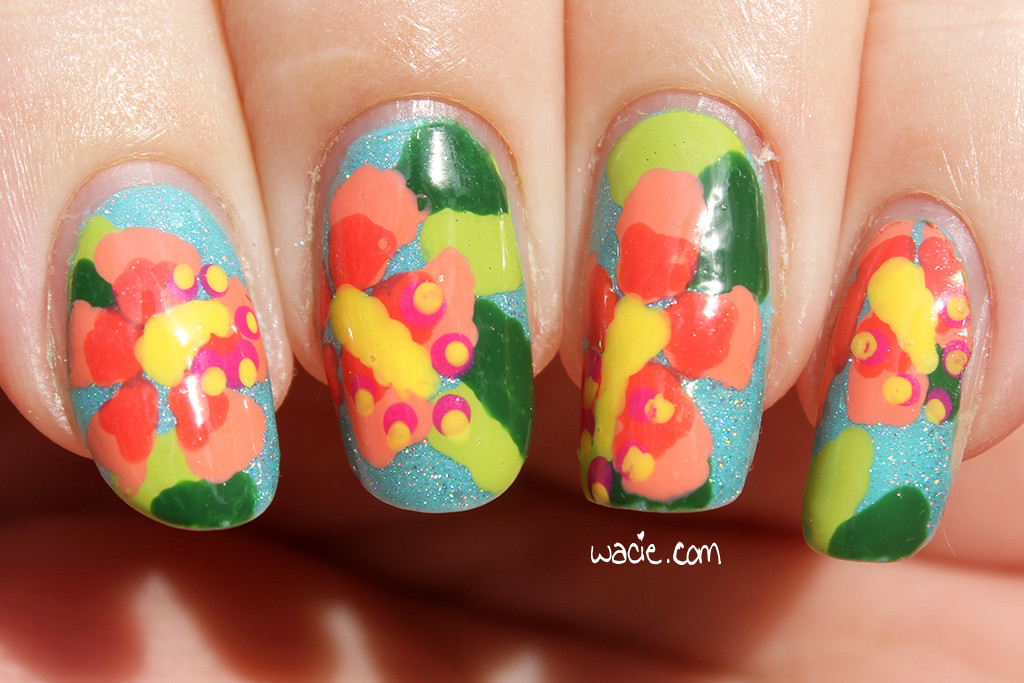
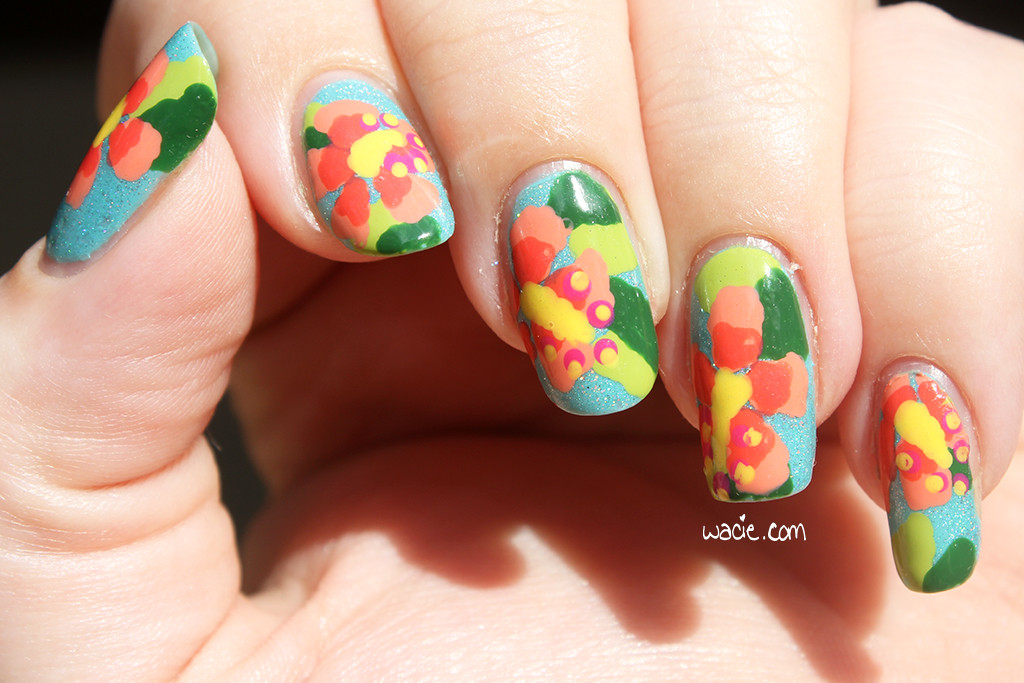
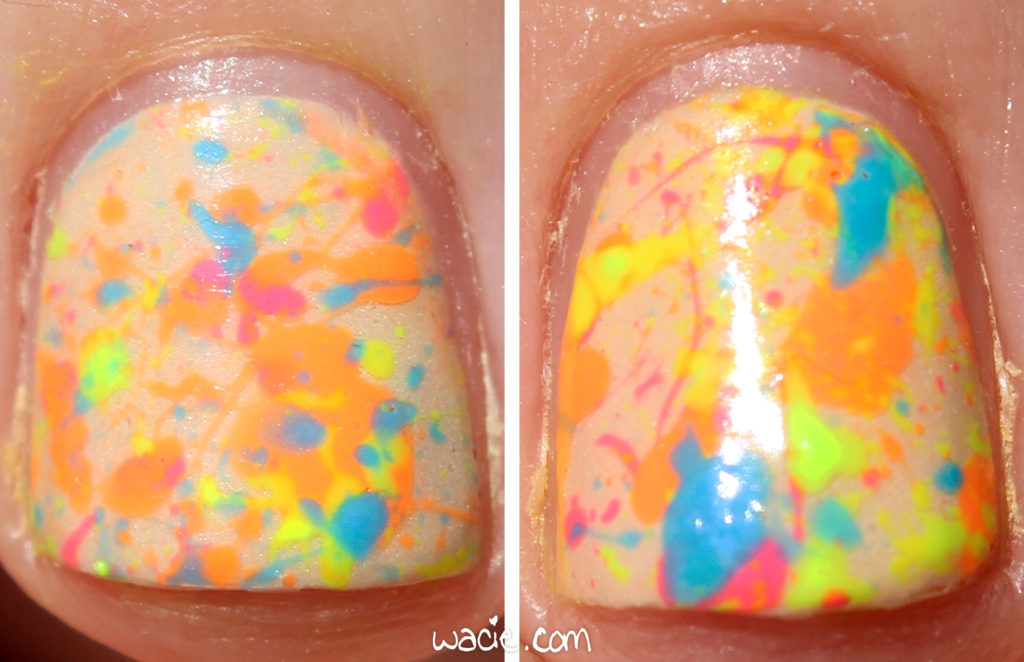
I did the leaves before I did the flowers, but I did them exactly the same way; instead of brushing the polish on, I stippled it on with a dotting tool. I don’t know what it is, but I’m much more comfortable with the dotting tool as a method. Brushing never works for me. I have small nail beds, and often the brush feels too large or unwieldy, even when my nails are quite long. For this reason, there’s not a lot of intricate detail in the foliage and flowers; I took a cruder colorblock approach to this. I stippled the leaves on — two colors for variety — and then the flower petals, and then the pistils and stamens. For reference, I used Nailstorming’s hibiscus nail art tutorial video. I actually picked my colors before I sought out the video, and I love that we both chose pretty similar colors.

IMG_69672

IMG_69702

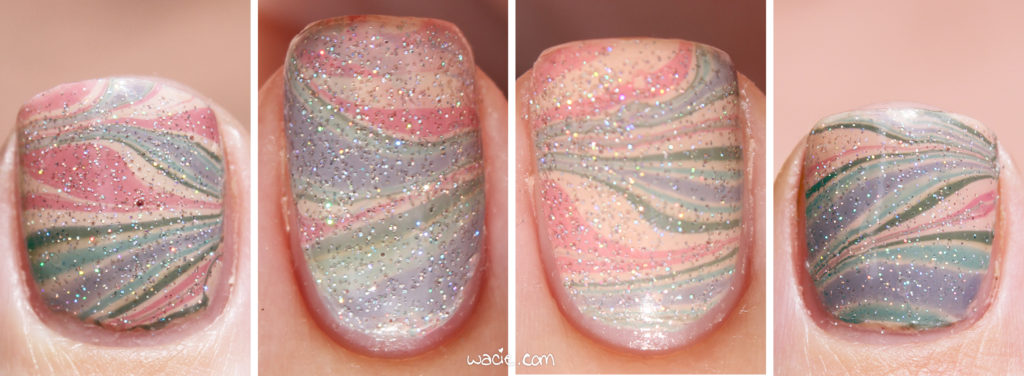
This was my first attempt at this kind of nail art, and I’m happy with how it came out. It’s rough, sure, but I didn’t screw it up or anything, you can tell what it’s supposed to be. It’s super in your face. Boyfriend accused them of being stick-on nails and that was kind of satisfying. I got to use a whole eight unused polishes, that’s pretty nice too.

IMG_69762

IMG_69832

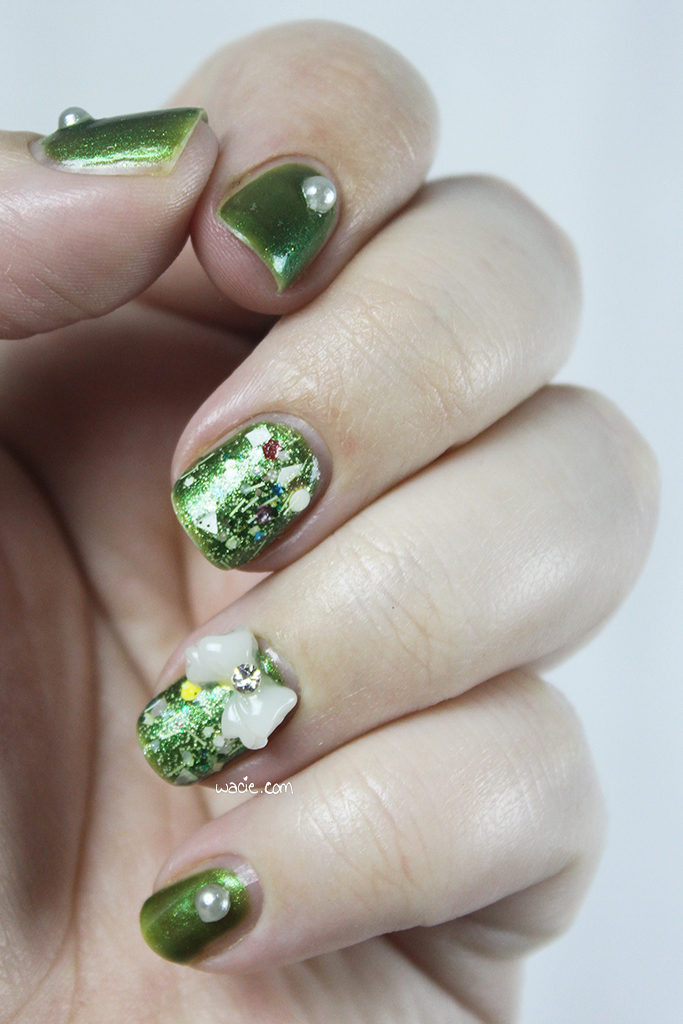
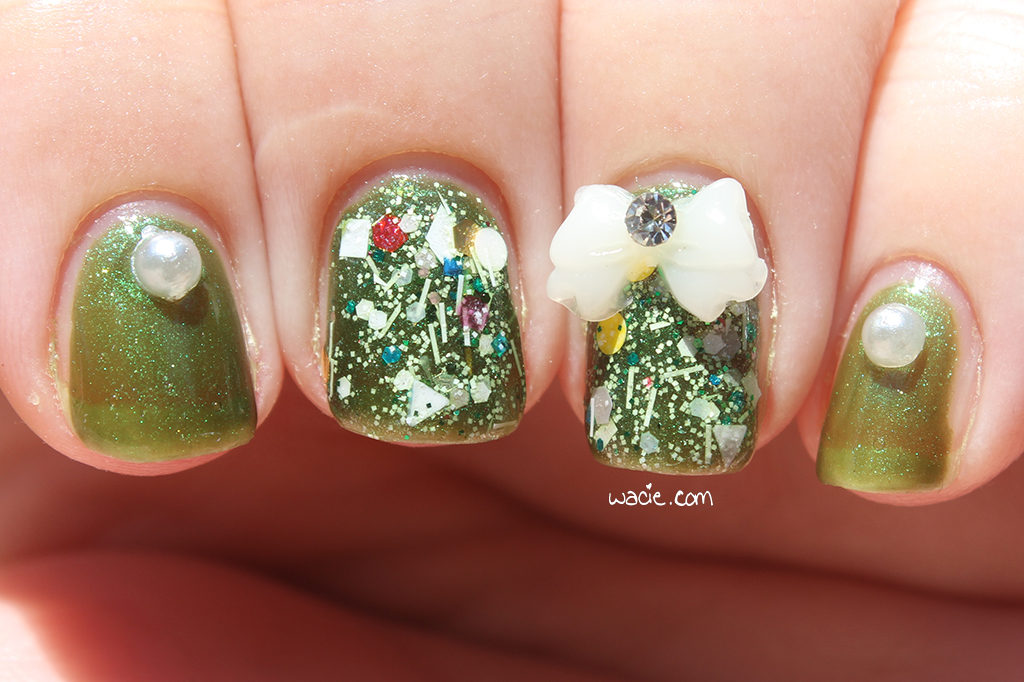
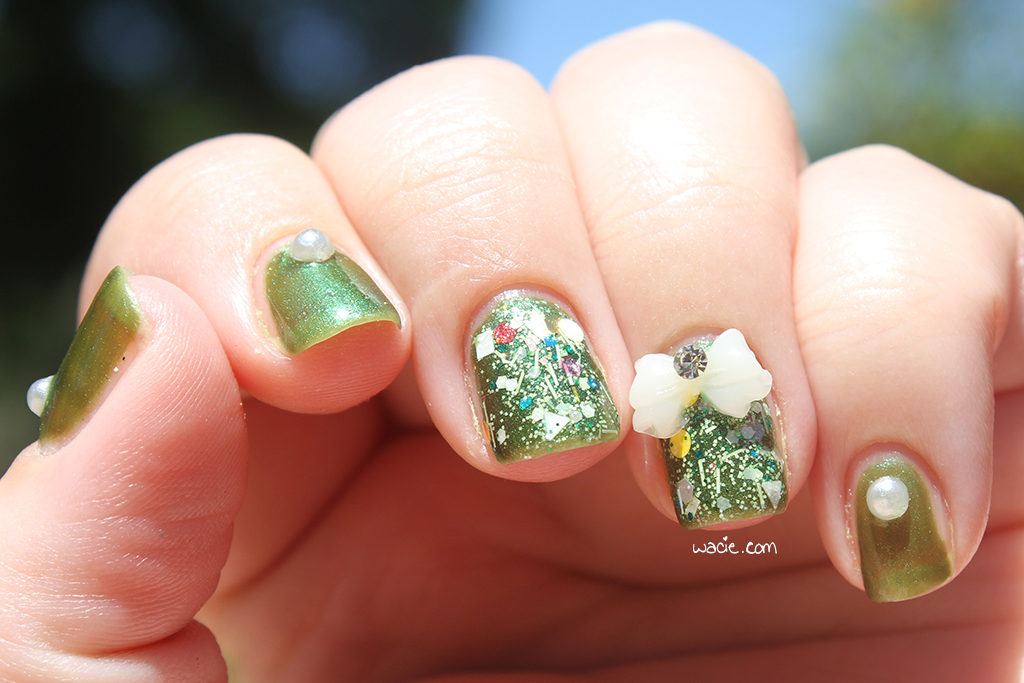
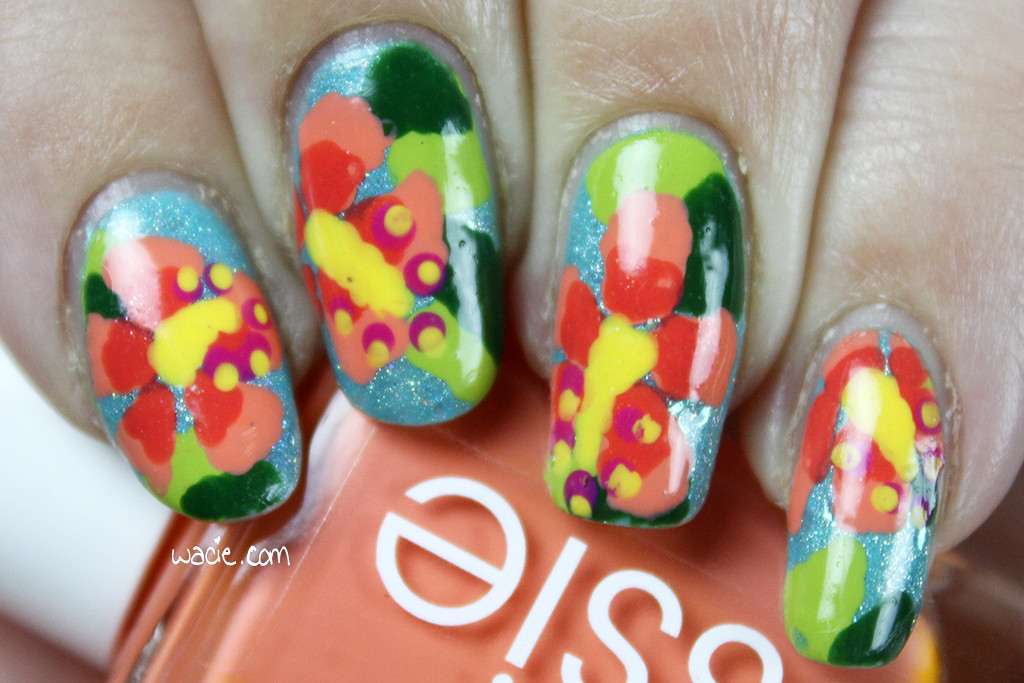
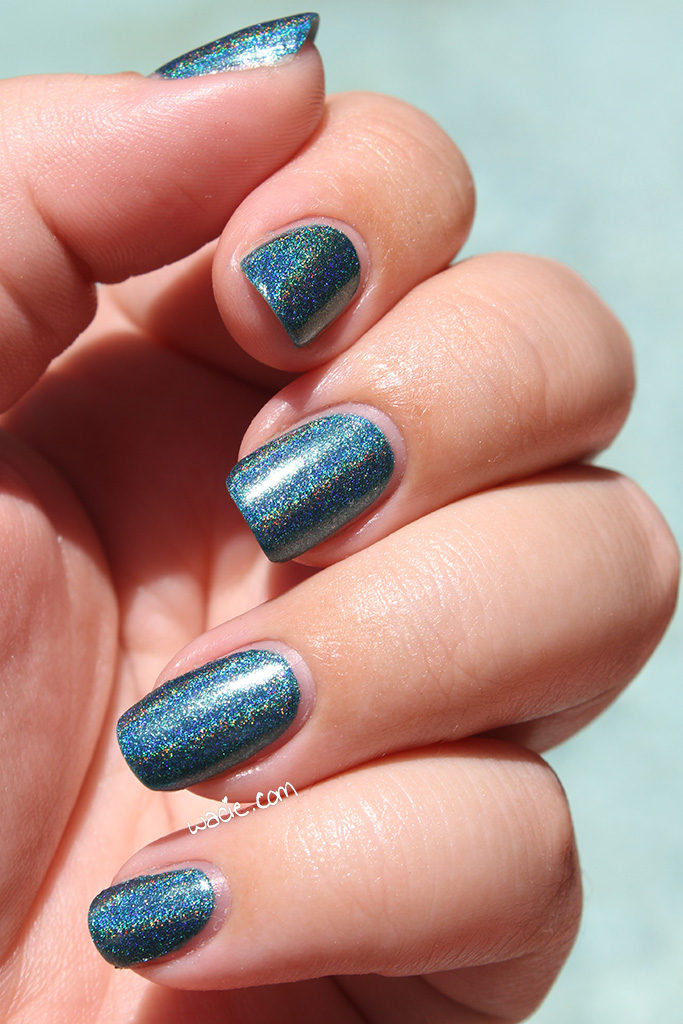
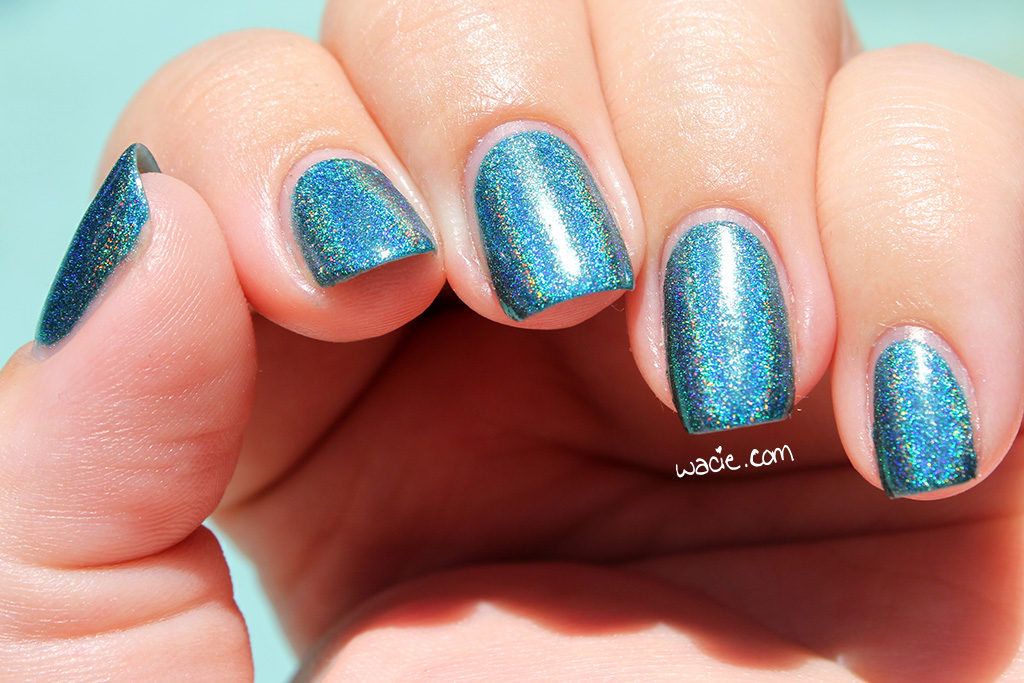
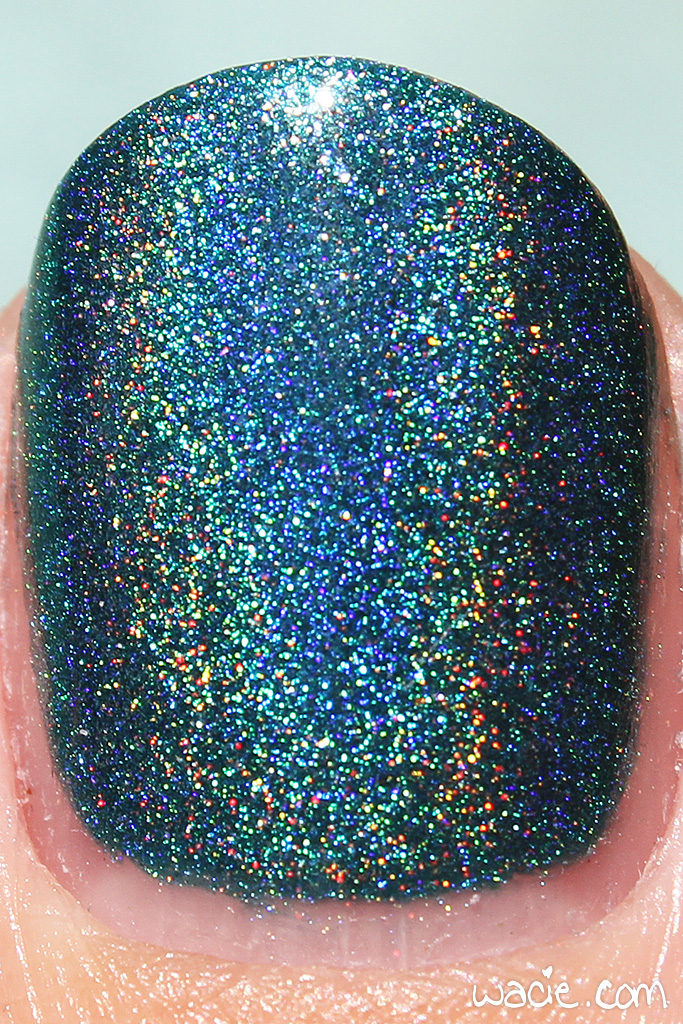
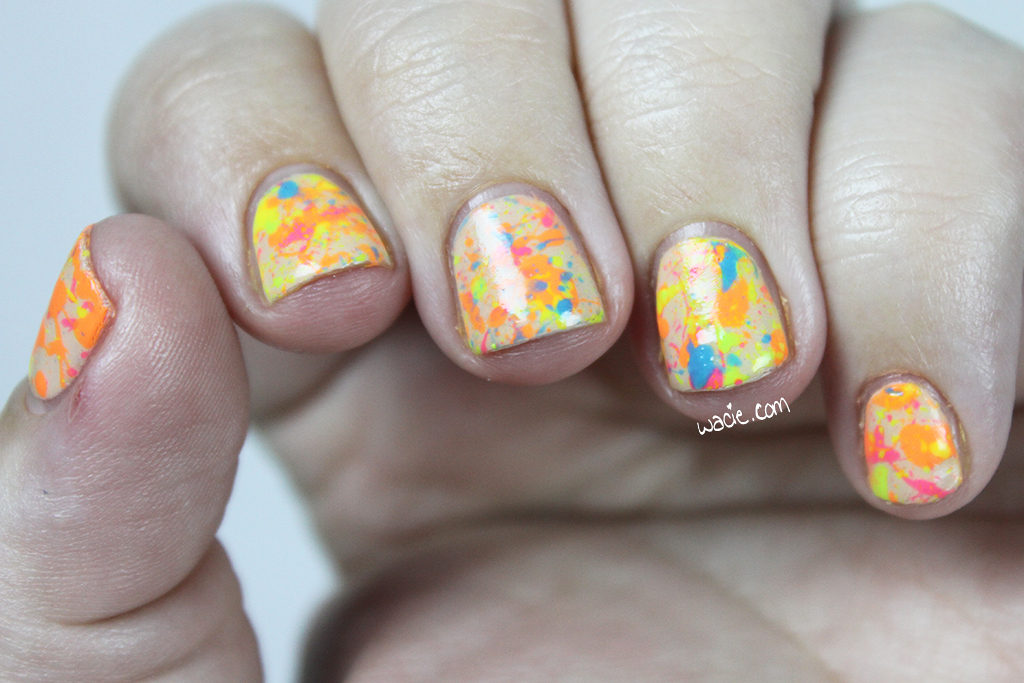
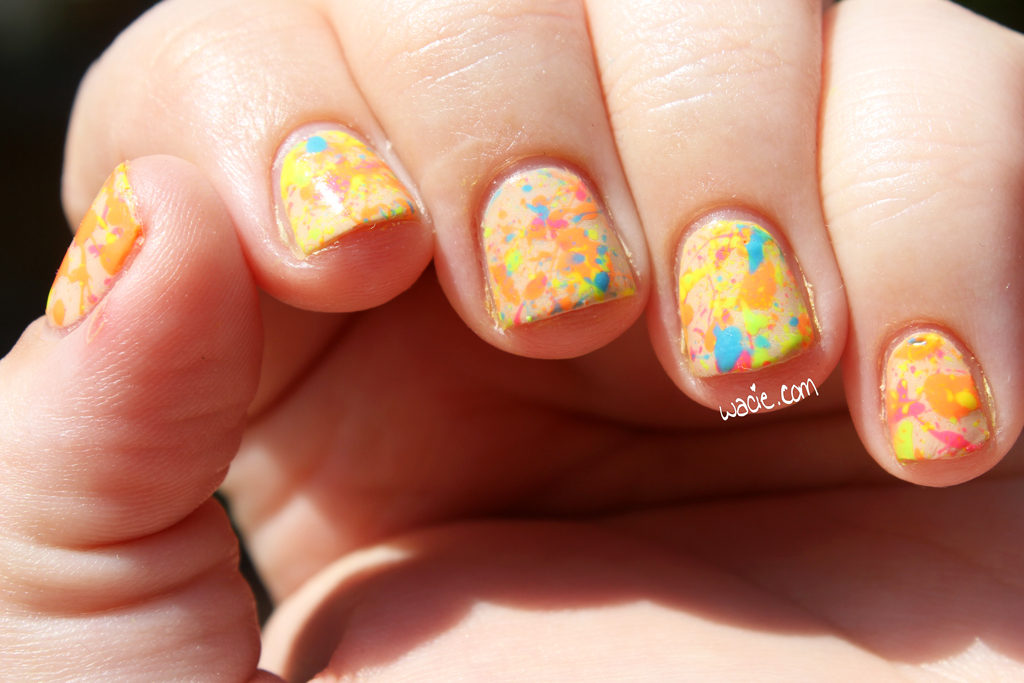
The truth is, spring came long ago to Florida. I know other parts of the country are still thawing out, but we’ve been enjoying it for some time now. That’s kind of the reason I didn’t want to do a spring flower mani, I was just so over spring flowers that I just wanted something summery and fun, something that really reflects Florida in March. Speaking of which, here’s some sunlight photos! The holo, or what you can see of it, looks amazing out here. I’m not sure if the Elevation or the Ellagee is my favorite of this look, but they look so beautiful together I couldn’t possibly choose.

IMG_69372

IMG_69522

IMG_69462

Here’s a product roundup, just for reference. I rarely do this, but I rarely use so many polishes for one mani.

IMG_69352

Elevation Polish has discontinued The Merchant’s Son, but you can find their other polishes in their shop. Breena also appears to be discontinued by Ellagee; other polishes are sold in their shop. Revlon, L’Oreal, and Essie are sold in stores nationwide.

I bought these polishes myself.
 Loading InLinkz ...