Manicure Monday: Latte

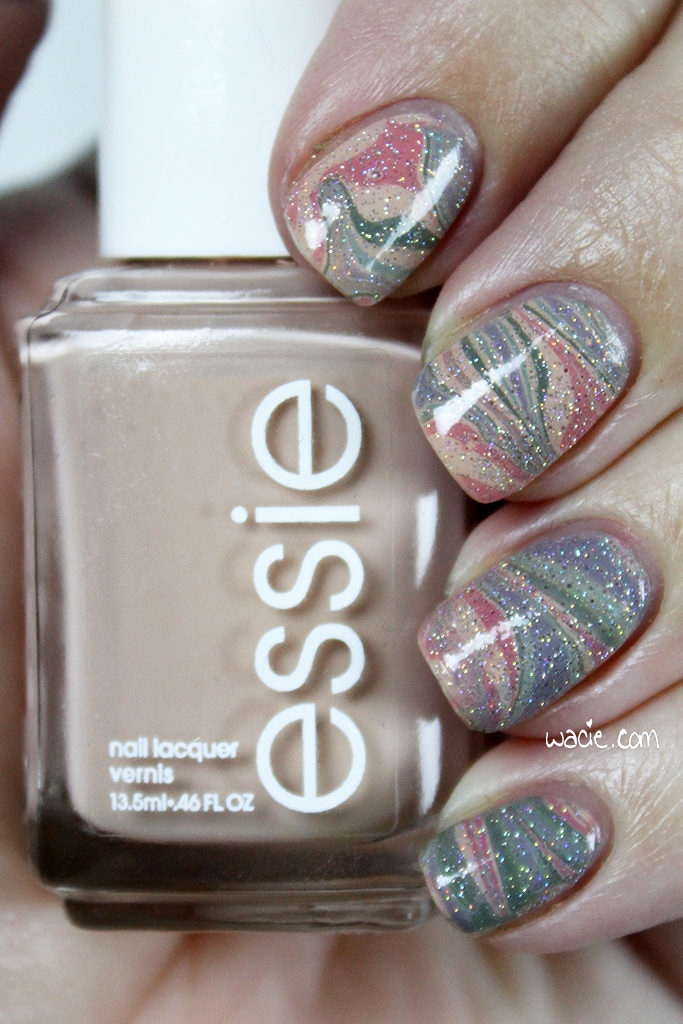
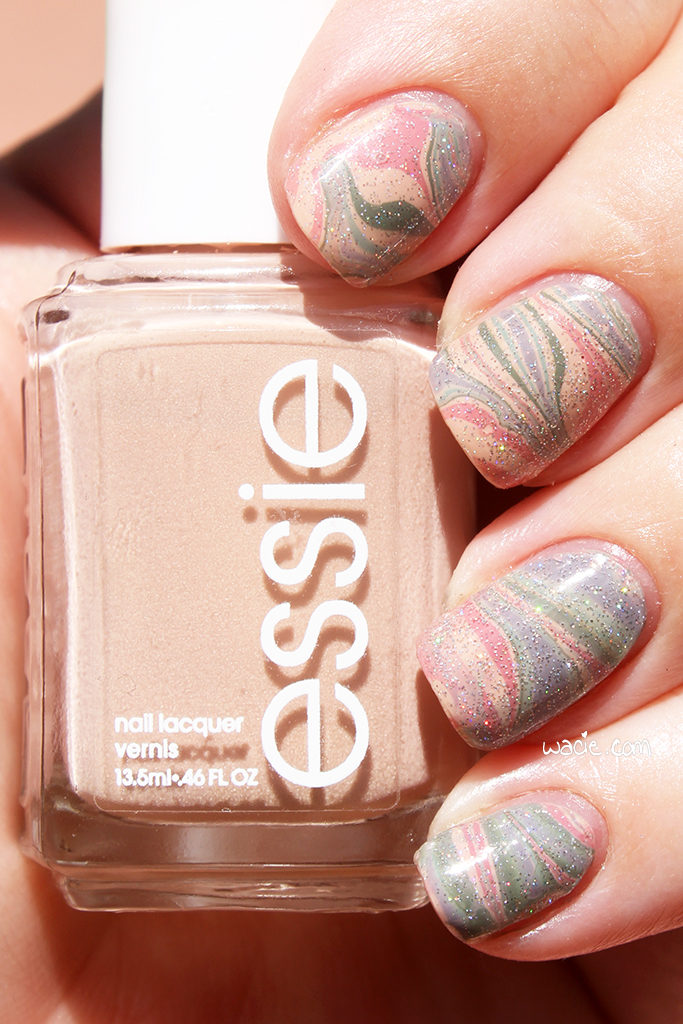
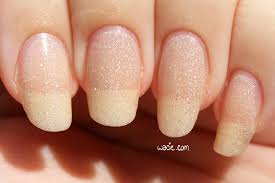
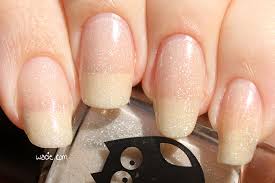
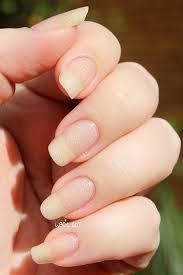
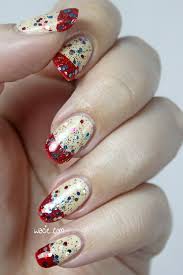
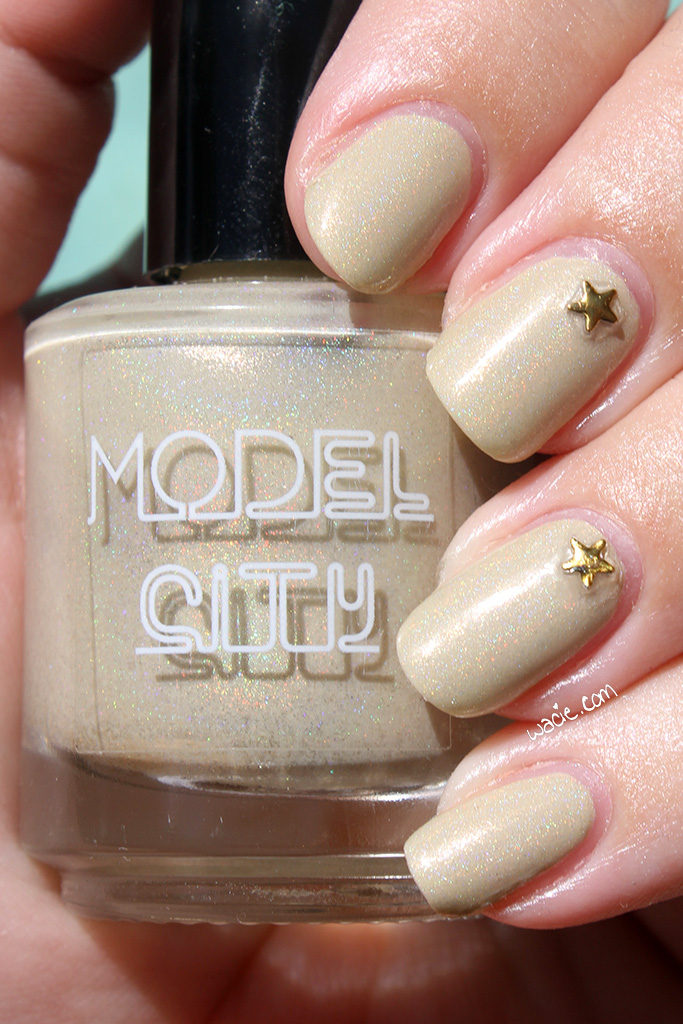
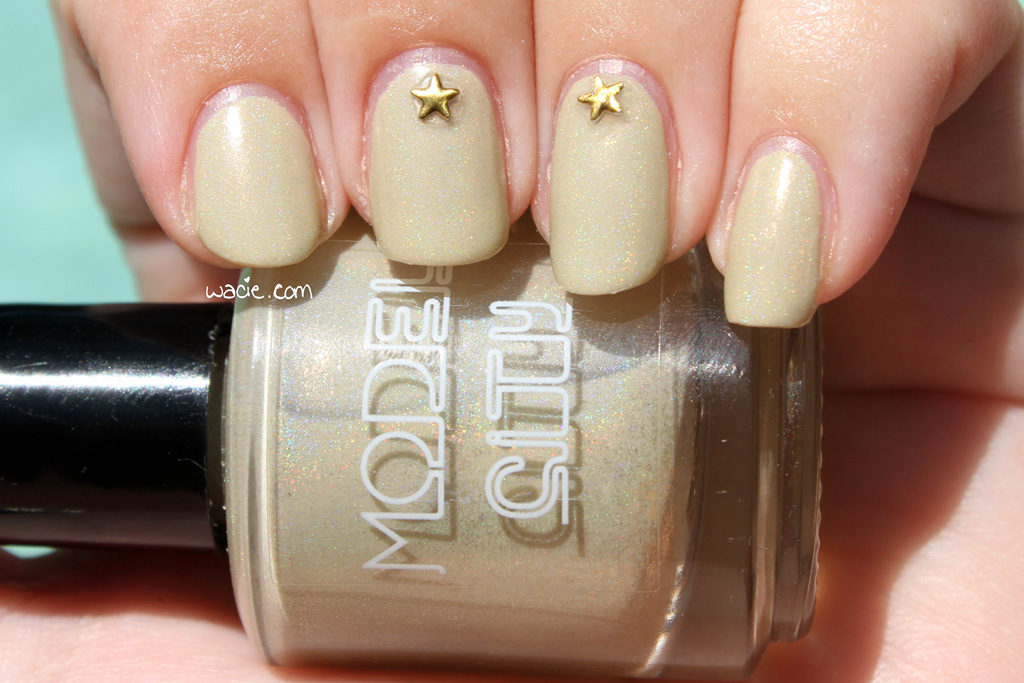
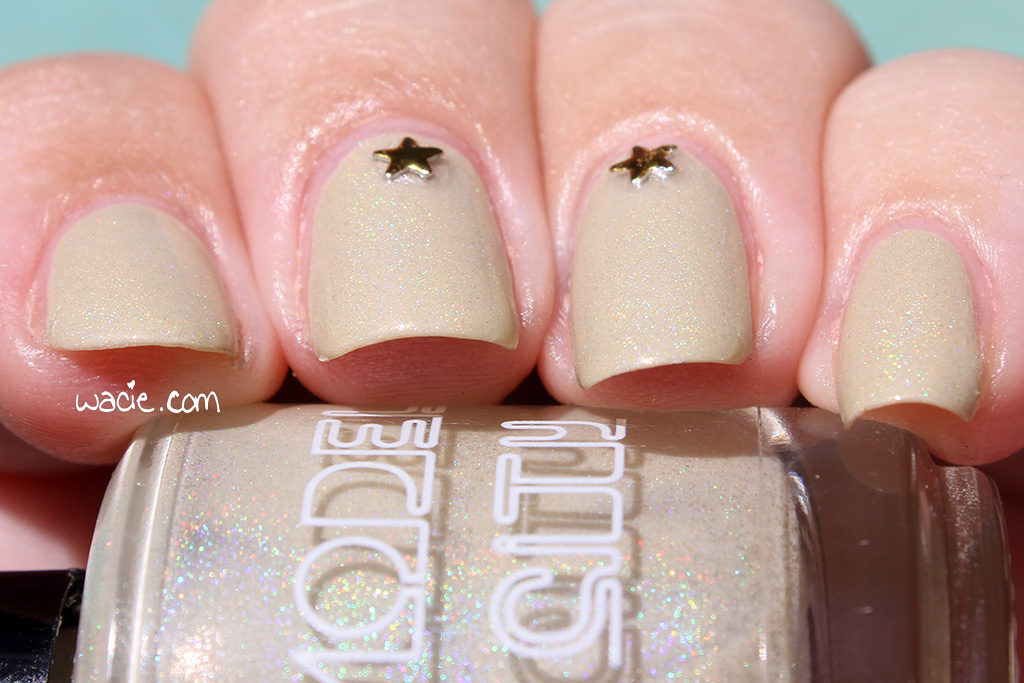
Happy Monday, reader! I’m excited to be wearing a holo today; I’m excited to have an excuse to leave my office and take advantage of the sunshine. The polish I used today is Model City‘s Latte; I’m wearing three coats with one coat of Seche Vite top coat.

IMG_34072

IMG_34112

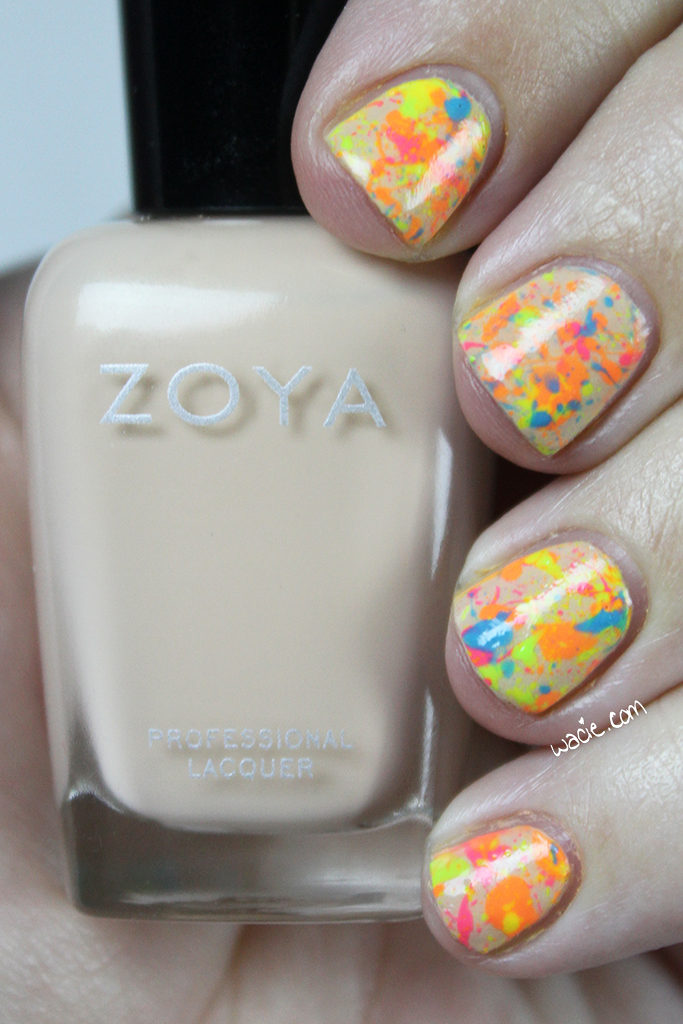
Latte is a polish from Model City’s 2014 fall collection, a collection of holos based on coffee drink favorites. I loved this set; it was autumnal and neutral but still had enough holo to warrant spending time outside. Of course, in Florida, autumn is just extended summer, and it feels weird drinking pumpkin spice lattes out of the red cups when it’s still 80 degrees out. We have to do them in frap form.

IMG_34182

IMG_34252

IMG_34242

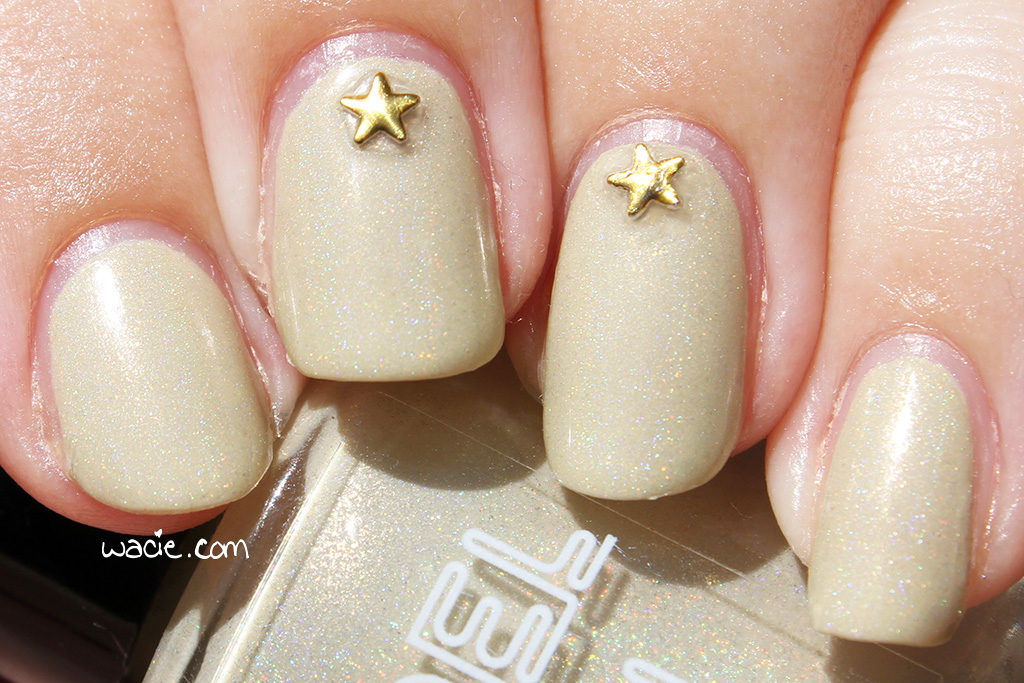
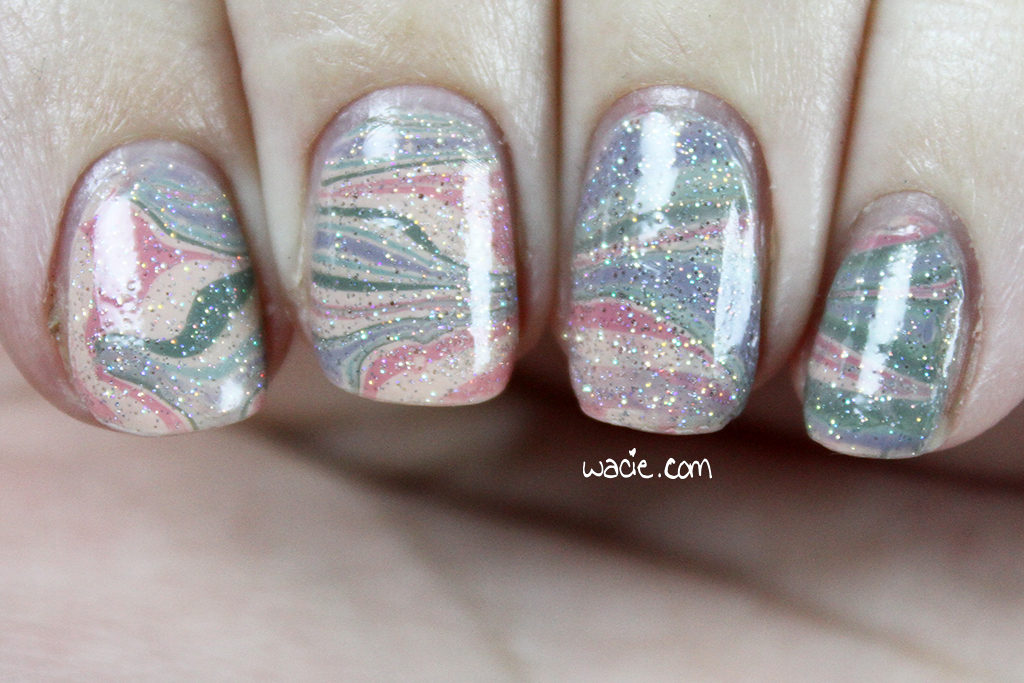
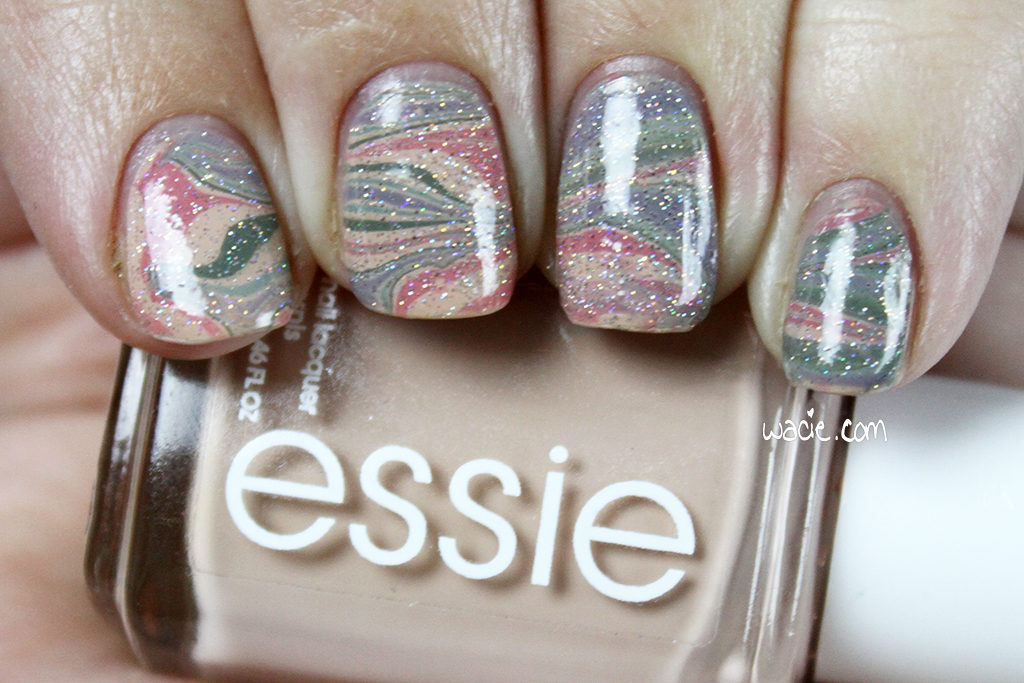
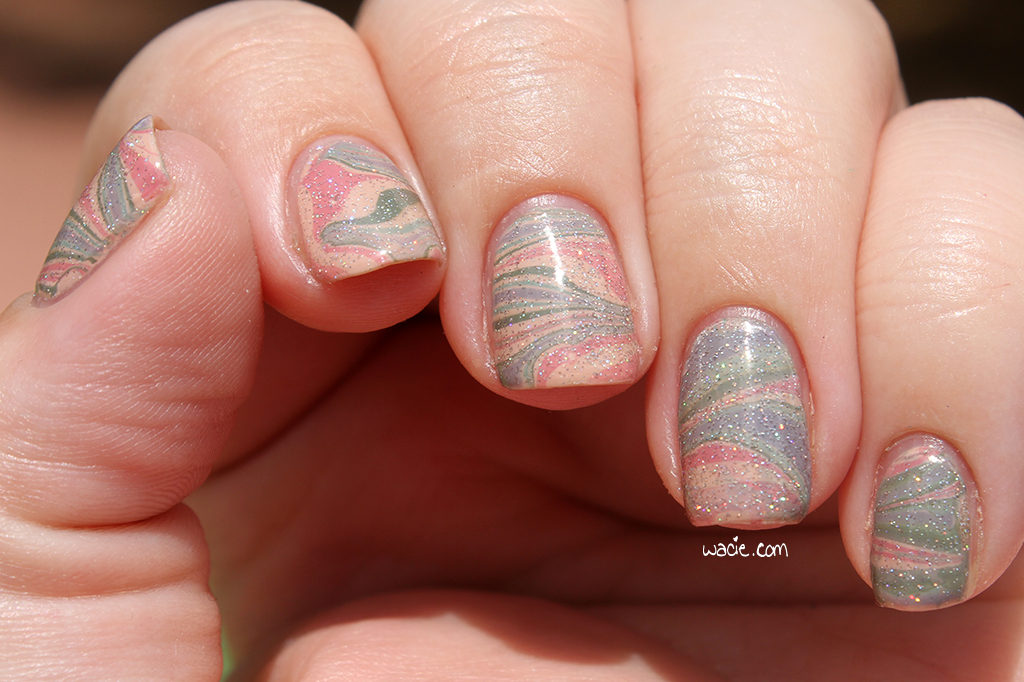
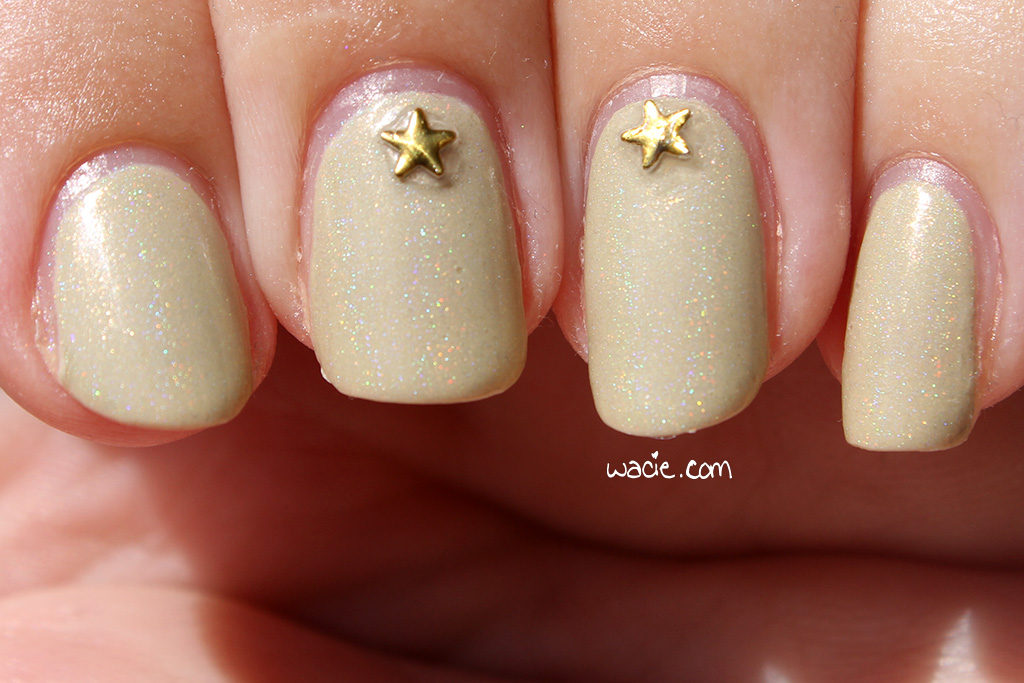
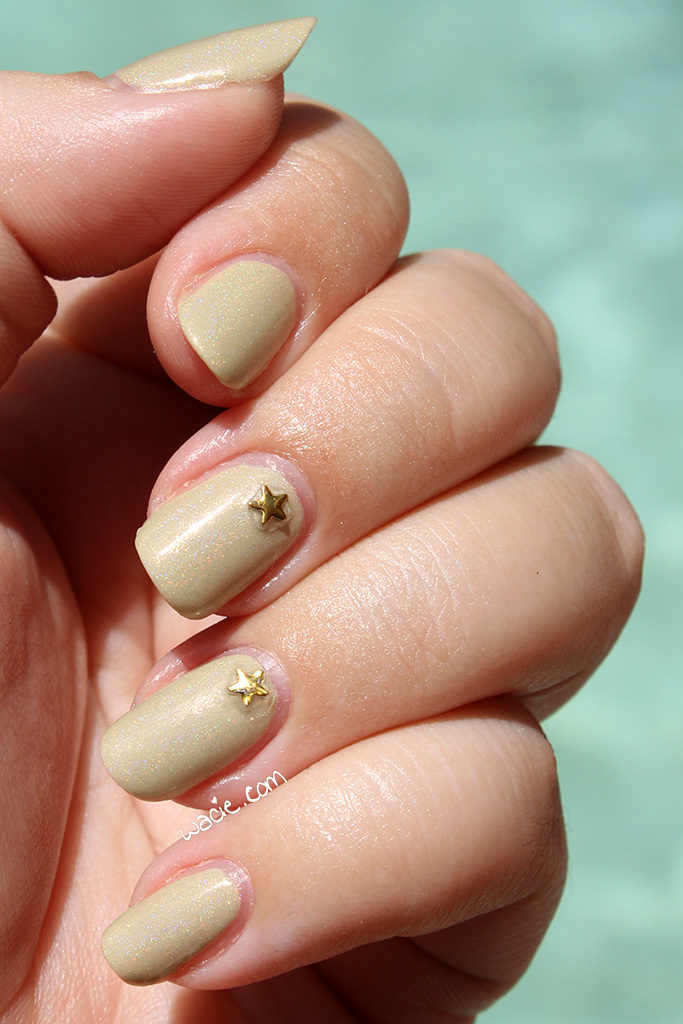
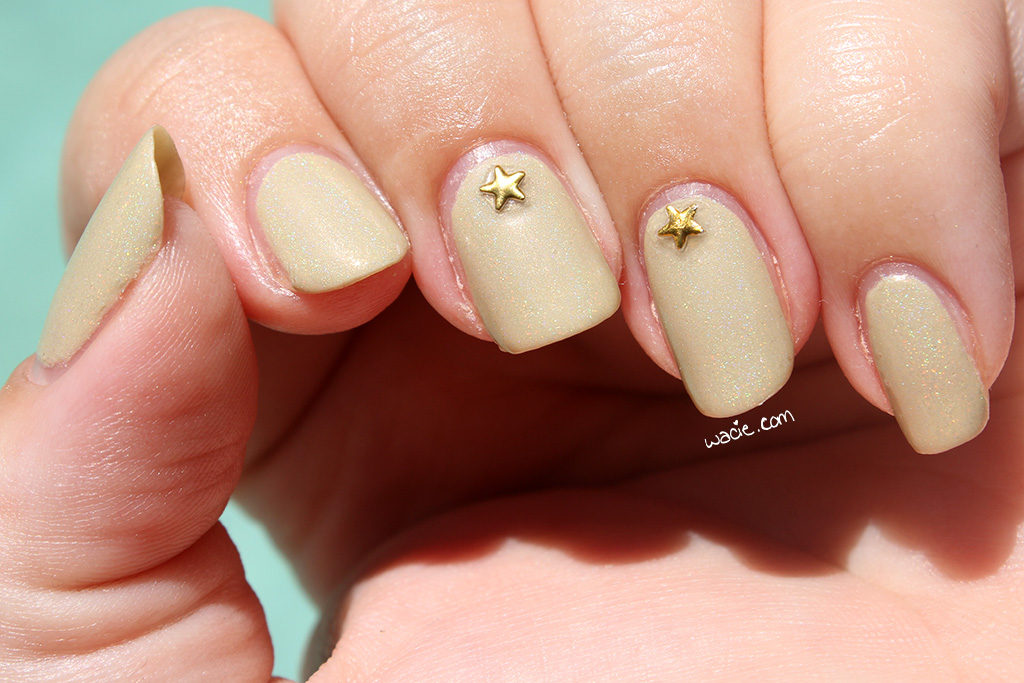
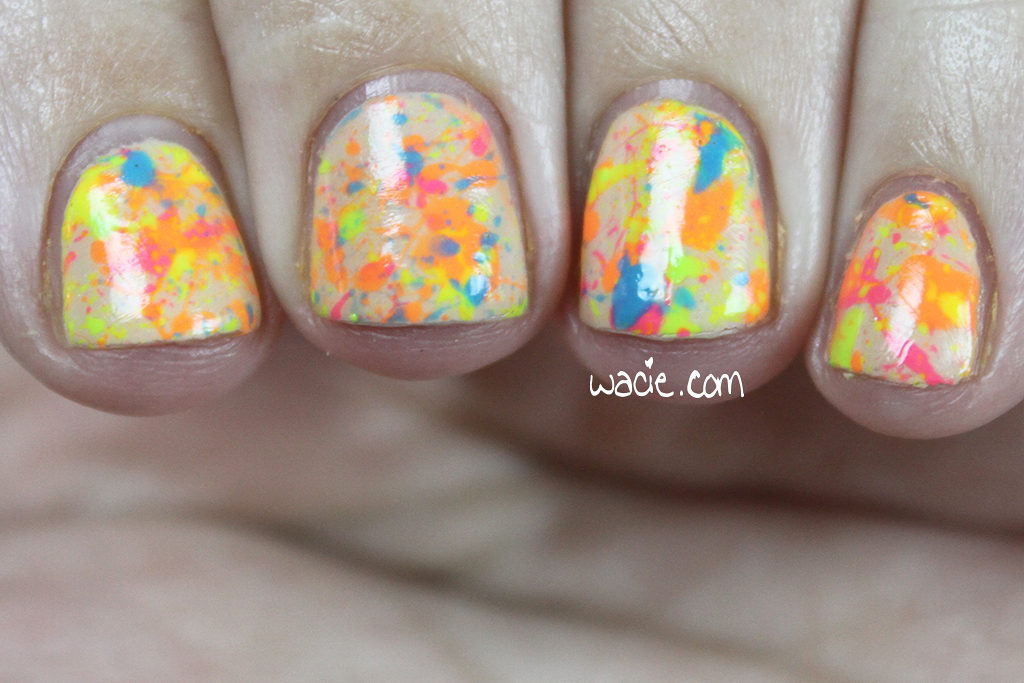
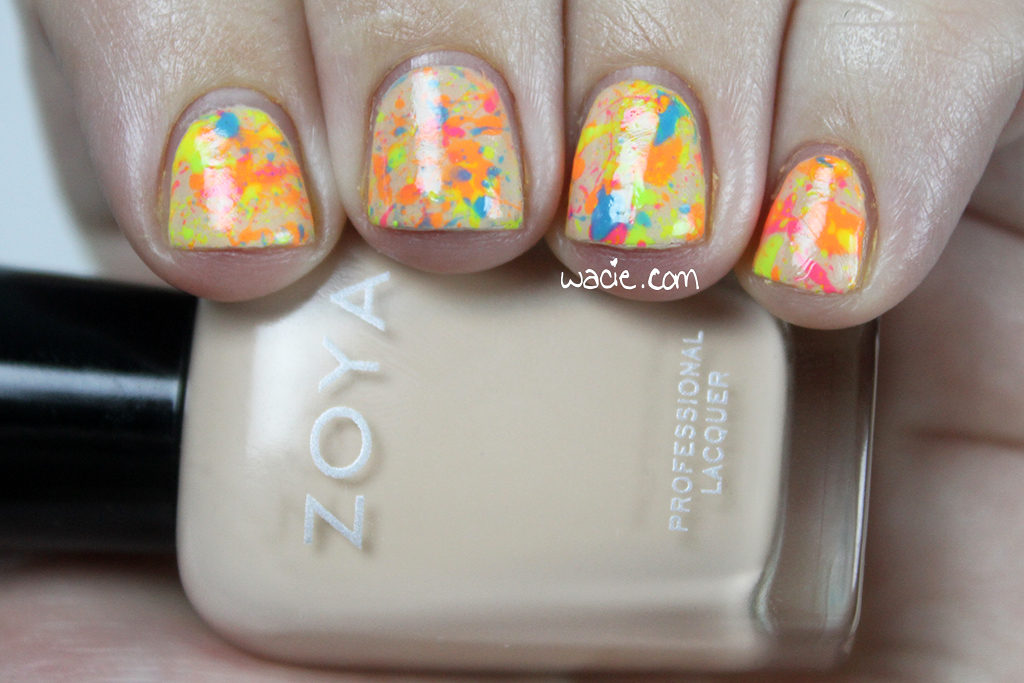
This polish is my favorite from the set, I believe. It’s so versatile. It would pair with anything, it would be a suitable base for any glitter, and would work into any nail art look you could imagine. Wearing it alone today was actually a tough choice; I had to stop myself from digging through my stash to find a polish to wear with it. I’m really glad I wore it alone, beacuse it’s such an elegant and clean look. It makes me feel pretty! Also grown up.

IMG_34332

IMG_34372

IMG_34412

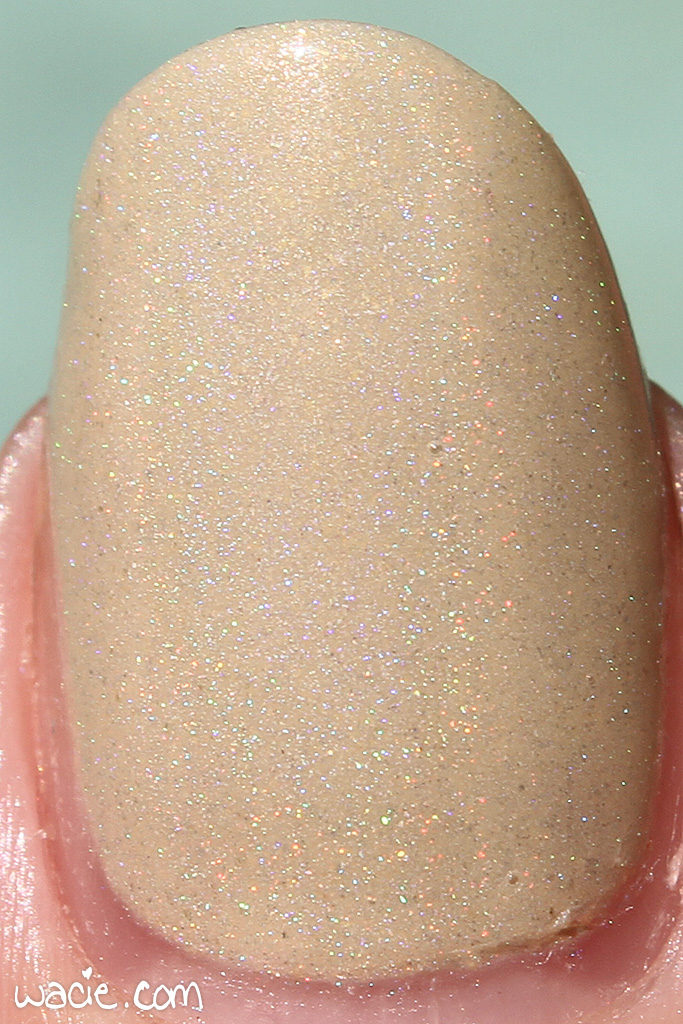
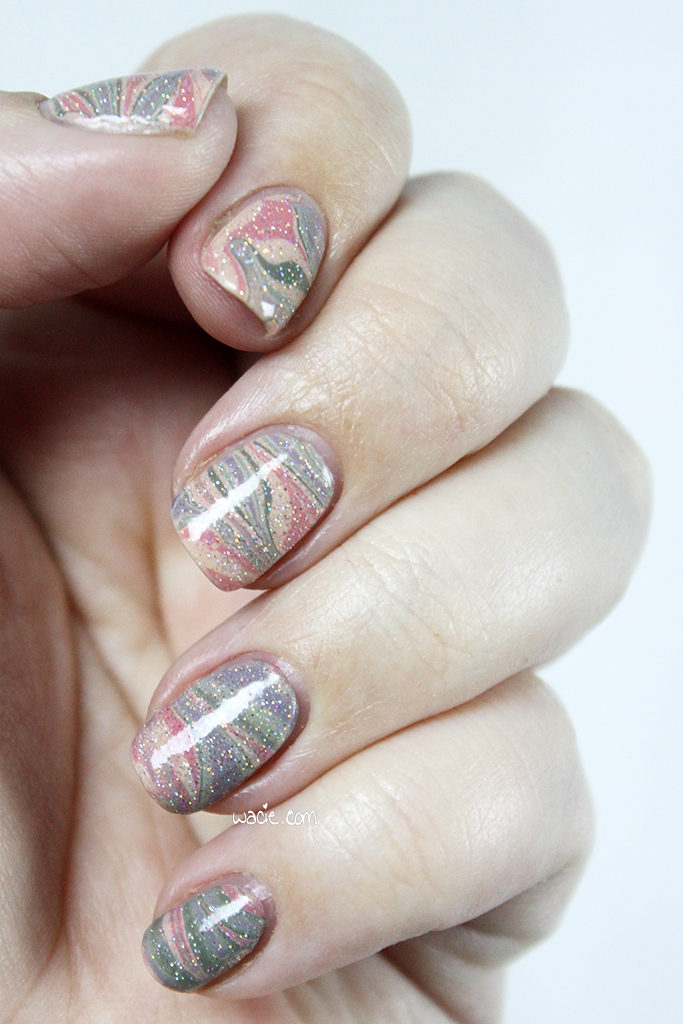
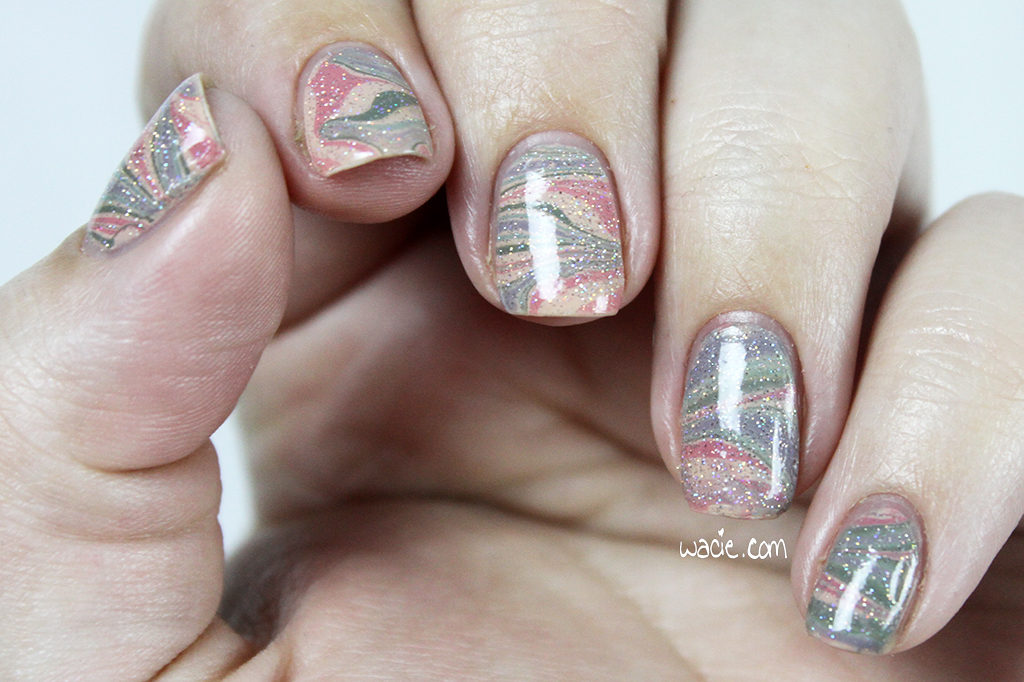
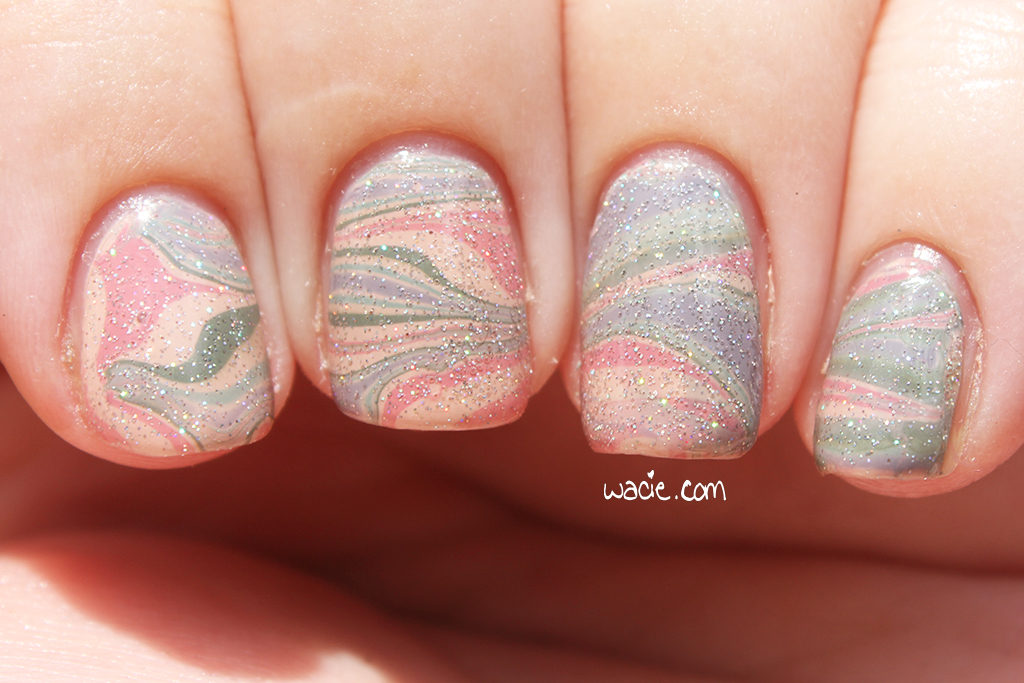
My photos don’t really do this polish justice. The holo effect got a little washed out in the harsh sunlight. The polish itself is pretty pigmented and the holo takes a back seat to the color, but there’s more to it than is visible here.

Latte is currently not in stock by Model City Polish; other MCPs are available in their etsy shop. My star studs were found in an outlet store.

I bought this polish myself.

HPB Presents Neon Splatter!

Hello, reader! Today’s post is a special Hobby Polish Bloggers linkup! Every month, the bloggers from the HPB Facebook group get together and do a themed mani; the mani can be as simple or elaborate as we want, so long as it adheres to the theme. The theme for May is neons and neutrals. For this look, I used Zoya’s Chantal and American Apparel’s Moon as the nude base, and American Apparel’s Neon Pink, Neon Coral, Neon Yellow, Neon Green, and Essie’s I’m Addicted as the colors. I actually did this post two weeks ago before I went on vacation, I’m excited to finally show it to you!

IMG_89032

IMG_89092

I really love this month’s theme, and I had a lot of ideas on how to work with it. My first thought was a watermarble, but I did that for last month’s theme, so I skipped it. I also considered the dry brush technique, but ultimately chose the splatter, because I saw an excellent one on Casual Contrast that totally made me want to try it, and also because I’d never done it before. I put my base colors down, got the straws out, and commenced to splattering. I had so much fun with this mani. It reminded me of when we were bored in middle school and we’d dismantle pens to blow the ink out all over stuff. I gotta say though, the cleanup was way worse than I expected. Totally not for the faint of heart.

IMG_89152

IMG_89182

For these HPB manis, and really every challenge mani, I try to use untried polishes, but this is the first one where all the polishes have been used multiple times. When it comes to neons, the American Apparel neons are my go-tos; they’re vivid without having to use a white base, and the product consistency makes them very easy to work with. However, there’s no blue, so that’s where the Essie comes in; I had it sitting out from a previous swatch, and it was just the right blue to work with my other neon shades. I love that the theme calls for nudes, because as cool as this would be with a white base, it means you can’t use just any neons, you’ve got to use some that are worth a crap.

IMG_89232

IMG_89282

Remember I mentioned Moon used as a base? This is why: super secret glow-in-the-dark action! I put a coat over Chantal, just before adding the splatters. I wasn’t totally satisfied with just nudes and neons, I needed one more element to make this look really special. Between the glow and the neons, this mani is like the ’90s threw up on my nails. These photos were taken in compelete darkness.

IMG_89352

IMG_89392

And these photos were taken in direct sunlight! Really harsh sunlight tends to wash neons out, so they’re not as bright out here as they could be.

IMG_88622

IMG_88752

IMG_88672

hpbpnsmc

Chantal and other Zoya polishes are available from Ulta. Essie polishes are sold at Walgreens and other stores nationwide. American Apparel polishes have been discontinued.

I bought these polishes myself.
 Loading InLinkz ...

Manicure Monday: Minty Fresh and Clean

Happy Monday, reader! Today’s look is a pretty simple one. I had a nail break — my nails were already pretty short — so I felt a simple look was best for nails this short. Today’s look was done with a vintage Maybelline mystery color, Lynnderella‘s The Full Minty, and rhinestones.

IMG_88092

IMG_88132

As you can see, this Maybelline polish is at least ten years old. That’s as long as I’ve had it, anyway. I don’t know anything about it; its name and other labels got peeled off, leaving its identity lost forever. It’s a really nice polish besides being old; it’s a warm nude with a subtle shimmer, it dries pretty quickly, and application was easy, even though I remember one of the last times I used it the brush dropped a strand in the wet polish. I’m always impressed by how long a polish can live.

IMG_88312

IMG_88362

I never know what to pair nude polishes with. Nudes are a great base for anything, and I couldn’t decide what to use with it, so what I did this week was pick a random Helmer drawer, shut my eyes, and grabbed a polish out. It was this one, Lynnderella’s The Full Minty. This was one of the first Lynnderellas I ever bought, and I’ve had it at least a year now, so I’m happy to be trying it out. At first I wasn’t sure about it; I thought the green would overwhelm the nude, and it kind of does, but I like it. The rhinestones, the final afterthought, pulls it together.

IMG_88502

IMG_88422

In the sun, this is really nice; you can see the full variety of glitters in The Fully Minty, as well as the subtle nude shimmer in the base.

IMG_87502

IMG_87632

IMG_87562

mmmfacmm

As the Maybelline mystery color is old and likely discontinued, I can’t offer any buying notes for it. The Fully Minty and other Lynnderella polishes are available on both eBay and Storenvy. My rhinestones are from Amazon.

I bought these products myself.

HPB Presents Dusty Watermarble

Welcome back, reader! Today’s post is a special Hobby Polish Bloggers link-up post! Every month a theme is selected by the group, and this month’s theme is dusty colors. The look itself is up to the blogger; as long as it adheres to the theme, it can be as simple or elaborate as the blogger wishes. I like to raise the difficulty a bit and use only untried polishes, but this month I couldn’t, because I have very few unused polishes that fit the theme. For this look, I used Essie’s Spin the Bottle, Sew Psyched, and Marathin, Zoya’s Bevin, Ciaté’s Pillow Fight, and China Glaze’s Fairy Dust.

IMG_80502

IMG_80542

As I mentioned, I don’t have a lot of colors in this dusty family, so I’m using a lot of polishes I’ve used in the past. I think Spin the Bottle and Sew Psyched were unused, but the others were probably only used once, so it’s not really a big deal. It took a lot of digging through the polish looking for the right colors; I have a lot of pastels and a lot of deep colors, but not too many in between. Marathin was actually the first polish that came to mind, and after a little bit of trial and error, I found a great combination, as well as the perfect way to wear them together.

IMG_80642

IMG_80722

Watermarbling is one of those things I want to do all the time, and yet, I rarely do. I’ve done a few marbled accent nails here and there, but it’s usually as an afterthought; when I’m planning a mani, I usually just pick a glitter topper that pairs well and that’s it. A lot of the time, I’m working with polishes that don’t seem conducive to marbling. I don’t want to use anything with fine glitters or shimmers because it may not spread well, I don’t want to use anything rare, discontinued, or expensive, and I don’t want to use anything with a really unique finish, like a holo. If I’m creating a look around a creme, I’m rarely thinking about other cremes. It’s a shame, because I love cremes; I think the glossy creme finish is the most underrated of them all, and yet I rarely take advantage of them. Even with all these beautiful creme shades and the marbling, I still had to top it with glitter. Fairy Dust counts as a dusty color, right?

IMG_80812

IMG_80882

The following photos were taken outdoors in direct sunlight. The colors are a bit washed out here, making the dusty colors look lighter and more pastel. Fairy Dust looks overwhelmed as well. On the plus side, I was able to get macros of all my favorite swirls. My ever-elusive right hand even makes an appearance.

IMG_80132

IMG_80172

IMG_80232

From left to right: Left thumb, left ring finger, left middle finger, right thumb

From left to right: Left thumb, left ring finger, left middle finger, right thumb

Essie, Zoya, Ciaté, and China Glaze are all sold in stores nationwide; mine are from Walgreens, Ulta, Sephora, and Sally Beauty Supply respectively.

Also, remember this is a group project, and there are links below to the other dusty manicures done by members of the group. Show them some love, too!

I bought these polishes myself.
 Loading InLinkz ...

Swatch Saturday: Blue-Eyed Girl Lacquer Prototype BBD1.0

Happy Saturday! It feels so good to be past our third anniversary. I still can’t believe we’ve passed such an important milestone, it’s crazy! For this week’s Saturday swatch, I’m wearing Blue-Eyed Girl Lacquer Prototype BBD1.0 over Nails Inc.’s Eaton Terrace, China Glaze’s Pelican Gray, and LA Girl’s Black, as well as Seche Vite top coat.

IMG_63092

IMG_63172

IMG_63212

IMG_63272


Prototype BBD1.0 is a clear-based fine glitter topper; the glitter mix is predominantly purple holo glitters, but also contains holo reds and blues and matte lime green glitters. Application was easy; the glitter brushed on without any problems, and the product consistency was very workable. It dried quickly and with a smooth finish. I added top coat for extra shine and protection.

IMG_63312

IMG_63352


This a really fun polish to wear. I used neutrals for this look because I wasn’t sure how the glitter would look over other colors, but the glitter is so fine and so varied in color that it would probably look good over anything. I’m actually impressed by how it looks over black; you get the flashes of color without the speckled effect the lighter colors get. I thought it would be boring over black, but I think it’s my favorite of all of them. The lime green satin glitters feel a bit out of place, but I don’t dislike them; I think it breaks up an otherwise monotonous (but still quite pretty) glitter mix.

IMG_63432

IMG_63472

Here are some sun shots. The glitter looks amazing outside; you can really see the variety of colors in the glitters here. The following photos were taken in direct sunlight.

IMG_62802

IMG_62842

IMG_62872

ssbeglpbbdmc


Prototype BBD1.0 is a one-off prototype, and I have the only bottle. Other Blue-Eyed Girl Lacquer polishes can be purchased from their online shop.

I bought these polishes myself.

Swatch Sunday: Nicole by OPI’s Love Your Life

Happy Sunday, reader! My swatch today is of a polish I’ve had for a long time. This was 2009 or so, long before indie polish came into my life. I had ten dollars to burn and I was at Ulta. I found a polish with heart glitter in it and the rest is history. This is Love Your Life from Nicole by OPI; I’m wearing one brushed coat over OPI’s Don’t Bossa Nova Me Around (taupe), Ciaté’s Sugar Plum (lavender), and Sally Hansen’s Kelp Yourself (green), as well as one coat of Seche Vite top coat.

ssnbolyl

ssnbolyl2

ssnbolyl3

ssnbolyl4

Love Your Life is a clear-based glitter topper with matte pastel pink heart glitters and a mix of fine iridescent hex glitters. Application was okay; the base is thick — unsure of whether this is due to formula or to age — and the bigger glitters tended to sink and had to be fished after. The iridescent glitters distribute well, at least. The hearts are a bit difficult to control with the brush; I kind of just brushed them on and left them where they landed. Though the product consistency was thick, it dried quickly, and with a glossy finish. I added top coat for protection and shine.

ssnbolyl5

You probably already have some fun dainty pink heart glitter polishes already from an indie, and if you do, you don’t need this polish. If you don’t, though, I do recommend it. It’s pretty simple, it’s just hearts and iridescent glitter, but I think it works. It’s annoying that the hearts are a little hard to get out, but it’s actually a good thing because you can control how many you want. You can make a mani as wild or as demure as you like. It also goes well over most colors, because it’s so light and pink. I actually really like it over these pastel cremes; when I swatch, I like to use some constrasting colors to make the swatch visually appealing, as well as show it some colors it might not normally be used over. I had to go for pastels this time, though, because it’s got that perfect Valentine’s candy vibe.

ssnbolyl6

ssnbolyl7

Love Your Life and other Nicole by OPI polishes are available at Ulta and other stores nationwide.

I bought this polish myself.

HPB Presents Elevated Gradient!

Hello, reader! This is a special post for the Hobby Polish Bloggers group on Facebook! Every month, we do themed manis, and January’s theme is the gradient. It doesn’t matter what kind of gradient we do, as long as it’s a gradient; we can make it as complex or as simple as we want. I decided to make mine a challenge and use four previously unused polishes. For this look, I used Sittin’ Pretty and Topless and Barefoot, both from Essie, as the base; I used Kilimanjaro and Salautay, both from Elevation Polish, as the glitter topper. All nails are topped with one coat of Seche Vite top coat.

hpbpeg

hpbpeg2

It’s been a while since I’ve done a two-color gradient, so long, in fact, that I started to wonder whether or not I’d lost my touch. This is probably one of the hardest gradients I’ve ever done. I could not get light purples and nudes — not just these Essie two, I tried OPI as well — and I could just never get them to come together. Either a color would go bald from oversponging, or a color just wouldn’t turn opaque, no matter how much of it I used. It did finally come together, and it was amazing.

hpbpeg3

hpbpeg4

I had to use purple and nude, though, because I had to use Kilimajaro and Salautay. I knew that as soon as I got these polishes that I had to put them together, because they have so many similarities: they both employ the use of round glitters and the color silver. After I finished the base gradient, I made a gradient with the glitters, flipping the colors so that the purple was over the nude and vice versa. Of course, after I sponged it on, they kind of bled into each other, which is actually pretty cool. My index fingernail got a little too much glitter, but aside from that, I totally got the result I wanted and I’m so happy.

hpbpeg5

hpbpeg6

This is the most intensive nail art work I’ve done in a while, so I’m really proud of it! Also, because this is a group effort, there’s an InLinkz widget here with everyone else’s gradient manis, so be sure to have a look at them! They’re just as proud of their work as I am with mine.

Sittin’ Pretty, Topless and Barefoot, and other Essie polishes are sold in most stores; I got mine from Walgreens. Kilimanjaro and Salautay are discontinued by Elevation Polishes, other Elevations are sold in their online shop.

I bought these polishes myself.

Swatch Sunday: Darling Diva Polish’s The Pumpkin Queen

Happy Sunday, reader! 2016 is off to a great start, isn’t it? I hope you’re all having a fantasic weekend. Yesterday, we looked a summer polish, and today we’re looking at an autumn polish. From a destash mystery bag, the same one that yielded this beauty, this is Darling Diva Polish‘s The Pumpkin Queen. I’m wearing one coat of The Pumpkin Queen over Nails Inc.’s Eaton Terrace and Baker Street and OPI’s I Just Can’t Cope-acabana, as well as one coat of Seche Vite top coat.

ssddptpq

ssddptpq2

ssddptpq3

The Pumpkin Queen is a clear-based glitter topper with a mix of glitter that is predominantly matte and metallic orange hexes and metallic green hexes and squares. Though these colors are the focus of the polish, it’s actually quite colorful; there are glitters in red, yellow, and blue, as well as very large purple hexes. The glitters brushed on easily, though sparsely at first. The base consistency is good; it carries the glitter without goop. It dries quickly and with a smooth finish, though the purple hexes don’t lie flat on the nail.

ssddptpq4

ssddptpq5

Though the glitter mix is inherently autumnal, wearing this polish in January doesn’t feel completely out of place. Because there aren’t any seasonally-shaped glitters, and because the mix is so colorful, it’s not strictly a fall polish, even though it’s intended as one. I like the blue glitters best; they stand out from the rest of the glitters, but they also make the orange bolder. I really love the purple hexes too, but they feel just a tad out of place. Overall though, I like this polish, even though it’s not something I would have bought myself.

ssddptpq6

ssddptpq7

I did a little bit of homework on this polish; it’s a polish from 2012. I don’t even know if I have any others that old, because I didn’t get into indie polish until 2013. How cool, it’s vintage! I also love the printed label, it’s like a bootleg.

The Pumpkin Queen is no longer sold by Darling Diva Polish; other polishes are available from their shop.

I got this polish in a grab bag.


Swatch Sunday: Anna Gorelova by Dance Legend’s Кот Баю

Hello reader! We’re looking at yet another polish from a destash sale. I’m really excited about this one; I’ve seen Dance Legend polishes everywhere, and I finally have one! This is a polish from the Anna Gorelova by Dance Legend collaboration; it’s called Кот Баю (Kot Bajun) and I’m wearing three coats with one coat of Seche Vite.

ssagbdlkb

ssagbdlkb2

ssagbdlkb3

ssagbdlkb4

Kot Bajun is a sheer nude with fine holographic silver glitter. Application was easy; the product consistency was on the thinner side, but still held onto the brush and applied evenly. As you can see, after three coats, there’s no such thing as full opacity when wearing it alone. The glitter shines nicely through the sheer polish; it distributes well and lays flat on the nail, leaving no texture behind. It dries quickly and with a smooth satin finish. I added top coat for extra shine.

ssagbdlkb5

ssagbdlkb6

I admit, I had to do some homework on this polish. There’s no shade name on the bottom on the bottle, only a number. The destash shop I bought it from called it Кот Баю, which also turns up in a Google search. It also turns out that this polish shares a name with an animal from a Russian folk legend; Kot Bajun is apparently a giant cat that lives in the forests of Siberia. I couldn’t find much about it in English. I just love the international appeal of this, though. I’m a huge fan of  products from other countries; my kitchen pantry is a mishmash of international foods, but I only have a few polishes that aren’t from the United States.

ssagbdlkb7

ssagbdlkb8

I love this polish. It’s another soft neutral that’s both sparkly and work-appropriate. It’s weird how many of these I’ve been wearing lately. The glitter is a lot like the same stuff that’s in Fairy Dust; it’s the same single-serve portion of sparkle, even with three coats. This would definitely pair well with a white tip or over a nude base.

Кот Баю seems to be discontinued. Check Dance Legend’s site for international stockist info.

I bought this polish myself.

Manicure Monday: Confetti Dreams

Happy Monday, reader! This week has all the hallmarks of being a holiday mani without actually being one, and might just be the closest I get to one all year. For this look, I used Julep’s Alexandra as the base color, Octopus Party‘s Universal Loner as the tip color, and LA Colors’s Confetti as the glitter topper, all with one coat of Seche Vite. Here we go!

mmcd

mmcd2

I think that, until this mani, I forgot drugstore glitter toppers were a thing. I mean, how could I; after all, they were my gateway to glitter addiction. Even now, I have tubs of them. It’s just that every glitter topper I’ve worn for the past year or so (at least) has been an indie polish, and I’ve gotten used to that sort of polish. Indie glitters just have so much going on: big glitters, small glitters, shimmer, flakies, crazy shapes. This one, though it was a pretty cool polish when I bought it, I’m having a hard time finding a word other than quaint to describe it. I’m not trying to say it’s bad, I’m really not, it’s just that glitter polish has come a long way since this one. This is two coats of glitter, by the way.

mmcd3

mmcd4

I chose Alexandra for the base because it was neutral, and I needed a color that wouldn’t interfere with any of the glitter colors. I ended up adding the red tips as an afterthought, hoping to tie everything together. That, and I already had it out to put on my toes. Both of these polishes performed very well; Alexandria had a bit of streakiness left after two coats, but the glitter hides it well. Universal Loner went on really easily; I didn’t have to deal with any coverage problems. It’s my first OPNL, too, yay.

mmcd5

mmcd6

I think it all came together really nicely. Like I said, red and glitter usually means a holiday mani. I actually plan my manicure combinations out way in advance, so it’s lucky it landed on a day so as to be seasonal as well as pretty.

LA Colors is sold nationwide, as is Julep. Octopus Party Nail Lacquers are sold from their etsy store.

I bought these polishes myself.